Product Overview
The HODIK Atomic Clock W02 is a self-setting digital clock featuring a large 11.4-inch LCD display for clear readability. It provides indoor and outdoor temperature readings wirelessly, along with time, date, and alarm functions. The clock automatically synchronizes with the atomic time signal for accuracy and includes a daylight saving time (DST) symbol. It is designed for both tabletop and wall-mount placement and operates on battery power.

Figure 1: Main Display Functions. This image illustrates the various indicators on the clock's display, including time zone, atomic time symbol, day of week, snooze, daylight saving time symbol, 12/24 hour format, alarm, current time, indoor temperature, month and date, sensor signal, channel symbol, and outdoor temperature.
Package Contents
- HODIK Atomic Clock W02 Main Unit
- Wireless Outdoor Temperature Sensor
- Instruction Manual
Setup
1. Battery Installation
The main clock unit and the wireless sensor require batteries (not included). Ensure correct polarity when inserting batteries.
- Main Unit: Insert 3 x AA batteries into the battery compartment on the back of the clock.
- Wireless Sensor: Insert 2 x AA batteries into the battery compartment of the outdoor sensor.

Figure 2: Battery Installation. This image shows the battery compartments for the main clock unit (requiring 3*AA batteries) and the wireless outdoor sensor (requiring 2*AA batteries). Batteries are not included.
2. Initial Synchronization (Atomic Time)
After battery installation, the clock will automatically attempt to synchronize with the WWVB atomic time signal. This process may take several minutes to several hours, depending on your location and signal strength. Place the clock near a window for better reception during initial setup.
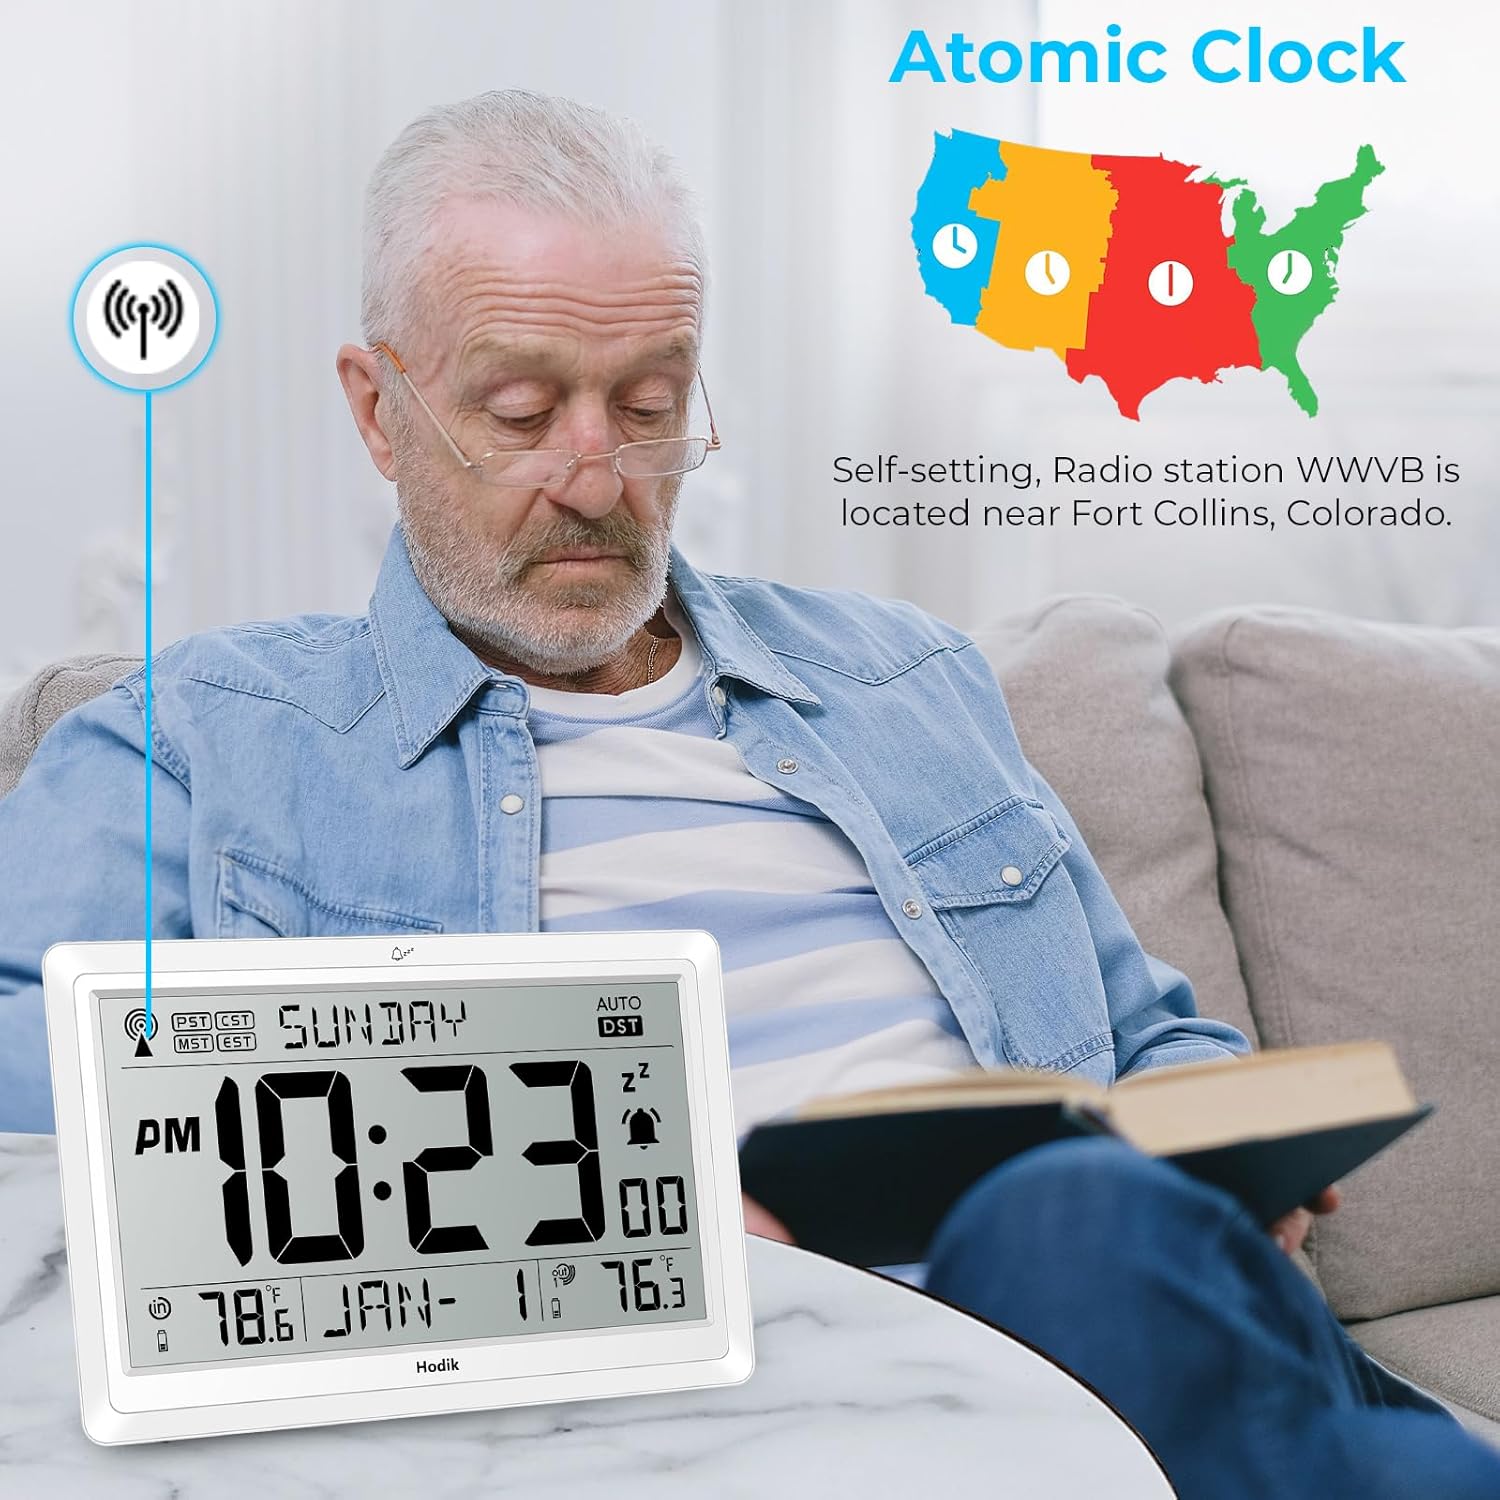
Figure 3: Atomic Clock Synchronization. The image depicts the clock receiving the atomic time signal from the WWVB radio station, located near Fort Collins, Colorado, enabling self-setting time.
3. Wireless Sensor Pairing
The outdoor sensor should automatically pair with the main unit once both have batteries installed. If the outdoor temperature does not display, ensure the sensor is within range and try re-pairing according to the operating instructions.
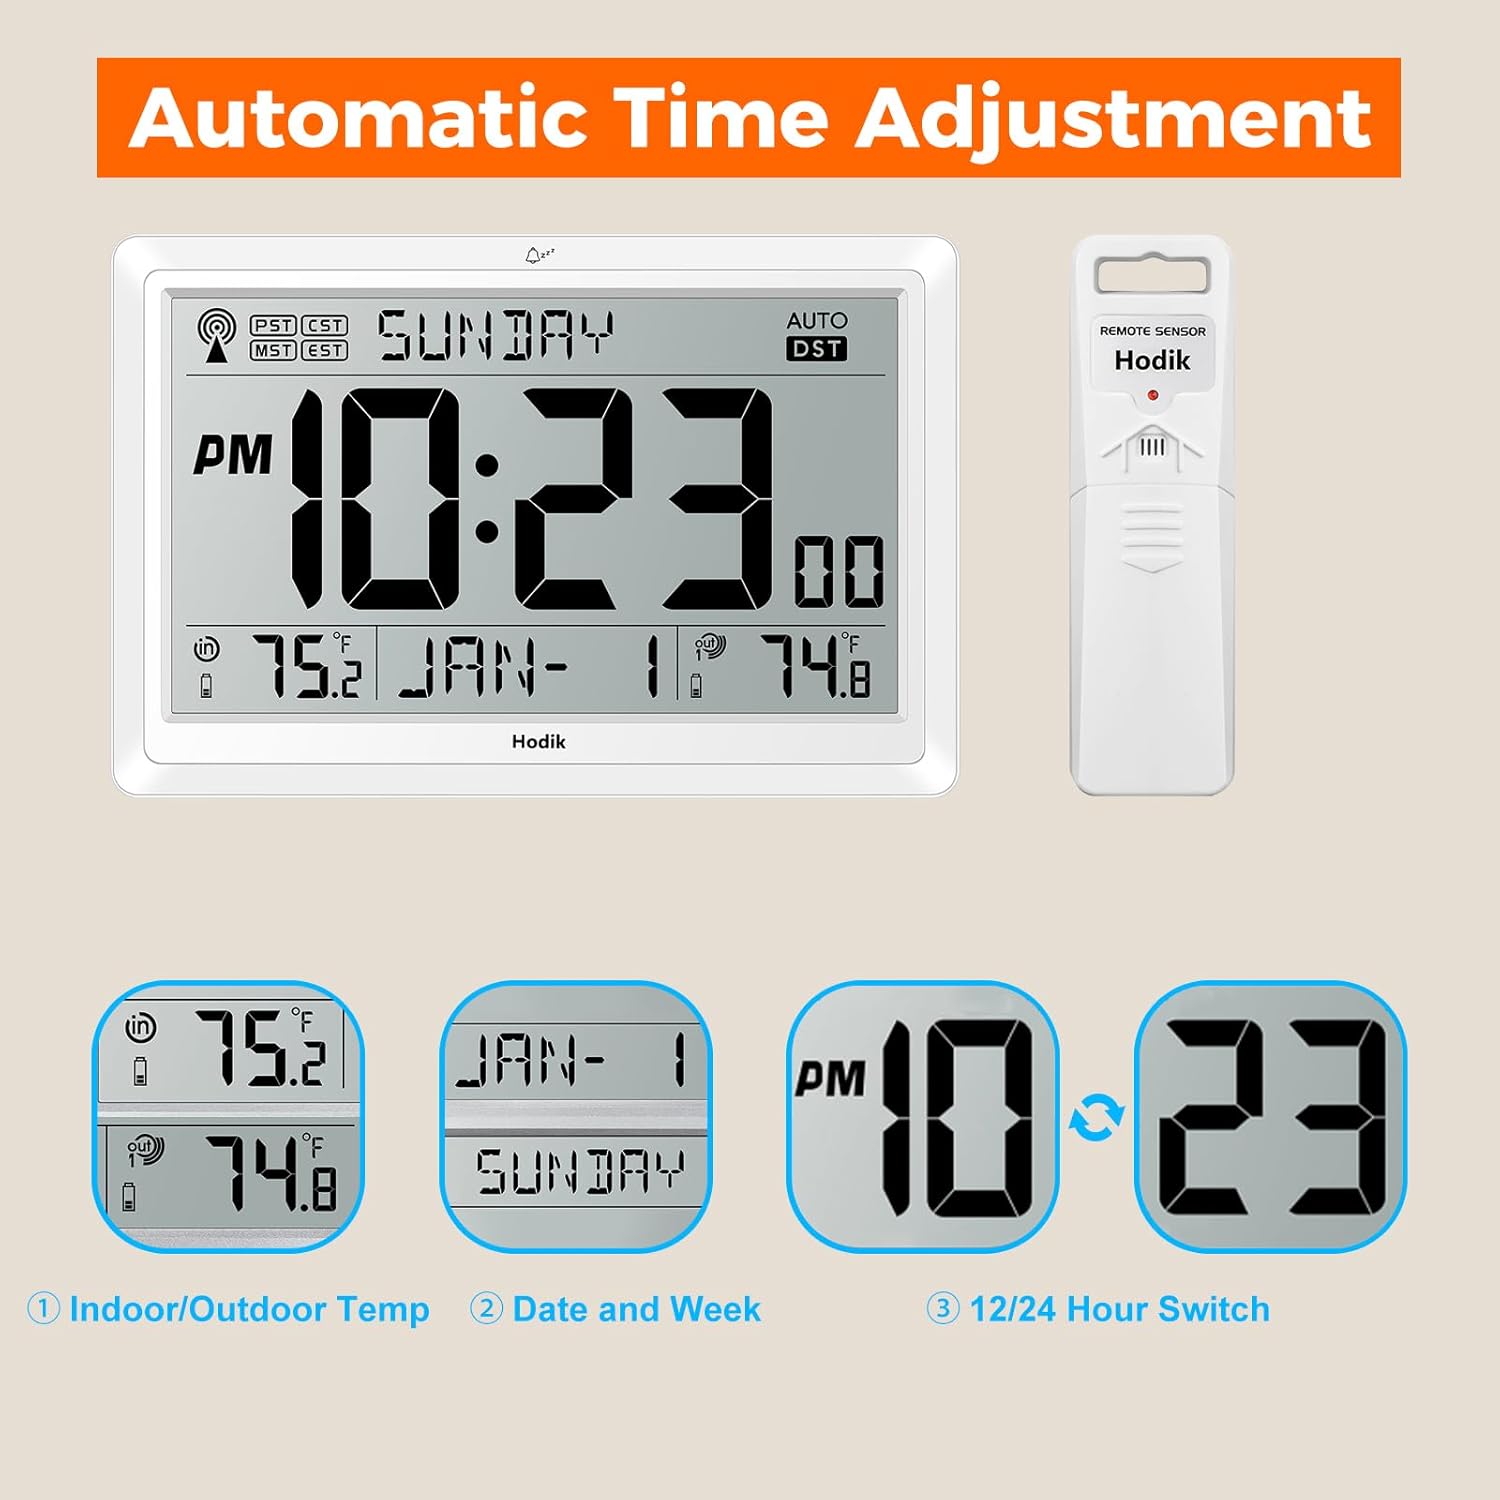
Figure 4: Wireless Temperature Sensor. This image illustrates the wireless outdoor temperature sensor and its effective transmission distance of up to 328 feet (100 meters) to the main clock unit.
4. Placement Options
The HODIK Atomic Clock W02 offers versatile placement options:
- Wall Mount: Use the two hang holes on the back of the clock to mount it securely on a wall.
- Tabletop: Utilize the folding bracket on the back to stand the clock on a desk or table.

Figure 5: Installation Methods. This image shows the two hang holes for wall mounting and the folding bracket for tabletop placement of the clock.
Operating Instructions
1. Automatic Time Adjustment
The clock automatically adjusts time and date once the atomic signal is received. It also adjusts for Daylight Saving Time (DST) automatically.

Figure 6: Automatic Time Adjustment. This image highlights the clock's ability to automatically adjust indoor/outdoor temperature display, date and week, and switch between 12/24 hour formats.
2. Manual Time and Date Setting
In case the atomic signal is not available or you wish to set the time manually:
- Refer to the specific buttons on your clock (e.g., SET, MODE, UP, DOWN) to enter manual setting mode.
- Adjust hours, minutes, year, month, and day as needed.
- Confirm settings to exit manual mode.
3. Temperature Unit Selection (°C/°F)
Press the designated button (often labeled "°C/°F" or similar) to switch between Celsius and Fahrenheit temperature displays for both indoor and outdoor readings.
4. 12/24 Hour Format Selection
Press the designated button (often labeled "12/24H" or similar) to toggle between 12-hour (with AM/PM indicator) and 24-hour time formats.
5. Alarm Clock Function
To set the alarm:
- Enter alarm setting mode (usually by pressing an "ALARM" or "MODE" button multiple times).
- Use adjustment buttons to set the desired alarm time.
- Activate or deactivate the alarm using the alarm ON/OFF button.
- The snooze function is typically activated by pressing the "SNOOZE" button when the alarm sounds.
6. Low Battery Indicator
The clock display will show a low battery indicator when the batteries in either the main unit or the wireless sensor need replacement. Replace batteries promptly to ensure continuous operation and accurate readings.
Maintenance
1. Battery Replacement
When the low battery indicator appears, replace the batteries in both the main unit and the outdoor sensor. Use fresh, high-quality AA batteries. Ensure correct polarity.
2. Cleaning
Wipe the clock and sensor with a soft, dry cloth. Do not use abrasive cleaners or solvents, as these may damage the display or casing. Avoid exposing the units to excessive moisture.
Troubleshooting
- No Atomic Signal / Incorrect Time:
- Ensure the clock is placed in an area with good reception, ideally near a window, away from electronic interference.
- Allow several hours for the clock to acquire the signal, especially during initial setup or after battery replacement.
- Manually set the time if atomic signal reception remains poor.
- Outdoor Temperature Not Displaying / "Wireless Interference":
- Check that the outdoor sensor has fresh batteries and is placed within the 328ft (100m) transmission range of the main unit.
- Ensure there are no major obstructions (thick walls, large metal objects) between the sensor and the main unit.
- Try re-pairing the sensor: Remove batteries from both units, wait a few minutes, then reinsert batteries into the sensor first, then the main unit.
- Avoid placing the sensor near strong electromagnetic fields.
- Display is Dim / Hard to Read in Low Light:
- This model is battery-powered and does not feature a constant backlight. Ensure adequate ambient lighting for optimal readability.
- Inaccurate Temperature Readings:
- Ensure the outdoor sensor is not in direct sunlight or exposed to other heat sources, which can affect accuracy.
- Verify that the sensor is protected from direct rain or snow.
Specifications

Figure 7: Product Dimensions and Temperature Ranges. This image provides the dimensions of the main clock unit (9 x 1.5 x 5.9 inches) and the remote sensor (4 inches tall), along with indoor and outdoor temperature measuring ranges and accuracy.
| Feature | Detail |
|---|---|
| Model | W02 |
| Display Type | Digital LCD |
| Display Size | 11.4 inches (diagonal) |
| Power Source (Main Unit) | 3 x AA Batteries (not included) |
| Power Source (Sensor) | 2 x AA Batteries (not included) |
| Indoor Temperature Range | 14.2°F ~ 122°F (-9.9°C ~ 50°C) |
| Indoor Temperature Accuracy | +/- 0.5°F |
| Outdoor Temperature Range | -40°F ~ 158°F (-40°C ~ 70°C) |
| Wireless Transmission Distance | Up to 328 ft / 100 m (open air) |
| Transmission Frequency | Updates every 30 seconds |
| Product Dimensions (Main Unit) | 9 x 1.5 x 5.9 inches |
| Item Weight | 1.06 pounds (0.48 kg) |
| Mounting Type | Wall Mount or Tabletop |
| Atomic Time Synchronization | WWVB Signal |
| Daylight Saving Time (DST) | Automatic Adjustment |
Warranty and Support
For product support, troubleshooting assistance beyond this manual, or warranty inquiries, please contact HODIK customer service. Refer to the product packaging or the HODIK official website for contact information.
Additional sensors can be purchased separately. Search for B0DM5WPC1F to find compatible sensors.