Introduction
This manual provides detailed instructions for the AMagisn Xplorer Camera Grip Kit, designed to enhance your action camera experience. The kit features a magnetic quick-release handle and a robust frame case, offering stable handling and versatile mounting options for compatible cameras.
What's in the Box
The AMagisn Xplorer Camera Grip Kit includes the following components:
- Camera Grip Handle
- Camera Frame Case
- Quick Release Mechanism
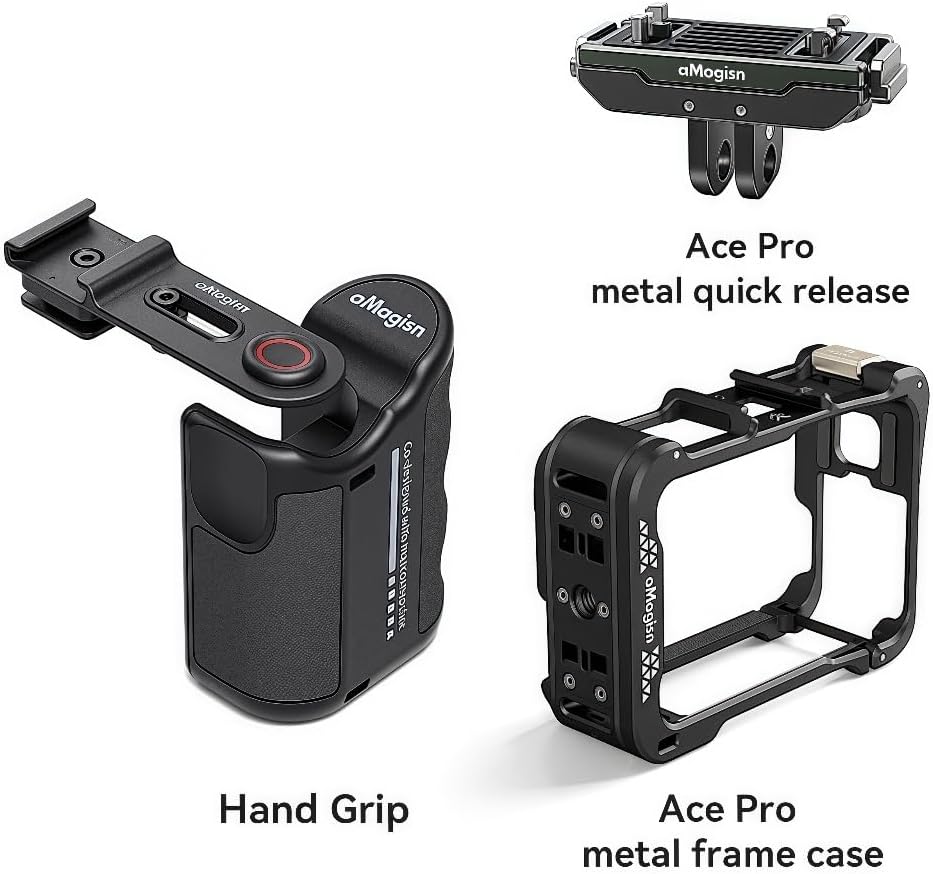
Image: The kit components, including the Hand Grip, Ace Pro metal quick release, and Ace Pro metal frame case.
Setup
Follow these steps to set up your AMagisn Xplorer Camera Grip Kit:
- Attach the Camera Frame Case: Carefully place your compatible action camera (e.g., Insta360 Ace Pro 2) into the designated Camera Frame Case. Ensure it fits securely and all ports are accessible if needed.
- Connect the Quick Release to the Camera Frame Case: The Camera Frame Case features a quick-release interface. Align the quick-release mechanism with this interface and slide it into place until it clicks securely. For metal quick releases, ensure the screw is tightened if applicable.
- Attach the Camera Grip Handle: The Camera Grip Handle features a magnetic quick-release system. Align the quick-release mechanism (now attached to your camera and frame case) with the magnetic receiver on the grip handle. The magnetic connection will secure the camera to the grip.
- Verify Compatibility: The kit is compatible with various quick-release mounts, including official original plastic 2-claw quick release mounts. Ensure you are using the correct quick-release type for your camera model.

Image: Illustration of compatibility with various quick release mounts, including aMagisn Ace Pro 2 plastic/metal, Action 5 Pro metal, and Hero13 plastic/metal quick releases.

Image: Compatible frame cases for aMagisn Ace Pro 2 (plastic/metal), Action 5 Pro (metal), and Hero13 (metal), along with other third-party cages.
Operating Instructions
The AMagisn Xplorer Camera Grip Kit is designed for stable and comfortable camera operation.
Using the Grip Handle
Hold the ergonomically designed grip handle firmly. Its contoured shape provides a comfortable and stable hold, which helps reduce shaking and enhances image quality during shooting. The magnetic quick-release allows for rapid attachment and detachment of your camera, enabling quick transitions between handheld and other mounting setups.

Image: A person demonstrating the comfortable and secure grip provided by the AMagisn Xplorer Camera Grip, designed to reduce shaking.

Image: The AMagisn Xplorer Kit with an action camera mounted, illustrating its use with Insta360, DJI Action, and Hero Series cameras.
Adjustable Shutter and Accessory Mounting
The shutter button module, when mounted on the cold shoe of the cage, provides an accessible shutter control. This module also features a spare cold shoe, allowing you to attach additional accessories such as fill lights or microphones directly to your setup, enhancing your filming capabilities.

Image: Detailed view of the adjustable shutter button module and its integrated cold shoe for attaching external accessories like lights and microphones.
General Usage Tips
- Always ensure your camera is securely attached to the quick-release mechanism and the grip before use.
- When detaching, apply firm but gentle pressure to release the magnetic lock.
- Utilize the various mounting options to adapt to different shooting scenarios, from vlogging to action shots.
Maintenance
To ensure the longevity and optimal performance of your AMagisn Xplorer Camera Grip Kit, follow these maintenance guidelines:
- Cleaning: Wipe the grip and frame case with a soft, dry cloth after each use to remove dust, dirt, or moisture. For stubborn grime, a slightly damp cloth can be used, followed by immediate drying. Avoid harsh chemicals or abrasive cleaners.
- Storage: Store the kit in a cool, dry place away from direct sunlight and extreme temperatures. Keep it in its original packaging or a protective case when not in use to prevent scratches and damage.
- Inspection: Periodically inspect all components, especially the quick-release mechanism and screws, for any signs of wear, damage, or looseness. Tighten any loose screws as necessary.
- Avoid Impact: While durable, avoid dropping the kit or subjecting it to strong impacts, as this can compromise its structural integrity and functionality.
Troubleshooting
If you encounter issues with your AMagisn Xplorer Camera Grip Kit, consider the following common solutions:
- Camera Not Securing Firmly:
- Ensure the quick-release mechanism is fully engaged and clicked into place.
- Check if the quick-release plate or the grip's magnetic receiver is obstructed by debris. Clean if necessary.
- Verify that you are using the correct quick-release type for your camera and frame case.
- Difficulty Detaching Camera:
- Apply firm, even pressure when attempting to release the magnetic lock.
- Ensure no foreign objects are wedged between the quick-release and the grip.
- Accessories Not Fitting Cold Shoe:
- Check if the accessory's cold shoe mount is compatible with standard cold shoe dimensions.
- Ensure the cold shoe slot on the shutter module is clear of any obstructions.
If the issue persists, please refer to the "Warranty and Support" section for further assistance.
Specifications
Detailed specifications for the AMagisn Xplorer Camera Grip Kit:
| Brand | MsCalido |
| Product Name | Xplorer Kit |
| Model | Ace Pro 2 Metal Kit |
| Compatibility | Insta360 Ace Pro 1/2, DJI Action 5 Pro/4/3, Hero 13/12/11/10/9 Series Action Cameras |
| Material | Metal (for Ace Pro 2 Metal Kit), ABS (for other variants) |
| Product Dimensions | 0.33 x 0.16 x 0.26 inches (81.2 x 53.9 x 31.2 mm for grip) |
| Item Weight | 7.8 ounces (220 Grams) |
| Maximum Weight Recommendation | 230 Grams |

Image: A visual representation of the product specifications, including brand, product name, compatibility, material, dimensions, and weight.
Warranty and Support
For warranty information or technical support regarding your AMagisn Xplorer Camera Grip Kit, please contact MsCalido customer service through the retailer where the product was purchased. Keep your proof of purchase for any warranty claims.
For general inquiries or troubleshooting not covered in this manual, you may also visit the official MsCalido website or contact their support channels directly.


