1. Introduction
Thank you for choosing the STAPON 13-inch 2K QLED Car Android Head Unit. This manual provides essential information for the proper installation, operation, and maintenance of your new car stereo system. Please read this manual thoroughly before using the product to ensure optimal performance and safety.
2. Safety Information
- Professional Installation Recommended: Due to the complexity of car electrical systems, professional installation is highly recommended to prevent damage to the unit or your vehicle.
- Power Supply: Ensure the unit is connected to a 12V DC power supply with negative grounding.
- Avoid Water and Moisture: Do not expose the unit to water or excessive moisture.
- Temperature Range: Operate the unit within the specified temperature range of -20°C to 60°C.
- Driving Safety: Do not operate the unit in a way that distracts you from driving. Always prioritize road safety.
- Ventilation: Ensure adequate ventilation around the unit to prevent overheating.
3. Package Contents
Please check the package for the following items:
- Display Unit (13-inch 2K QLED Car Android Head Unit)
- Power Harness
- GPS Antenna
- USB Cables
- User Manual (this document)
- Additional accessories may vary based on specific package.
4. Product Overview
The STAPON 13-inch 2K QLED Car Android Head Unit is a versatile multimedia system designed to enhance your driving experience. It features a high-resolution display, advanced connectivity options, and a powerful Android operating system.
4.1 Key Features
- 13-inch 2K QLED Display (1920x1200 resolution)
- Android Operating System
- Wired and Wireless Apple CarPlay & Android Auto Support
- Built-in WiFi and Bluetooth 5.0
- GPS Navigation
- 64GB Internal Storage, Quad-core Processor
- AHD Reverse Camera Support (optional)
- Steering Wheel Control Compatibility
- Multi-language Support
4.2 Front Panel Layout
The front panel features the large 13-inch QLED touchscreen display, providing access to all functions and applications.

Image 4.2.1: Front view of the STAPON 13-inch QLED Car Android Head Unit, showing the large touchscreen display with a diagonal measurement of 13 inches.

Image 4.2.2: The main interface of the head unit, showing navigation, music, radio, and settings icons.

Image 4.2.3: Icons representing key features: HD Large Screen, WiFi, Steering Wheel Button, CarPlay Connection, Multi-Touch Screen, Navigational Fixing, Bluetooth 5.0, Sound Effect Regulation, and Mobile Internet.
5. Setup & Installation
This section provides general guidelines for installing the STAPON head unit. Due to variations in vehicle models, specific wiring and mounting procedures may differ. It is highly recommended to consult a professional installer or your vehicle's service manual.
5.1 Pre-Installation Checklist
- Ensure the vehicle's ignition is off and the battery is disconnected.
- Gather necessary tools (screwdrivers, wire strippers, electrical tape, etc.).
- Confirm compatibility with your vehicle's dashboard and wiring harness.
5.2 Mounting the Head Unit
The head unit is designed for in-dash mounting. It comes with a bracket that allows installation with standard 9-inch or 10-inch frames, depending on your vehicle's dash opening.
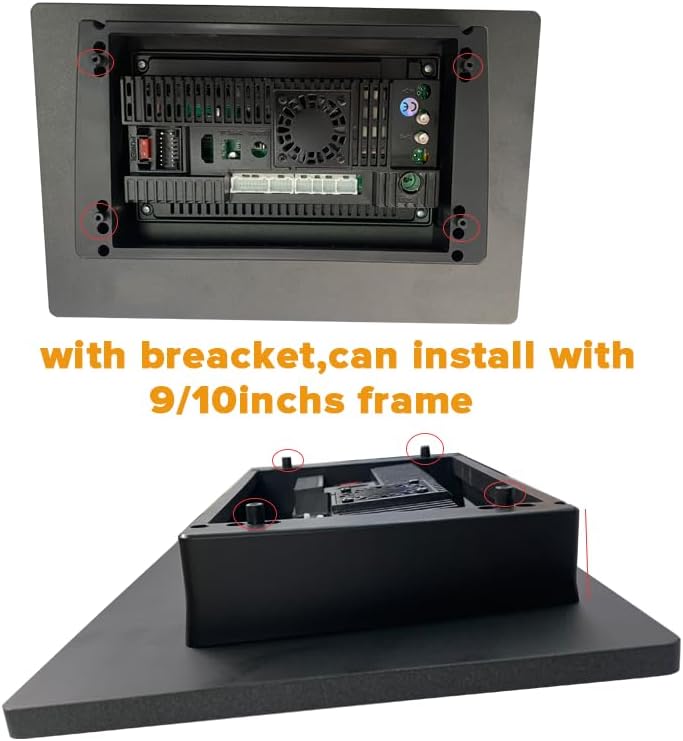
Image 5.2.1: Rear view of the head unit showing the mounting bracket and screw points for installation into a 9-inch or 10-inch frame.
5.3 Wiring Connections
Connect the power harness, GPS antenna, and any other peripheral cables (USB, reverse camera, etc.) according to the wiring diagram provided with your specific unit. Ensure all connections are secure to prevent intermittent issues.
- Power: Connect the main power harness to the vehicle's power supply (12V DC, negative ground).
- GPS Antenna: Mount the GPS antenna in a location with a clear view of the sky for optimal signal reception.
- USB: Connect USB devices for media playback or data transfer.
- Reverse Camera (Optional): If installing an AHD reverse camera, connect it to the designated input.
- Steering Wheel Control: Connect the steering wheel control wires to integrate with your vehicle's existing controls.
5.4 Initial Power-On
After all connections are made, reconnect the vehicle's battery. Turn on the ignition and power on the head unit. Follow any on-screen prompts for initial setup, such as language selection and time zone settings.
6. Operating Instructions
6.1 Basic Operation
- Power On/Off: Press and hold the power button (if available) or turn the vehicle ignition on/off.
- Volume Control: Adjust volume using the touchscreen controls or integrated steering wheel controls.
- Touchscreen Navigation: Swipe, tap, and pinch to navigate through menus and applications.
6.2 Display Features
The 2K QLED screen offers a high-resolution visual experience. Adjust brightness and display settings through the system's settings menu.
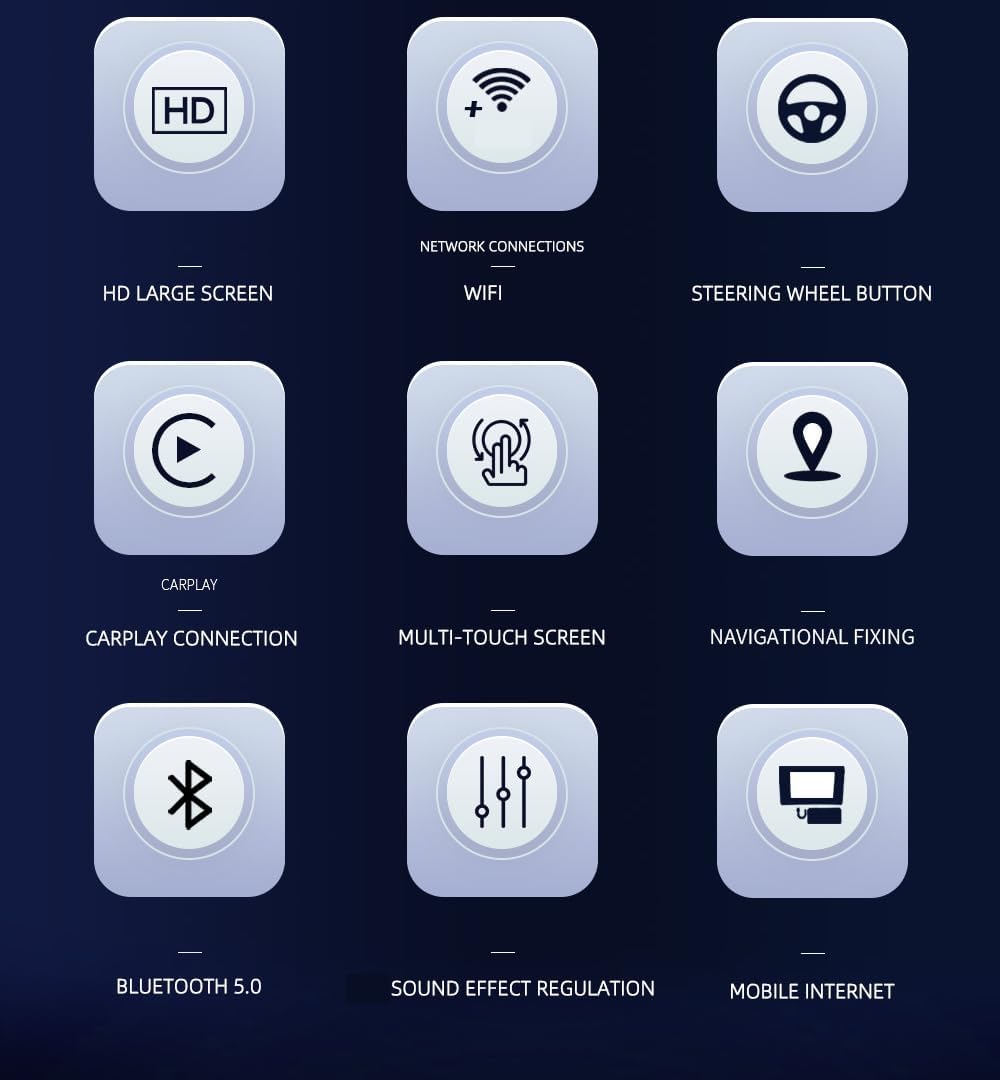
Image 6.2.1: The display showcasing 2K Ultra HD resolution (1920x1200) with vivid and layered images, demonstrating excellent color performance and clarity.

Image 6.2.2: The head unit integrated into a car dashboard, displaying vibrant visuals, highlighting its excellent color performance and clarity for comfortable visual enjoyment.
6.3 Connectivity
- Bluetooth 5.0:
Pair your smartphone via Bluetooth for hands-free calling and audio streaming. Go to Settings > Bluetooth, enable Bluetooth on your phone, and select the head unit from the list of available devices.
- WiFi:
Connect to a WiFi hotspot (e.g., from your phone or a portable hotspot) to access online features, download apps, and update software. Go to Settings > Network & Internet > Wi-Fi, select your network, and enter the password.
- FM Radio:
Access the FM Radio application to tune into local radio stations. Use the scan function to find available stations.
6.4 Apple CarPlay & Android Auto
The unit supports both wired and wireless Apple CarPlay and Android Auto, allowing seamless integration of your smartphone's features.

Image 6.4.1: The head unit displaying both Apple CarPlay and Android Auto interfaces, showing phone navigation mirrored onto the car screen.
- Wired Connection: Connect your smartphone to the head unit via a USB cable. The system should automatically detect and launch CarPlay or Android Auto.
- Wireless Connection: Ensure Bluetooth and WiFi are enabled on your phone and the head unit. Follow the on-screen prompts or refer to your phone's specific instructions for wireless CarPlay/Android Auto setup.
6.5 GPS Navigation
The built-in GPS module provides accurate navigation. Use pre-installed navigation apps or download your preferred apps from the Google Play Store (requires WiFi connection).
- Ensure the GPS antenna is properly installed and has a clear view of the sky.
- For online maps, a stable internet connection via WiFi or a mobile hotspot is required.
6.6 Multimedia Playback
The unit supports various audio and video formats from USB drives or internal storage.
- Supported Audio Formats: MP3, WMA, WAV, APE, FLAC
- Supported Video Formats: RM, RMVB, MP4, 3GP, AVI, MKV
- Supported Image Formats: JPG
6.7 Split Screen Function (Picture-in-Picture)
The head unit supports a split-screen function, allowing you to run two applications simultaneously, such as navigation and media playback. The size of each window can be adjusted.
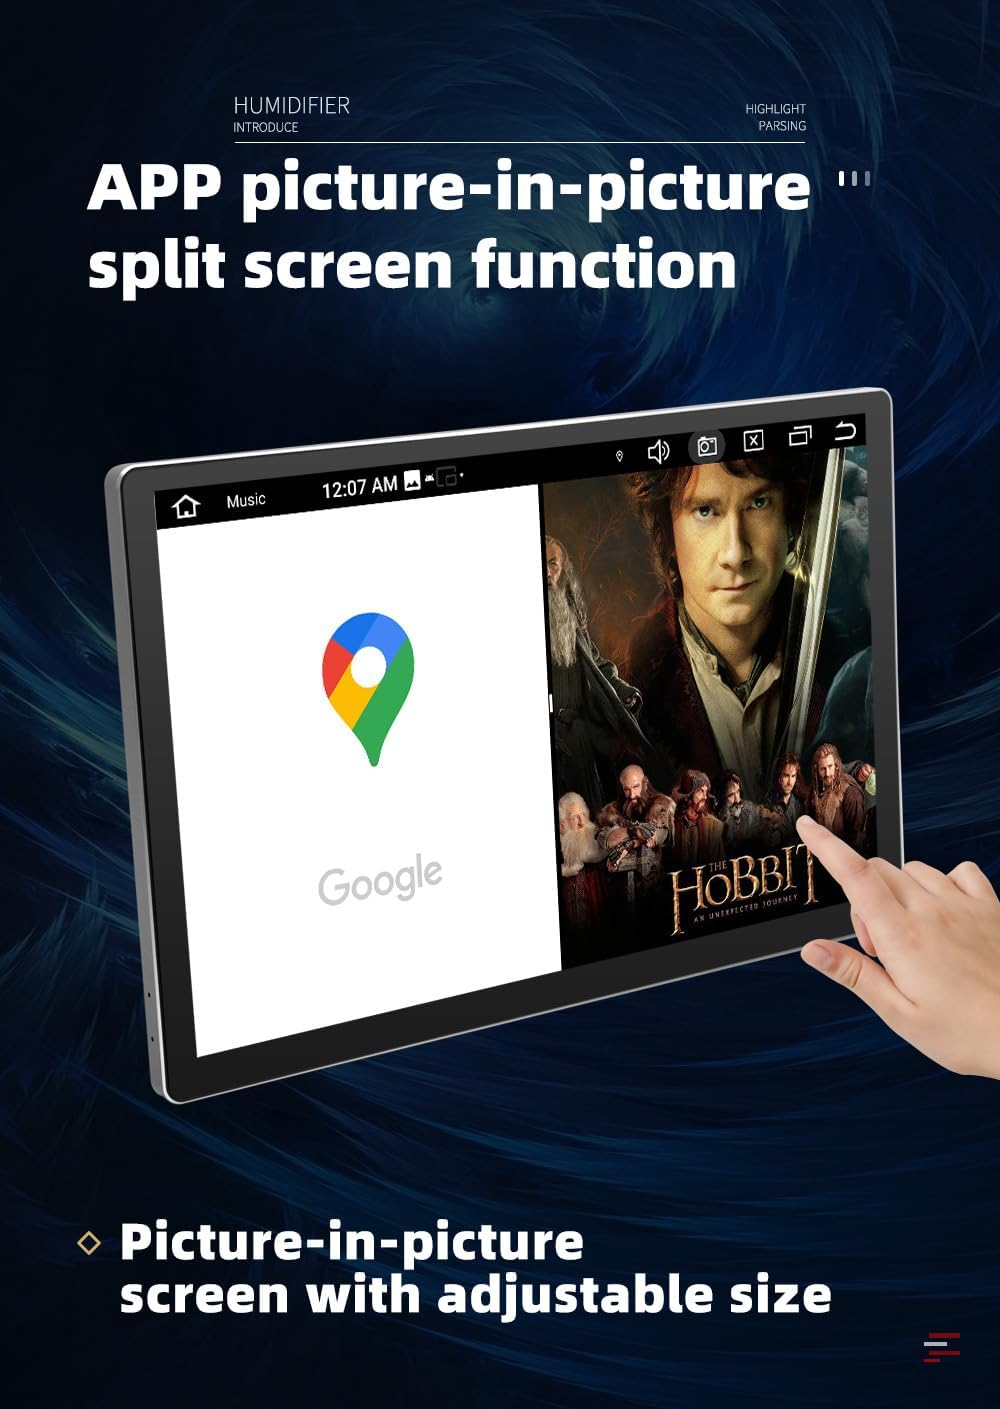
Image 6.7.1: The head unit displaying the split-screen function, showing Google Maps on one side and a video player on the other, with adjustable window sizes.
6.8 AHD Reverse Camera (Optional)
If an AHD reverse camera is connected, the display will automatically switch to the camera view when the vehicle is put into reverse gear, providing a clear image for safer parking and maneuvering.
Image 6.8.1: The head unit displaying a clear reversing image with guidelines, as seen from an optional AHD reverse camera.
7. Maintenance
- Cleaning the Screen: Use a soft, lint-free cloth to gently wipe the screen. For stubborn smudges, slightly dampen the cloth with water or a screen-cleaning solution. Avoid harsh chemicals or abrasive materials.
- Software Updates: Periodically check for software updates through the system settings (requires WiFi connection) to ensure optimal performance and access to new features.
- Avoid Extreme Temperatures: Do not expose the unit to prolonged direct sunlight or extreme cold, as this can affect its lifespan and performance.
8. Troubleshooting
| Problem | Possible Cause | Solution |
|---|---|---|
| Unit does not power on. | No power supply; incorrect wiring; blown fuse. | Check power connections; verify fuse; consult a professional installer. |
| No sound. | Volume too low; incorrect audio settings; speaker wiring issue. | Increase volume; check audio output settings; verify speaker connections. |
| GPS signal lost or inaccurate. | GPS antenna improperly installed or obstructed. | Ensure GPS antenna has a clear view of the sky; check antenna connection. |
| CarPlay/Android Auto not connecting. | Incorrect USB cable; Bluetooth/WiFi issues; phone settings. | Use a high-quality USB cable; ensure Bluetooth/WiFi are enabled; check phone permissions. |
| Touchscreen unresponsive. | System freeze; temporary software glitch. | Restart the unit (turn vehicle ignition off and on); perform a factory reset if necessary (Note: this will erase all data). |
If the problem persists after attempting these solutions, please contact customer support.
9. Specifications
| Model Name | STAPON 13-inch 2K |
| Display Size | 13 Inches (Note: Some specifications list 10.1 inches, but product title and images indicate 13 inches) |
| Resolution | 1920x1200 (2K QLED) |
| Operating System | Android |
| Processor | Quad-core |
| RAM | 2GB |
| Internal Storage | 64GB |
| Bluetooth Version | 5.0 |
| Connectivity | Wi-Fi, Bluetooth, USB |
| Car Integration | Wired/Wireless Apple CarPlay, Wired/Wireless Android Auto |
| GPS | Built-in GPS Navigation (Online Map Type) |
| Audio Output Mode | Stereo |
| Mounting Type | In-dash |
| Operating Temperature | -20°C to 60°C |
| Product Dimensions | 7.84 x 2 x 7.5 inches |
| Item Weight | 3.74 pounds |
Note: Specifications are subject to change without prior notice.
10. Warranty & Support
This STAPON product comes with a 1-year warranty from the date of purchase, covering manufacturing defects. Please retain your proof of purchase for warranty claims.
For technical support, troubleshooting assistance, or warranty inquiries, please contact your retailer or the STAPON customer service team through the contact information provided at the point of purchase or on the official STAPON website.
When contacting support, please have your product model number (B0FCC3X6TR) and a detailed description of the issue ready.