1. Introduction
Thank you for purchasing the Generic Nv400b 7X31 Digital Night Vision Binoculars. This device is designed for both daytime and nighttime observation, offering clear viewing with its digital zoom and infrared capabilities. It features image capture and video recording functions, allowing you to document your observations. Please read this manual thoroughly before operating the device to ensure proper use and to maximize its performance and longevity.
2. Safety Information
- Do not look directly at the sun or any bright light source through the binoculars, as this can cause permanent eye damage.
- Keep the device away from water and moisture. If it gets wet, turn it off immediately and allow it to dry completely before use.
- Avoid dropping or subjecting the device to strong impacts.
- Do not attempt to disassemble or repair the device yourself. Refer all servicing to qualified personnel.
- Use only specified batteries (8 x AA) or a compatible power bank. Incorrect battery usage can lead to fire, explosion, or other hazards.
- Store the device in a cool, dry place when not in use.
3. Package Contents
Please check the package contents upon unboxing. If any items are missing or damaged, contact your retailer.
- Nv400b Digital Night Vision Binoculars
- Neck Strap
- USB Cable
- AV Cable
- Cleaning Cloth
- User Manual (this document)

Figure 3.1: Nv400b Digital Night Vision Binoculars with included accessories (neck strap, USB cable, AV cable, cleaning cloth).
4. Product Overview
Familiarize yourself with the main components of your Nv400b binoculars.
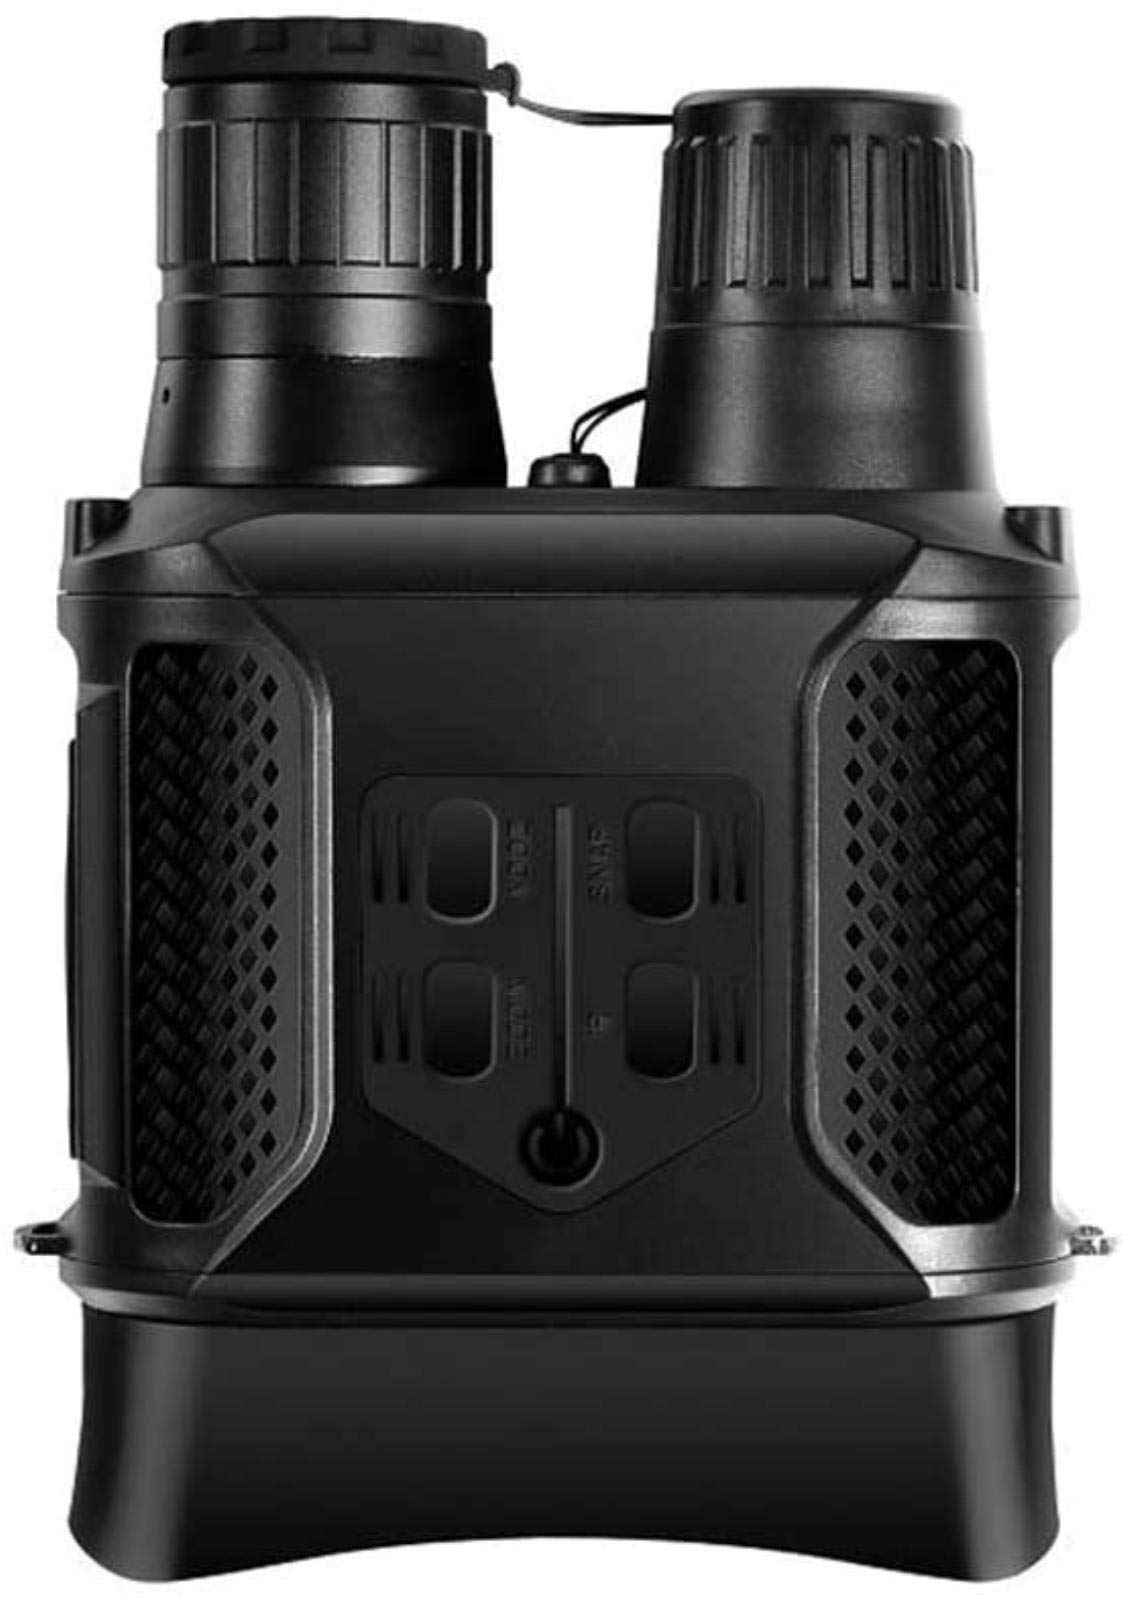
Figure 4.1: Front view showing objective lenses and infrared illuminator.
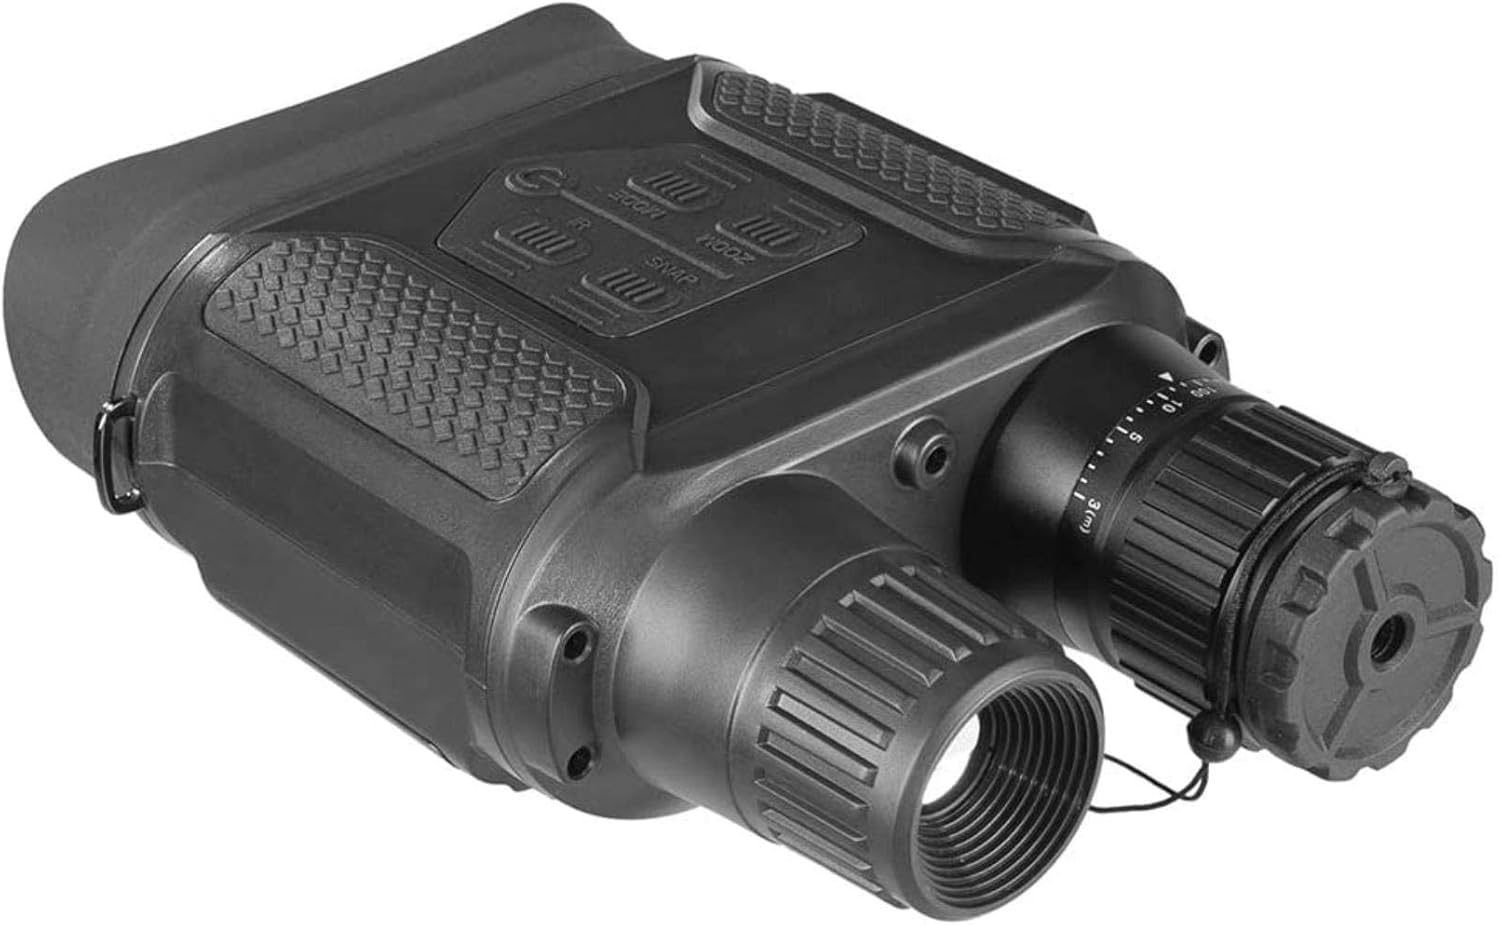
Figure 4.2: Top-angled view highlighting the control buttons: MODE, ZOOM, SNAP, and IR.

Figure 4.3: Top-angled view showing the focus adjustment wheel and eyepiece.
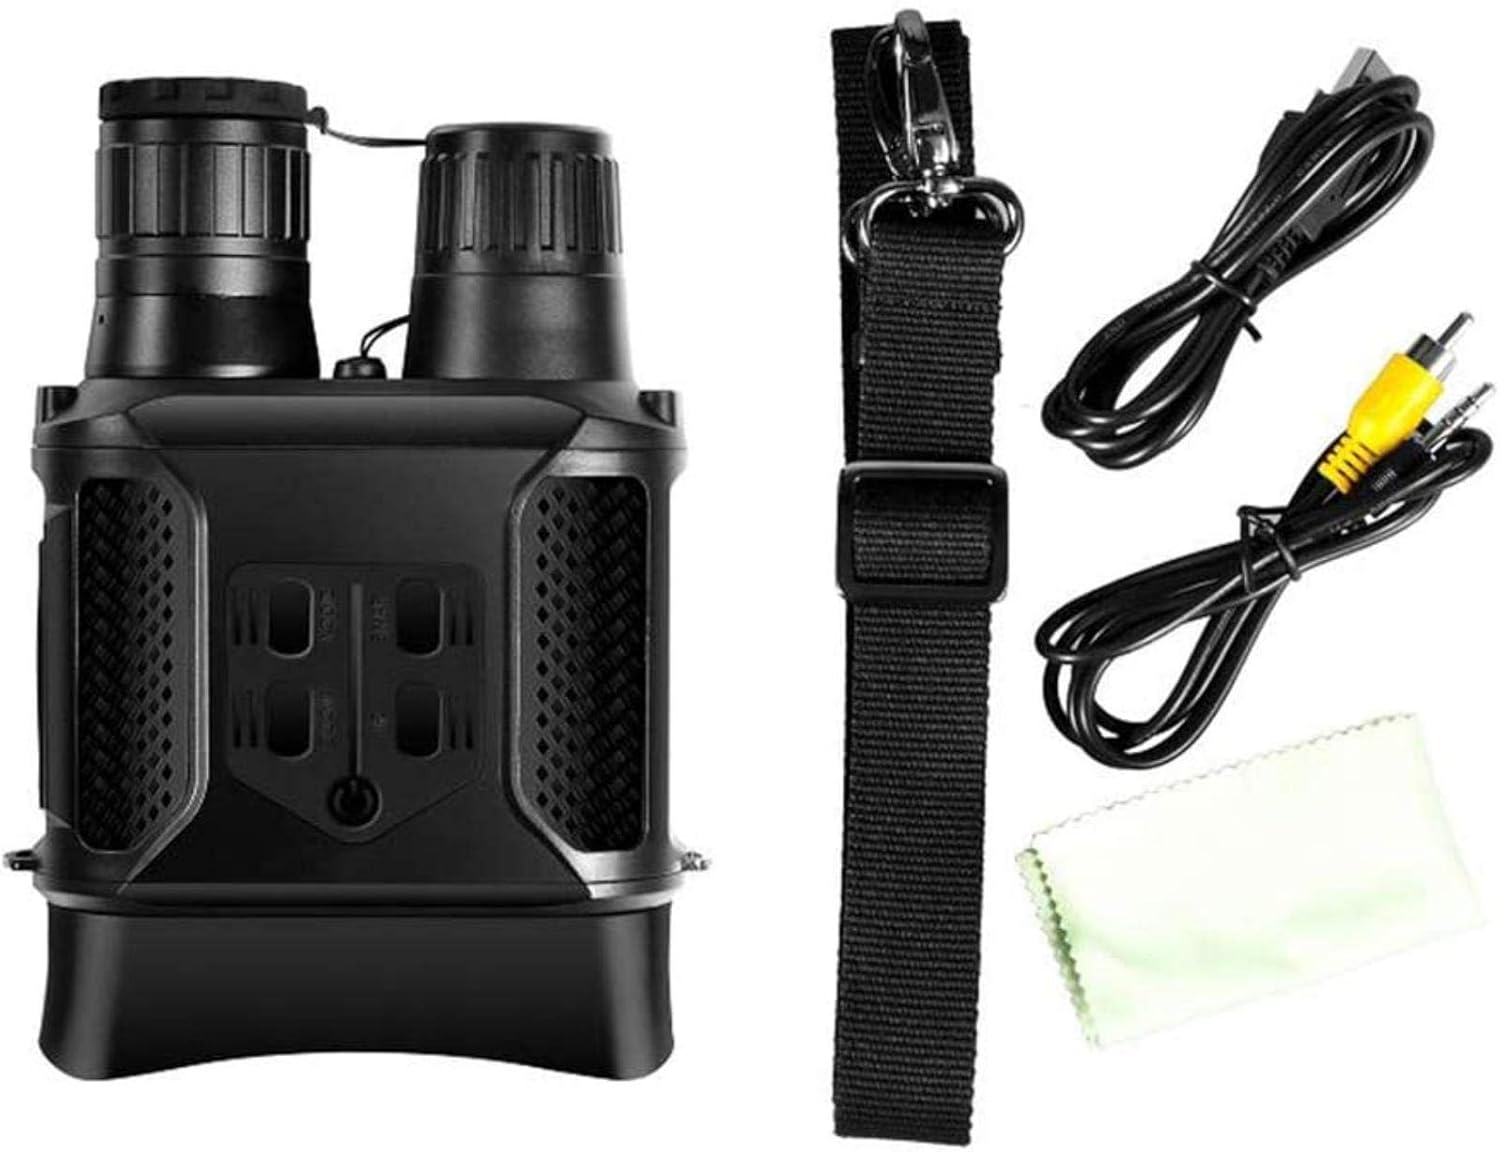
Figure 4.4: The 2.0-inch TFT LCD display for viewing observations and navigating menus.
Key Components:
- Objective Lenses: Capture light from the scene.
- Infrared (IR) Illuminator: Provides invisible light for night vision in complete darkness.
- Eyepiece/LCD Screen: For viewing images and videos.
- Focus Wheel: Adjusts the focus for clear viewing.
- Control Buttons: (MODE, ZOOM, SNAP, IR) for operating various functions.
- Battery Compartment: Holds 8 x AA batteries.
- Memory Card Slot: For inserting a Micro SD card (4GB-32GB recommended).
- USB Port: For connecting to a computer.
- AV Out Port: For connecting to a television.
5. Setup
5.1 Battery Installation
- Locate the battery compartment cover on the device.
- Open the cover and insert 8 x AA batteries, ensuring correct polarity (+/-).
- Close the battery compartment cover securely.
- Alternatively, the device can be powered by a compatible power bank via the USB port.
5.2 Memory Card Installation
- The device requires a Micro SD card (not included) for storing images and videos. A capacity of 4GB to 32GB is recommended.
- Locate the memory card slot.
- Insert the Micro SD card into the slot until it clicks into place. Ensure the card is inserted in the correct orientation.
- To remove, gently push the card until it springs out.
6. Operating Instructions
6.1 Powering On/Off
- To power on, press and hold the Power button (usually marked with a power symbol) until the LCD screen illuminates.
- To power off, press and hold the Power button again until the screen turns off.
6.2 Focusing
- While looking through the eyepiece/LCD screen, rotate the focus wheel (refer to Figure 4.3) until the image appears sharp and clear.
6.3 Adjusting Digital Zoom
- Press the ZOOM button to cycle through available digital zoom levels (up to 2X).
6.4 Using Infrared (IR) for Night Vision
- In low light or complete darkness, press the IR button to activate the infrared illuminator.
- Press the IR button repeatedly to adjust the IR intensity level. Higher levels provide better visibility in darker conditions but consume more battery power.
- The display will switch to black and white when IR is active for optimal night vision.
6.5 Capturing Images and Videos
- Image Capture: In observation mode, press the SNAP button to take a still photograph. The image will be saved to the Micro SD card.
- Video Recording: Press the MODE button to switch to video recording mode. Then, press the SNAP button to start recording. Press SNAP again to stop recording. The video will be saved to the Micro SD card.
6.6 Menu Navigation and Language Settings
- Press the MODE button to access the menu or switch between observation, photo, and video playback modes.
- Use the ZOOM and IR buttons (often doubling as navigation arrows) to scroll through menu options.
- Press the SNAP button to confirm a selection.
- To change the language, navigate to the 'Language' option in the menu and select your preferred language (English, French, Spanish, Portuguese, German, etc.).
6.7 Connecting to a Computer (USB)
- Ensure the device is powered on.
- Connect the binoculars to your computer using the provided USB cable.
- The device should appear as a removable disk drive on your computer, allowing you to access and transfer saved images and videos.
6.8 Connecting to a Television (AV Out)
- Connect the binoculars to your television using the provided AV cable.
- Select the appropriate AV input channel on your television to view the binoculars' display.
7. Maintenance
7.1 Cleaning
- Lenses: Use the provided cleaning cloth or a soft, lint-free cloth specifically designed for optical lenses. Gently wipe the lens surfaces. Do not use abrasive materials or harsh chemicals.
- Body: Wipe the body of the binoculars with a soft, damp cloth. Avoid using solvents or strong detergents.
7.2 Storage
- When not in use for extended periods, remove the batteries to prevent leakage.
- Store the binoculars in a dry, cool, and well-ventilated place, away from direct sunlight and extreme temperatures.
- Use the protective caps for the objective lenses to prevent dust and scratches.
8. Troubleshooting
| Problem | Possible Cause | Solution |
|---|---|---|
| Device does not power on. | Batteries are dead or incorrectly inserted. | Replace batteries or check polarity. Ensure power button is pressed and held. |
| Poor image quality / blurry view. | Incorrect focus; dirty lenses; insufficient IR illumination (at night). | Adjust the focus wheel. Clean lenses with the provided cloth. Increase IR intensity or ensure IR is active in dark conditions. |
| Cannot save images/videos. | No Micro SD card inserted; Micro SD card is full or corrupted. | Insert a Micro SD card. Delete old files or replace the card. Format the card (via device menu if available). |
| Device freezes or becomes unresponsive. | Temporary software glitch. | Remove and reinsert batteries to perform a hard reset. |
9. Specifications
| Model | Nv400b |
| Optical Magnification | 3.5X - 7X |
| Digital Zoom | 2X |
| Objective Lens Diameter | 31mm |
| Angle of View | 4.5° - 9° |
| Daytime Observation Range | 5m to infinity |
| Nighttime Observation Range (Full Darkness) | Up to 400 meters (black and white) |
| Display Screen | 2.0" TFT LCD (320 x 240 resolution) |
| Image Resolution | 640 x 480 |
| Storage | Micro SD card, up to 32GB (not included) |
| Power Source | 8 x AA batteries (not included) or external power bank |
| Dimensions | 22cm x 14cm x 6cm |
| Weight | 760g |
| Color | Black |
| Supported Languages | English, French, Spanish, Portuguese, German, and 5 other languages |
10. Warranty and Support
This product is covered by a standard manufacturer's warranty. For specific warranty details, please refer to the documentation included with your purchase or contact your retailer. For technical support or service inquiries, please reach out to the manufacturer or your point of purchase.

