1. Introduction
Thank you for choosing the Imdot Wall Mounted Pressure Washer. This powerful unit features a maximum pressure of 5500 PSI and a flow rate of 3.6 GPM, designed for effective cleaning of various surfaces. Its wall-mounted design with a 100FT retractable hose offers convenience and space-saving benefits. Please read this manual thoroughly before first use to ensure proper assembly, operation, and maintenance.
2. Safety Information
General Safety Warnings
- Always wear appropriate personal protective equipment (PPE) such as safety glasses, gloves, and hearing protection when operating the pressure washer.
- Never point the spray gun at people, pets, or electrical outlets.
- Ensure all connections are secure before starting the unit.
- Do not operate the pressure washer in an enclosed space.
- Keep children and pets away from the operating area.
- Disconnect the power supply before performing any maintenance or cleaning.
- Use only manufacturer-approved accessories and replacement parts.
- This appliance is designed for outdoor use only.
Electrical Safety
- Connect the pressure washer to a grounded outlet only.
- Do not use extension cords unless absolutely necessary, and ensure they are rated for outdoor use and the power requirements of the unit.
- Inspect the power cord for damage before each use.
- The unit features a Total Stop System (TSS) which automatically shuts off the pump when the trigger is not activated, saving energy and extending pump life.
3. Package Contents
Verify that all items are present in the package. If any parts are missing or damaged, contact customer support.
- Imdot Wall Mounted Pressure Washer Unit
- 100FT Retractable Pressure Hose
- Spray Gun with Wand
- 4 Quick-Connect Nozzles (0°, 15°, 25°, 40°)
- Turbo Nozzle
- High-Pressure Foam Cannon (1 Liter capacity)
- Universal Garden Adapter
- Wall Mounting Hardware (Screws, metal support)
- Power Cord (10FT)
- Instruction Manual

Image: All components of the Imdot Wall Mounted Pressure Washer, including the main unit, spray gun, various nozzles, foam cannon, and mounting hardware.
4. Setup
4.1 Wall Mounting
The pressure washer is designed for wall mounting to save space.
- Select a suitable location on a sturdy wall, ensuring it is close to a grounded power outlet and a water source.
- Use the provided screws and wall mounting expansion anchors to secure the metal support bracket to the wall.
- Carefully lift and secure the pressure washer unit onto the installed metal support.
- Ensure the unit is firmly attached and stable before proceeding.

Image: Step-by-step visual guide for wall mounting the pressure washer unit.
4.2 Connecting Water Supply
- Attach the universal garden adapter to the water inlet on the pressure washer unit.
- Connect your garden hose to the universal garden adapter. Ensure a tight, leak-free connection.
- Turn on the water supply.
Video: This video demonstrates the unboxing and initial setup steps for the Wall Mounted Electric Pressure Washer, including connecting the water supply and assembling the spray gun components.
4.3 Assembling the Spray Gun
- Attach the wand to the spray gun by twisting until secure.
- Select the desired quick-connect nozzle (0°, 15°, 25°, 40°) or the turbo nozzle. Pull back the collar on the wand, insert the nozzle, and release the collar to lock it in place.
- Connect the 100FT retractable pressure hose from the main unit to the spray gun.
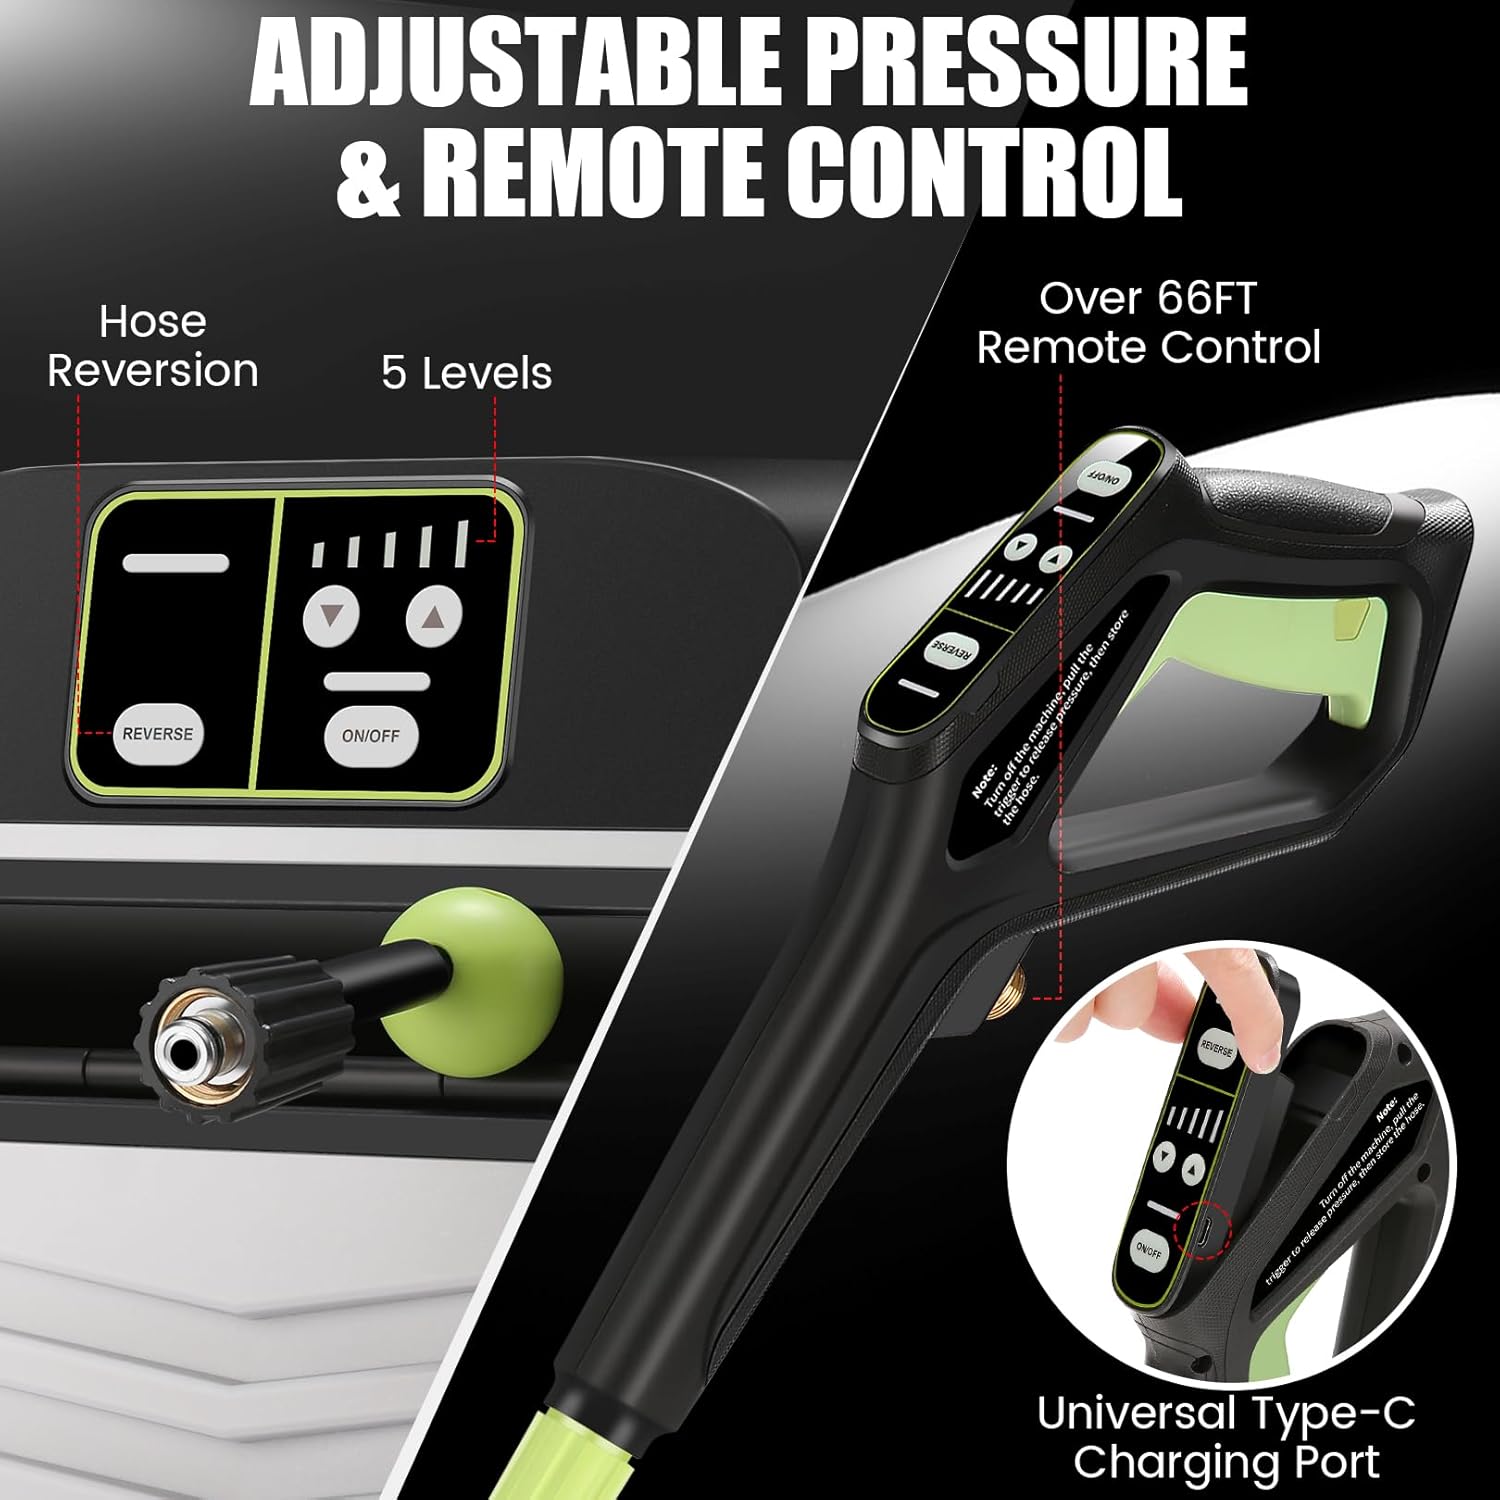
Image: Detail of the spray gun, showing the quick-connect nozzle attachment points and the remote control interface.
5. Operating Instructions
5.1 Starting the Pressure Washer
- Ensure the water supply is fully open.
- Plug the power cord into a grounded electrical outlet.
- Press the "ON/OFF" button on the main unit or the remote control on the spray gun to power on the machine.
- Before spraying, squeeze the trigger on the spray gun to purge air from the system until a steady stream of water emerges.
5.2 Adjusting Pressure and Modes
The Imdot pressure washer offers 5 adjustable pressure settings, controllable via the main unit or the remote control on the spray gun.
- Use the "Up" and "Down" arrow buttons to cycle through the pressure levels: ECO (1000W), Soft (1200W), Mid (1400W), Strong (1600W), and Maximum (1800W).
- Choose the appropriate pressure setting for your cleaning task. Lower pressure is suitable for delicate surfaces, while higher pressure is for stubborn dirt.
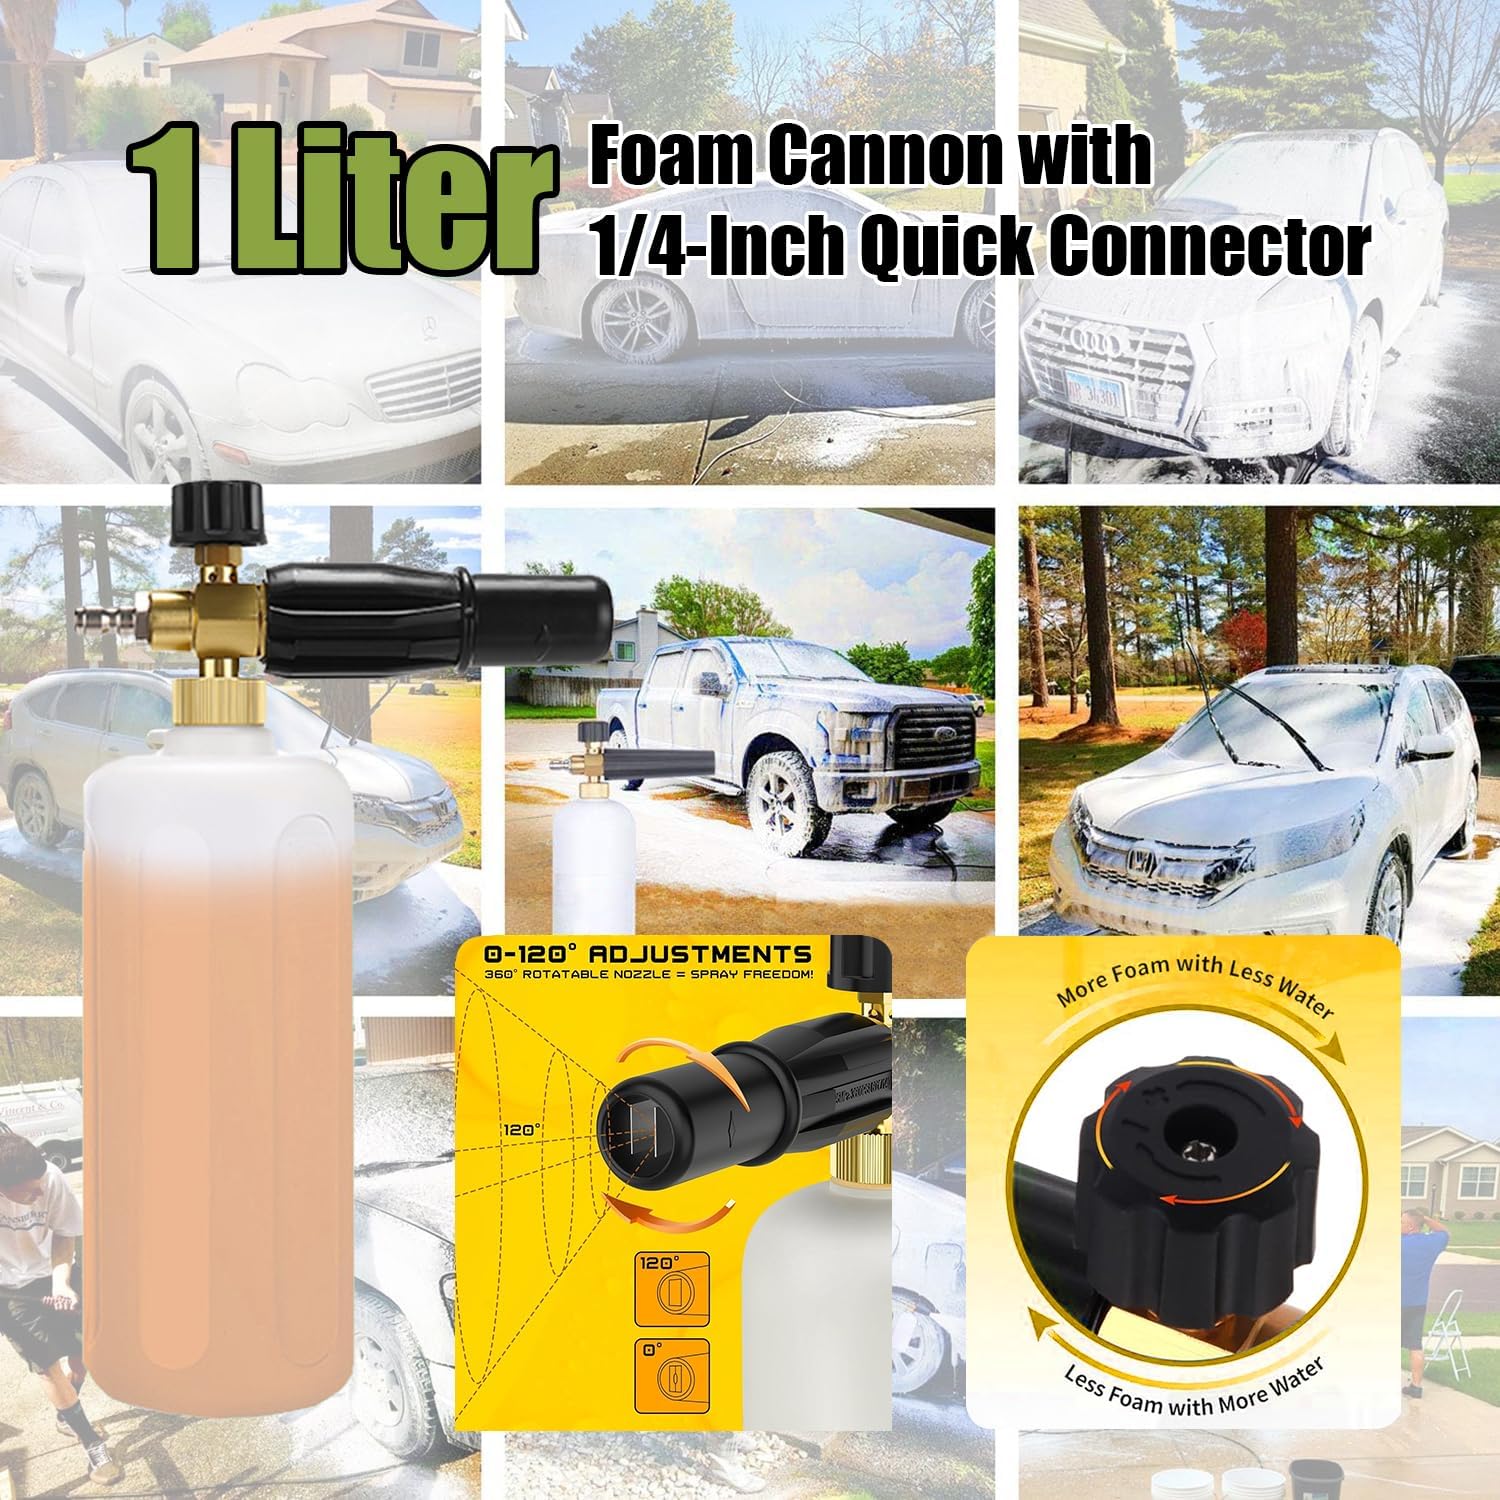
Image: Visual representation of the 5 smart cleaning modes and how the remote control on the spray gun allows for pressure adjustment.
5.3 Using Quick-Connect Nozzles
The pressure washer includes various quick-connect nozzles for different applications:
- 0° (Red): For concentrated, high-pressure stream. Use with extreme caution for tough stains on durable surfaces.
- 15° (Yellow): For intense cleaning of small areas.
- 25° (Green): For general cleaning of most surfaces.
- 40° (White): For gentle cleaning of delicate surfaces.
- Turbo Nozzle (Black): Provides a rotating stream for faster cleaning of heavily soiled areas.

Image: Illustration of the four quick-connect nozzles and their corresponding spray patterns for various cleaning tasks.
5.4 Using the Foam Cannon
- Assemble the high-pressure foam cannon by attaching the suction tube to the brass fitting and then screwing the bottle onto the assembly.
- Fill the 1-liter foam cannon bottle with appropriate pressure washer detergent.
- Connect the foam cannon to the spray gun wand using the quick-connect fitting.
- Adjust the water regulator knob on the foam cannon to control the foam consistency (more foam with less water, or less foam with more water).
- Adjust the spray nozzle on the foam cannon for desired spray pattern.
- Spray the detergent onto the surface to be cleaned.
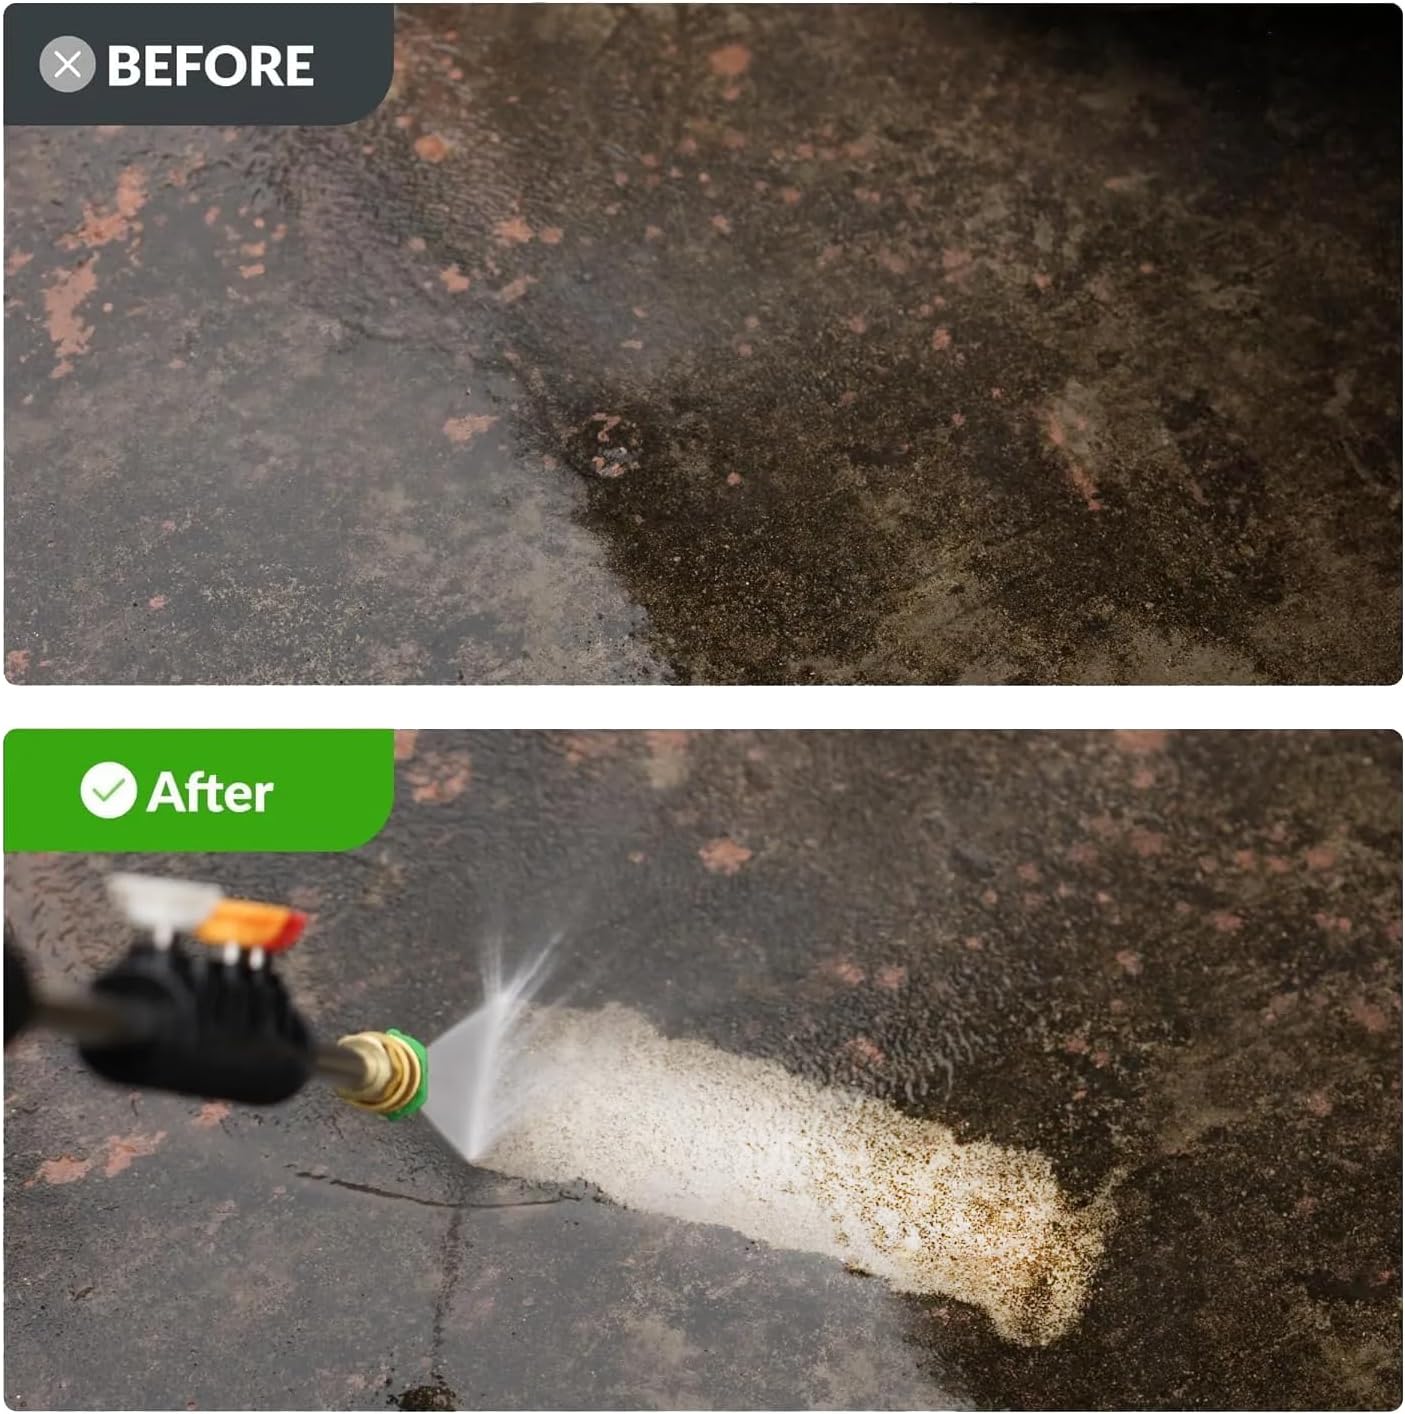
Image: The 1-liter foam cannon, highlighting its quick connector and adjustable features for optimal foam application.
5.5 Retracting the Hose
The 100FT retractable hose can be locked at any desired length. To retract the hose:
- Gently pull the hose to disengage the locking mechanism.
- Press the "REVERSE" button on the main unit or the remote control. The hose will automatically rewind into the unit.
- Guide the hose as it retracts to prevent kinks or tangles.

Image: The pressure washer's retractable hose feature, showing how it locks at any length and the unit's IPX5 waterproof rating.
6. Maintenance
6.1 After Each Use
- Turn off the pressure washer and disconnect the power supply.
- Turn off the water supply.
- Squeeze the spray gun trigger to release any remaining pressure in the system.
- Disconnect the garden hose and spray gun.
- Drain any remaining water from the pump and hoses.
- Clean the nozzles and foam cannon to prevent clogging.
- Retract the hose fully into the unit.
6.2 Storage
Store the pressure washer in a dry, frost-free location. Protect the unit from freezing temperatures, which can damage the pump.
The wall-mounted design allows for convenient, space-saving storage.

Image: The wall-mounted pressure washer in a storage setting, emphasizing its compact and organized design.
7. Troubleshooting
| Problem | Possible Cause | Solution |
|---|---|---|
| Motor does not start | No power supply; tripped circuit breaker; faulty switch | Check power connection; reset circuit breaker; contact service |
| Low pressure | Insufficient water supply; clogged nozzle; air in pump | Ensure full water flow; clean nozzle; purge air from system |
| Water leaks | Loose connections; damaged O-rings | Tighten connections; replace O-rings |
| Hose does not retract | Hose is kinked or jammed; retraction mechanism issue | Straighten hose; ensure no obstructions; contact service |
8. Specifications
| Feature | Detail |
|---|---|
| Brand | Imdot |
| Model Number | HX0008 |
| Power Source | AC Electric |
| Maximum Pressure | 5500 PSI |
| Maximum Flow Rate | 3.6 Gallons Per Minute (GPM) |
| Hose Length | 100 Feet |
| Product Dimensions (L x W x H) | 21"L x 18"W x 17"H |
| Tank Volume (Foam Cannon) | 1 Liter |
| Special Features | 5 Adjustable Pressure Settings, Remote Control, Automatic Hose Rewind, Any Length Lock, Total Stop System (TSS), IPX5 Waterproof |
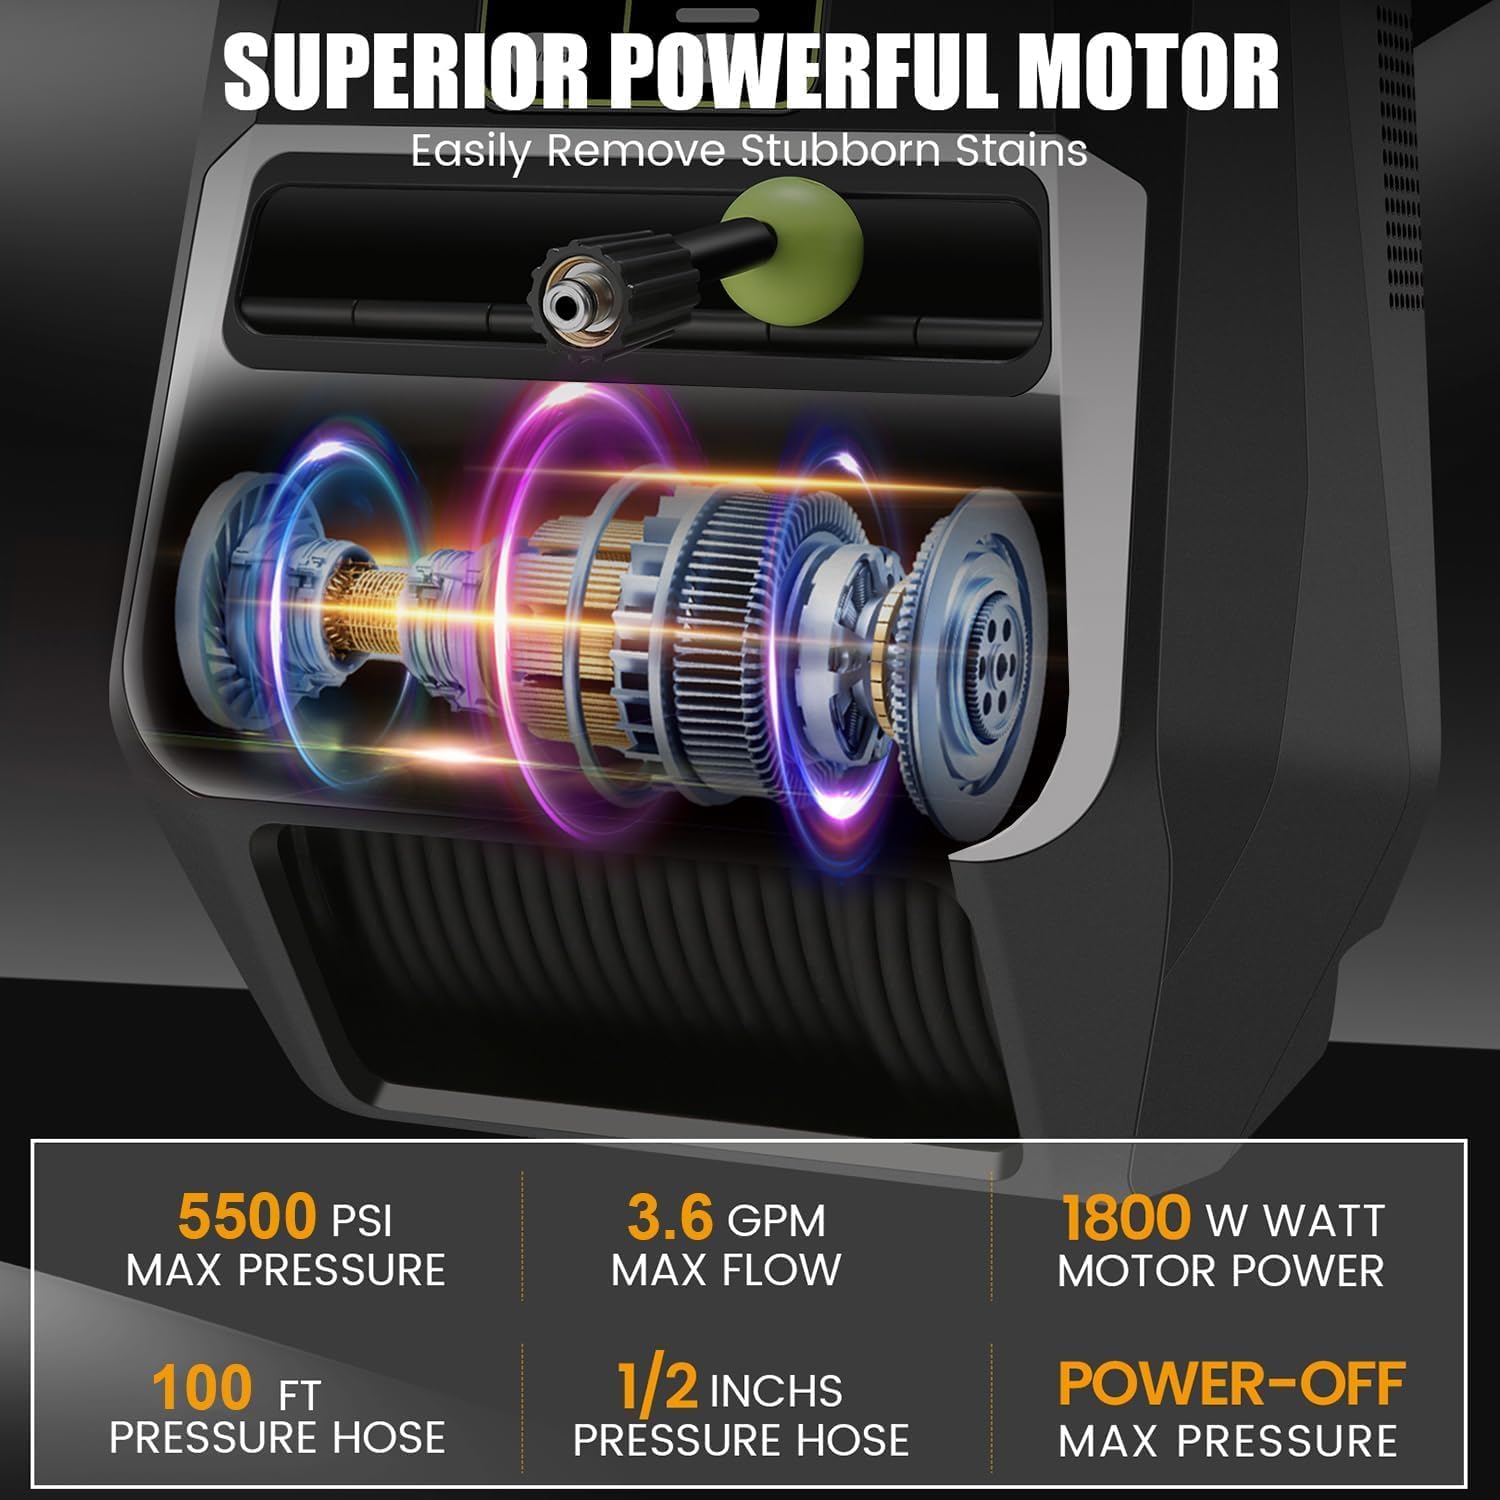
Image: Technical specifications and features of the pressure washer's motor and performance capabilities.
9. Warranty and Support
Imdot provides a 36-month warranty for this product. For any issues, questions, or support needs, please contact Imdot customer service. They are committed to providing prompt solutions and friendly customer support throughout the product's lifetime.
For further assistance, please refer to the contact information provided on the product packaging or the official Imdot website.