1. Important Safety Instructions
When using your steam iron, basic safety precautions should always be followed to reduce the risk of fire, electric shock, and personal injury. Read all instructions before using this appliance.
- Use the iron only for its intended use.
- To protect against a risk of electric shock, do not immerse the iron in water or other liquids.
- The iron should always be turned to 'OFF' before plugging or unplugging from the outlet. Never yank cord to disconnect from the outlet; instead, grasp plug and pull to disconnect.
- Do not allow cord to touch hot surfaces. Let the iron cool completely before putting away. Loop cord loosely around the iron when storing.
- Always disconnect iron from electrical outlet when filling with water or emptying, and when not in use.
- Do not operate iron with a damaged cord or if the iron has been dropped or damaged. To avoid the risk of electric shock, do not disassemble the iron; take it to a qualified service person for examination and repair. Incorrect reassembly can cause a risk of electric shock when the iron is used.
- Close supervision is necessary for any appliance being used by or near children. Do not leave iron unattended while connected or on an ironing board.
- Burns can occur from touching hot metal parts, hot water, or steam. Use caution when you turn a steam iron upside down – there may be hot water in the reservoir.
- The iron must be used and rested on a stable surface.
- The iron is not intended for use by persons (including children) with reduced physical, sensory or mental capabilities, or lack of experience and knowledge, unless they have been given supervision or instruction concerning use of the iron by a person responsible for their safety.
2. Product Overview
The IRONDAY Steam Iron SW-627 is designed for efficient garment care, featuring a powerful 1800W heating element and a ceramic soleplate for smooth gliding. It includes multiple functions for versatile ironing.
Key Features:
- 1800W High Power: Ensures rapid heat-up in approximately 20 seconds.
- 20.28oz (600ml) Water Tank: Large capacity for extended steam ironing sessions.
- Ceramic Soleplate: Provides even heat distribution and smooth gliding over fabrics.
- 3-Way Auto Shut-off: Automatically powers off for safety after 30 seconds horizontally or on its side, and after 8 minutes vertically.
- Multi-function Ironing: Supports dry ironing, continuous steam, burst of steam (25g/min), and water spray (0.8g/press).
- Vertical Steaming: Allows for steaming hanging garments.
- Precision Tip: Designed to reach difficult areas like collars, buttons, and pleats.
- Self-Cleaning & Anti-Calcification: Functions to maintain performance and extend product life.

Image: The IRONDAY Steam Iron SW-627, showcasing its design and features like 1800W power and 20-second fast heat-up.
3. Setup and Preparation
3.1 Unpacking
Carefully remove the iron and all accessories from the packaging. Retain the packaging for future storage or transport. Verify all components are present:
- IRONDAY Steam Iron x1
- Measuring Cup x1
- User Manual x1

Image: The contents of the product box, including the IRONDAY Steam Iron, a measuring cup, and the user manual.
3.2 Filling the Water Tank
- Ensure the iron is unplugged from the electrical outlet and the steam control is set to 'OFF' or minimum.
- Open the water tank cover.
- Using the provided measuring cup, carefully pour tap water into the water inlet until it reaches the 'MAX' fill line. Do not overfill.
- Close the water tank cover securely.

Image: A close-up view of the iron's large 600ml water tank, illustrating the filling process.
3.3 Initial Use
Before first use, or if the iron has not been used for a long time, iron a piece of scrap fabric to ensure no residue or impurities are transferred to your garments.

Image: A visual guide showing the six steps for preparing and using the iron: setting steam control, filling water, plugging in, setting temperature, waiting for the green light, and starting to iron.
4. Operating Instructions
4.1 Temperature and Steam Settings
Always check the garment's care label for recommended ironing temperature. Adjust the temperature dial to the appropriate setting for your fabric type (e.g., Cotton, Linen, Wool, Silk, Synthetic).
- Dry Ironing: Set the steam control to 'OFF' and select the desired temperature. Wait for the indicator light to turn off, signaling the iron has reached the set temperature.
- Steam Ironing: Fill the water tank. Set the temperature dial to a steam-appropriate setting (usually between '••' and 'MAX'). Once the indicator light turns off, adjust the steam control to the desired steam level.
- Burst of Steam: For stubborn wrinkles, press the 'Steam Burst' button. This delivers a powerful shot of steam (25g/min). Wait a few seconds between bursts to allow steam to regenerate.
- Water Spray: Press the 'Spray' button to release a fine mist of water (0.8g/press), which helps to dampen fabrics and ease wrinkle removal.
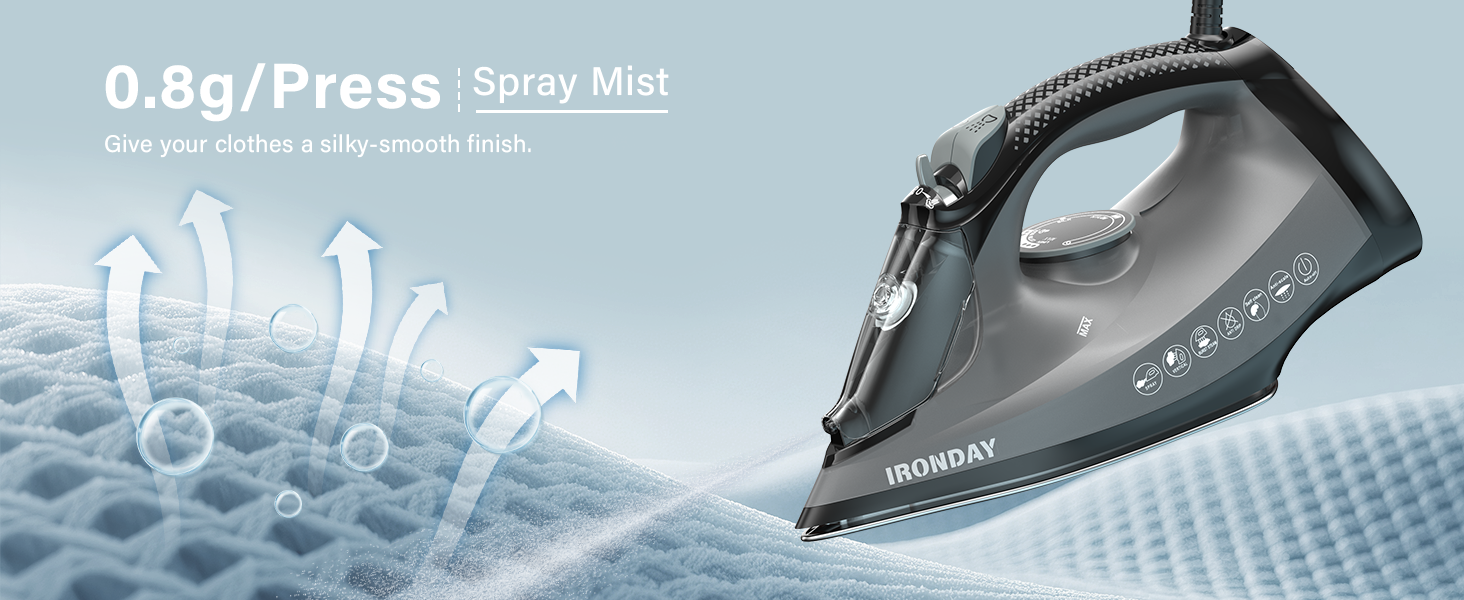
Image: The iron is suitable for various fabrics including cotton, linen, wool, synthetic, silk, and denim.
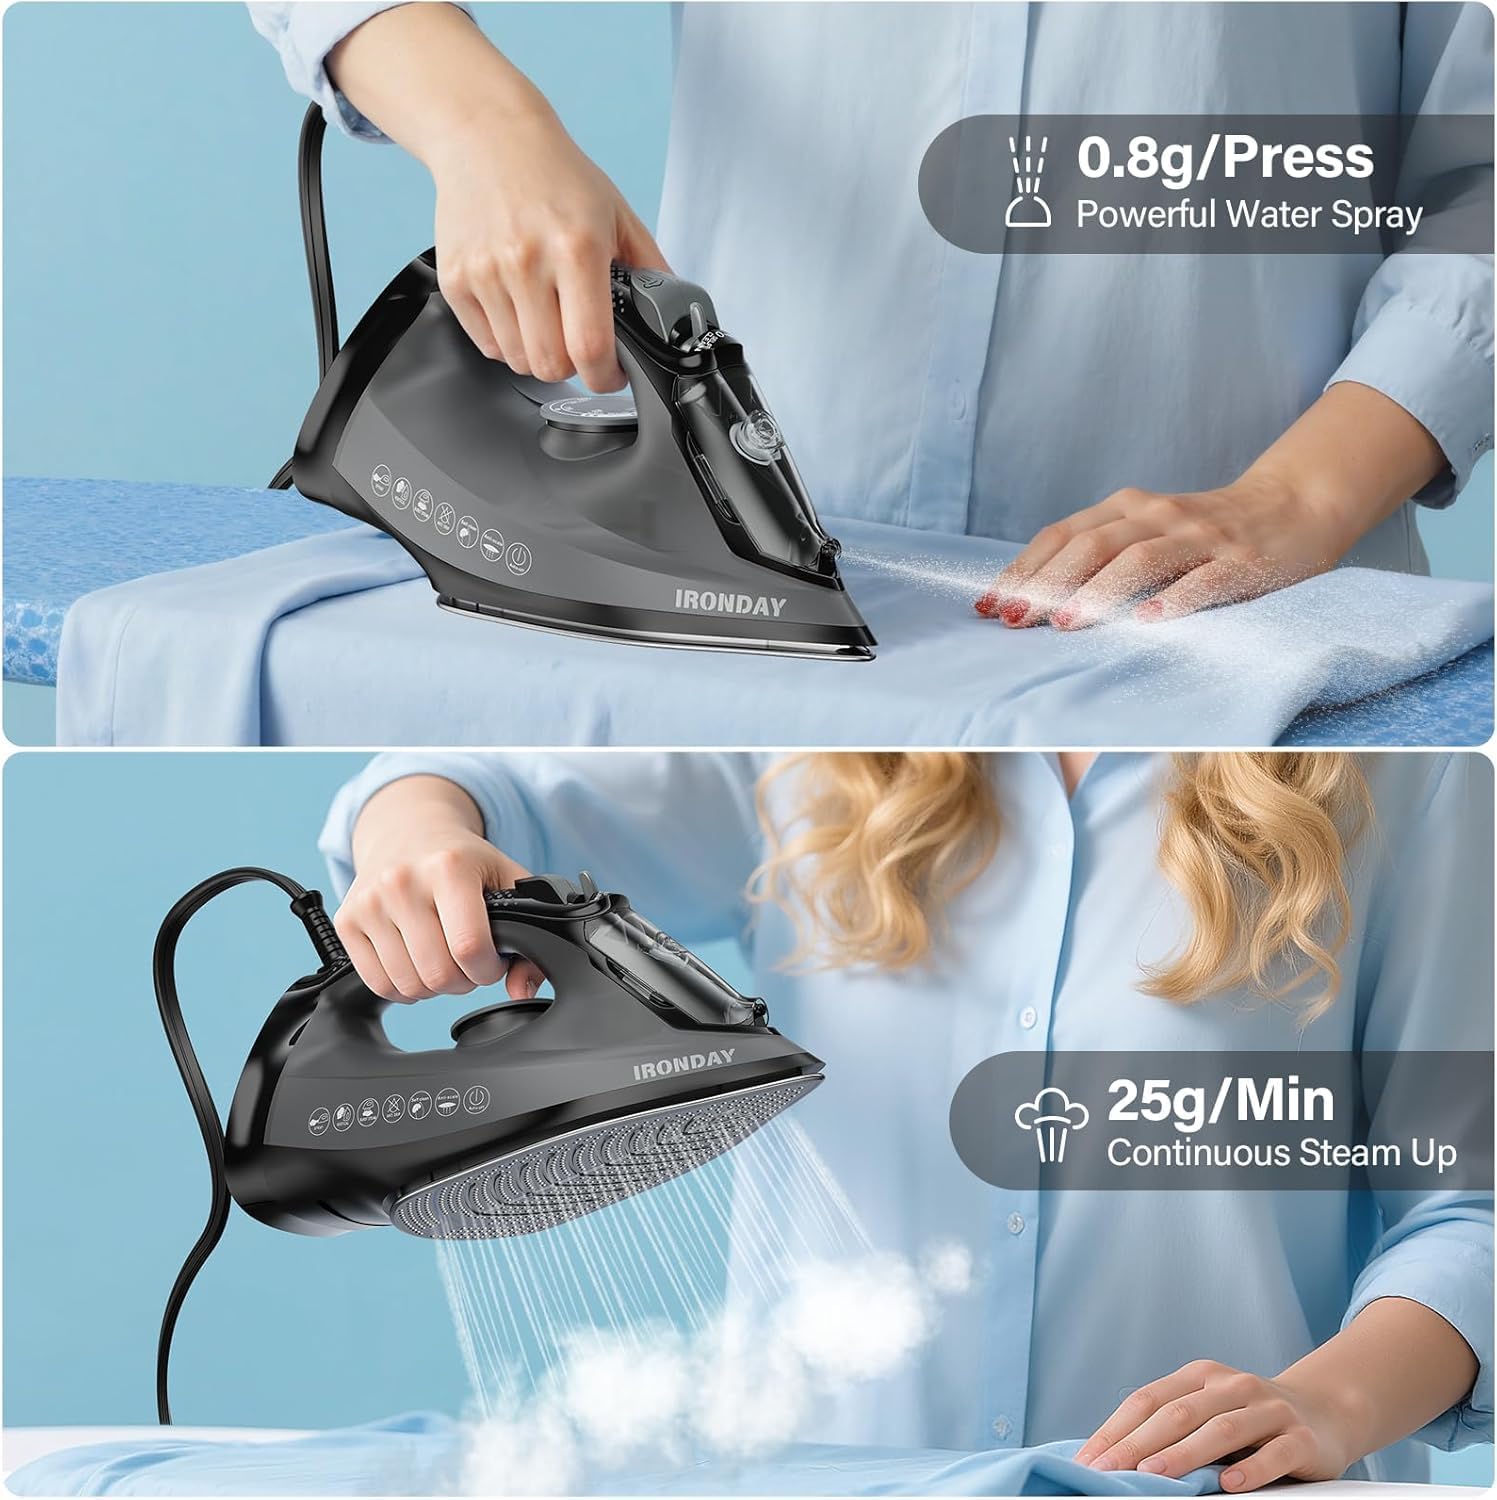
Image: A user demonstrating the iron's water spray function (0.8g/press) and continuous steam output (25g/min).
4.2 Horizontal and Vertical Ironing
- Horizontal Ironing: Place the garment on an ironing board. Move the iron smoothly over the fabric, applying even pressure.
- Vertical Steaming: Hang the garment on a hanger. Hold the iron vertically a few inches away from the fabric and press the 'Steam Burst' button to release steam. This is ideal for delicate fabrics or quick touch-ups.

Image: A woman demonstrating horizontal ironing on an ironing board and vertical steaming of a hanging coat.
4.3 Precision Tip
The iron features a precision tip design, allowing you to easily iron around buttons, collars, and plackets for a crisp finish.

Image: A close-up of the iron's pointed tip, designed to reach difficult areas and eliminate ironing 'dead spots'.

Image: The precision tip effectively ironing a shirt collar.

Image: The precision tip effectively ironing a shirt placket.
4.4 Auto Shut-off Feature
For safety, the iron is equipped with a 3-way auto shut-off feature:
- If left horizontally or on its side, the iron will automatically power off after 30 seconds.
- If left vertically on its heel rest, the iron will automatically power off after 8 minutes.
The red indicator light will flash to signal that the iron has automatically shut off.
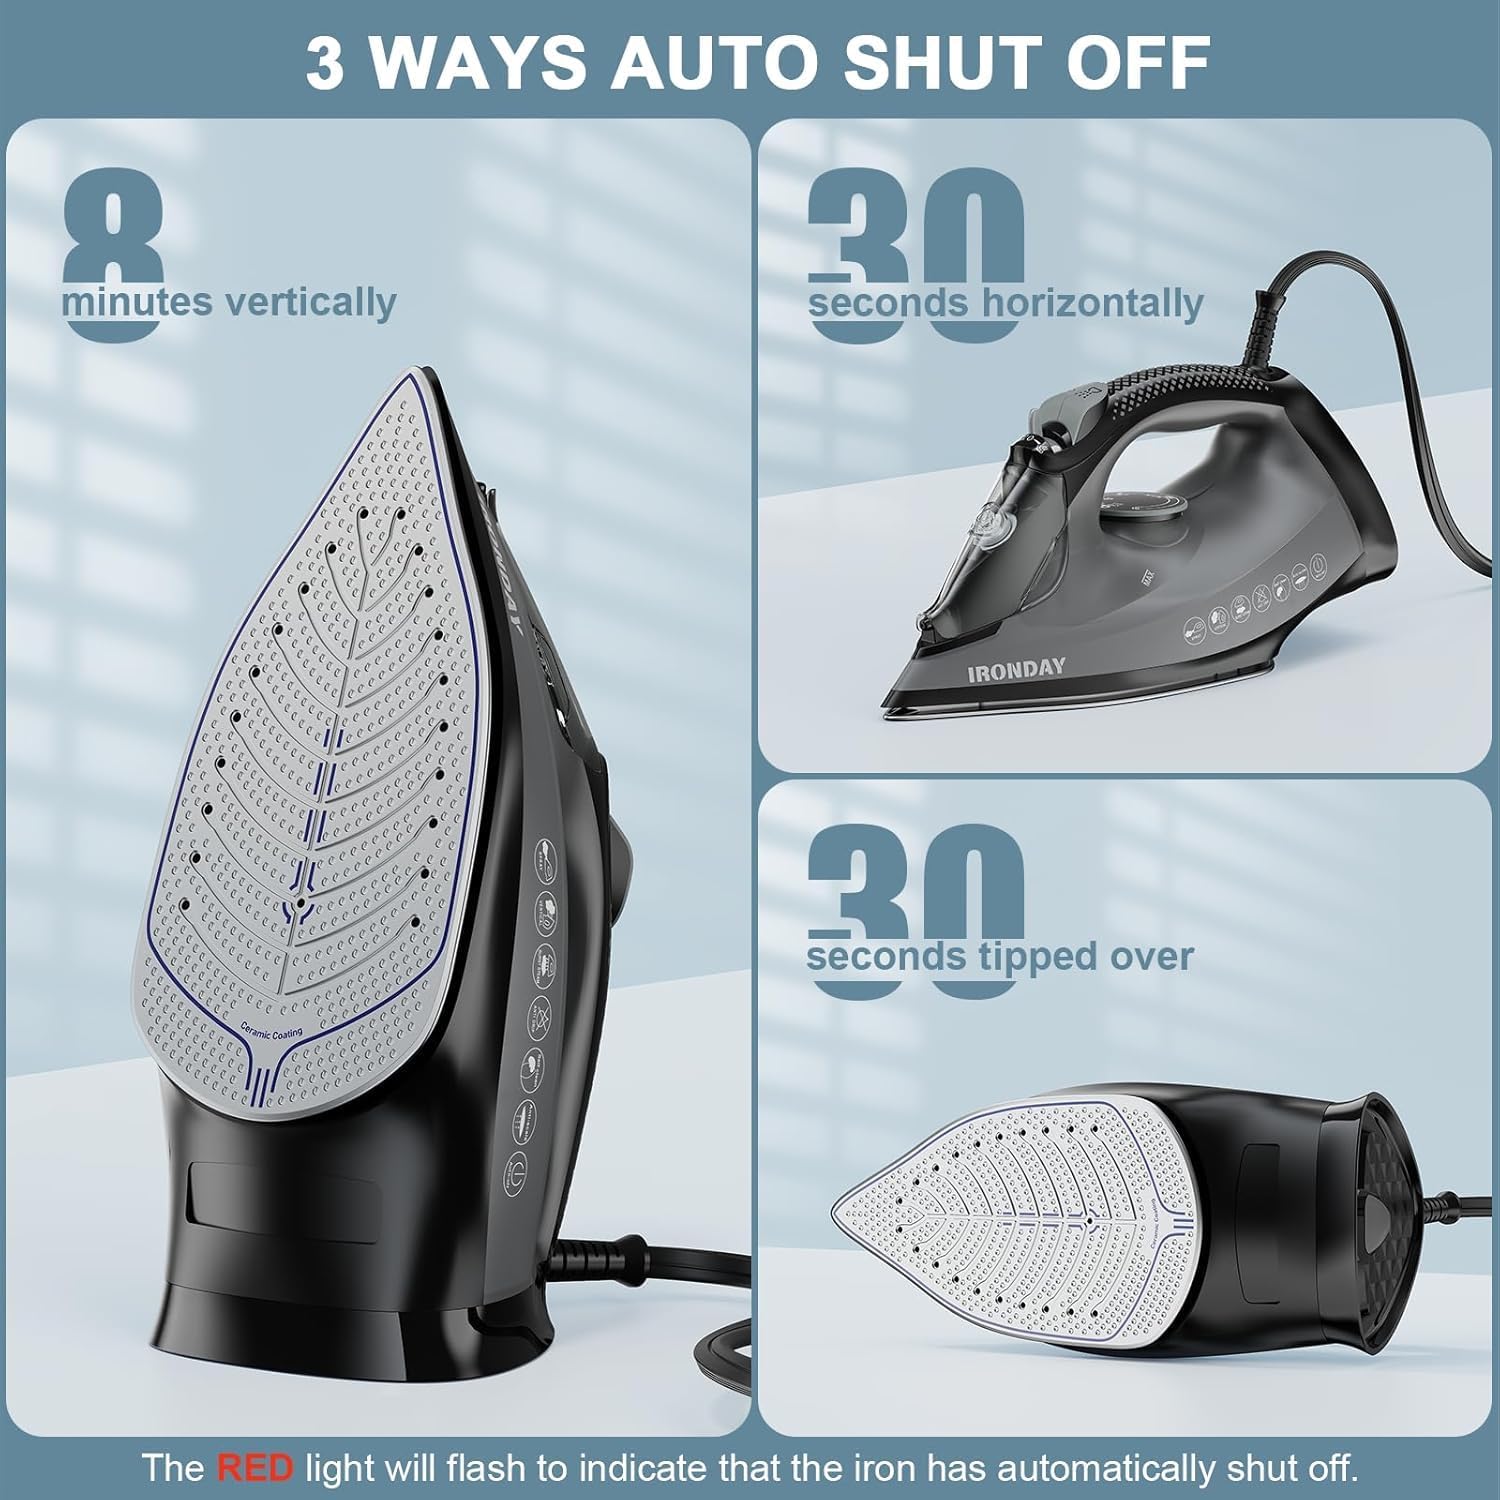
Image: Visual representation of the iron's 3-way auto shut-off: 8 minutes vertically, 30 seconds horizontally, and 30 seconds when tipped over.
5. Maintenance and Care
5.1 Self-Cleaning Function
The self-cleaning function helps remove scale and mineral deposits from the steam vents, ensuring optimal steam performance and extending the iron's lifespan. It is recommended to use this function monthly or as needed.
- Fill the water tank to the 'MAX' line.
- Plug in the iron and set the temperature dial to 'MAX'.
- Once the iron reaches maximum temperature (indicator light turns off), unplug it.
- Hold the iron horizontally over a sink.
- Turn the steam control to the 'SELF CLEAN' position and hold it. Hot water and steam will be expelled from the soleplate, flushing out impurities.
- Gently shake the iron back and forth until the water tank is empty.
- Release the self-clean button and plug the iron back in to heat up and dry the soleplate.
- Unplug and let the iron cool completely before storing.

Image: A visual guide to the self-cleaning function, showing water and dirt being discharged from the soleplate.

Image: A comparison showing the benefit of the self-cleaning function, preventing dirt transfer to clothes.
5.2 Anti-Calcification System
The built-in anti-calcification system reduces the accumulation of mineral deposits, helping to maintain consistent steam output and prevent clogging.
5.3 Cleaning the Soleplate
If the soleplate becomes stained, clean it with a damp cloth and a non-abrasive cleaner designed for iron soleplates. Do not use abrasive scouring pads or metal cleaners.
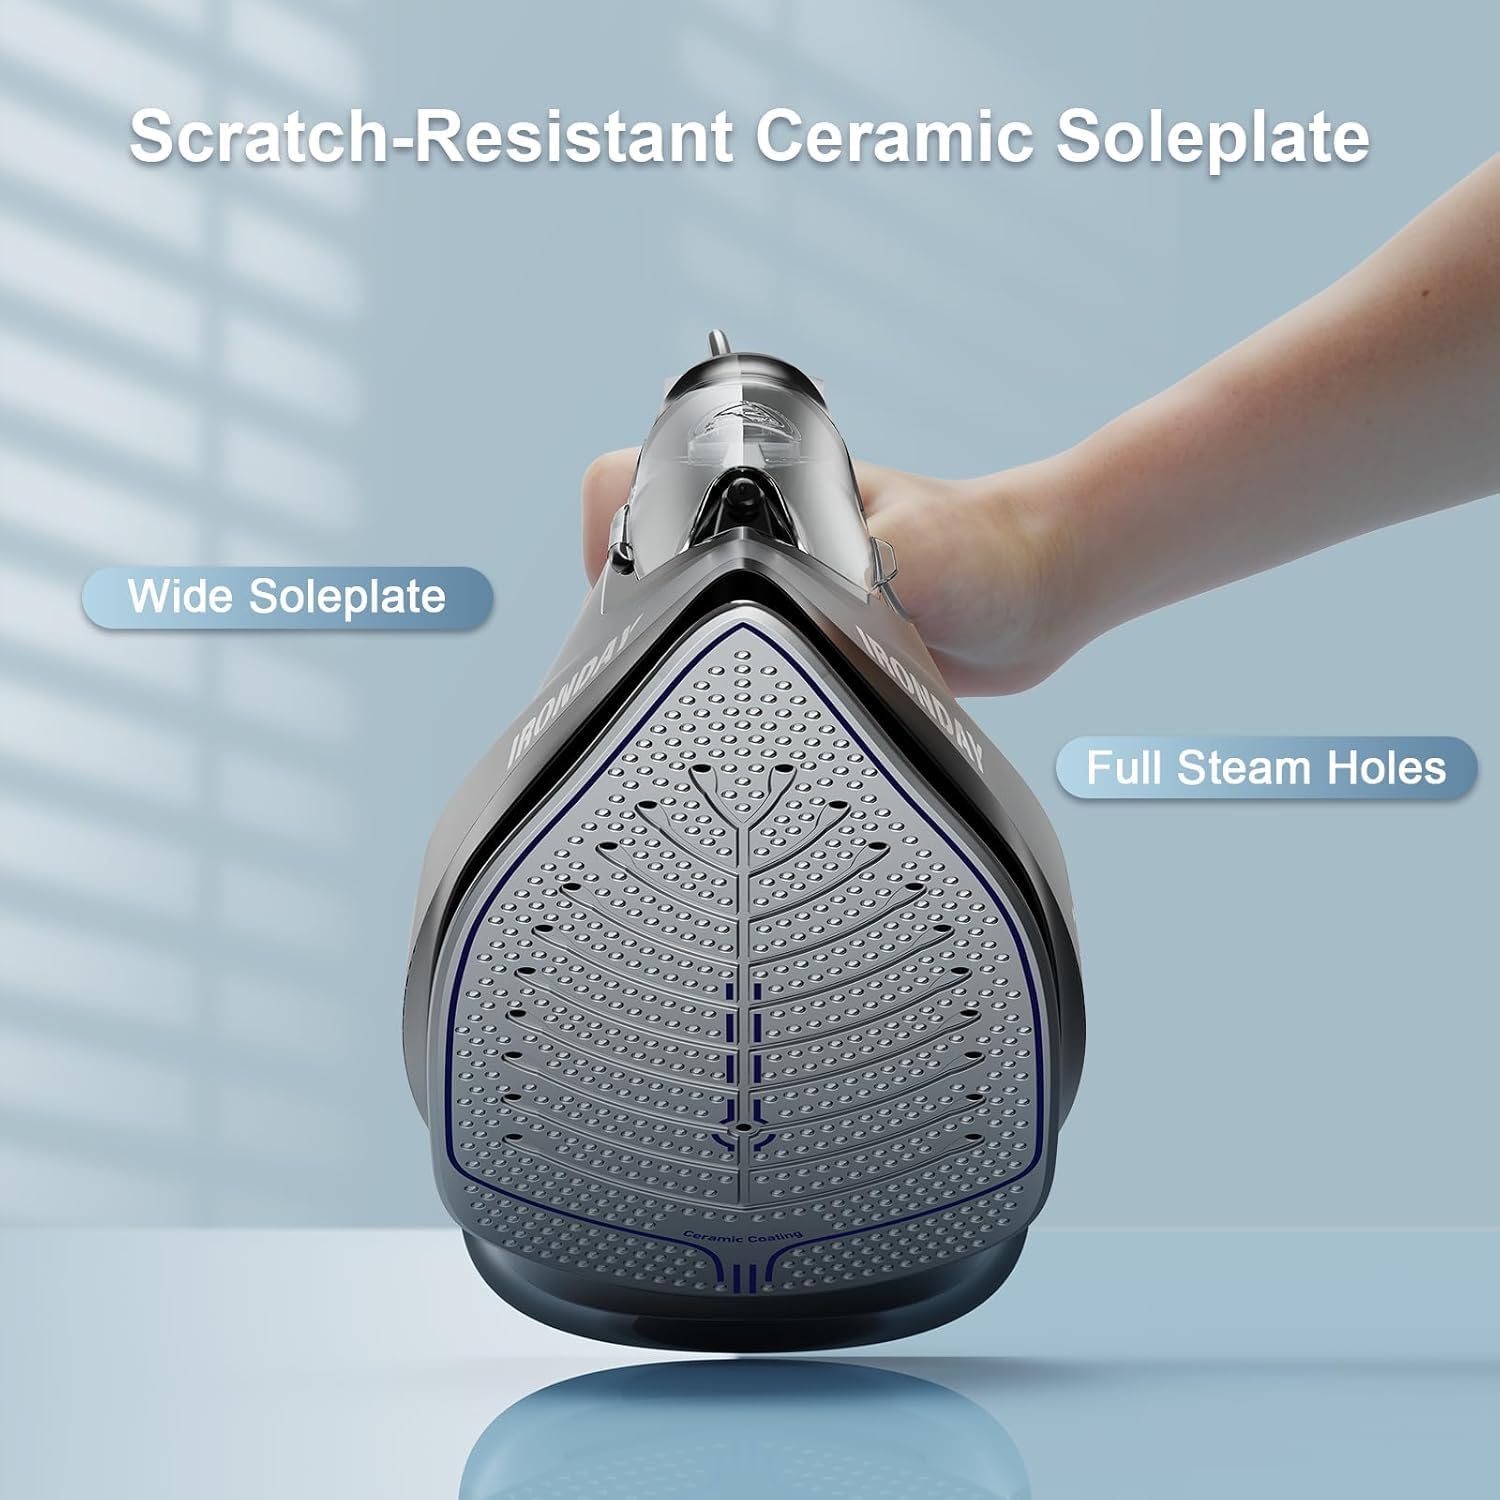
Image: The scratch-resistant ceramic soleplate with numerous steam holes for even steam distribution.
5.4 Storage
After use, ensure the iron is unplugged and completely cool. Empty any remaining water from the tank. Store the iron upright on its heel rest in a safe, dry place.
Note: It is normal to find residual water in the tank upon first use, as each iron is water-tested during manufacturing to ensure quality.

Image: A close-up of the iron's water tank showing water residue, confirming it is a new item that has undergone water testing.
6. Troubleshooting
If you encounter issues with your IRONDAY Steam Iron, refer to the following common problems and solutions:
| Problem | Possible Cause | Solution |
|---|---|---|
| Iron does not heat up. | Not plugged in; power outlet issue; auto shut-off activated. | Ensure iron is securely plugged in. Check power outlet. Move iron to reactivate if auto shut-off engaged. |
| No steam or insufficient steam. | Water tank empty; temperature too low for steam; steam control set to 'OFF'; clogged steam vents. | Fill water tank. Set temperature to a steam-appropriate setting. Adjust steam control. Perform self-cleaning. |
| Water leaks from soleplate. | Water tank overfilled; temperature too low for steam; iron not hot enough; water tank cap not closed properly. | Do not overfill. Ensure iron is fully heated before using steam. Close water tank cap securely. |
| Iron leaves stains on fabric. | Mineral deposits in steam vents; dirty soleplate. | Perform self-cleaning. Clean soleplate with a damp cloth and non-abrasive cleaner. |
| Auto shut-off activates too frequently. | Iron left stationary for too long. | This is a safety feature. Move the iron periodically to prevent it from shutting off. |
7. Specifications
| Feature | Specification |
|---|---|
| Model Name | SW-627 |
| Brand | IRONDAY |
| Wattage | 1800W |
| Water Tank Capacity | 20.28oz (600ml) |
| Soleplate Material | Ceramic |
| Product Dimensions | 11.81"L x 5.11"W |
| Item Weight | 2.86 pounds |
| Special Features | Anti-Drip, Auto Shutoff, Self-Cleaning, Steam Boost Function, Water Spray Function |
8. Warranty and Support
For warranty information and customer support, please refer to the warranty card included with your product or contact IRONDAY customer service directly. Keep your purchase receipt as proof of purchase.
For further assistance, visit the official IRONDAY store: IRONDAY Store on Amazon