1. Introduction
This manual provides instructions for the installation, operation, and maintenance of your Philips Solar Motion Sensor Outdoor Security Light. Please read this manual thoroughly before installation and use, and retain it for future reference.
2. Safety Information
- Ensure the solar panel receives direct sunlight for optimal charging.
- Do not attempt to disassemble or modify the product. This may void the warranty and pose safety risks.
- Keep the product away from fire or extreme heat sources.
- Install the light in a stable location to prevent it from falling.
- This product is designed for outdoor use and is water-resistant. However, avoid submerging it in water.
3. Package Contents
Verify that all components are present in the package:
- Philips LED Wall Light (2 units)
- Mounting Screws (4 units)
- Expansion Screws (4 units)

Image: Contents of the Philips Solar Security Light package, including two light units and the product box.
4. Product Overview
The Philips Solar Motion Sensor Outdoor Security Light features a high-quality solar panel, integrated motion sensor, and 258 LEDs for bright illumination. It is designed for easy, wire-free installation and is built to withstand various weather conditions.
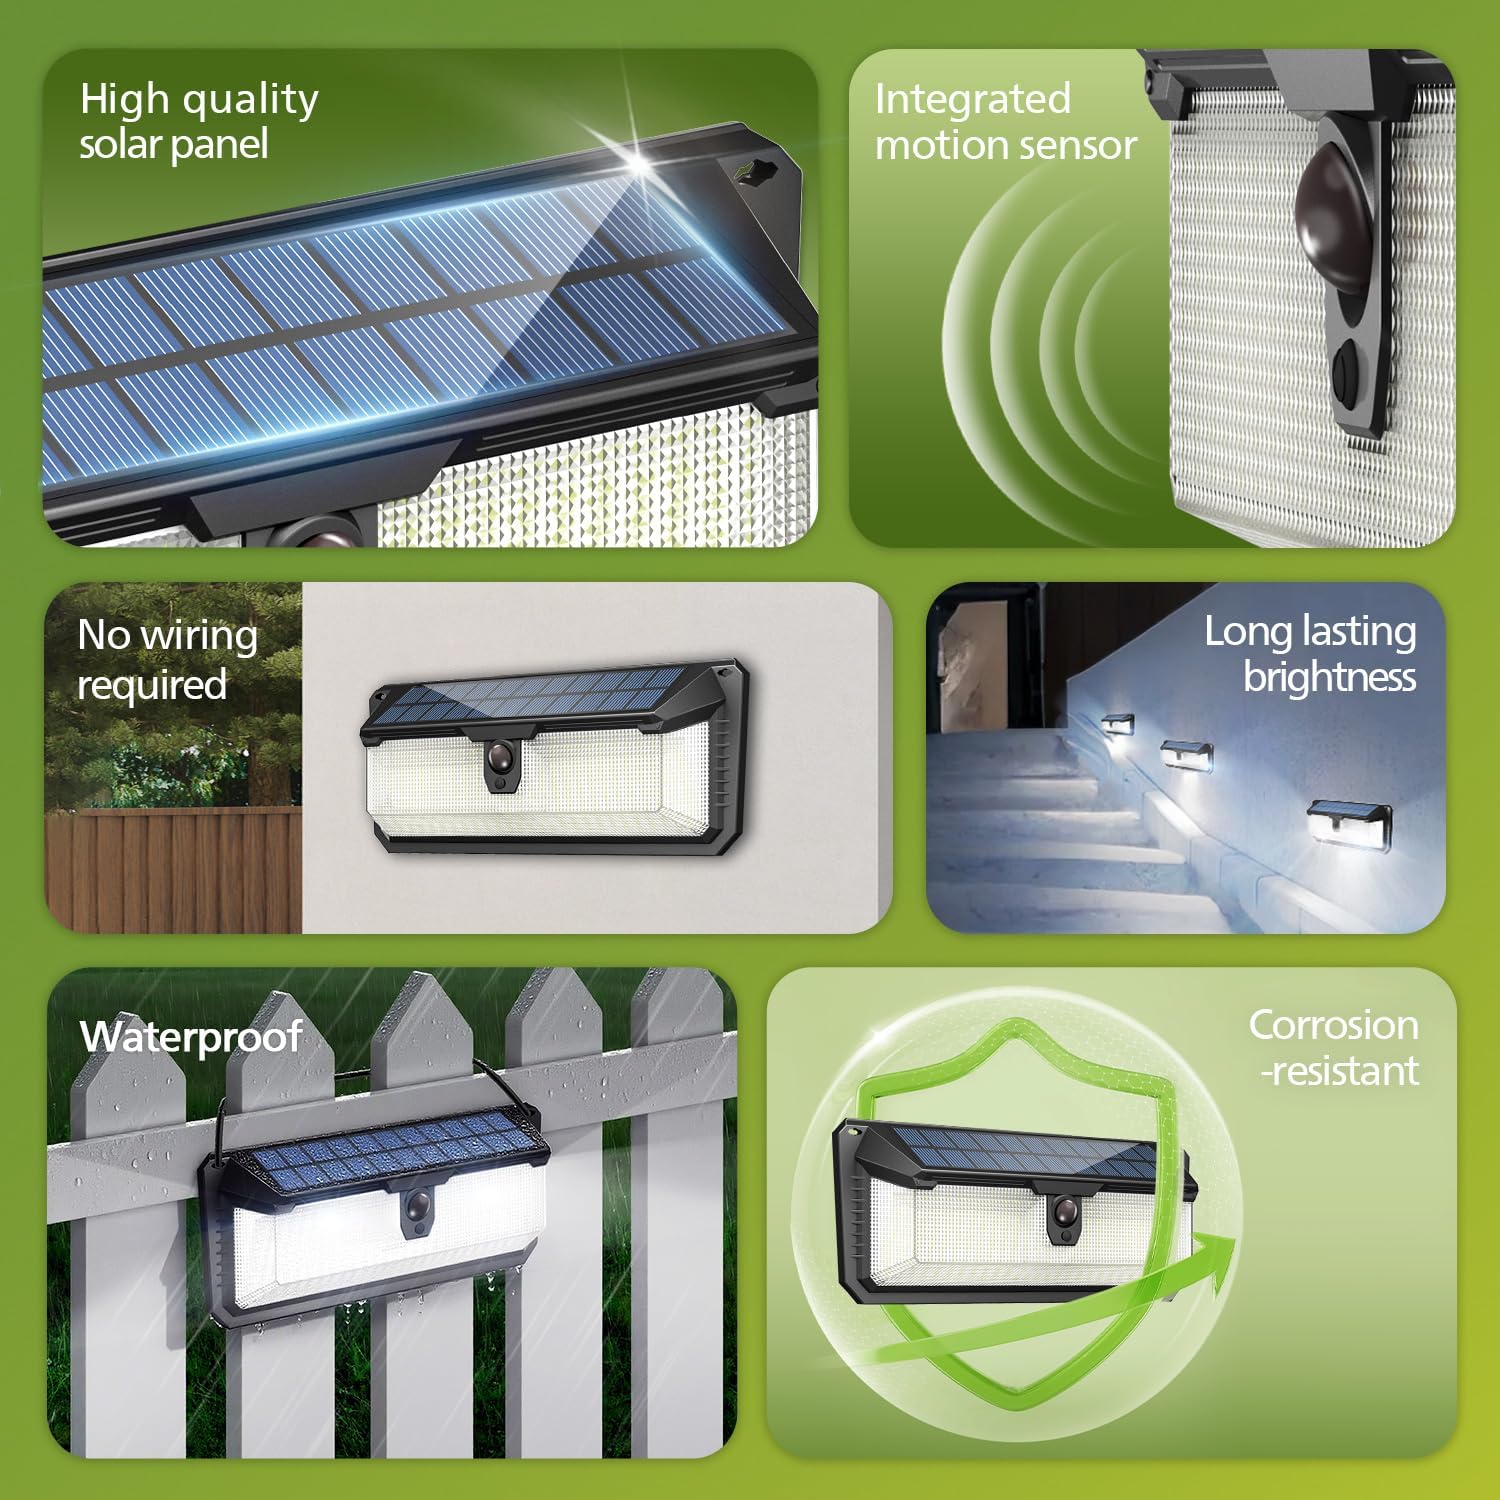
Image: Overview of the solar light's features, highlighting the solar panel, motion sensor, and robust design.
5. Installation
No wiring is required for installation. Follow these steps:
- Choose a Location: Select a location that receives direct sunlight for at least 6-8 hours daily to ensure optimal charging of the solar panel. The recommended installation height is approximately 8.2 feet (2.5 meters) for effective motion detection and light coverage.
- Mark Drill Holes: Hold the light against the desired mounting surface and mark the positions for the two mounting screws.
- Drill Holes: Use an appropriate drill bit to drill holes at the marked positions. Insert the expansion screws (wall anchors) into the drilled holes if mounting on masonry or drywall.
- Mount the Light: Align the light with the drilled holes and secure it using the mounting screws. Ensure the light is firmly attached to the surface.
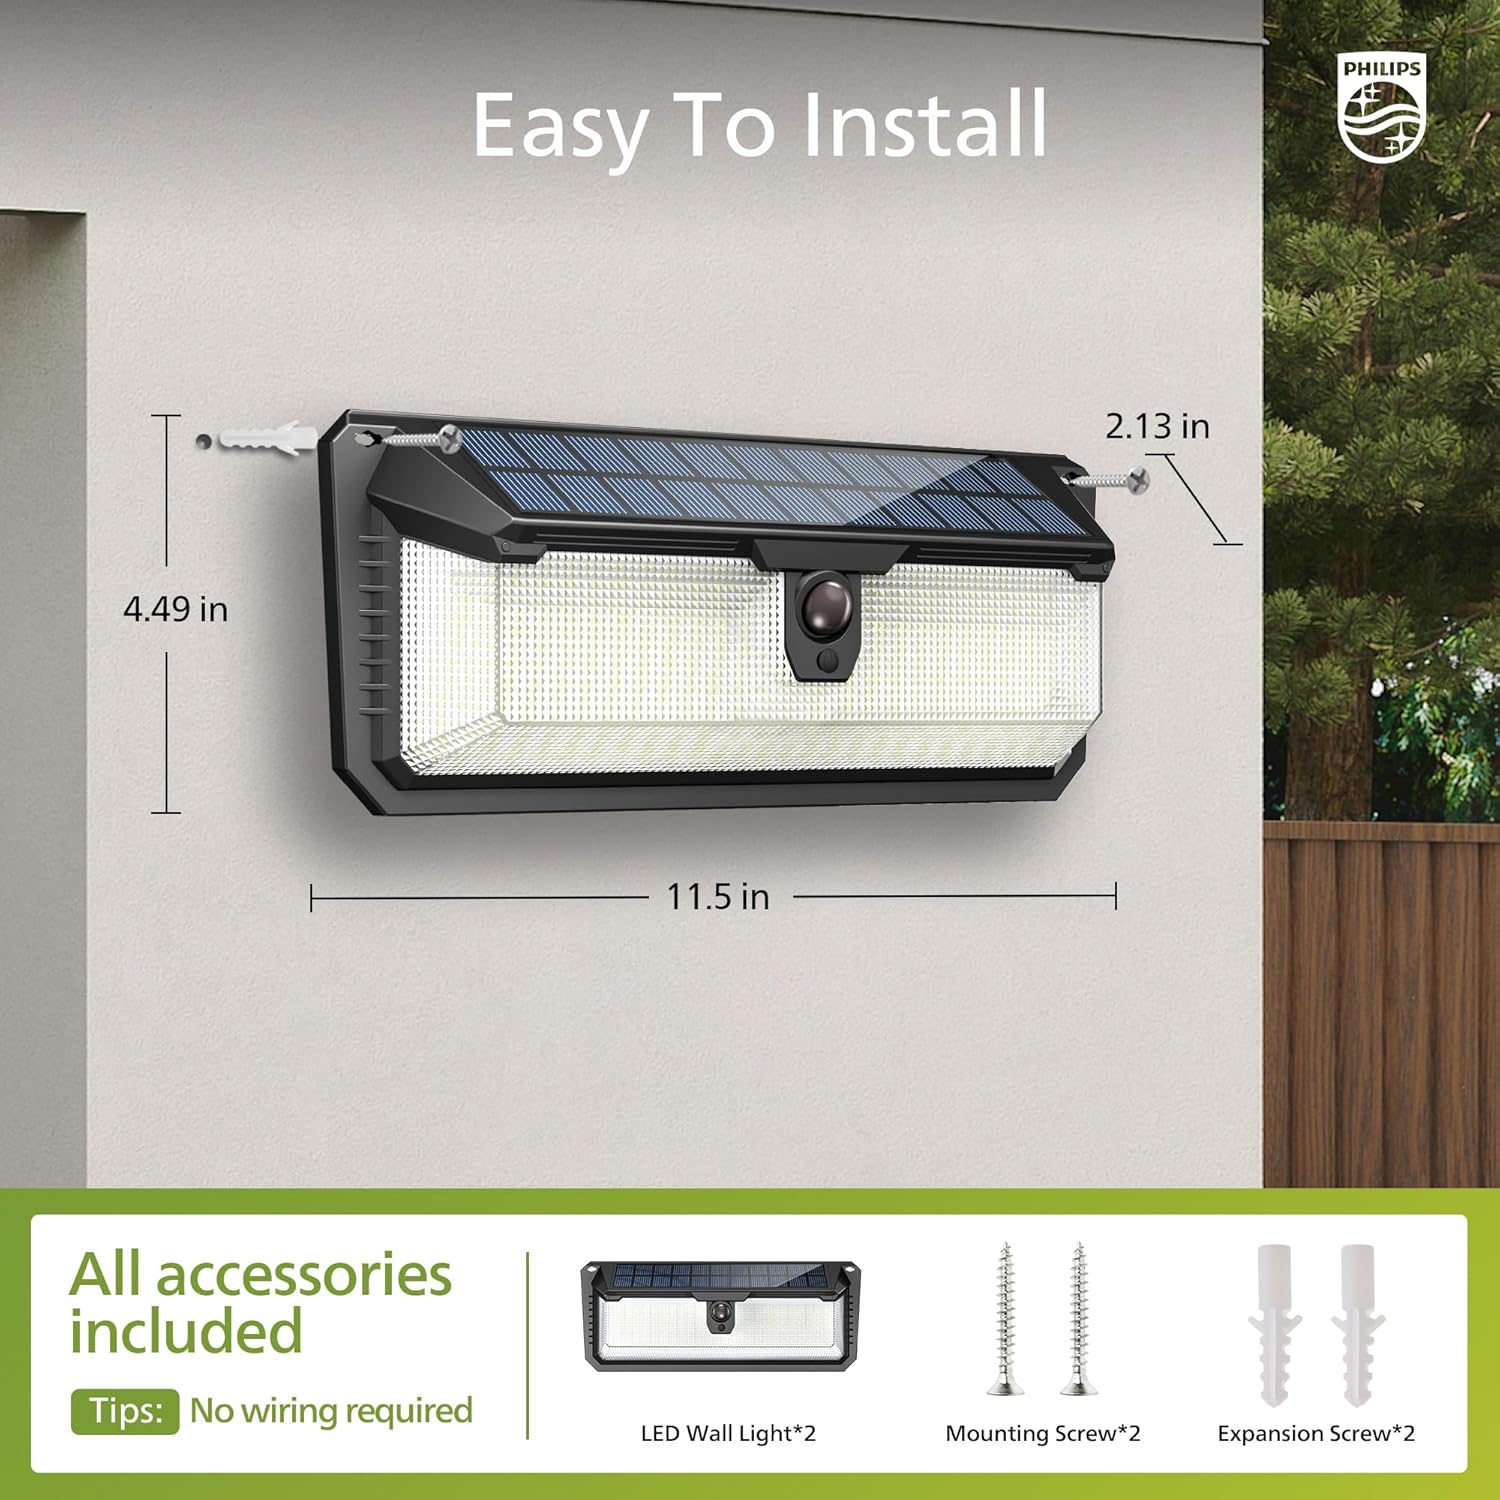
Image: Detailed installation guide with product dimensions and screw placement.

Image: An installed solar light on a building, illustrating the ease of installation and recommended height.
6. Operating Instructions
The light features three distinct operating modes, selectable via the power button located on the unit. Each press of the button cycles through the modes.

Image: Close-up of the solar light indicating the position of the mode selection switch and its functionality.
Mode 1: Sensor Mode
Press the button once. In this mode, the light remains off until motion is detected. Upon detection, it illuminates at 100% brightness (800 lumens) for 25 seconds, then turns off if no further motion is detected.

Image: Visual representation of the light's behavior in Sensor Mode.
Mode 2: Dim Mode
Press the button twice. The light will automatically turn on at 10% brightness (80 lumens) after dusk and remain on for 8 hours, regardless of motion. After 8 hours, it will turn off.

Image: Visual representation of the light's behavior in Dim Mode.
Mode 3: Dim + Sensor Mode
Press the button three times. The light stays on at a low 3% brightness (24 lumens) after dusk. When motion is detected, it switches to 100% brightness (800 lumens) for 25 seconds, then returns to 3% brightness.

Image: Visual representation of the light's behavior in Dim + Sensor Mode.
To Turn Off
Press the button four times to turn the light off completely.
Motion Sensor: The high-sensitivity passive infrared (PIR) motion sensor detects motion up to 32.8 feet (10 meters) away over a 110° angle.

Image: Illustration of the motion sensor's detection angle and range in an outdoor setting.
7. Maintenance
- Cleaning: Regularly wipe the solar panel and LED surface with a soft, damp cloth to remove dust, dirt, or debris. This ensures optimal charging efficiency and light output.
- Solar Panel Exposure: Ensure the solar panel remains unobstructed by leaves, snow, or other objects that could block sunlight.
- Battery: The integrated high-capacity 1800 mAh battery is designed for long life. No user maintenance or replacement is required.

Image: The solar light operating under rainy conditions, demonstrating its water-resistant design.
8. Troubleshooting
| Problem | Possible Cause | Solution |
|---|---|---|
| Light does not turn on at night. |
|
|
| Light is dim or runtime is short. |
|
|
| Motion sensor not detecting. |
|
|
9. Specifications
| Feature | Detail |
|---|---|
| Brand | Philips |
| Model Name | Philips Solar Security Light 2PK |
| Model Number | 6944402330 |
| Light Source Type | LED (258 LEDs) |
| Brightness | 800 Lumens (Max) |
| Color Temperature | 7500 Kelvin (Daylight White) |
| Power Source | Solar Powered |
| Battery | 1800 mAh (Nonstandard Battery, included) |
| Motion Sensor Detection Angle | 110 Degrees |
| Motion Sensor Detection Range | Up to 32.8 ft (10 meters) |
| Product Dimensions | 11.5"L x 2.26"W x 4.49"H |
| Material | Acrylonitrile Butadiene Styrene, Plastic |
| Water Resistance | Water-resistant (Designed for all weather conditions) |
| Wattage | 10 watts |
| Voltage | 3.7 Volts |
| UPC | 046677608743 |
10. Warranty and Support
For warranty information and customer support, please refer to the official Philips website or contact your retailer. Keep your purchase receipt as proof of purchase.
Manufacturer: Signify