1. Introduction
Thank you for choosing the venveal Mini Power Distribution Box. This device is designed to provide versatile and reliable power distribution for various applications, including outdoor adventures, camping, RV use, and emergency situations. It features multiple output ports, including Anderson connectors, USB 3.0, Type-C fast charging, and 12V cigarette lighter sockets, all integrated into a compact and durable unit.
This manual provides essential information for the safe and efficient operation of your power distribution box. Please read it thoroughly before use and retain it for future reference.
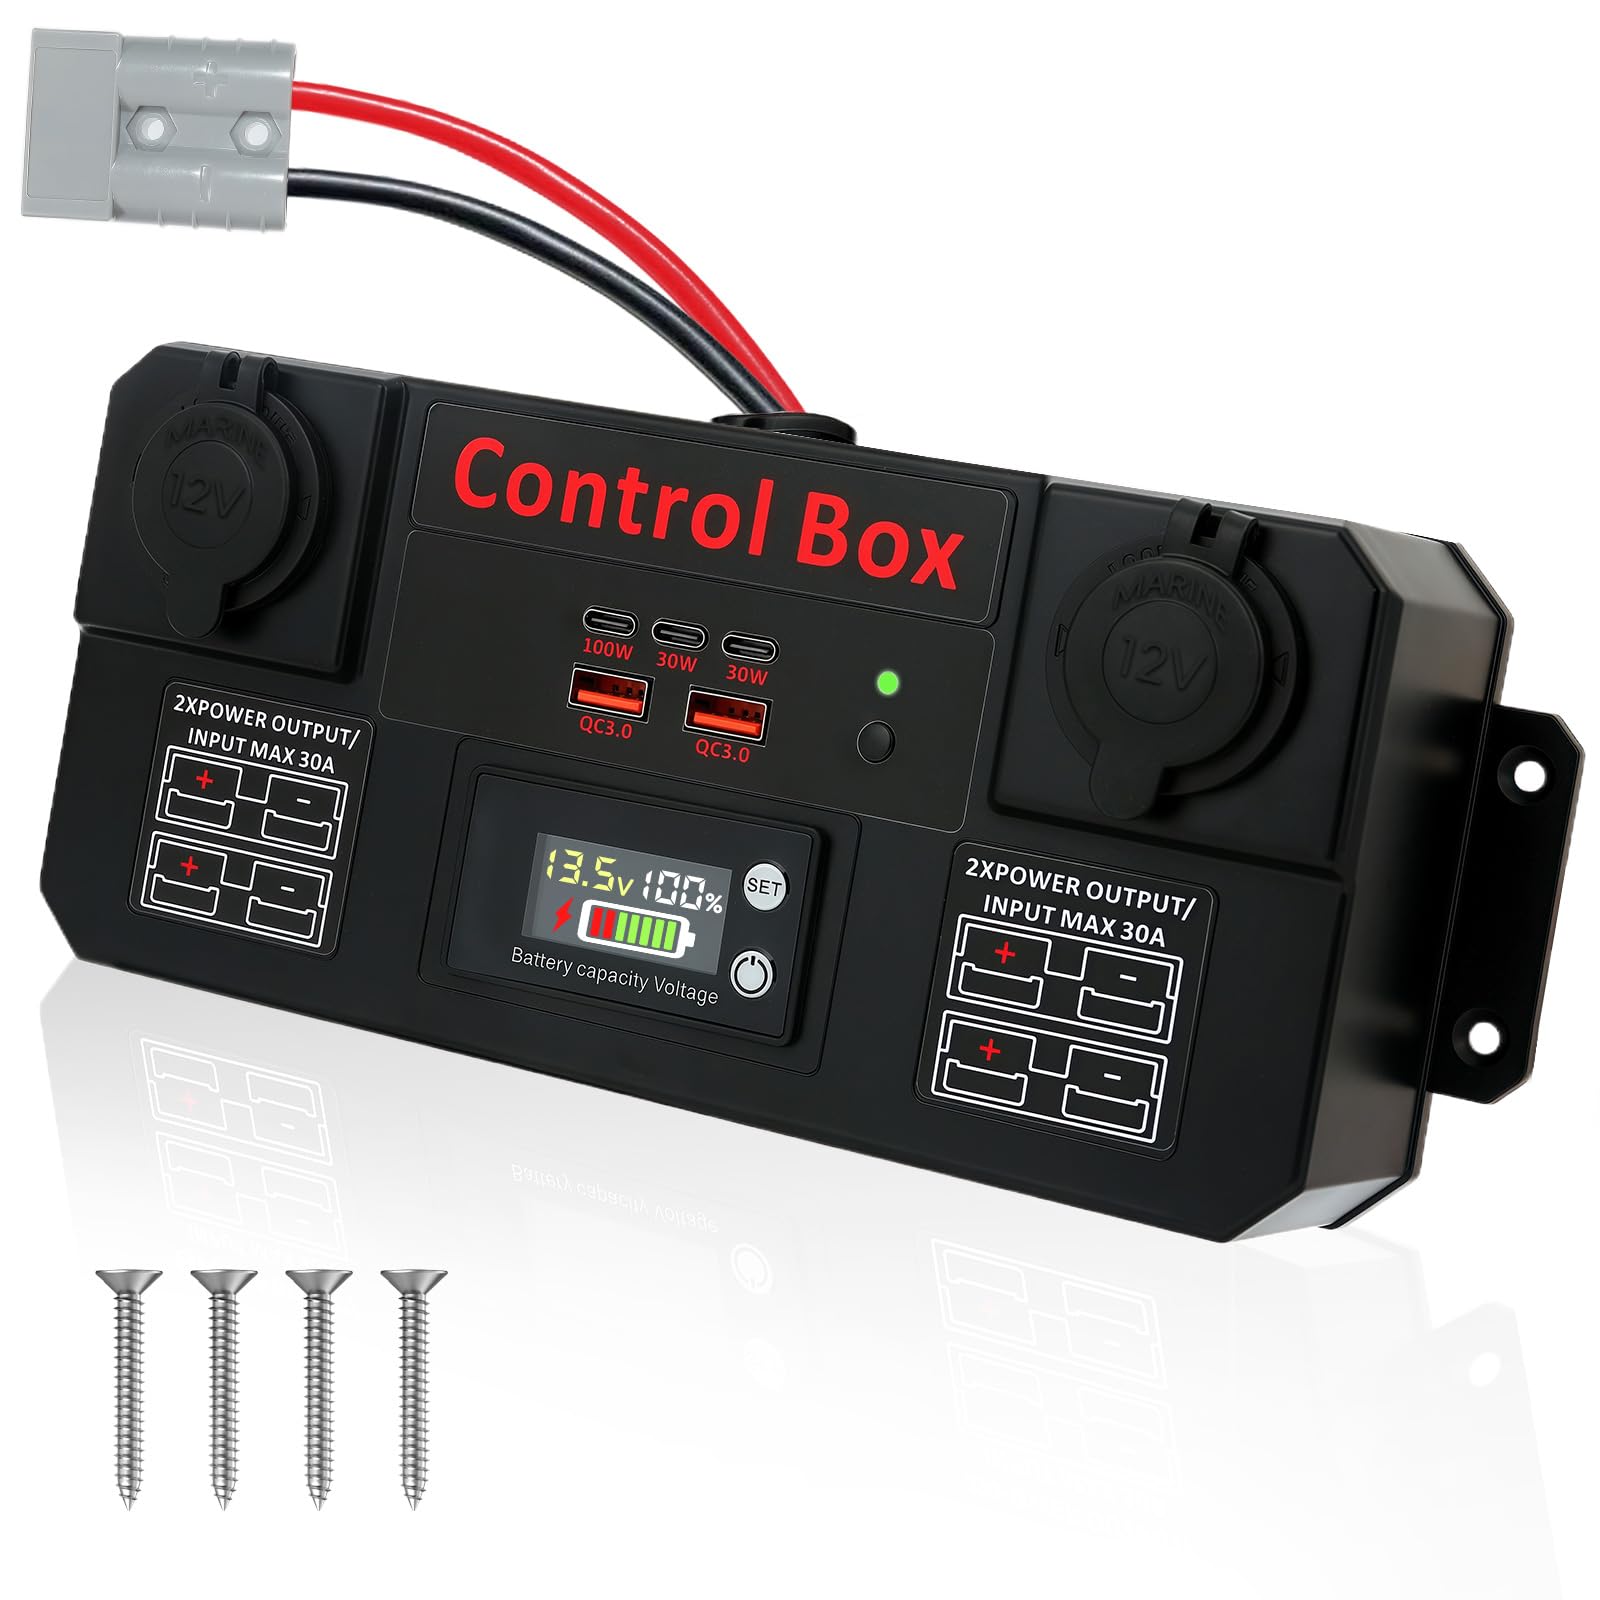
Figure 1: Overview of the venveal Mini Power Distribution Box, highlighting its various input and output ports.
2. Product Features
- High-Efficiency Multi-Device Power: Equipped with 2x QC 3.0 USB ports, 3x Type-C fast charging ports (100W+30W+30W), 2x 12V cigarette lighter sockets, and 4x 30A Anderson input/output connectors. This allows for stable power supply to multiple high-wattage devices simultaneously, such as smartphones, tablets, car refrigerators, camping lights, and air compressors.
- Mini Distribution Box Design: Supports 12V/24V 30A voltage input. Connect directly to a battery via Anderson cables or positive/negative wires to intelligently distribute power to various devices. Ensure the input voltage is 12V to prevent damage to connected equipment.
- Wide Application Compatibility: Fully compatible with various battery types, including lithium and lead-acid batteries. Anderson connectors allow direct connection to solar panels and energy storage batteries, simplifying power system setup.
- LED Digital Display: Real-time voltage monitoring via an LED digital display ensures electrical safety and allows for quick verification of outdoor power consumption. Supports 12-24V intelligent power solutions.
- Easy Installation: Compact body design (approximately 10 x 4 inches) allows for easy placement in tight spaces, such as RV control panels or marine battery compartments. Pre-set screw holes on the back support wall-mounting, flat mounting, or flush mounting for quick and secure installation.
- High-Quality Durable Materials: Constructed from high-quality ABC flame-retardant material, offering effective dust protection suitable for both indoor and outdoor use. Built-in triple intelligent protection against over-voltage, over-current, and short-circuit ensures stable operation in harsh environments, providing a reliable power solution for outdoor activities and professional operations.
3. Setup
3.1 Unpacking and Inspection
Carefully remove the power distribution box from its packaging. Inspect the unit for any signs of damage during transit. Ensure all components are present as listed in the packaging.
3.2 Connecting to a Power Source
The Mini Power Distribution Box supports 12V/24V 30A input. It can be connected to a battery (lithium or lead-acid) or a solar panel system.
- Using Anderson Connectors: Connect your battery or solar panel's Anderson cable directly to one of the 30A Anderson input ports on the distribution box. Ensure a secure connection.
- Direct Wire Connection: If using bare wires, connect the positive (+) wire from your power source to the positive terminal and the negative (-) wire to the negative terminal on the distribution box. Ensure proper polarity to avoid damage.
Important: Verify that the input voltage from your power source is 12V or 24V as required by your devices. Inconsistent voltage can damage connected equipment.

Figure 2: Example of the power distribution box set up outdoors, connected to a battery and charging a mobile device.
3.3 Mounting Options
The compact design allows for flexible mounting:
- Flat Surface Mounting: Place the unit on any stable, flat surface.
- Wall/Flush Mounting: Utilize the pre-drilled screw holes on the back of the unit to securely mount it to a wall or flush into a panel. Ensure adequate ventilation around the unit.
4. Operating Instructions
4.1 Powering On/Off
Once connected to a power source, the LED digital display will illuminate, indicating the current battery voltage and capacity. There is no separate power button; the unit is active when connected to a power source.
4.2 Using Output Ports
Connect your devices to the appropriate ports:
- USB 3.0 Ports: Use for charging smartphones, tablets, and other USB-powered devices.
- Type-C Fast Charging Ports: Ideal for devices that support USB Power Delivery (PD) for rapid charging, such as laptops, modern smartphones, and tablets.
- 12V Cigarette Lighter Sockets: Connect 12V accessories like car refrigerators, air compressors, or camping lights.
- 30A Anderson Output Connectors: Use for high-current 12V/24V devices or to connect to other power systems.

Figure 3: Detailed view of the various charging and power output ports on the distribution box.
4.3 LED Digital Display
The LED display provides real-time information:
- Voltage (V): Shows the current input voltage from the connected battery.
- Battery Capacity (%): Indicates the estimated remaining battery capacity.
- Battery Type Setting: The 'SET' button allows you to cycle through different battery types (P for lead-acid, L for ternary lithium, F for iron-lithium) and adjust voltage parameters for accurate readings. Refer to the specifications section for default settings.
To adjust battery type settings:
- Press and hold the 'SET' button for a few seconds until the display flashes.
- Short press 'SET' to cycle through battery types (P, L, F) and series (e.g., L03 to L20).
- Once the desired battery type is selected, wait a few seconds for the setting to save automatically.
5. Maintenance
- Cleaning: Use a soft, dry cloth to clean the exterior of the unit. Do not use abrasive cleaners or solvents.
- Connections: Periodically check all cable connections to ensure they are secure and free from corrosion.
- Storage: When not in use for extended periods, disconnect the unit from the power source and store it in a cool, dry place away from direct sunlight and extreme temperatures.
6. Troubleshooting
- No Power/Display Off:
- Check if the power source (battery) is connected correctly and has sufficient charge.
- Ensure all cables are securely connected to the distribution box.
- Devices Not Charging:
- Verify that the distribution box is receiving power and the display is active.
- Check the charging cable and the device itself. Try a different port or device.
- Ensure the device's power requirements do not exceed the port's output capacity.
- Inaccurate Battery Reading:
- Confirm that the correct battery type (P, L, F) and series are selected on the LED digital display. Refer to section 4.3 for adjustment instructions.
- Overheating:
- Ensure the unit has adequate ventilation and is not covered.
- Reduce the number of connected high-power devices if the unit feels excessively hot.
If you encounter issues not covered here, please contact customer support.
7. Specifications

Figure 4: Dimensions of the venveal Mini Power Distribution Box.
| Feature | Specification |
|---|---|
| Brand | venveal |
| Model Number | SF20251007B0FC5S5F4K |
| Power Source | Battery Powered |
| Input Voltage | 12V / 24V (30A Max) |
| USB Ports | 2 x QC 3.0 USB |
| Type-C Ports | 3 x Type-C (100W, 30W, 30W) |
| Cigarette Lighter Sockets | 2 x 12V |
| Anderson Connectors | 4 x 30A Input/Output |
| Mounting Type | Wall Mount / Flat / Flush Mount |
| Material | ABC Flame-Retardant Material |
| Dimensions (Approx.) | 10 x 4 inches (25cm x 10cm) |
| LED Display | Voltage, Battery Capacity, Battery Type Setting |
| Battery Type Settings (Default) | P = Lead-acid (DC12V, 36V, 48V, 60V, 72V, 84V) L = Ternary Lithium (L03-L20 series) F = Iron-Lithium (F03-F23 series) |
| Low Voltage Alarm (Lithium) | 11.5V (Customizable) |
8. Warranty and Support
This product comes with a standard manufacturer's warranty. For specific warranty details, please refer to the product packaging or contact your retailer. If you have any questions, require technical assistance, or need to report an issue, please contact venveal customer support through the platform where you purchased the product.