1. Introduction
This manual provides detailed instructions for the assembly, operation, and maintenance of your ONBRILL L4 Wall Mounted Industrial Pipe Clothing Rack. This versatile closet organizer system is designed to maximize storage space and provide a sturdy solution for hanging clothes and organizing accessories. Please read this manual thoroughly before installation and use to ensure proper setup and safe operation.

Figure 1: Overview of the ONBRILL L4 Wall Mounted Industrial Pipe Clothing Rack.
2. Safety Information
- Ensure the rack is securely mounted to a suitable wall structure (e.g., wall studs, concrete) using the provided wall screw fittings. Improper installation can lead to instability and potential injury.
- Do not exceed the maximum weight recommendation of 1100 pounds. Distribute weight evenly across rods and shelves.
- Keep small parts and packaging materials away from children to prevent choking hazards.
- Avoid hanging excessively heavy items on expandable rod sections when fully extended, as this may reduce stability.
3. Package Contents
Verify that all components are present before beginning assembly:
- 6 x Hanging Rods (including 4 expandable rods)
- 8 x Mesh Shelves
- Wall Screw Fittings (anchors and screws suitable for gypsum board or concrete slab)
- Vertical Support Poles
- Plastic Clips for Shelf Installation
- Adjustable Feet
- Assembly Tools (if provided)
4. Specifications
| Brand | ONBRILL |
| Model Number | 105-1 |
| Material | Metal |
| Item Dimensions (L x W x H) | 11.8 x 119.3 x 88.6 inches |
| Mounting Type | Wall Mount |
| Maximum Weight Recommendation | 1100 Pounds |
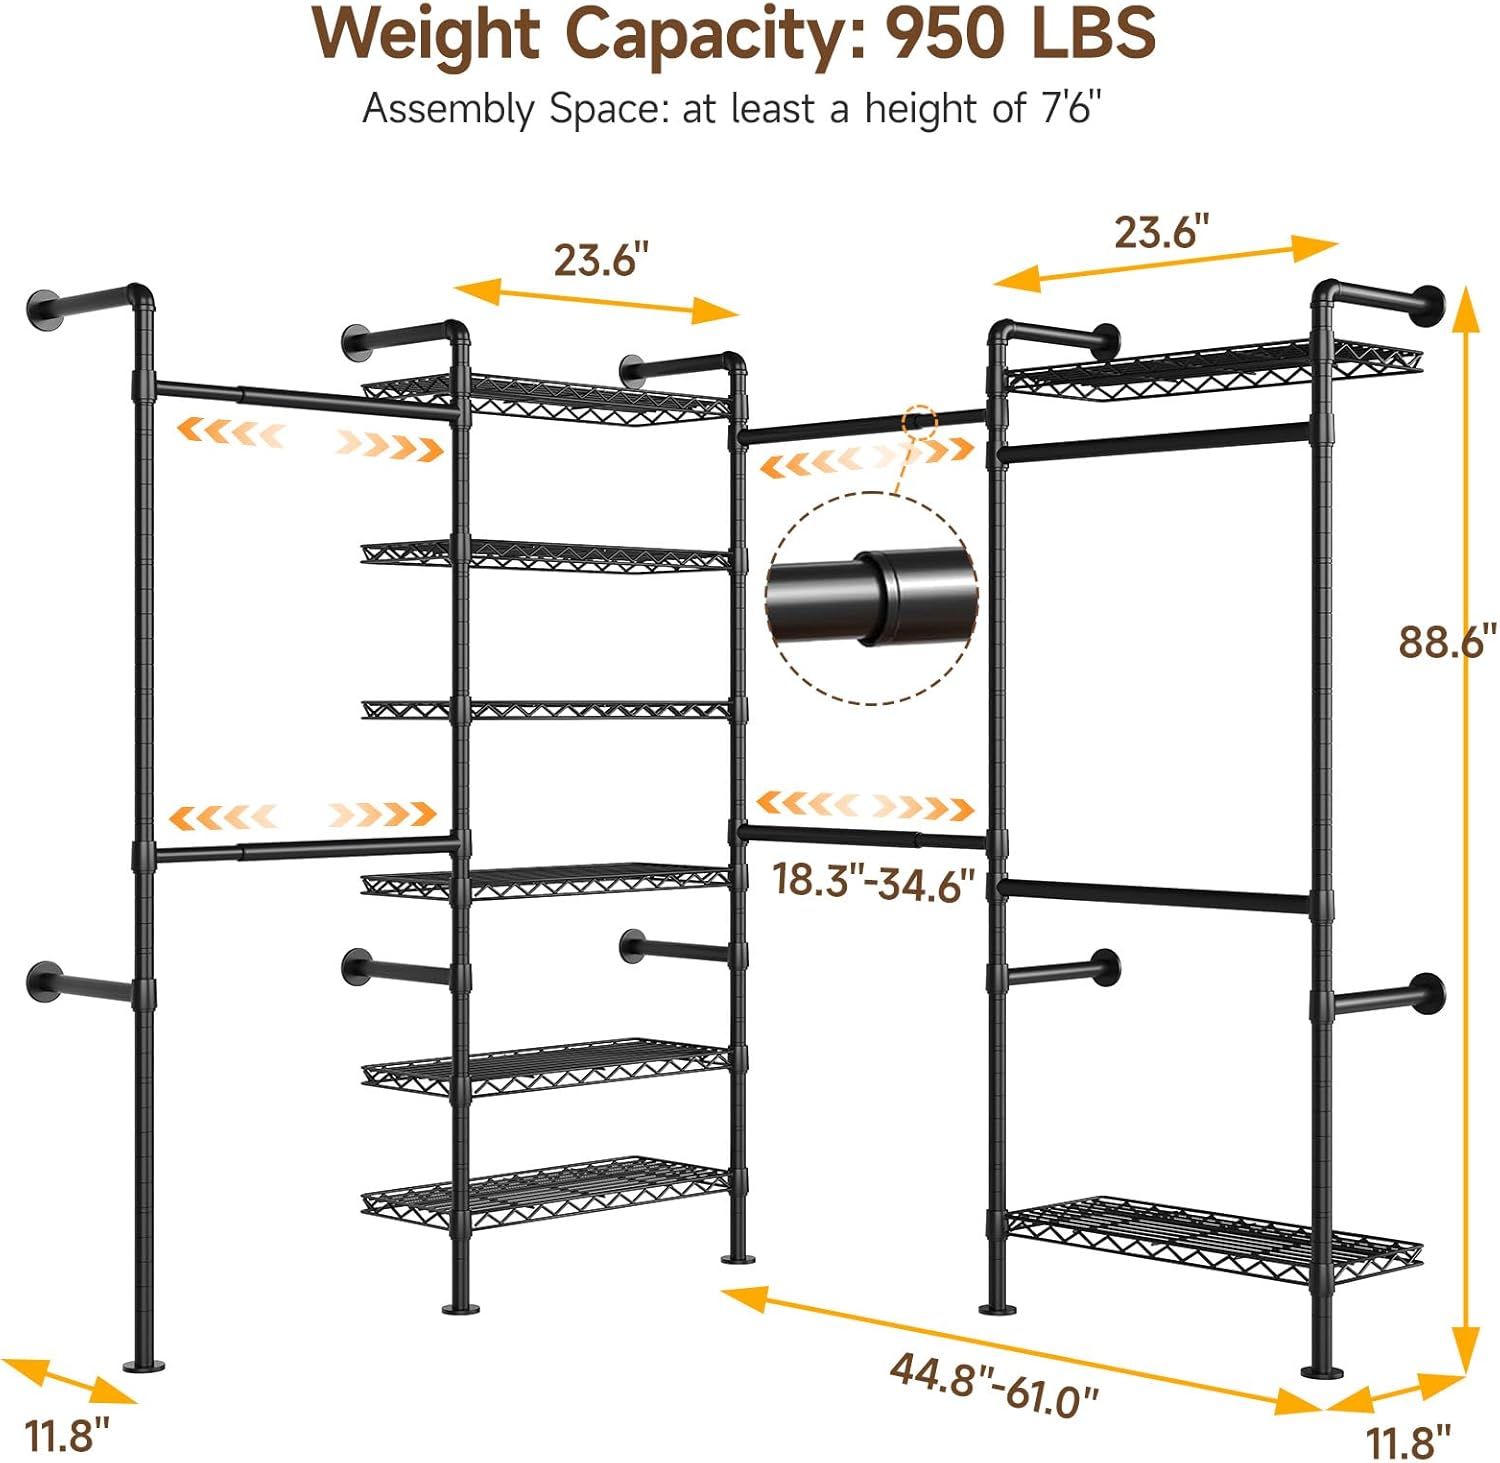
Figure 2: Product Dimensions.
5. Setup and Installation
The ONBRILL L4 system features threaded joints for secure and efficient assembly. It offers customizable configurations to fit various room layouts.
5.1 General Assembly Notes
- Poles connect directly via threaded joints. Ensure they are tightened for stability.
- Plastic clips for shelves should have the arrow pointing upwards. Ensure the flanges fit perfectly with the grooves in the poles to prevent sliding.
- The system can be configured in L-shape, 45° shape, Horizontal, or Combination layouts. Plan your desired layout before starting.
- Wall mounting is essential for stability. Use appropriate tools and ensure secure attachment to wall studs or concrete.
5.2 Step-by-Step Installation
- Prepare Components: Unpack all parts and identify them using the provided parts list.
- Assemble Vertical Poles: Connect pole sections using the threaded joints. Ensure they are securely fastened.
- Install Plastic Clips: For each shelf, attach two pairs of plastic clips to the vertical poles at the desired height. Ensure the arrow on each clip points upwards and the clips snap firmly into the pole grooves.
- Place Shelves: Slide the mesh shelves over the installed plastic clips. Apply appropriate force to ensure the shelf sits securely on the clips.
- Mount Wall Brackets: Determine the desired location for the wall-mounted sections. Mark and drill pilot holes for the wall brackets. Securely attach the brackets to the wall using the provided wall screw fittings.
- Attach Hanging Rods: Connect the hanging rods to the vertical poles and wall brackets. The expandable rods can be adjusted to your preferred length.
- Final Adjustments: Adjust the height of shelves and rods as needed. Ensure all connections are tight and the entire system is stable before loading with items.
5.3 Installation Visual Aids
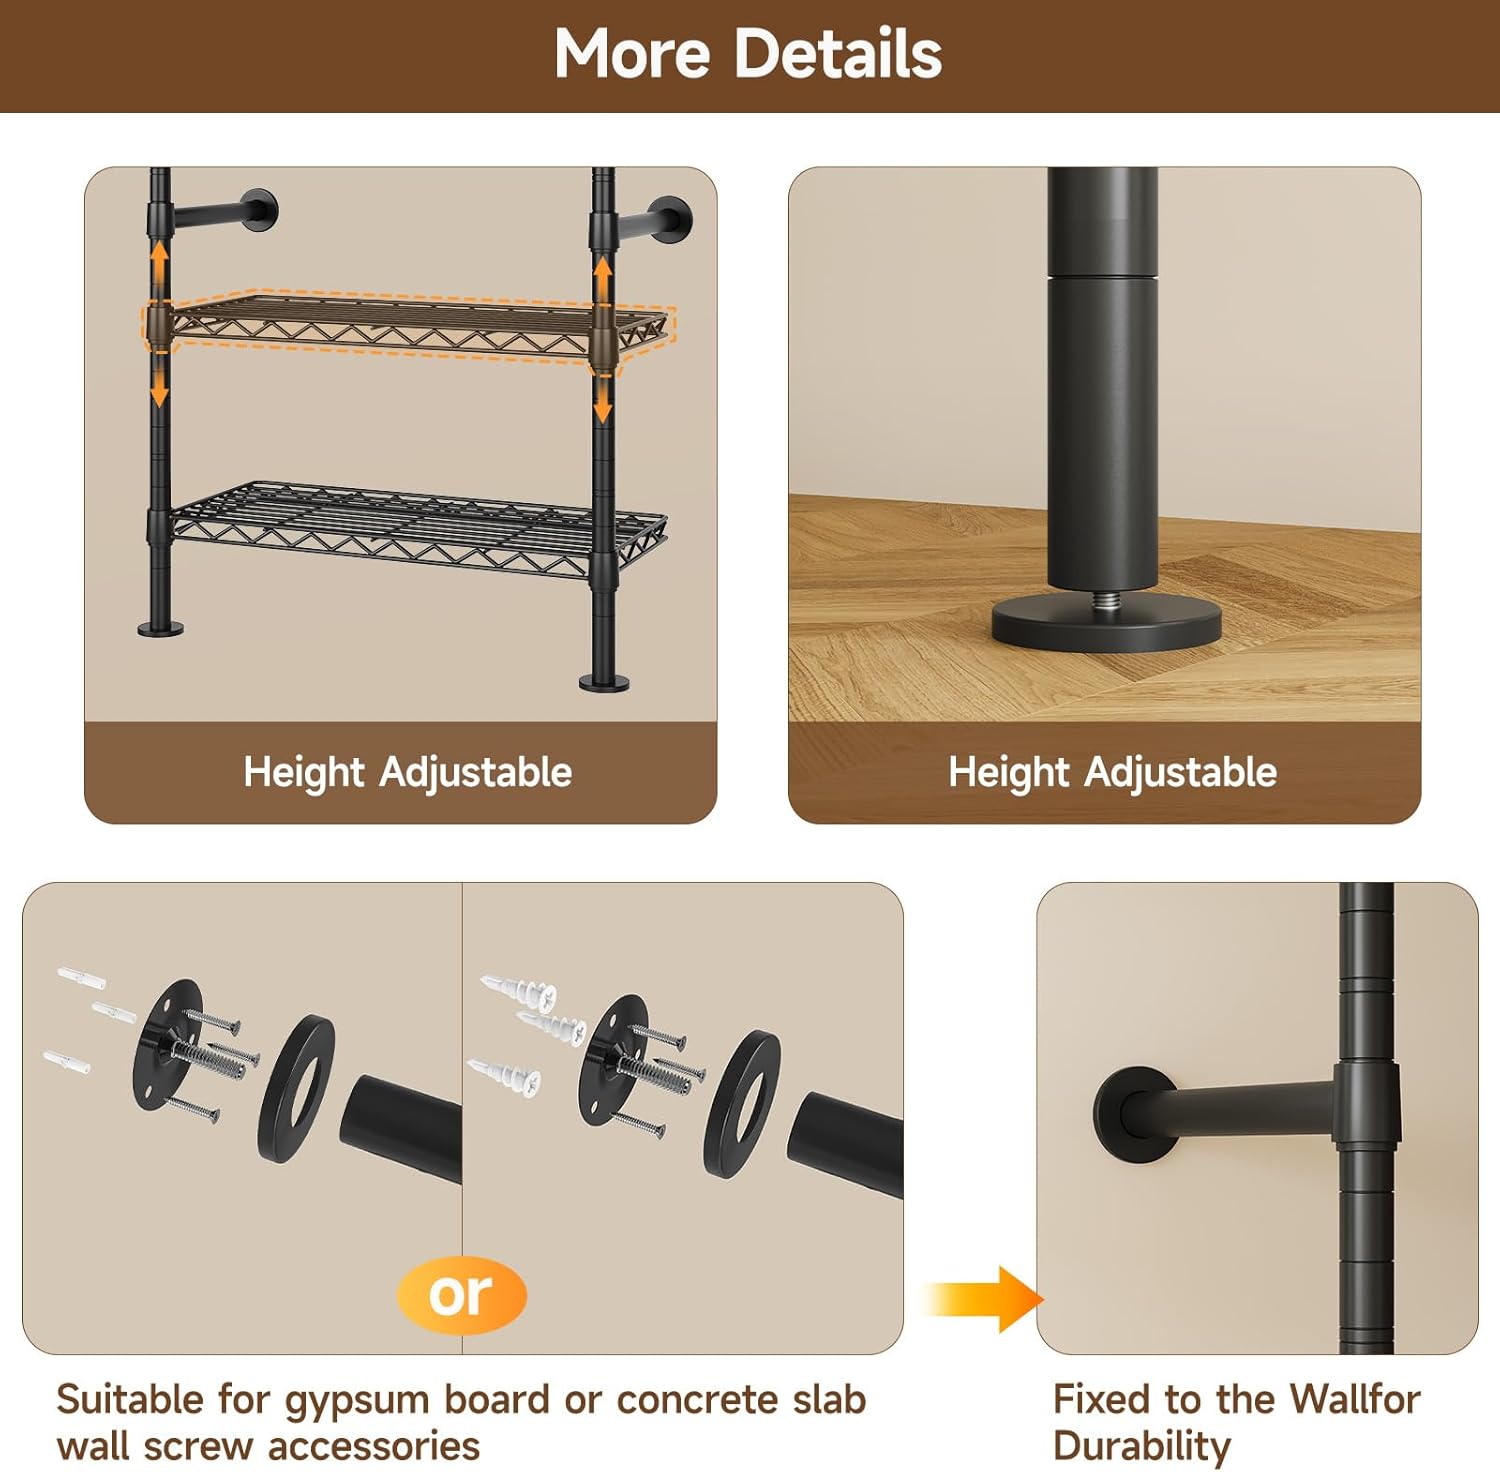
Figure 3: Thread Rolling Mounting for secure connections.

Figure 4: Height adjustment and wall fixing details.

Figure 5: Various customizable configurations.
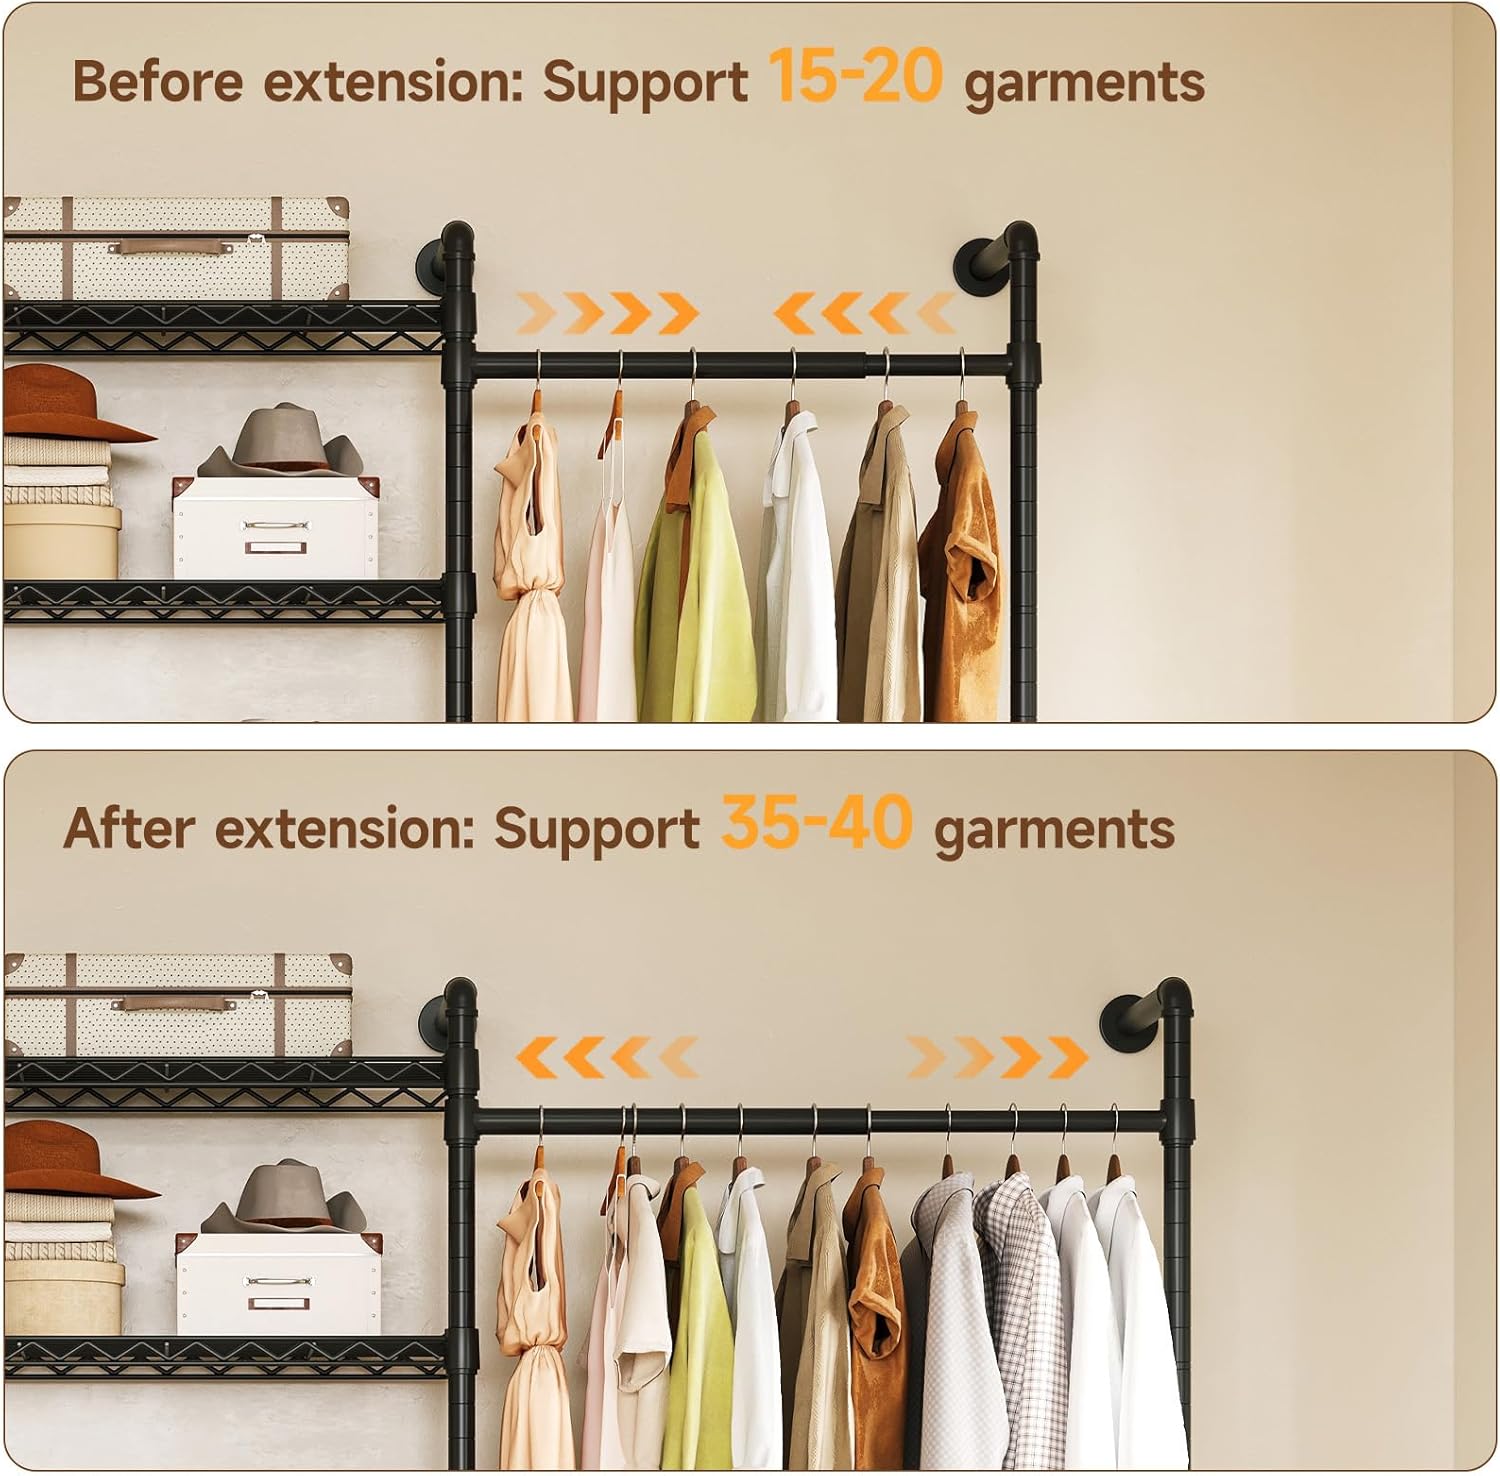
Figure 6: Expandable rod capacity comparison.
5.4 Installation Videos
Video 1: Clip Installation Instructions. This video demonstrates the correct method for installing the plastic clips onto the poles.
Video 2: ONBRILL H4 / L4 Closet Organizer System Overview. This video provides a general overview of the system and its various uses.
6. Operating Instructions
The ONBRILL L4 system is designed for flexible use and organization.
- Adjusting Rod Length: The 4 expandable rods can be pulled out or pushed in to accommodate different garment widths or to increase hanging space.
- Adjusting Shelf Height: To change a shelf's height, remove the items, lift the shelf, reposition the plastic clips to a new set of grooves on the vertical poles, and then place the shelf back onto the clips.
- Reconfiguring Layout: The modular design allows for various layouts (L-shape, 45° shape, horizontal, or combination) to best suit your space. This may require partial disassembly and reassembly of certain sections.
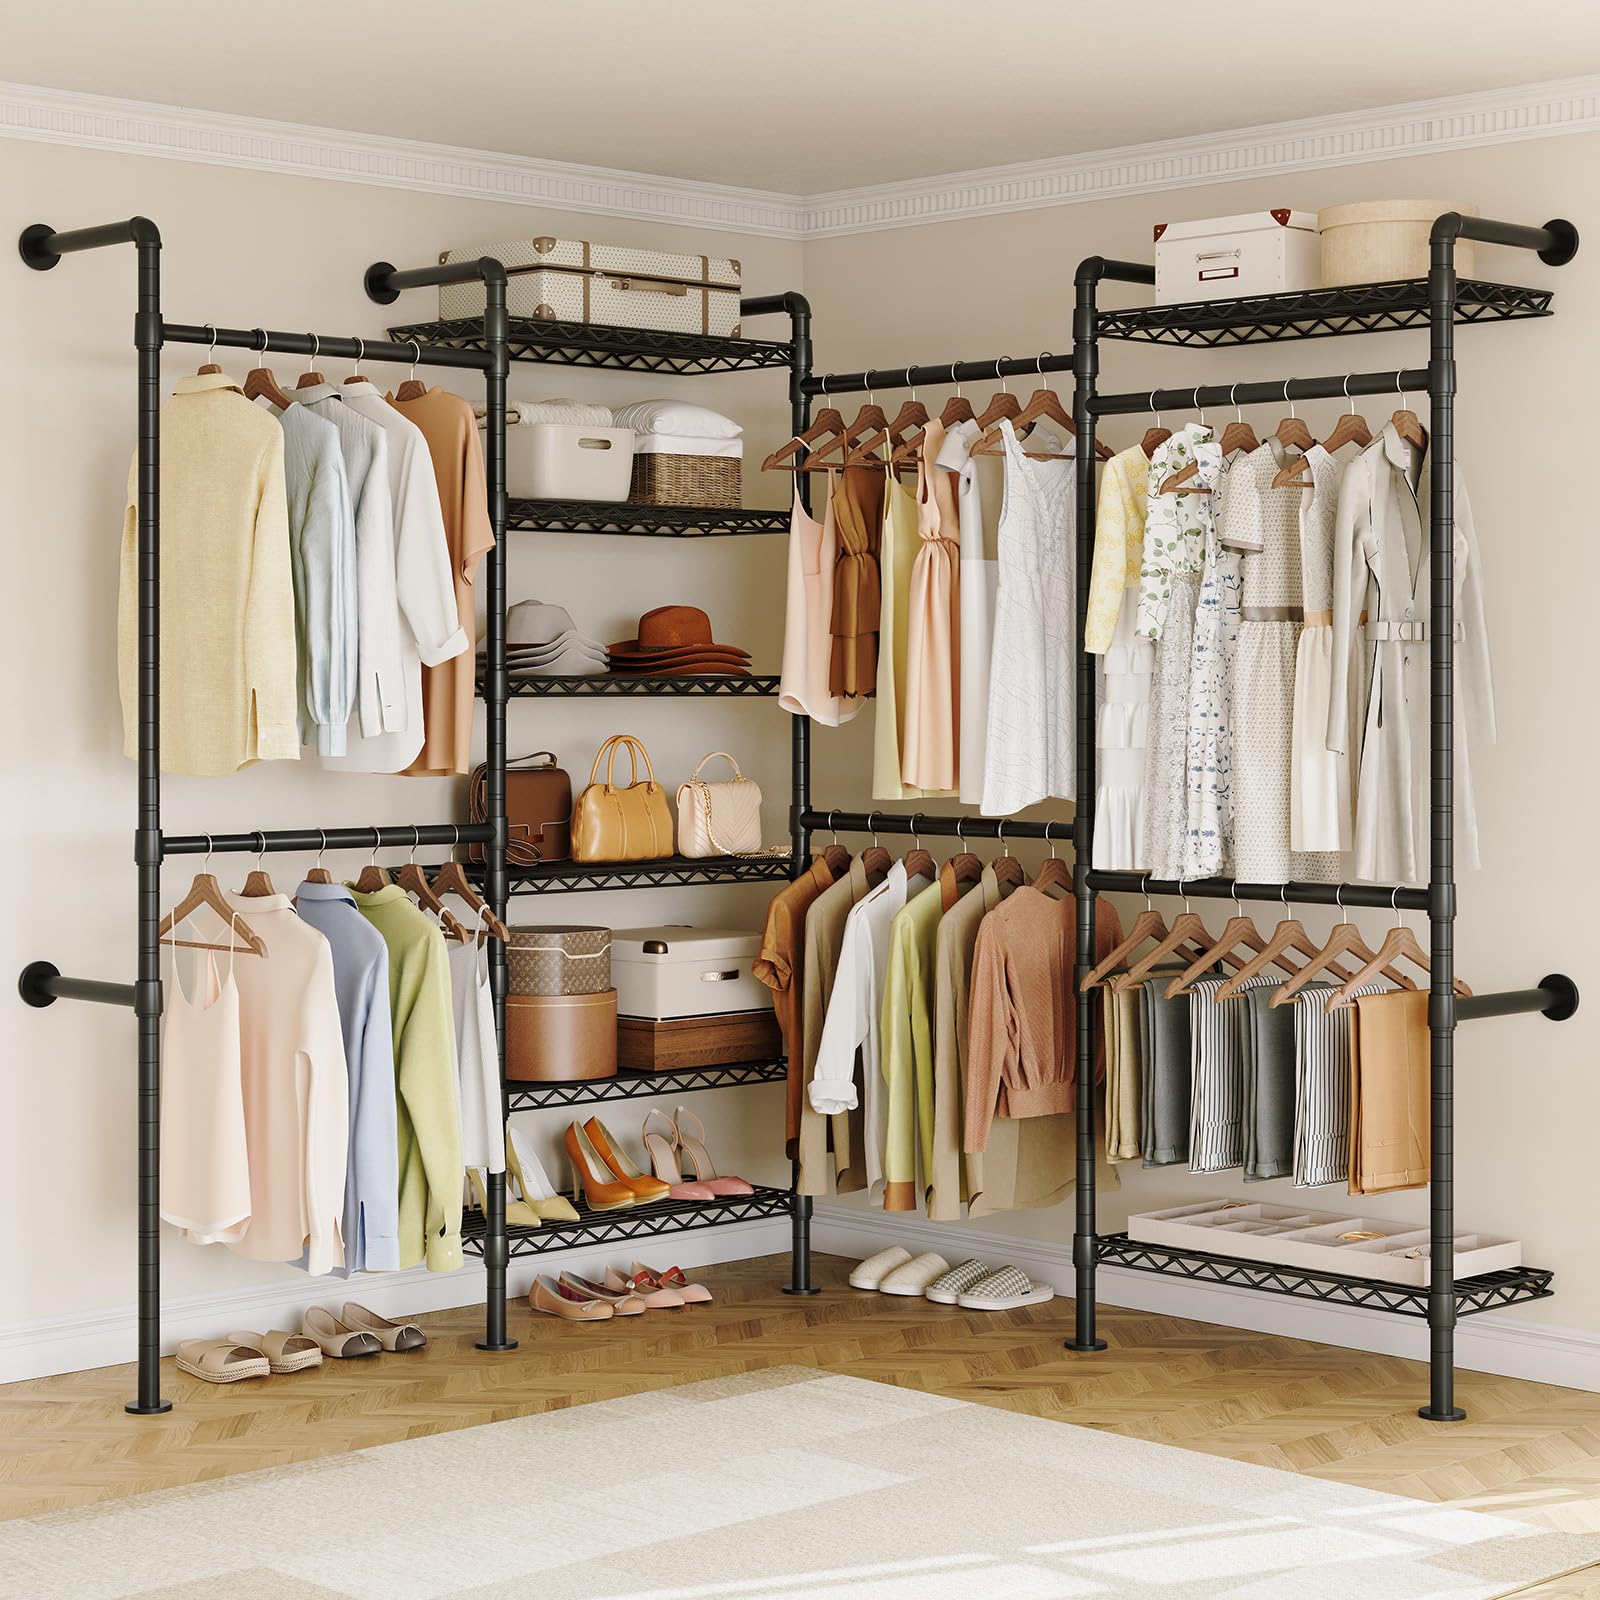
Figure 7: Versatile storage capacity of the organizer.
7. Maintenance
- Cleaning: Wipe down the metal surfaces and mesh shelves with a soft, damp cloth. Avoid using abrasive cleaners or harsh chemicals, as they may damage the finish.
- Regular Checks: Periodically inspect all wall mounts, threaded joints, and plastic clips to ensure they remain tight and secure. Tighten any loose connections to maintain stability.
8. Troubleshooting
- Issue: The rack feels unstable or wobbly.
Solution: Verify that all wall mounts are securely fastened to the wall studs or concrete. Ensure all threaded joints connecting the poles are fully tightened. Check that all plastic clips are correctly installed with the arrow pointing upwards and fully engaged in the pole grooves. - Issue: Shelves are not level.
Solution: Remove items from the uneven shelf. Adjust the position of the plastic clips on the vertical poles to ensure they are at the same height and properly seated in the grooves. Re-place the shelf. - Issue: Hangers get caught when sliding across expandable rod sections.
Solution: This is a characteristic of expandable rods where the inner and outer tubes meet. Be mindful when sliding hangers over these transition points.
9. Warranty and Support
For warranty information, product support, or to inquire about replacement parts, please contact ONBRILL customer service. Refer to your purchase documentation for specific contact details.