1. Product Overview
The MINISFORUM Venus Series NAB9 is a compact barebone mini PC designed for high performance. It features an Intel Core i9-12900HK processor, offering robust computing power for various applications. This manual provides essential information for setting up, operating, and maintaining your NAB9 Mini PC.
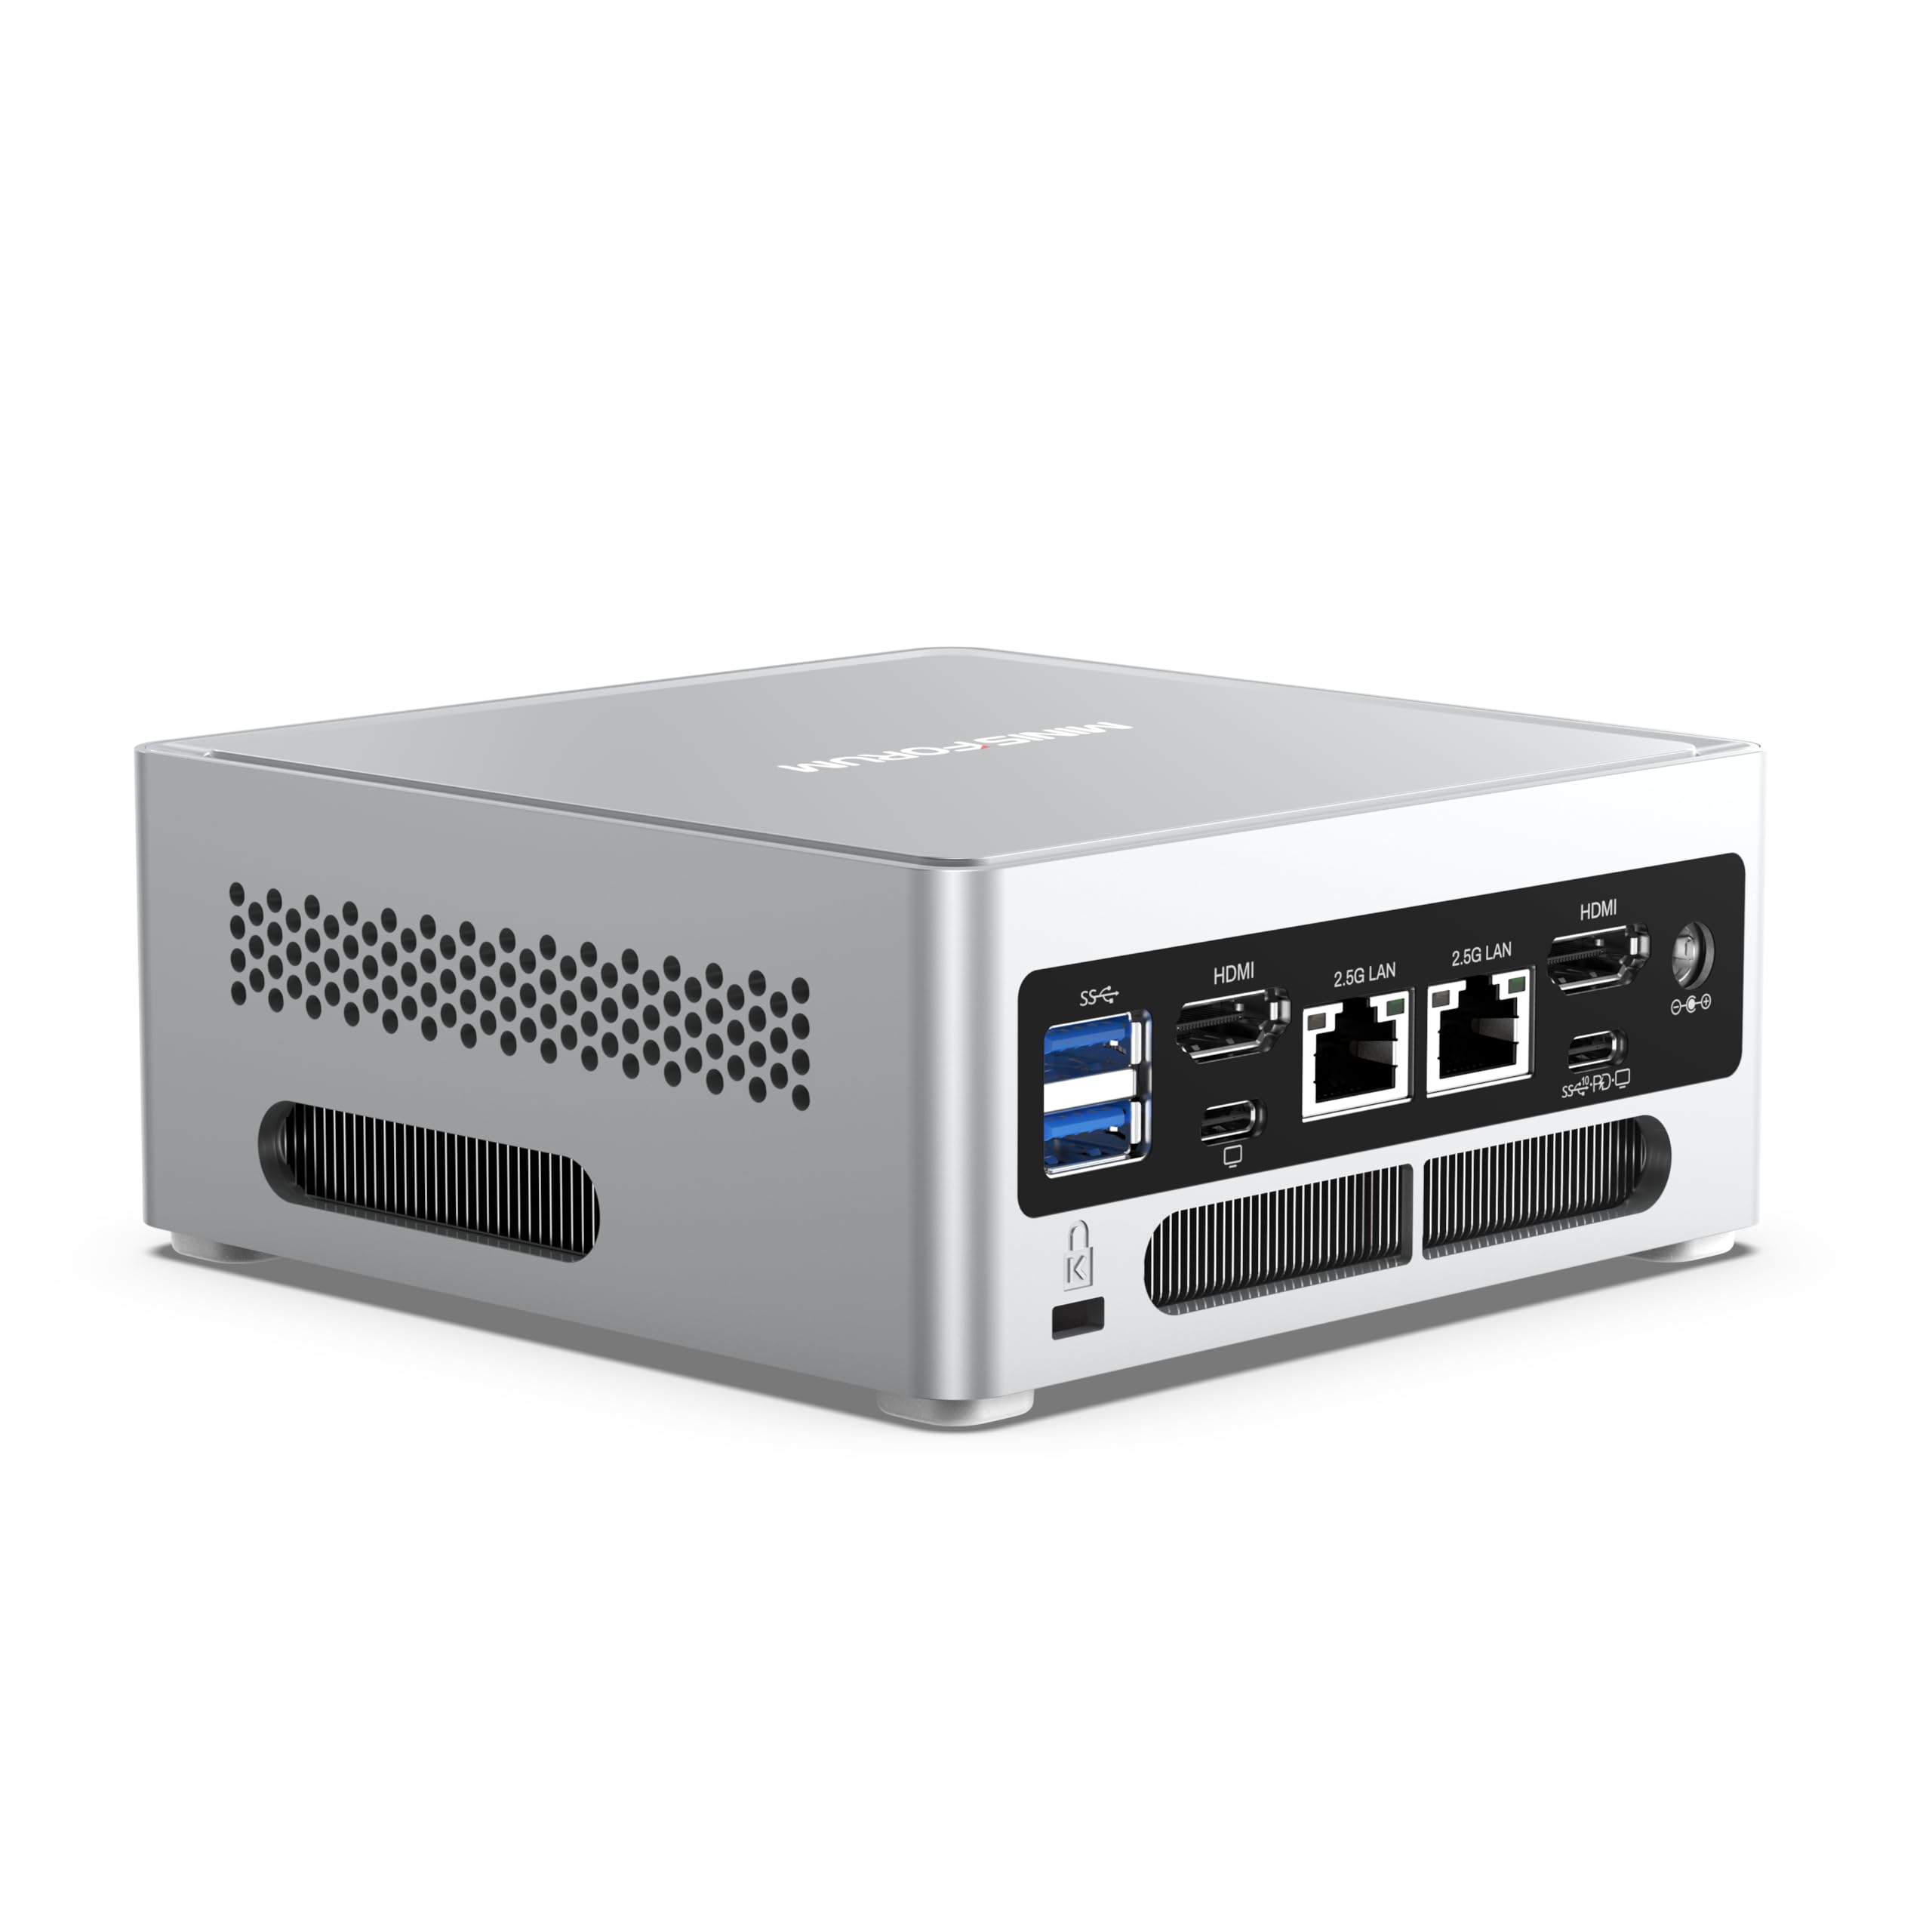
Image: Front view of the MINISFORUM NAB9 Mini PC, showcasing its compact design.
Key Features:
- Powerful Performance: Equipped with an Intel Core i9-12900HK processor (14 cores/20 threads, up to 5.0GHz) and Intel Iris Xe Graphics eligible for demanding tasks.
- Quad 4K Display Output: Supports up to four 4K@60Hz displays simultaneously via 2x HDMI and 2x USB-C ports, ideal for multi-monitor setups.
- Expandable Storage: Barebone system supporting DDR4-3200 SODIMM RAM (up to 64GB), M.2 2280 PCIe4.0 SSD, and a 2.5-inch SATA 3.0 HDD.
- Dual 2.5G LAN Ports: Provides high-speed network connectivity for various applications, including software routers and firewalls.
- Efficient Cooling System: Features dual heat pipes, dual air vents, and an active solid-state heatsink to manage heat effectively.

Image: Diagram illustrating the Intel Core i9-12900HK processor with 14 Cores, 20 Threads, 24MB Cache, and 5.0GHz Max Turbo Frequency.
2. Setup Guide
The NAB9 Mini PC is a barebone system, meaning RAM, SSD, and an operating system are not pre-installed. Follow these steps to prepare your device for first use.
2.1 Installing RAM and Storage
Before proceeding, ensure the device is powered off and disconnected from the power adapter.
- Open the Chassis: Carefully remove the bottom cover of the Mini PC to access the internal components. Refer to the product's quick start guide for specific instructions on opening the chassis.
- Install RAM: The NAB9 supports DDR4-3200 SODIMM RAM (1.1V CL40 JEDEC standard) up to a maximum of 64GB. Insert the RAM modules into the SODIMM slots, ensuring they are seated correctly and the clips lock into place.
- Install M.2 SSD: Locate the M.2 2280 PCIe4.0 slot. Insert your M.2 SSD into the slot at an angle and secure it with the provided screw.
- Install 2.5-inch SATA HDD (Optional): If installing a 2.5-inch SATA 3.0 (6.0Gb/s) HDD, place it in the designated bay and connect it using the provided SATA cable. Secure the drive with screws if necessary.
- Close the Chassis: Carefully reattach the bottom cover, ensuring all connections are secure.
2.2 Connecting Peripherals
Connect your display, keyboard, mouse, and power adapter to the Mini PC.
- Display: Connect your monitor(s) to the HDMI or USB-C (DisplayPort Alt Mode) ports. The NAB9 supports up to four 4K@60Hz displays.
- Keyboard and Mouse: Connect your USB keyboard and mouse to any of the available USB 3.2 ports.
- Network: For wired internet access, connect an Ethernet cable to one of the two 2.5G RJ45 LAN ports.
- Power: Connect the included power adapter to the DC 19V input port on the Mini PC, then plug the adapter into a power outlet.

Image: Detailed view of the front and rear ports of the MINISFORUM NAB9 Mini PC, including USB, HDMI, USB-C, LAN, and power input.
2.3 Operating System Installation
After installing RAM and storage, you will need to install an operating system (e.g., Windows, Linux) from a bootable USB drive or other media. Refer to your chosen operating system's installation guide for detailed steps.
3. Operating Instructions
3.1 Power On/Off
- Power On: Press the power button located on the front of the Mini PC. The power indicator light will illuminate.
- Power Off: To shut down the system, use the operating system's shutdown function. For a forced shutdown, press and hold the power button for approximately 5 seconds.
3.2 Multi-Display Setup
The NAB9 supports connecting up to four displays simultaneously. Connect your monitors to the available HDMI and USB-C ports. Once connected, configure your display settings within your operating system to extend or duplicate your desktop.

Image: Illustration of the NAB9 Mini PC connected to four monitors, demonstrating its quad 4K display capability.
3.3 Network Connectivity
Utilize the dual 2.5G RJ45 LAN ports for high-speed wired network connections. Ensure your network cables are securely connected to the Mini PC and your router/switch.
4. Maintenance
Proper maintenance ensures the longevity and optimal performance of your Mini PC.
4.1 Cooling System
The NAB9 features an advanced cooling system with dual heat pipes and an active solid-state heatsink. To maintain efficient cooling:
- Ensure the Mini PC is placed in a well-ventilated area, free from obstructions around its air vents.
- Regularly clean dust from the exterior vents using compressed air or a soft brush. Do not open the chassis for cleaning unless you are familiar with computer hardware maintenance.

Image: Diagram showing the internal heat dissipation system of the NAB9, including the active SSD heatsink and dual copper heat pipes.
4.2 Software Updates
Keep your operating system and drivers updated to ensure system stability, security, and optimal performance. Check the MINISFORUM official website for the latest driver releases for your NAB9 model.
5. Troubleshooting
This section addresses common issues you might encounter with your Mini PC.
Common Issues and Solutions:
- No Power:
- Ensure the power adapter is securely connected to both the Mini PC and a working power outlet.
- Verify the power outlet is functional by testing it with another device.
- No Display Output:
- Check that the monitor is powered on and the display cable (HDMI/USB-C) is securely connected to both the Mini PC and the monitor.
- Try a different display cable or monitor if available.
- Ensure RAM and SSD are correctly installed.
- Network Connectivity Issues:
- Verify the Ethernet cable is properly connected to both the Mini PC and your router/modem.
- Check your router/modem for internet connectivity.
- Ensure network drivers are installed and up to date in your operating system.
- System Instability/Freezes:
- Ensure the cooling system is not obstructed and the device is not overheating.
- Check for sufficient RAM and storage space.
- Update your operating system and drivers.
- Clear CMOS: If you encounter boot issues or incorrect BIOS settings, locate the "Clear CMOS" button (often a small pinhole button) on the device (refer to port diagram image for location). With the device powered off, press and hold this button for a few seconds to reset BIOS settings to default.
6. Specifications
Detailed technical specifications for the MINISFORUM Venus Series NAB9 Mini PC.
| Feature | Specification |
|---|---|
| Model | NAB9 |
| Processor | Intel Core i9-12900HK (14 Cores, 20 Threads, up to 5.0 GHz) |
| Graphics | Intel Iris Xe Graphics (Integrated) |
| Memory (RAM) Support | DDR4-3200 SODIMM, Max 64GB |
| Storage Support | 1x M.2 2280 PCIe4.0 SSD, 1x 2.5-inch SATA 3.0 HDD/SSD |
| Video Output | 2x HDMI (4K@60Hz), 2x USB-C (4K@60Hz) |
| LAN | 2x 2.5G RJ45 Ethernet Ports |
| USB Ports | 4x USB 3.2 (various generations/types) |
| Audio | 3.5mm Combo Jack |
| Dimensions | Approximately 7.15 x 6.26 x 4.4 inches (Package) |
| Weight | Approximately 3.22 pounds |
| Operating System | Not included (Barebone) |
7. Warranty and Support
For warranty information and technical support, please refer to the documentation included with your purchase or visit the official MINISFORUM website. The seller for this product is MINISFORUM US Official.
Keep your purchase receipt and product serial number readily available when contacting support.


