1. Introduction
Thank you for choosing the IRONDAY Mini Travel Steam Iron SW-602. This compact and versatile iron is designed for efficient wrinkle removal, offering both steam and dry ironing functions with dual voltage compatibility for global use. Please read this manual thoroughly before operation to ensure safe and optimal performance.
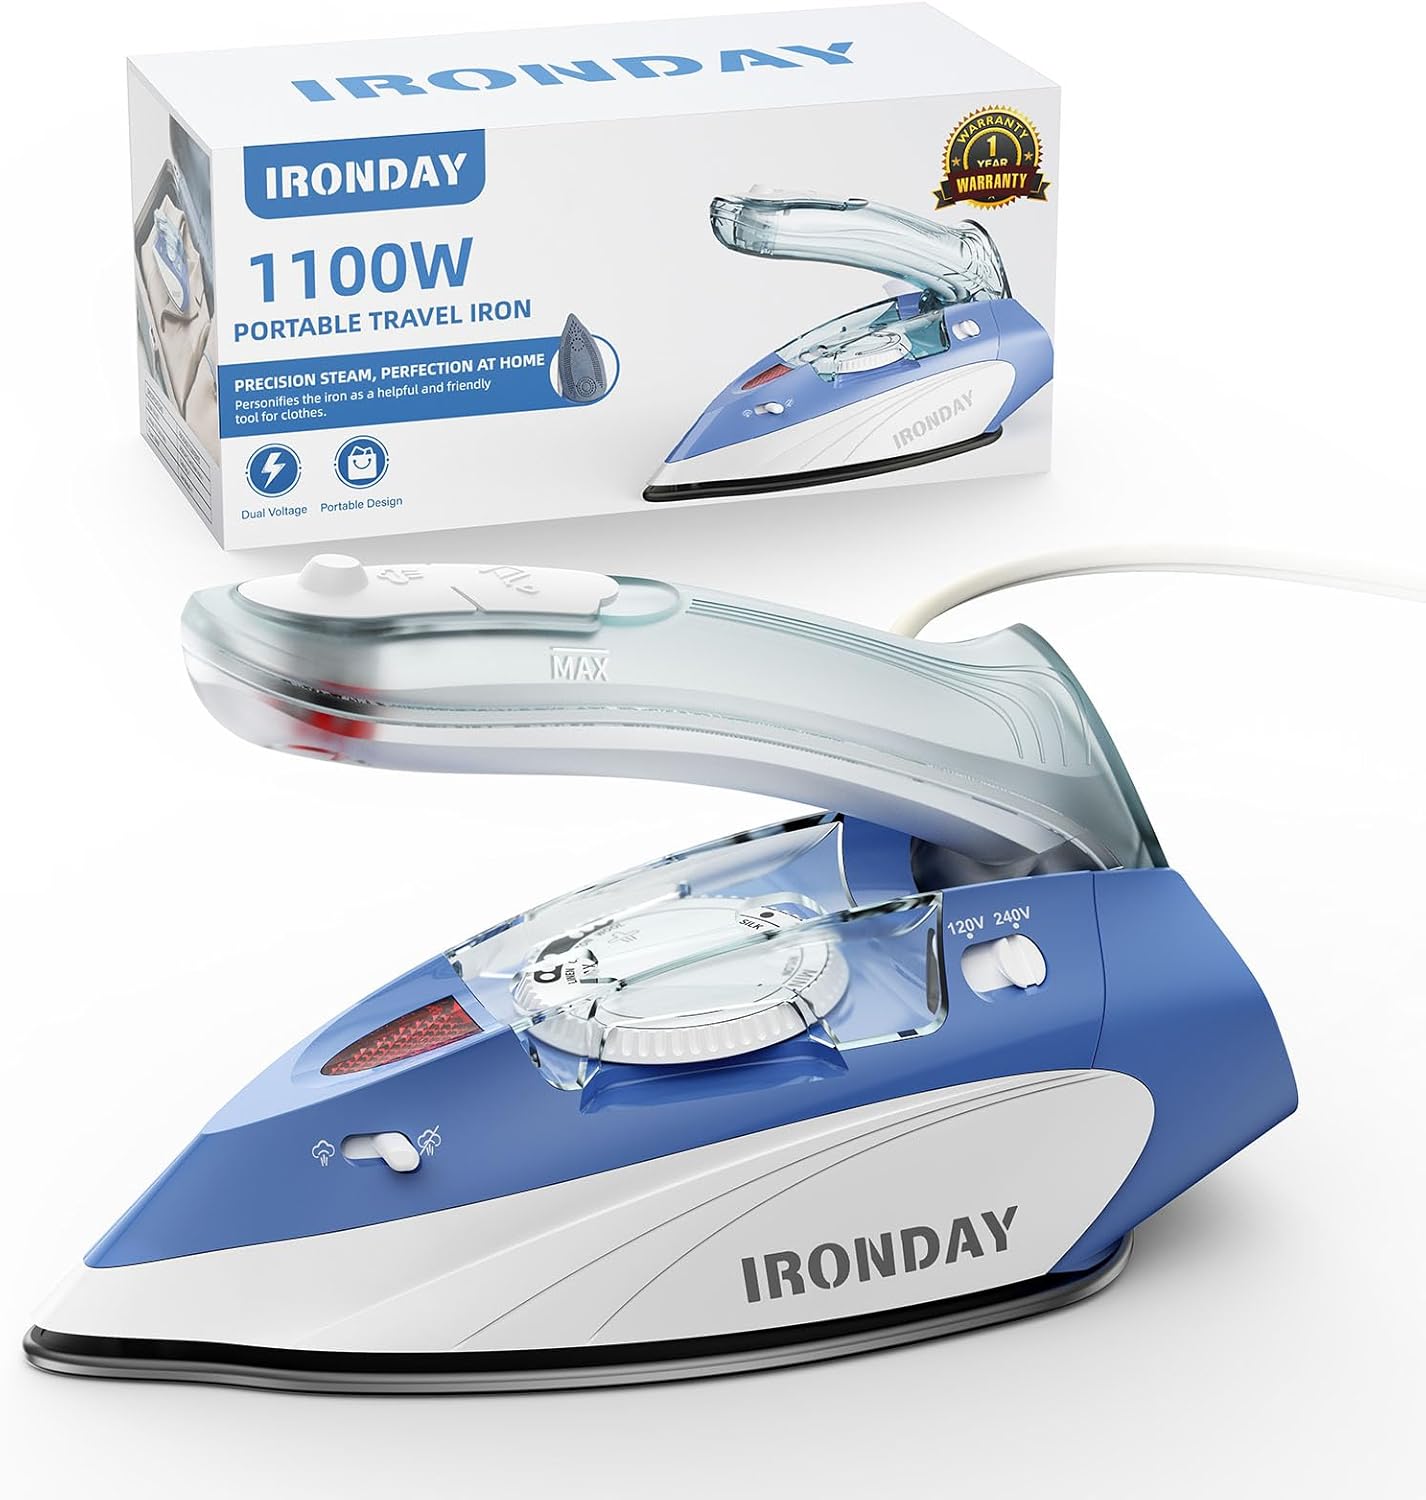
Image 1.1: IRONDAY Mini Travel Steam Iron SW-602 and its retail packaging.
2. Safety Instructions
- Always ensure the voltage selector matches the local power supply before plugging in the iron.
- Do not leave the iron unattended while it is plugged in or hot.
- Keep the iron out of reach of children and pets.
- Do not immerse the iron, power cord, or plug in water or other liquids.
- Use the iron only for its intended purpose.
- Avoid touching hot surfaces. Use handles or knobs.
- Unplug the iron from the outlet when filling with water, emptying, or when not in use.
- Do not operate the iron with a damaged cord or plug, or if the iron has been dropped or damaged.
- When vertically steaming, keep the iron at least 8 inches (20 cm) away from garments. Do not steam clothing while it is being worn.
3. Package Contents
Verify that all items are present in the package:
- IRONDAY Steam Iron x 1
- Measuring Cup x 1
- User Manual x 1
- Cloth Bag x 1
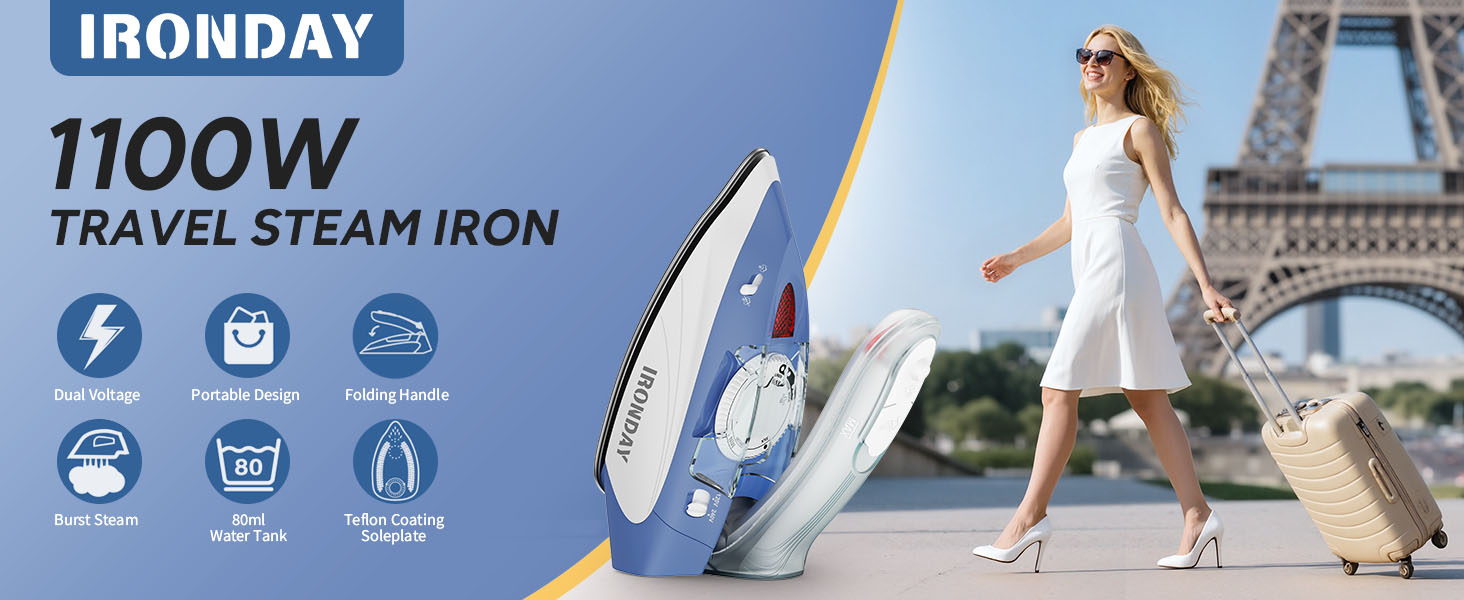
Image 3.1: Included items in the IRONDAY Mini Travel Steam Iron package.
4. Product Overview
Familiarize yourself with the components of your IRONDAY Mini Travel Steam Iron:
- Steam Switch: Controls steam output.
- Steam Burst Button: Releases a powerful burst of steam.
- Water Tank: Transparent tank for water, 2.7oz (80ml) capacity.
- Water Filling Mouth: Opening for adding water.
- Adjustable Temperature Dial: Selects appropriate temperature for different fabrics.
- Voltage Selector: Switch between 120V and 240V.
- Handle Fold Button: For folding the handle for compact storage.
- Non-Stick Soleplate: Smooth surface for efficient ironing.
- Power Cord: 5.9ft (1.8m) length.

Image 4.1: Key components of the IRONDAY Mini Travel Steam Iron.
5. Setup and First Use
5.1. Unfolding the Handle
- Press the button marked "PUSH" on the back of the handle.
- Gently pull the handle up until it locks into place.
5.2. Selecting Voltage
The iron features dual voltage (110V/220V) for worldwide compatibility. Before plugging in, ensure the voltage selector switch on the iron matches the local power supply.
- For 110-120V regions (e.g., USA, Canada), set the switch to 120V.
- For 220-240V regions (e.g., Europe, Australia), set the switch to 240V.
Note: Using the incorrect voltage setting can damage the iron and connected devices. If necessary, use a travel adapter that meets the safety requirements of the country you are in.
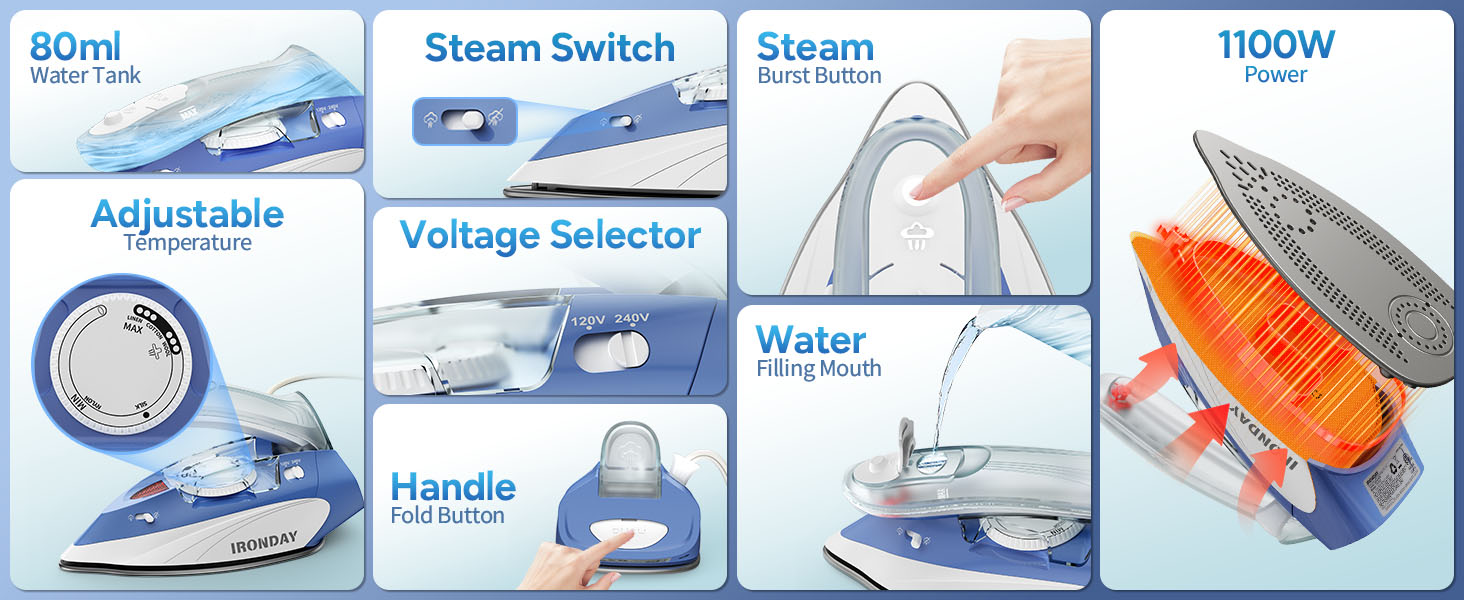
Image 5.1: Dual voltage selection for worldwide use.
5.3. Filling the Water Tank (for Steam Ironing)
- Ensure the iron is unplugged and cooled down.
- Set the steam switch to the "MIN" or dry ironing position.
- Open the water filling mouth cover.
- Using the provided measuring cup, carefully pour water into the water tank up to the "MAX" level (approximately 2.7oz / 80ml). Do not overfill.
- Close the water filling mouth cover securely.
Important: For optimal performance and to prevent mineral buildup, use distilled or demineralized water. Tap water may be used in areas with soft water, but it can lead to mineral deposits over time.
6. Operating Instructions
Follow these steps for effective ironing:
- Prepare the Iron: Ensure the handle is unfolded and the voltage is correctly selected.
- Fill Water (for Steam): If steam ironing, fill the water tank as described in Section 5.3.
- Plug In: Insert the power cord into a suitable electrical outlet. The red indicator light will illuminate, indicating the iron is heating up.
- Set Temperature: Turn the adjustable temperature dial to the desired setting based on the fabric type (refer to the fabric guide below). Wait for the red indicator light to turn off, indicating the iron has reached the set temperature.
- Ironing Mode Selection: Choose between Dry Ironing, Steam Ironing, or Vertical Steaming.

Image 6.1: Step-by-step guide for using the iron.
6.1. Dry Ironing
- Ensure the water tank is empty or the steam switch is set to the "MIN" position.
- Set the temperature dial according to the fabric type.
- Once the indicator light turns off, begin ironing.
6.2. Steam Ironing (Horizontal)
- Fill the water tank as described in Section 5.3.
- Set the temperature dial to a steam-compatible setting (usually between "MIN" and "MAX" on the dial, indicated by steam icons).
- Once the indicator light turns off, set the steam switch to the desired steam level.
- Begin ironing horizontally. The iron will release continuous steam.
- For stubborn wrinkles, press the Steam Burst Button for an extra powerful shot of steam.
6.3. Vertical Steaming
- Fill the water tank.
- Set the temperature dial to a high setting suitable for steam.
- Hold the iron vertically, keeping it 8 inches (20 cm) away from the garment.
- Press the Steam Burst Button repeatedly to release steam and remove wrinkles from hanging clothes, curtains, etc.

Image 6.2: Different ironing modes for versatile use.
6.4. Fabric Temperature Guide
Always check the garment's care label before ironing. If unsure, start with a lower temperature setting on an inconspicuous area.
| Fabric Type | Temperature Range | Steam Recommended |
|---|---|---|
| Nylon | 140-212°F (60-100°C) | No / Low |
| Silk | 230-302°F (110-150°C) | Low |
| Wool | 284-410°F (140-210°C) | Yes |
| Cotton | 284-410°F (140-210°C) | Yes |
| Linen | 356-428°F (180-220°C) | Yes |

Image 6.3: Fabric guide for temperature selection.
7. Maintenance and Storage
7.1. Cleaning the Iron
- Always unplug the iron and allow it to cool completely before cleaning.
- Wipe the soleplate with a damp cloth and a non-abrasive cleaner if necessary. Do not use harsh scouring pads or metallic cleaners.
- Wipe the exterior of the iron with a soft, damp cloth.
- Empty any remaining water from the tank after each use to prevent mineral buildup.
7.2. Storage
- Ensure the iron is completely cool and dry before storing.
- Fold the handle down for compact storage.
- Store the iron in its cloth bag in a dry, safe place, away from direct sunlight and moisture.
7.3. Note on Residual Water
Each IRONDAY steam iron undergoes water testing at the factory to ensure quality and safety. It is normal for some residual water to be present in the water tank upon first use. This does not indicate a used or defective product.

Image 7.1: Explanation regarding residual water from factory testing.
8. Troubleshooting
If you encounter issues with your IRONDAY Mini Travel Steam Iron, refer to the following table:
| Problem | Possible Cause | Solution |
|---|---|---|
| Iron does not heat up. | Not plugged in; incorrect voltage selected; power outlet issue. | Ensure iron is securely plugged in. Verify voltage selector matches local supply. Test outlet with another appliance. |
| No steam or insufficient steam. | Water tank empty; steam switch off; temperature too low; mineral buildup. | Fill water tank. Set steam switch to desired level. Increase temperature setting. Clean soleplate and steam vents. |
| Water leaking from soleplate. | Temperature too low for steam; water tank overfilled; iron tilted excessively. | Ensure iron is hot enough for steam (indicator light off). Do not overfill water tank. Keep iron horizontal during steam ironing. |
| Iron sticks to fabric. | Temperature too high for fabric type; soleplate dirty. | Reduce temperature setting. Clean the soleplate. |
| Red light stays on. | Iron is continuously heating or not reaching set temperature. | Allow sufficient time for heating. If it persists, contact customer support. |
9. Specifications
| Feature | Specification |
|---|---|
| Model Name | SW-602 |
| Power | 1100W |
| Voltage | 120V/240V, 60Hz (Dual Voltage) |
| Water Tank Capacity | 2.7oz (80ml) |
| Power Cord Length | 5.9 ft (1.8 m) |
| Max Temperature | 428°F (220°C) |
| Product Dimensions | Approx. 8.26"L x 3.7"W x 3.5"H |
| Net Weight | 1.54 lbs (0.7 kg) |
| Special Features | Anti-Drip, Collapsible Handle, Continuous Steam, Steam Control, Vertical Steaming |

Image 9.1: Technical specifications of the iron.
10. Warranty and Support
IRONDAY provides a 1-year warranty for this product, covering manufacturing defects from the date of purchase. This warranty does not cover damage caused by misuse, accident, unauthorized modification, or normal wear and tear.
For any questions, concerns, or warranty claims, please contact IRONDAY customer service. Our team is available for 24-hour online service to assist you promptly.
Please refer to your purchase documentation for specific contact details or visit the official IRONDAY website for support information.