1. Introduction
Thank you for choosing the Pedono A50 Dog Training Collar. This manual provides detailed instructions for the safe and effective use of your new training system. Please read this manual thoroughly before operating the device to ensure proper function and to maximize your dog's training experience. This collar is designed to assist in training dogs of various sizes, offering beep, vibration, and static correction modes.
2. Important Safety Information
- Not for Aggressive Dogs: Do not use this product on aggressive dogs. If your dog is aggressive, consult a professional dog trainer.
- Skin Irritation: Prolonged wear or improper fit can cause skin irritation. Check your dog's neck regularly for signs of irritation. Remove the collar if irritation is found and consult a veterinarian.
- Supervision: Always supervise your dog when using the training collar.
- Children: Keep the device out of reach of children.
- Water Safety: The receiver is IPX7 waterproof, but the remote control is not waterproof. Do not immerse the remote in water. Ensure the Type-C charging port's silicone plug is securely closed on the receiver before water exposure.
- Proper Fit: The collar should fit snugly but not too tightly. Ensure the contact points touch the dog's skin.
3. Package Contents
The Pedono A50 Dog Training Collar package includes the following items:
- 1 x Remote Control
- 1 x Receiver Collar
- 1 x Dog Clicker
- 1 x Type-C Charging Cable
- 1 x Wrist Strap for Remote
- 1 x User Manual (this document)
- 1 x Test Light Tool
- 4 x Contact Points (two short, two long)
- 2 x Silicone Caps for Contact Points
4. Product Overview
The Pedono A50 training system consists of a remote control and a receiver collar. The remote allows you to deliver various training commands to your dog from a distance.
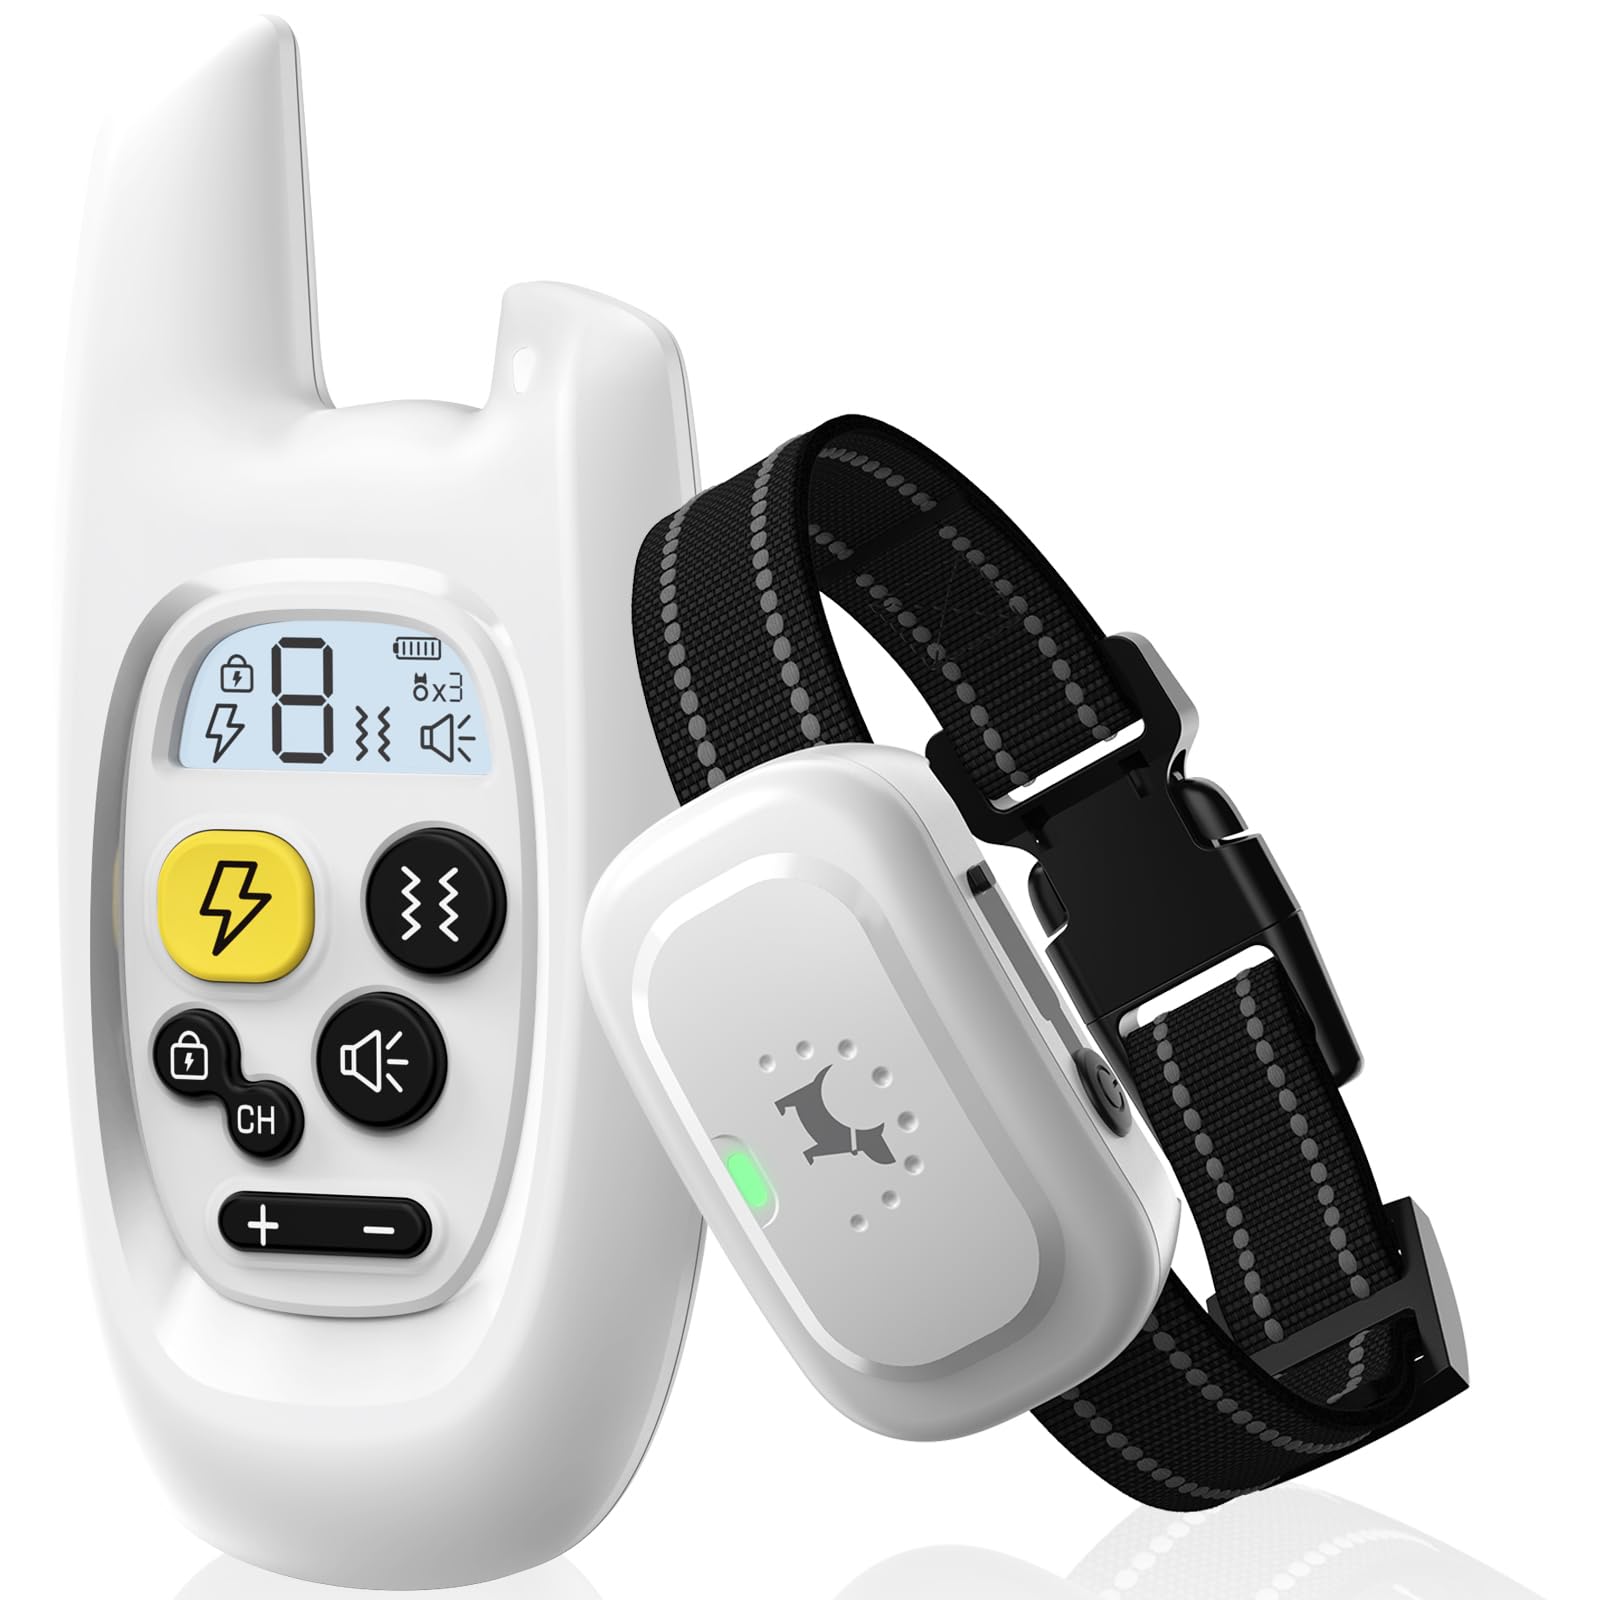
Image: The Pedono A50 remote control and receiver collar.
Remote Control Features
- Display Screen: Shows current channel, battery level, and mode settings.
- Shock Button: Activates static correction.
- Vibration Button: Activates vibration correction.
- Beep Button: Activates an audible tone.
- Channel Button (CH): Switches between training channels (1, 2, 3, and A).
- Lock Keypad Button: Prevents accidental activation of static correction.
- Intensity Adjustment Buttons (+/-): Adjusts vibration and static correction levels (0-9).
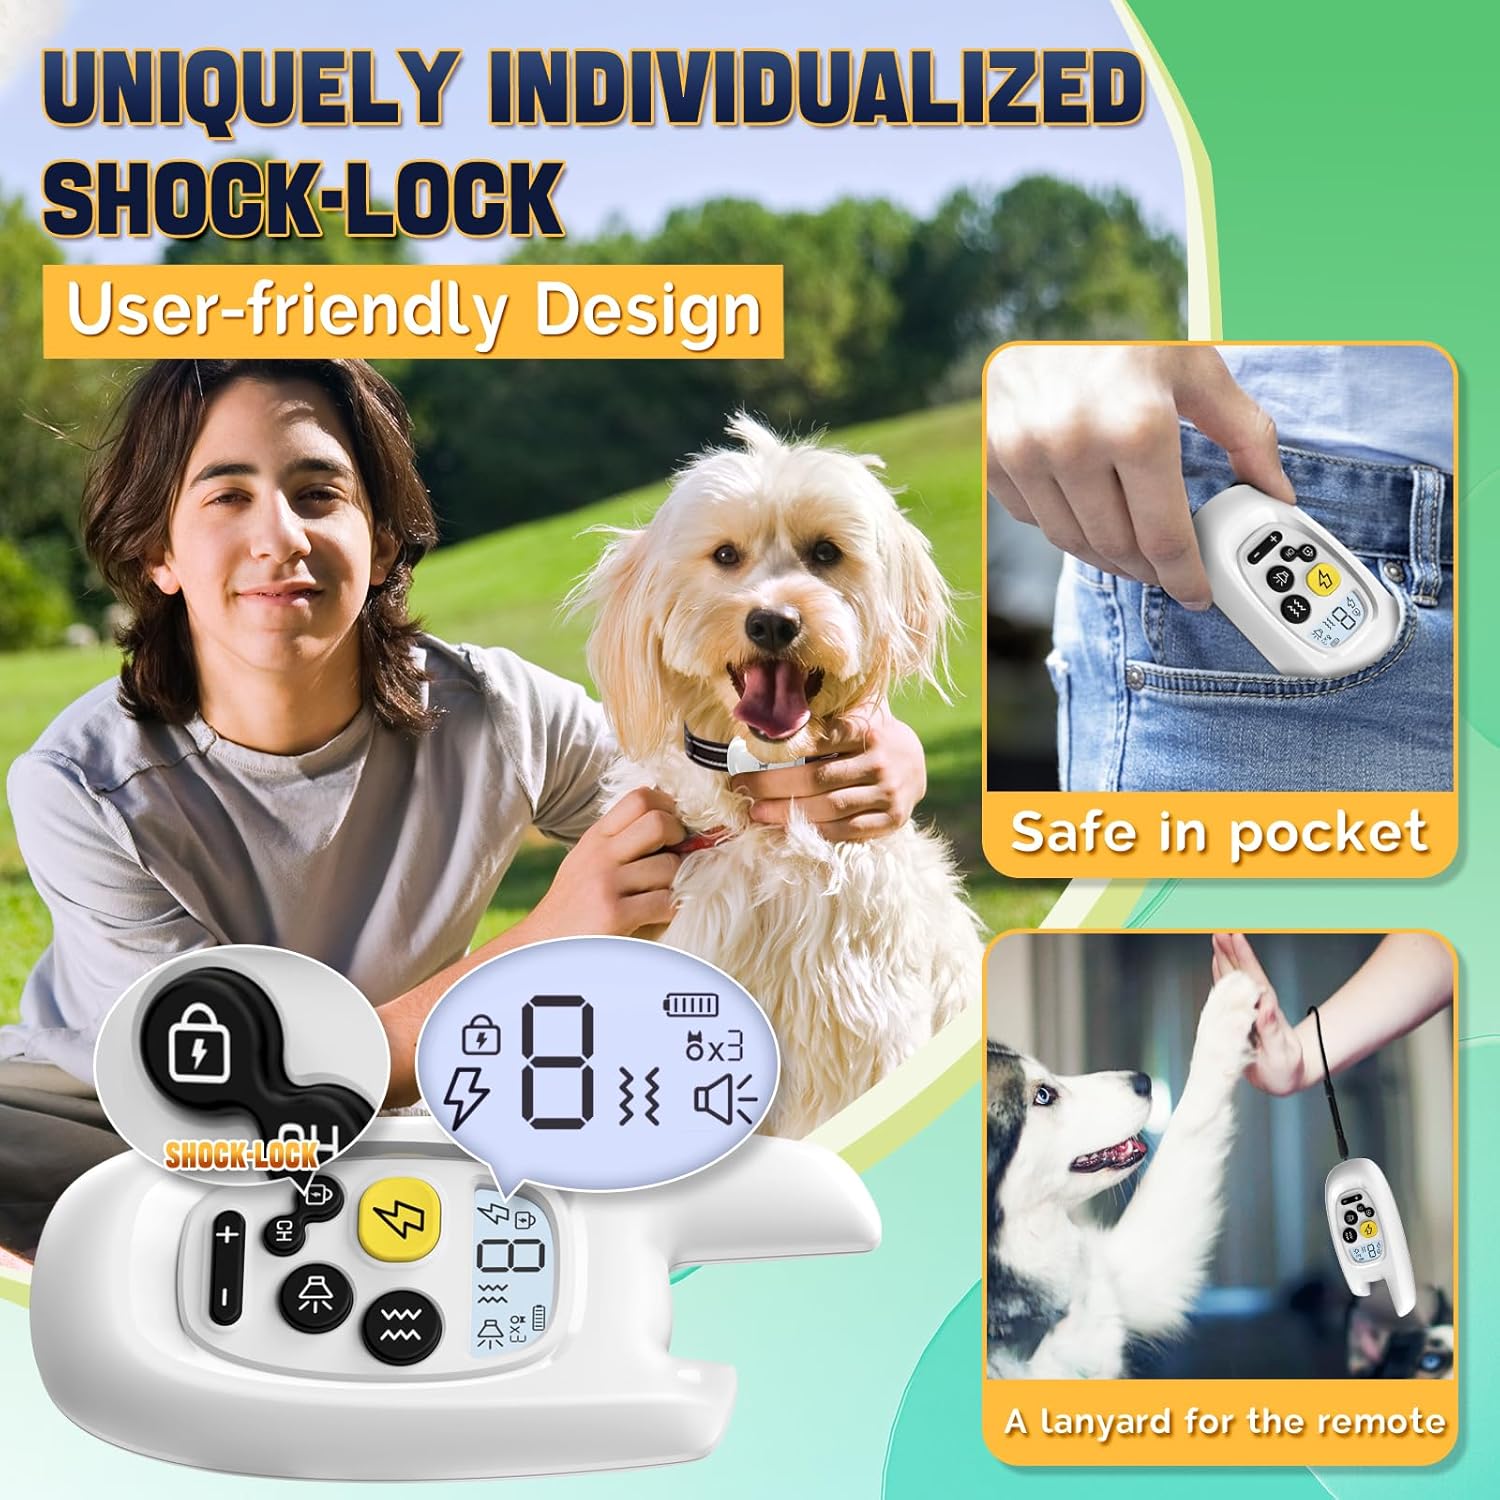
Image: The remote control is designed for user convenience, fitting securely in a pocket and featuring a lanyard for easy carrying.
Receiver Collar Features
- Contact Points: Deliver static correction and vibration.
- LED Indicator: Shows power status, charging status, and mode activation.
- On/Off Button: Powers the receiver on or off.
- Type-C Charging Port: For recharging the receiver's battery.
5. Setup
5.1. Charging the Devices
Before first use, fully charge both the remote control and the receiver collar.
- Connect the Type-C charging cable to the charging ports on both the remote and the receiver.
- Plug the other end of the cable into a USB power source (e.g., USB power strip, computer, power bank, or power adapter).
- The LED indicator on the receiver will show charging status. The remote's screen will indicate battery status.
- Charging typically takes 2-3 hours. Once fully charged, the indicators will change (e.g., solid green LED on receiver, full battery icon on remote).

Image: Both the remote and receiver feature Type-C charging ports for convenient and rapid charging.
5.2. Attaching and Fitting the Collar
Proper fit is essential for effective training and your dog's comfort.
- Select the appropriate length of contact points (short for short-haired dogs, long for long-haired dogs) and screw them onto the receiver. Optionally, place silicone caps over the contact points for added comfort.
- Place the receiver collar around your dog's neck, ensuring the contact points are positioned underneath the neck, touching the skin.
- Adjust the nylon strap so it is snug but not too tight. You should be able to fit two fingers comfortably between the strap and your dog's neck.
- If the strap is too long, you can trim the excess and burn the end lightly to prevent fraying.
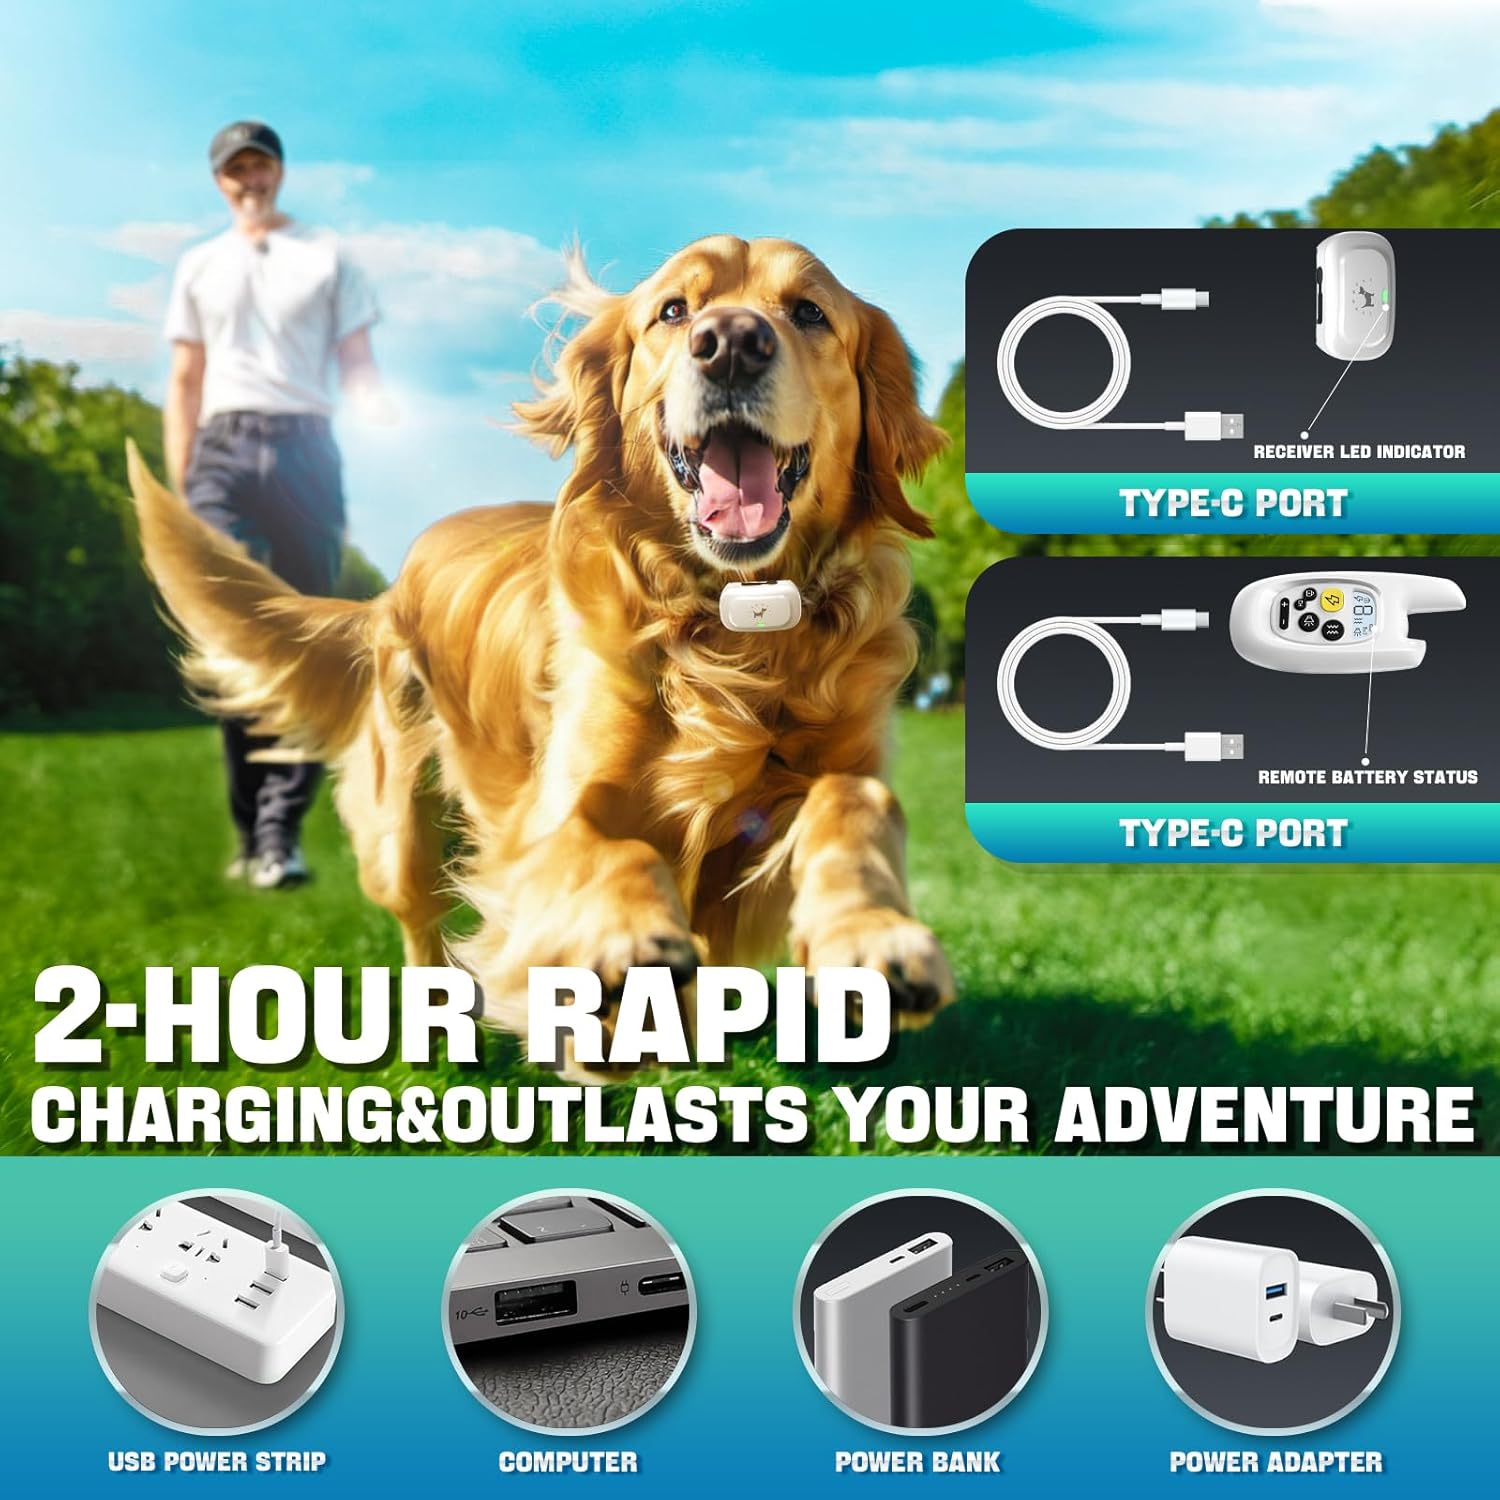
Image: Guide for properly fitting the collar and trimming the strap to suit your dog's neck size (8 to 24 inches, 20 to 120 pounds).
5.3. Pairing the Remote and Receiver
The remote and receiver need to be paired to communicate.
- Ensure the receiver is turned on.
- Press and hold the receiver's ON/OFF button for 3 seconds until you hear the first 'long beep' from the receiver.
- On the remote, select the desired channel (Channel 1, 2, or 3) using the 'CH' button.
- Press the remote's 'Vibrate/Beep' button to pair the receiver.
- You will hear a 'long beep' from the receiver, indicating successful pairing.

Image: Step-by-step instructions for pairing the remote control with the receiver collar.
6. Operating Modes
The Pedono A50 offers three training modes to suit various training needs.

Image: The remote control displays the three training modes: Beep (Standard), Vibration (Level 0-9), and Static (Level 0-9).
6.1. Beep Mode (Standard)
Press the 'Beep' button to emit an audible tone from the receiver. This mode is ideal for initial training and positive reinforcement.
6.2. Vibration Mode (Level 0-9)
Press the 'Vibration' button to activate a vibration on the receiver. Use the '+' and '-' buttons to adjust the intensity level from 0 (no vibration) to 9 (strongest vibration). This mode is effective for getting your dog's attention or correcting unwanted behaviors.
6.3. Static Mode (Level 0-9)
Press the 'Shock' button to deliver a static correction. Use the '+' and '-' buttons to adjust the intensity level from 0 (no static) to 9 (strongest static). This mode should be used as a last resort and only after your dog understands the command associated with the correction. Always start at the lowest effective level.
6.4. Shock-Lock Keypad
The remote features a unique shock-lock keypad to prevent accidental static corrections. Press the 'Lock' button to enable or disable the static correction function. When locked, the static button will not function, providing enhanced safety.

Image: The shock-lock keypad on the remote control prevents accidental static corrections, offering a user-friendly design.
7. Multi-Pet Use (Channel A)
The Pedono A50 system supports training up to three dogs simultaneously. Each dog's receiver should be paired to a different channel (Channel 1, 2, or 3).
For convenience, the remote also features a 'Channel A' (Co-frequency) mode. When selected, Channel A allows you to control all paired collars (on channels 1, 2, and 3) at the same time. This eliminates the need to switch channels repeatedly when training multiple dogs, making it ideal for multi-pet households.
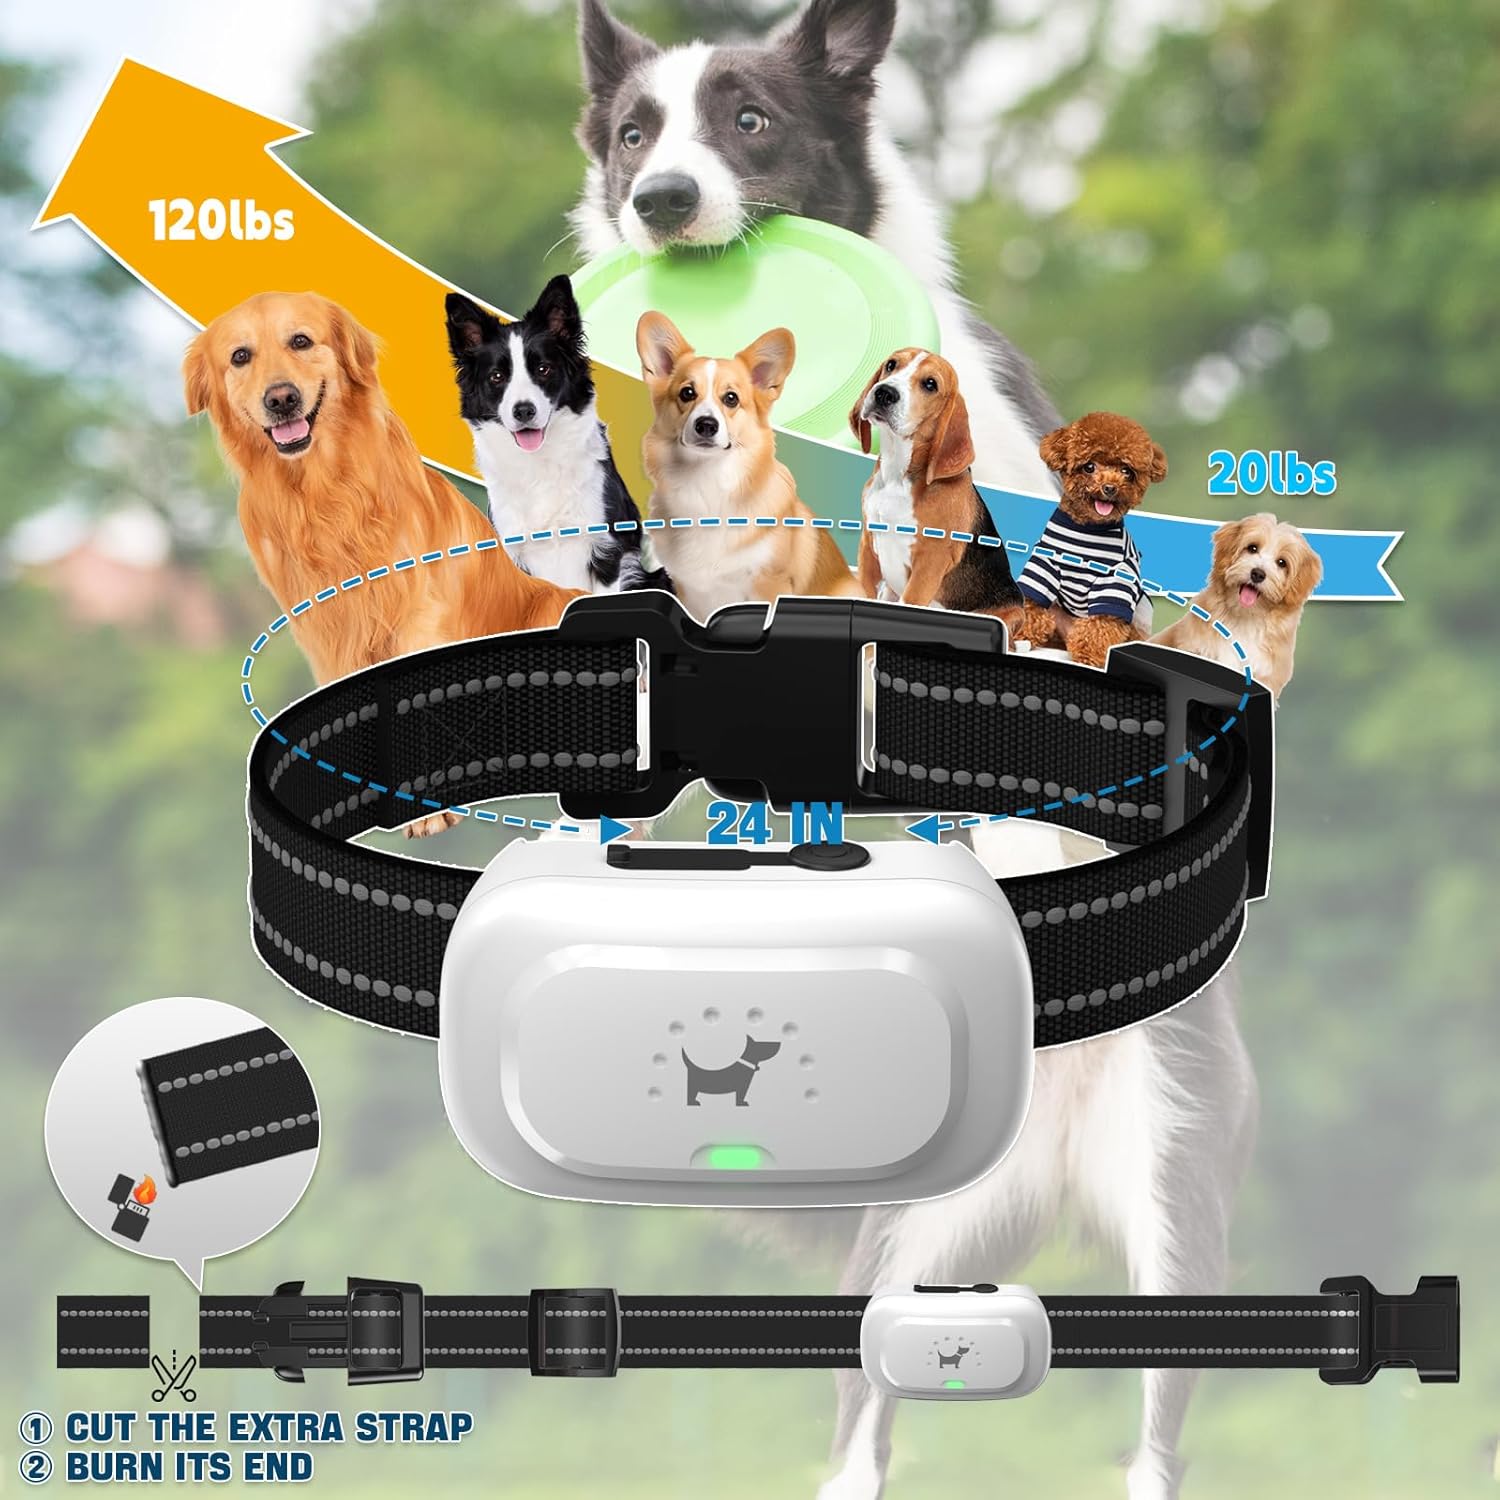
Image: Illustrates how Channel A on the remote control allows simultaneous control of multiple paired collars for efficient multi-dog training.
8. Waterproofing
The receiver collar is rated IPX7 waterproof, meaning it can withstand immersion in water up to 1 meter for 30 minutes. This allows your dog to play in water or rain without damaging the receiver.
Important Note: Always ensure the silicone plug of the Type-C charging port on the receiver is securely closed before exposing the collar to water. The remote control is not waterproof and should not be immersed in water.

Image: A dog wearing the Pedono A50 collar enjoying water activities, highlighting the receiver's IPX7 waterproof rating.
9. Battery Life and Charging
The Pedono A50 training collar system is designed for long-lasting performance.
- Charging Time: Both the remote and receiver fully charge in approximately 2-3 hours.
- Remote Standby Time: Up to 90 days.
- Remote Working Time: Approximately 30 days.
- Receiver Standby Time: Up to 20-30 days.
- Receiver Working Time: Approximately 10-15 days.
Use the provided Type-C cable for charging. Ensure the charging ports are clean and dry before connecting the cable.
10. Maintenance
- Cleaning: Regularly clean the receiver collar and contact points with a damp cloth. Ensure all components are dry before storage or charging.
- Storage: Store the device in a cool, dry place when not in use.
- Battery Care: To prolong battery life, avoid fully discharging the devices frequently. Charge them when the battery indicator shows low power.
- Collar Strap: Hand wash the nylon collar strap as needed.
11. Troubleshooting
If you encounter issues with your Pedono A50 Dog Training Collar, refer to the common problems and solutions below:
| Problem | Possible Cause & Solution |
|---|---|
| Shock function does not respond. |
|
| Receiver not turning on or holding a charge. |
|
| Remote not controlling receiver. |
|
If problems persist, please contact Pedono Customer Service for assistance.

Image: Pedono encourages customers to contact support for any quality issues, including charging failures, accidental damage, or missing accessories.
12. Specifications
| Feature | Detail |
|---|---|
| Model Number | A50 |
| Brand | Pedono |
| Training Modes | Beep (Standard), Vibration (Level 0-9), Static (Level 0-9) |
| Remote Range | Up to 1600 feet (unobstructed areas) |
| Waterproof Rating (Receiver) | IPX7 (Remote is NOT waterproof) |
| Battery Type | 2 Lithium Polymer batteries (included) |
| Charging Time | 2-3 hours |
| Collar Size Range | 8 to 24 inches (adjustable) |
| Recommended Dog Weight | 20 to 120 pounds |
| Material | Plastic (device), Nylon (strap) |
| Included Components | Remote, Receiver, Dog Clicker, Type-C Cable, Wrist Strap, User Manual, Test Light Tool, Contact Points, Silicone Caps |
13. Warranty and Support
The Pedono A50 Dog Training Collar comes with a 1-year warranty from the date of purchase.
If you experience any issues with your product, such as charging problems, accidental damage, missing accessories, or any other quality concerns, please do not hesitate to contact Pedono Customer Service. Our team is dedicated to providing support and ensuring your satisfaction.
For customer service inquiries, please refer to the contact information provided with your purchase or visit the official Pedono store on Amazon.