1. Introduction
This instruction manual provides detailed guidance for the installation, maintenance, and replacement of the YSVQHHDV Robot Vacuum Accessories Set. Regular replacement of these components is crucial for maintaining optimal cleaning performance and extending the lifespan of your robot vacuum cleaner. Please read this manual thoroughly before proceeding with any installation or maintenance tasks.
2. Package Contents
The YSVQHHDV Robot Vacuum Accessories Set typically includes the following components:
- 1 x Main Brush
- 2 x Side Brushes (3-arm design)
- 1 x HEPA Filter
- 2 x Mop Cloths
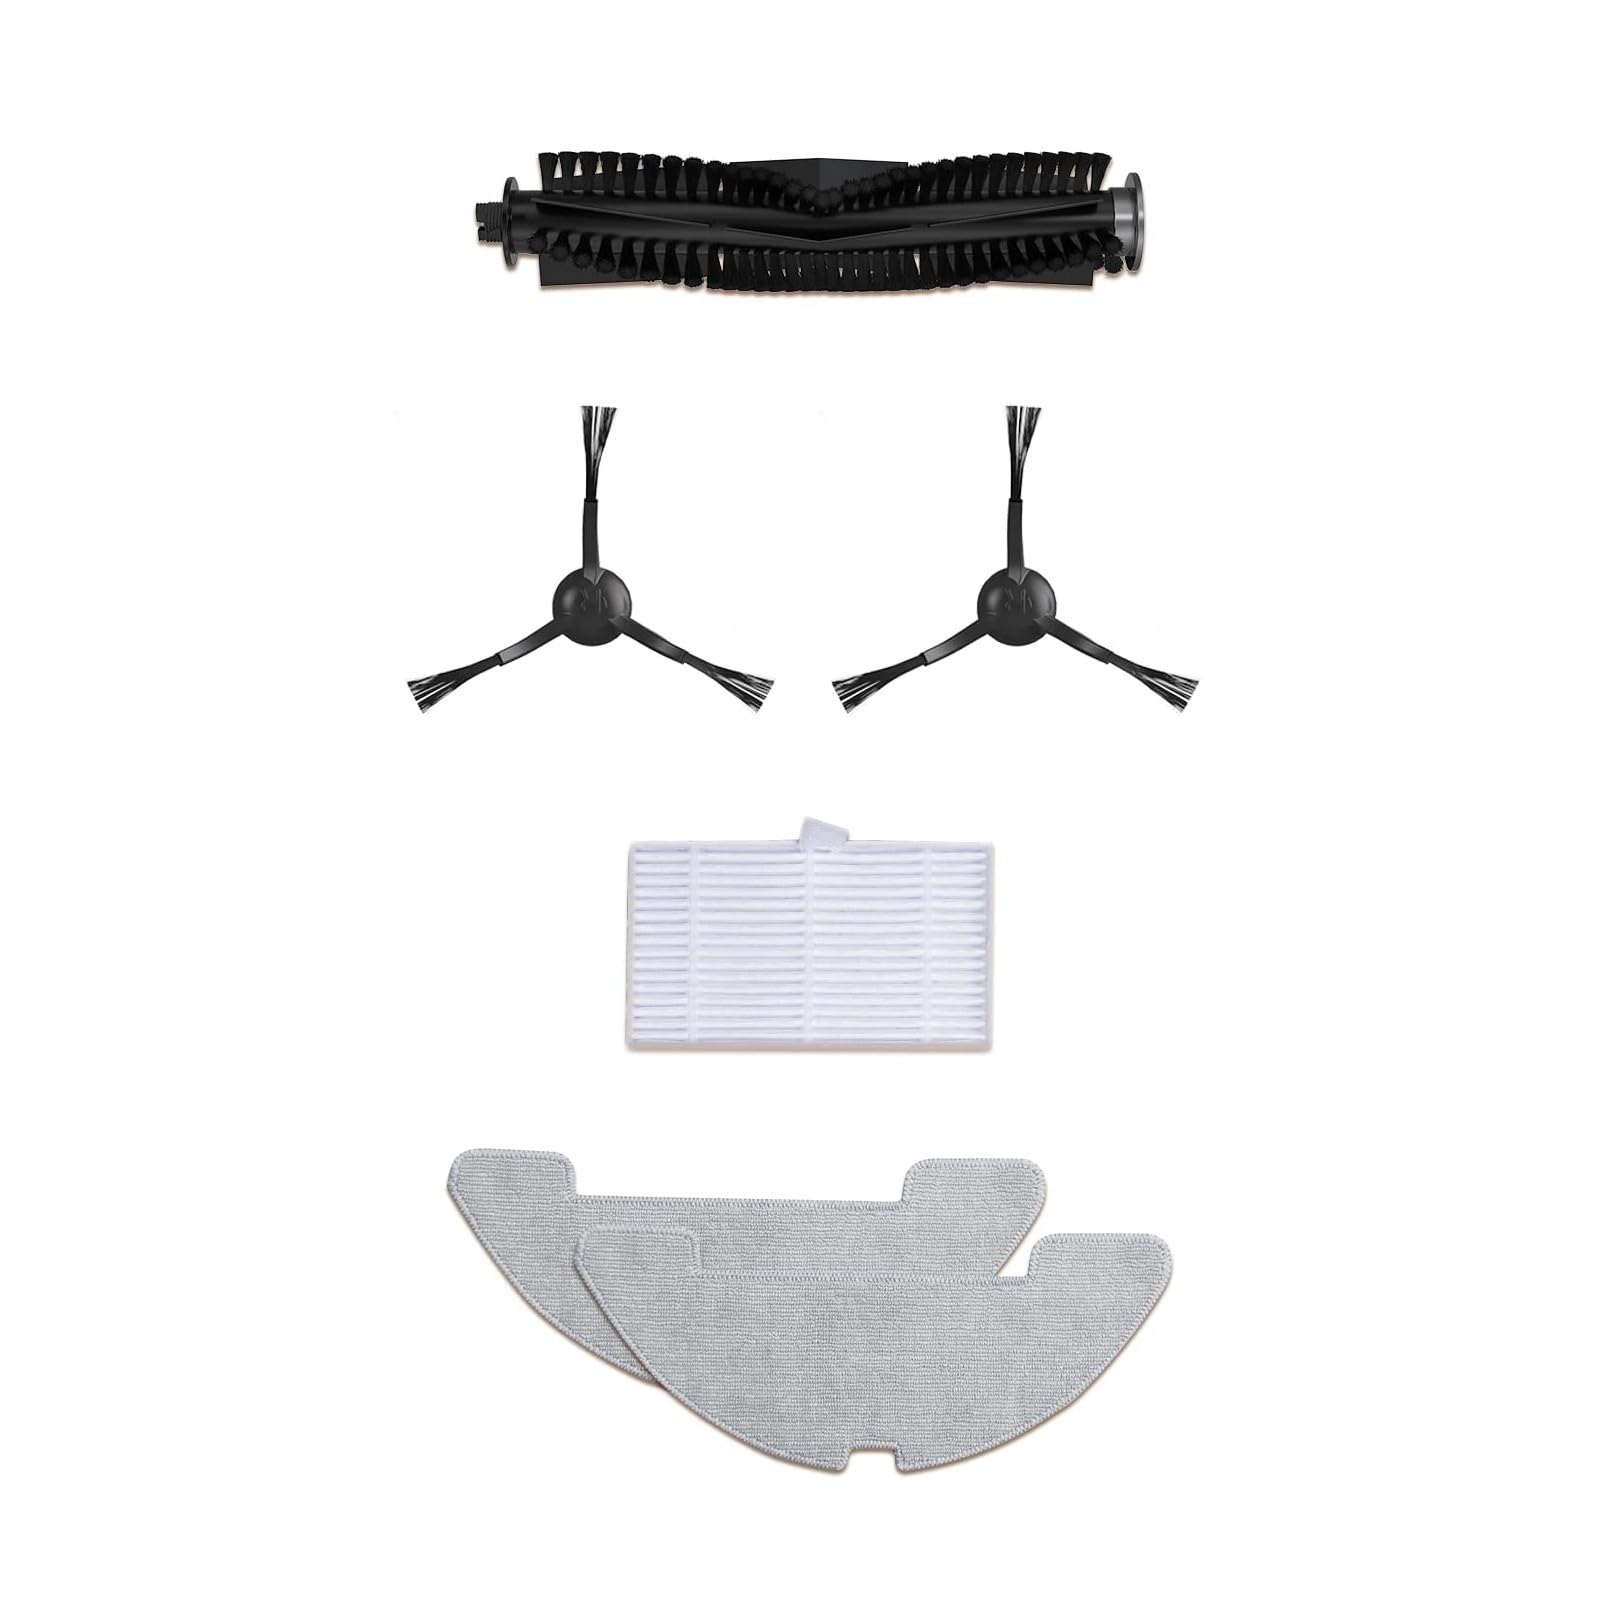
Figure 2.1: Overview of the YSVQHHDV Robot Vacuum Accessories Set components. The image displays one main brush, two three-arm side brushes, one rectangular HEPA filter, and two grey mop cloths.
3. Compatibility
This accessory set is designed to be compatible with the following robot vacuum cleaner models:
- Honiture Robot Vacuums
- Airzeen R7 Robot Vacuums
- Laresar P10 Robot Vacuums
Please verify your robot vacuum model before purchasing or installing these accessories to ensure proper fit and function.
4. Installation Guide
Before installing any accessories, ensure your robot vacuum is powered off and disconnected from its charging base.
4.1. Main Brush Installation
- Turn the robot vacuum upside down to access the brush compartment.
- Locate the main brush cover, usually secured by latches or screws. Open or remove the cover.
- Carefully remove the old main brush. Note its orientation.
- Insert the new main brush into the compartment, ensuring the ends align with the designated slots. The brush should fit snugly.
- Close the main brush cover and secure it.
Refer to Figure 2.1 for an illustration of the main brush component (the long, cylindrical brush with black bristles).
4.2. Side Brush Installation
- Turn the robot vacuum upside down.
- Locate the side brushes. They are typically held in place by a single screw or snap-on mechanism.
- If screwed, use a screwdriver to remove the screw and detach the old side brush.
- Align the new side brush with the post on the vacuum's underside. Ensure the arms are correctly oriented.
- Press the new side brush firmly into place or secure it with the screw.
Refer to Figure 2.1 for an illustration of the side brush components (the smaller, three-arm brushes).
4.3. HEPA Filter Installation
- Open the dustbin compartment of your robot vacuum.
- Remove the dustbin.
- Locate the filter housing within the dustbin. Remove the old HEPA filter.
- Insert the new HEPA filter into the designated slot, ensuring it is seated correctly to prevent air leakage.
- Reinstall the dustbin into the robot vacuum and close the compartment.
Refer to Figure 2.1 for an illustration of the HEPA filter component (the rectangular white filter).
4.4. Mop Cloth Installation
- Locate the mop cloth attachment or water tank on your robot vacuum.
- Remove the old mop cloth if one is present.
- Attach the new mop cloth to the designated area, typically using Velcro strips or a sliding mechanism. Ensure it is securely fastened.
- If applicable, fill the water tank before reattaching it to the vacuum.
Refer to Figure 2.1 for an illustration of the mop cloth components (the two grey, contoured cloths).
5. Maintenance Schedule and Tips
Regular cleaning and timely replacement of accessories are vital for optimal performance and longevity of your robot vacuum.
5.1. Main Brush Maintenance
- Cleaning Frequency: Inspect and clean weekly, or more often if pets are present.
- Cleaning Steps: Remove the main brush. Use the cleaning tool (often provided with the vacuum) or scissors to cut and remove tangled hair and debris. Wipe the brush and its bearings with a dry cloth.
- Replacement Frequency: Replace every 3-6 months, depending on usage and floor type. Signs of wear include reduced cleaning efficiency or increased noise.
5.2. Side Brush Maintenance
- Cleaning Frequency: Inspect and clean bi-weekly.
- Cleaning Steps: Remove the side brushes. Untangle any hair or debris. If bent, soak in warm water for a few minutes to reshape, then dry thoroughly.
- Replacement Frequency: Replace every 3-6 months, or if bristles are visibly worn, bent, or missing.
5.3. HEPA Filter Maintenance
- Cleaning Frequency: Tap out dust weekly. Do not wash HEPA filters with water unless explicitly stated by your vacuum's manufacturer.
- Replacement Frequency: Replace every 1-3 months, depending on usage and air quality. A clogged filter reduces suction power and cleaning effectiveness.
5.4. Mop Cloth Maintenance
- Cleaning Frequency: Wash after each use.
- Cleaning Steps: Remove the mop cloth. Hand wash with mild detergent and warm water, or machine wash on a gentle cycle. Air dry completely before reattaching.
- Replacement Frequency: Replace every 1-3 months, or when the cloth shows significant wear, staining, or reduced cleaning ability.
6. Troubleshooting
If you encounter issues after replacing accessories, consider the following:
6.1. Reduced Cleaning Efficiency
- Check Main Brush: Ensure it is installed correctly and free from tangles.
- Check Side Brushes: Verify they are securely attached and not bent or damaged.
- Check HEPA Filter: A clogged filter can reduce suction. Ensure it is clean and properly seated.
- Check Mop Cloth: If wet cleaning is inefficient, ensure the mop cloth is clean and properly saturated (if applicable).
6.2. Increased Operating Noise
- Main Brush: Ensure the main brush is free of debris and installed correctly. An improperly seated or tangled brush can cause noise.
- Side Brushes: Check for debris or damage.
- Filter: A very clogged filter can sometimes cause the motor to work harder, leading to increased noise.
6.3. Accessories Not Fitting
- Verify Compatibility: Double-check that your robot vacuum model is listed under the compatible models in Section 3.
- Correct Orientation: Ensure you are attempting to install the accessories in the correct orientation as described in Section 4.
7. Product Specifications
| Feature | Detail |
|---|---|
| Package Dimensions | 0.39 x 0.39 x 0.39 inches |
| Item Weight | 1.76 ounces |
| Manufacturer | congyili |
| ASIN | B0FC2DZTB1 |
| Item Model Number | congyili |
| Date First Available | June 5, 2025 |
8. Warranty and Support
Specific warranty information for this accessory set is not provided in this manual. For warranty details, technical support, or any inquiries regarding the product, please contact the seller directly through the platform where the purchase was made. Ensure you have your purchase details readily available when contacting support.