1. Introduction
The Dipclea Q9 is an indoor wireless security camera designed for effective surveillance through windows, eliminating the need for complex outdoor installations. This camera features an F1.0 large aperture lens, AI full-color night vision, and supports WiFi6 for stable connectivity. It offers 24/7 continuous recording, two-way audio communication, and remote monitoring capabilities, making it an ideal solution for home security.
This manual provides detailed instructions to help you set up, operate, and maintain your Dipclea Q9 camera, ensuring optimal performance and security for your premises.
2. Setup and Installation
The Dipclea Q9 camera is designed for easy, drill-free installation, primarily on windows. Follow these steps for quick setup:
2.1 Package Contents
- Dipclea Q9 Camera
- Adhesive Mounting Film
- Power Cable
- Instruction Manual
2.2 Physical Installation
- Prepare the Surface: Clean both the inner and outer surfaces of the window glass where you intend to mount the camera. Ensure the area is free of dust and grease for optimal adhesion.
- Apply Protective Film: Peel off the protective film from the adhesive pad. Carefully apply this pad to the camera lens area.
- Attach Camera to Window: Attach the camera to the desired spot on the window glass. The adhesive pad ensures a secure fit without drilling. The camera can also be mounted on glass cabinets, fish tanks, or office glass walls.
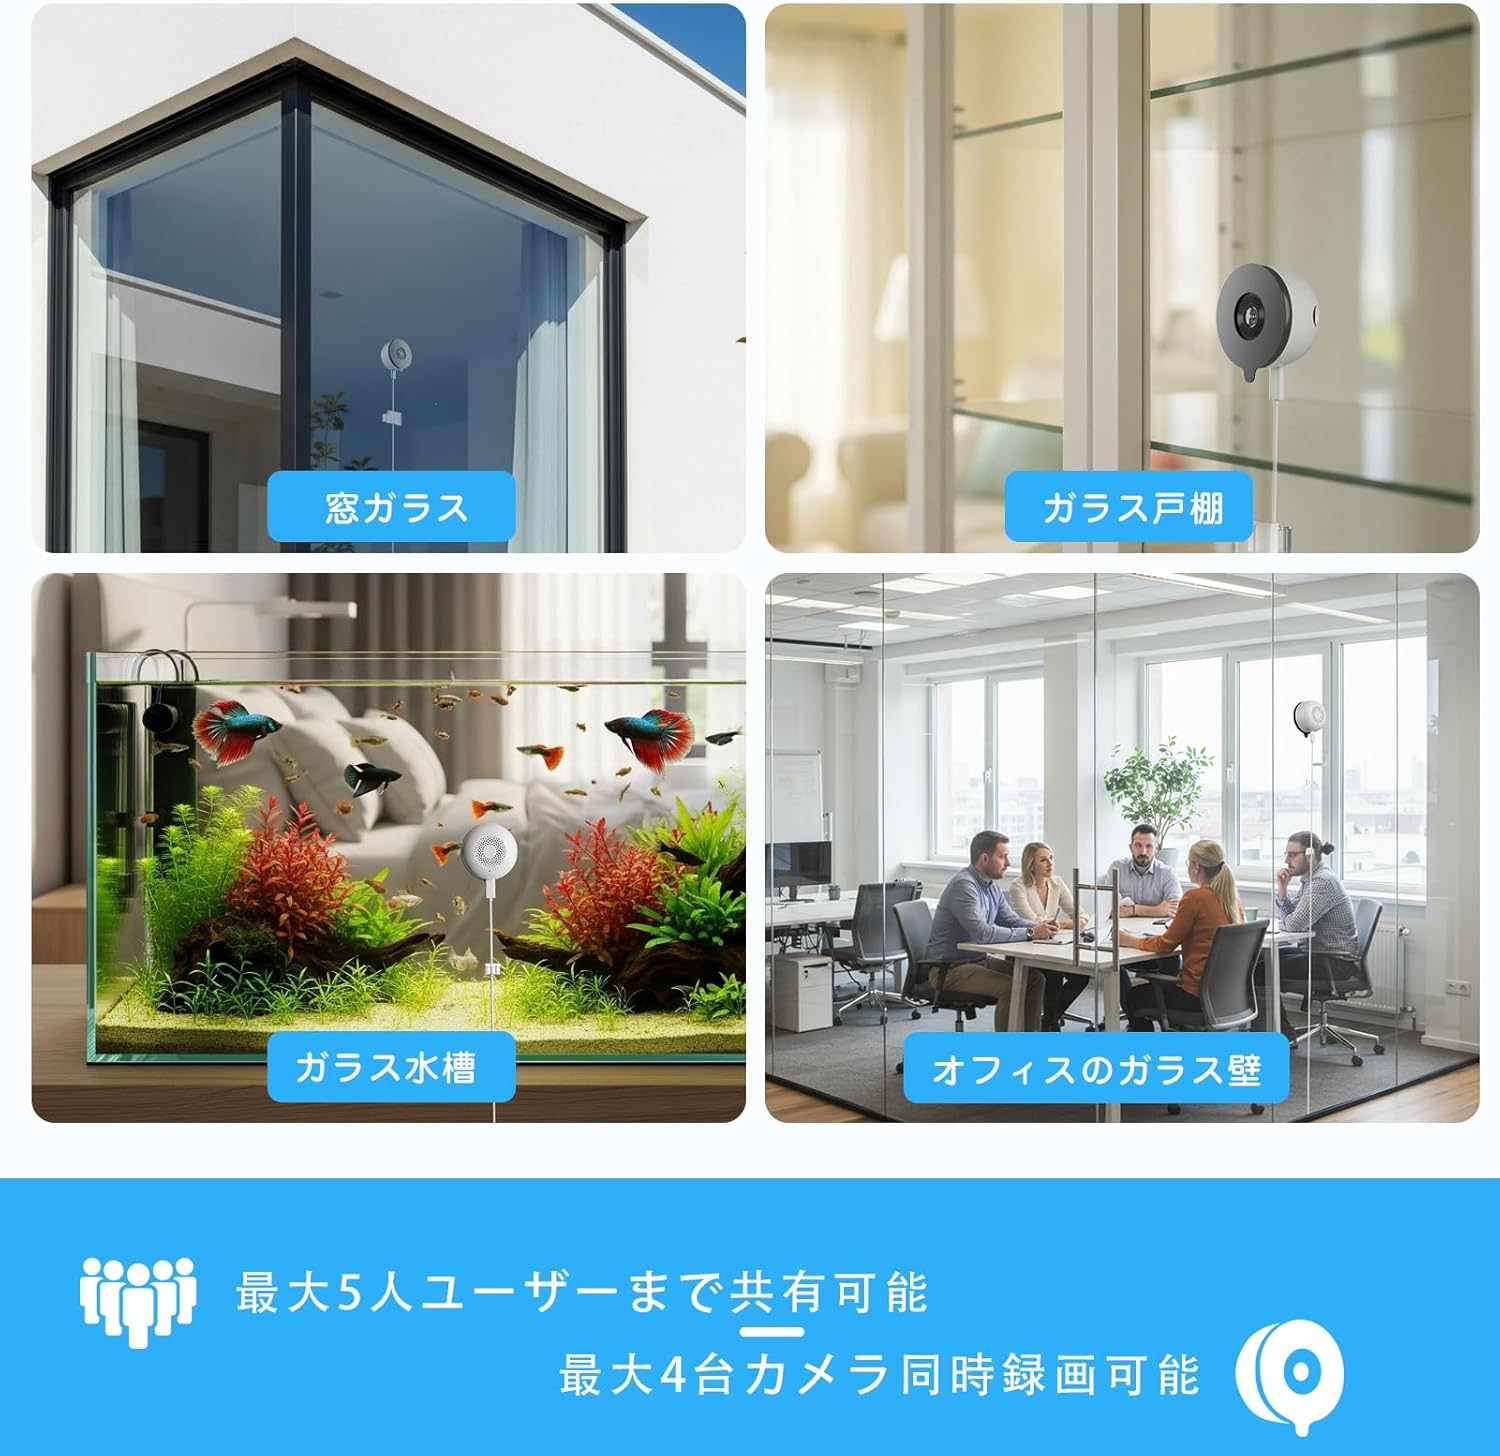
Image: The Dipclea Q9 camera is shown mounted on a window, providing a clear view of the outdoor area.

Image: A visual guide illustrating the three simple steps for camera installation: cleaning the glass, applying the adhesive film, and attaching the camera to the window.
2.3 Initial Connection (Bluetooth)
The Dipclea Q9 utilizes Bluetooth for a quick initial setup, bypassing complex Wi-Fi configurations.
- Download the App: Download the dedicated application (e.g., DIHOOM or YESKAMO as mentioned in some contexts) from your smartphone's app store (iOS or Android).
- Power On: Connect the camera to a power source.
- Bluetooth Pairing: Open the app on your smartphone. The app will automatically search for the camera via Bluetooth. Select the detected camera to initiate pairing.
- Wi-Fi Configuration: Once paired via Bluetooth, the app will guide you through connecting the camera to your home Wi-Fi network. The camera supports both 2.4GHz and 5GHz bands (WiFi6 compatible) for stable connectivity.

Image: A smartphone displaying the Bluetooth pairing interface, indicating a quick and easy connection process for the Dipclea Q9 camera.
3. Operating Instructions
After successful setup, you can access and control your Dipclea Q9 camera through the dedicated smartphone application.
3.1 Remote Monitoring
View live footage from your camera anytime, anywhere, directly from your smartphone. The app provides a real-time feed of the monitored area.

Image: A smartphone screen showing the live video feed from the Dipclea Q9 camera, demonstrating remote monitoring capabilities.
3.2 Two-Way Audio
The camera features a built-in microphone, enabling two-way communication. You can speak through your smartphone app and have your voice transmitted through the camera, and hear audio from the camera's location.
3.3 AI Detection and Alerts
The camera is equipped with AI human and motion detection capabilities. You can:
- Customize Detection Areas: Define specific zones within the camera's view for motion detection.
- Receive Notifications: Get instant alerts on your smartphone when motion or human presence is detected in the monitored areas.
- Event Recording: The camera will automatically record footage when an event is triggered.
3.4 Family Sharing
The app supports multi-account sharing, allowing up to five users to simultaneously view real-time images and access camera functions. This feature is useful for family members or small teams.
3.5 Alexa Integration
If using the DIHOOM app, the camera supports integration with Alexa. You can use voice commands like "Alexa, show me the garden" to view specific camera feeds.
4. Recording Features
The Dipclea Q9 offers flexible recording options to ensure continuous surveillance and event capture.
4.1 24/7 Continuous Recording
The camera can record continuously, 24 hours a day, 7 days a week, ensuring no moment is missed. This footage is stored and can be reviewed at any time.

Image: A visual representation of the camera's ability to record continuously, day and night, symbolized by '7x24'.
4.2 Storage Options
- Micro SD Card: Supports up to 128GB Micro SD card (sold separately). The camera features an automatic overwrite function, ensuring that recording continues even when the card is full by replacing the oldest footage.
- Cloud Storage: Cloud storage options are available for secure backup of your recordings. The first 7 days of cloud storage are typically offered for free.

Image: A graphic showing the camera's support for both cloud storage and local Micro SD card storage for recorded video data.
5. Advanced Imaging Features
The Dipclea Q9 is equipped with advanced optical technology to deliver clear and detailed images, even in challenging conditions.
5.1 F1.0 Large Aperture Lens
The camera utilizes an F1.0 large aperture lens, which gathers four times more light compared to standard F2.0 lenses. This significantly enhances image brightness and clarity, especially in low-light environments.

Image: A detailed close-up of the Dipclea Q9 camera's F1.0 large aperture lens, highlighting its advanced optical design.
5.2 AI Full-Color Night Vision
Combined with AI enhancement technology, the F1.0 lens enables the camera to capture highly detailed and bright images in complete darkness (down to 0.01 lux, equivalent to less than moonlight). This results in rich, realistic color reproduction, surpassing the capabilities of conventional security cameras that typically require 0.1 lux.
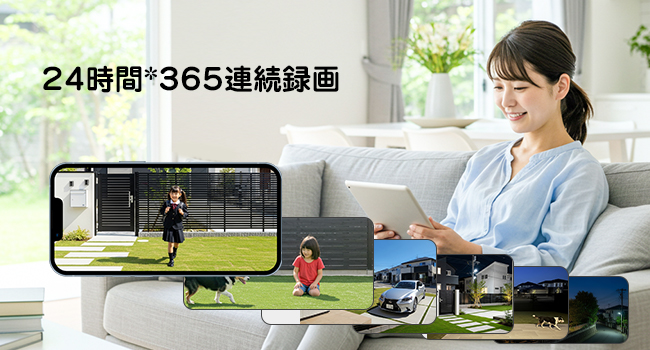
Image: A comparison showing the superior clarity and color of Dipclea's F1.0 AI-enhanced night vision compared to other standard night vision cameras.
5.3 Anti-Reflection Technology
The camera incorporates anti-reflection features to overcome common issues with window-through surveillance, such as glare and reflections from indoor lighting or sunlight. This ensures clear outdoor footage regardless of lighting conditions.

Image: A diagram explaining how anti-reflection coating works, alongside a visual comparison of an image with and without reflection, demonstrating improved clarity.
5.4 High Resolution and Wide Angle
The Dipclea Q9 records in 2K resolution (2304x1296P), providing sharp and detailed images. Its 105° ultra-wide-angle lens covers a broad area, and a 4x digital zoom allows for closer inspection of distant objects up to 15 meters.

Image: A demonstration of the camera's clear glass-through shooting capability, highlighting its 3MP resolution and 4x zoom feature for detailed views.
6. Connectivity
The Dipclea Q9 camera features advanced wireless connectivity for reliable performance.
6.1 WiFi6 Support
Upgraded to WiFi6 technology, the camera offers a more stable signal compared to older WiFi4 technology. It supports both 2.4GHz and 5GHz Wi-Fi bands, ensuring compatibility with various home network environments and reducing connection drops.

Image: A technical diagram showcasing the camera's dual-band WiFi6 connectivity, emphasizing faster data transfer on 5GHz and longer reception distance on 2.4GHz.
6.2 AP Mode
The camera includes an AP (Access Point) mode, allowing direct connection to your smartphone within a 15-meter range even without an internet connection. This is useful for local monitoring or initial setup in areas without Wi-Fi.
Note: In AP mode, internet-based features like remote viewing and notifications will not be available.
7. Specifications
| Feature | Detail |
|---|---|
| Product Model Number | Q9 |
| Brand | Dipclea |
| Product Dimensions | 6 x 6 x 6 cm |
| Product Weight | 140 g |
| Indoor/Outdoor Use | Indoor |
| Connection Protocol | Wi-Fi (WiFi6, 2.4GHz/5GHz) |
| Mounting Type | Window Mount / Wall Mount |
| Video Capture Resolution | 1296p (2K, 2304x1296P) |
| Lens Aperture | F1.0 |
| Viewing Angle | 105° Ultra-Wide Angle |
| Digital Zoom | 4x |
| Storage | Micro SD (up to 128GB, sold separately), Cloud Storage |
| Included Components | Instruction Manual |
8. Maintenance
To ensure the longevity and optimal performance of your Dipclea Q9 camera, follow these simple maintenance guidelines:
- Clean the Lens: Regularly wipe the camera lens with a soft, lint-free cloth to remove dust or smudges that may affect image quality.
- Clean Window Surface: Periodically clean the window surface where the camera is mounted to maintain clear viewing and strong adhesion.
- Power Supply: Ensure the camera is connected to a stable power source. Avoid frequent power interruptions.
- Software Updates: Check the app regularly for firmware updates. Keeping the camera's software up-to-date ensures access to the latest features and security enhancements.
- Storage Management: If using a Micro SD card, periodically check its status and ensure it is functioning correctly. Manage cloud storage as needed.
9. Troubleshooting
If you encounter issues with your Dipclea Q9 camera, refer to the following common solutions:
- Camera Not Connecting to Wi-Fi:
- Ensure your Wi-Fi network is active and the camera is within range.
- Verify that you have entered the correct Wi-Fi password.
- Check if your router supports both 2.4GHz and 5GHz bands, and try connecting to the other band if one fails.
- Restart your router and the camera.
- Poor Image Quality:
- Clean the camera lens and the window surface.
- Ensure there are no obstructions in front of the lens.
- Check the app settings to ensure the resolution is set to the highest quality.
- No Notifications:
- Verify that motion detection and notification settings are enabled in the app.
- Check your smartphone's notification settings for the camera app.
- Ensure the camera has a stable internet connection.
- Two-Way Audio Not Working:
- Check the microphone and speaker settings in the app.
- Ensure your smartphone's microphone is enabled for the app.
- Verify the camera's internet connection.
- Camera Not Recording:
- If using an SD card, ensure it is properly inserted and not full. Format the SD card if necessary (this will erase all data).
- Check cloud storage subscription status if applicable.
- Verify recording schedules or event detection settings in the app.
If these steps do not resolve the issue, please contact customer support.
10. Warranty and Support
10.1 Manufacturer's Warranty
The Dipclea Q9 camera comes with a 2-year manufacturer's warranty from the date of purchase. This warranty covers defects in materials and workmanship under normal use.
Note: The product has obtained Japan's technical compliance certification, ensuring its safety and reliability.
10.2 Customer Support
Should you encounter any problems with your product within the warranty period, or have any questions, please do not hesitate to contact us. We are committed to providing prompt assistance and will replace the product quickly if a defect occurs.
Contact Methods:
- Refer to the email address provided in the instruction manual included with your product.
- Contact us via LINE@:
@479isilg - Through your Amazon order history, contact our company directly.