Wancle CBG-9000
Wancle Conical Burr Coffee Grinder Electric CBG-9000 User Manual
Model: CBG-9000
1. Important Safety Instructions
Please read all instructions carefully before using the Wancle Conical Burr Coffee Grinder. Retain this manual for future reference.
- Ensure the power supply voltage matches the rating label on the appliance.
- Do not immerse the motor base, cord, or plug in water or other liquids.
- Unplug from the outlet when not in use, before assembling or disassembling parts, and before cleaning.
- Avoid contact with moving parts.
- Do not operate any appliance with a damaged cord or plug, or after the appliance malfunctions or has been damaged in any manner.
- The use of attachments not recommended or sold by the manufacturer may cause fire, electric shock, or injury.
- Do not use outdoors.
- Do not let the cord hang over the edge of a table or counter, or touch hot surfaces.
- This appliance is for household use only.
- Always ensure the bean hopper lid and ground coffee container are properly in place before operating.
2. Product Overview and Components
Familiarize yourself with the parts of your Wancle Conical Burr Coffee Grinder.
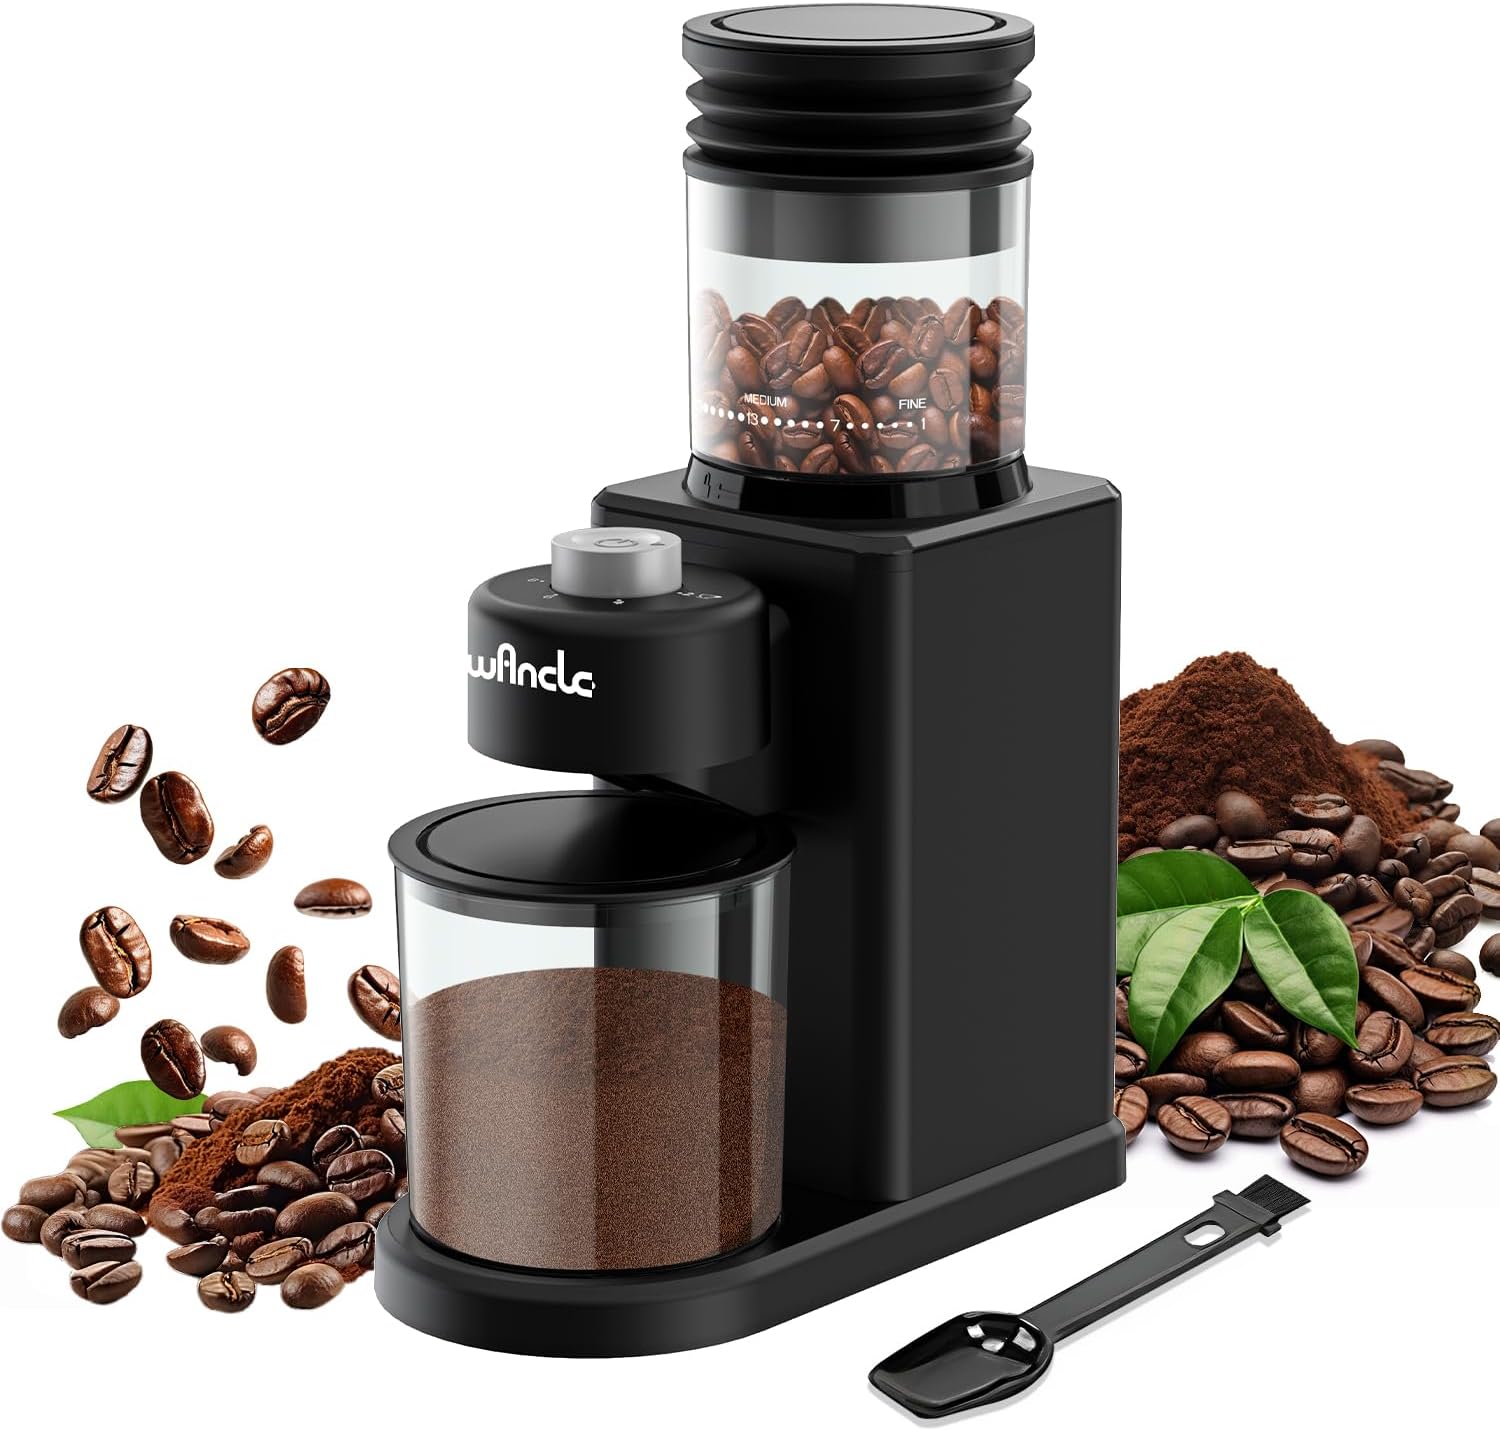
Image: The Wancle Conical Burr Coffee Grinder, showing the bean hopper, grinding unit, ground coffee container, and a cleaning brush/scoop.
- Bean Hopper: Holds whole coffee beans. Features grind size markings.
- Grind Size Selector: Adjustable ring on the bean hopper to choose desired grind fineness.
- Grinding Unit: Houses the conical burrs for precise grinding.
- Control Dial: Used to select the number of cups (grinding duration).
- Start/Stop Button: Initiates and pauses the grinding process.
- Ground Coffee Container: Collects the freshly ground coffee.
- Cleaning Brush/Scoop: Included for maintenance and measuring.
- Powder Blower: Integrated feature to minimize static and clear residual grounds.
3. Setup and First Use
- Unpack: Carefully remove all components from the packaging.
- Clean: Wash the bean hopper, ground coffee container, and lid with warm soapy water. Rinse thoroughly and dry completely before assembly. The grinding unit should be wiped with a damp cloth.
- Assemble:
- Place the grinding unit onto the motor base, ensuring it is securely locked.
- Attach the bean hopper to the top of the grinding unit. Rotate it clockwise until it clicks into place.
- Insert the ground coffee container into its designated slot at the front of the grinder.
- Placement: Place the grinder on a stable, dry, and level surface.
- Connect Power: Plug the power cord into a suitable electrical outlet.
4. Operating Instructions
4.1 Filling the Bean Hopper
Open the bean hopper lid and pour whole roasted coffee beans into the hopper. The hopper has an 80g capacity, expandable to 120g. Do not overfill.

Image: Illustration of the bean hopper capacity (80g-120g) and the 2-12 cup selection for grinding.
4.2 Selecting Grind Size
The grinder offers 25 grind settings, from extra fine to extra coarse. Rotate the bean hopper to align the desired grind setting with the indicator. Refer to the table below for recommended settings.

Image: Visual guide to 25 grind settings, indicating appropriate ranges for different coffee brewing methods.
| Brew Method | Grind Fineness | Setting Range |
|---|---|---|
| Italian Espresso | Extra Fine | 1-4 |
| Moka Pot | Slightly Fine | 5-8 |
| Siphon Pot | Fine | 9-12 |
| Drip Pot | Medium | 13-17 |
| Hand Pouring | Coarse | 18-21 |
| French Press | Extra Coarse | 22-25 |
4.3 Selecting Cup Quantity
Use the control dial to select the desired number of cups (2-12). This adjusts the grinding duration to produce the appropriate amount of ground coffee.
4.4 Grinding Process
- Ensure the bean hopper is filled and the grind size and cup quantity are selected.
- Press the Start/Stop button to begin grinding. The grinder will operate until the selected quantity is reached or the button is pressed again.
- After grinding, remove the ground coffee container.
5. Cleaning and Maintenance
Regular cleaning ensures optimal performance and extends the lifespan of your grinder.
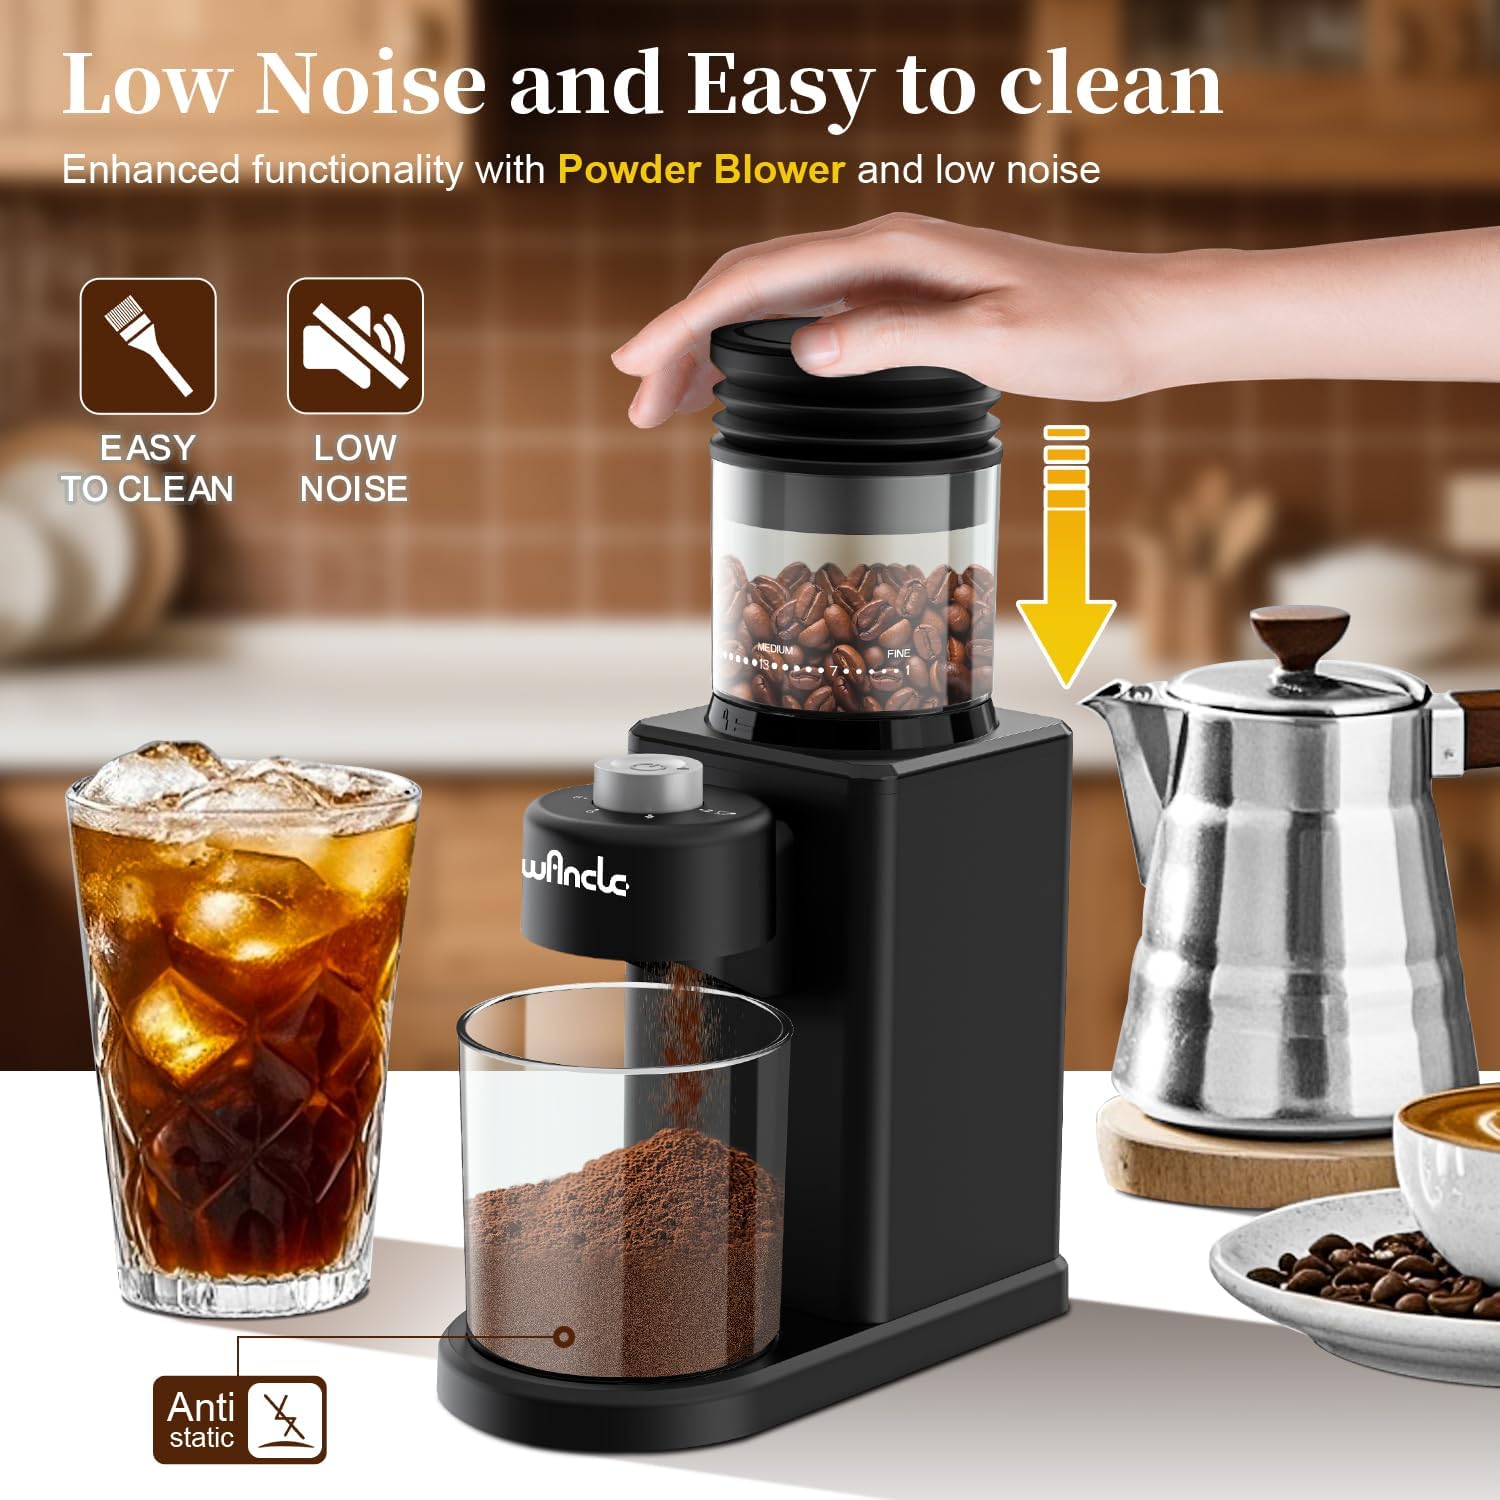
Image: The Wancle grinder highlighting its easy-to-clean design and low noise operation, with a hand pressing the powder blower.
- Unplug: Always unplug the grinder from the power outlet before cleaning.
- Disassemble: Remove the bean hopper and ground coffee container.
- Clean Bean Hopper and Ground Coffee Container: Wash these parts with warm soapy water. Rinse thoroughly and dry completely.
- Clean Grinding Unit:
- Use the provided cleaning brush to remove any residual coffee grounds from the burrs and the grinding chamber.
- The upper burr can be removed for deeper cleaning. Rotate it counter-clockwise and lift it out. Clean both burrs with the brush.
- Wipe the exterior of the motor base with a damp cloth. Do not immerse the motor base in water.
- Powder Blower: After grinding, you can press the top of the bean hopper (powder blower) a few times to clear any remaining grounds and minimize static buildup.
- Reassemble: Ensure all parts are completely dry before reassembling the grinder.
6. Troubleshooting
Refer to this section for common issues and their solutions.
| Problem | Possible Cause | Solution |
|---|---|---|
| Grinder does not start. | Not plugged in; bean hopper or ground coffee container not properly installed; power outage. | Ensure the grinder is plugged in. Check that the bean hopper and ground coffee container are securely locked in place. Verify power supply. |
| Grinder stops during operation. | Overheat protection activated; beans jammed; insufficient beans. | Unplug and allow to cool for 30 minutes. Check for foreign objects or jammed beans and clear them. Ensure sufficient beans are in the hopper. |
| Inconsistent grind. | Burrs are dirty or worn; incorrect grind setting. | Clean the burrs thoroughly. Adjust the grind setting to a finer or coarser option as needed. |
| Excessive static or mess. | Dry air conditions; residual grounds. | Use the powder blower feature after grinding. Ensure all parts are clean and dry. |
7. Specifications
- Model: CBG-9000
- Brand: Wancle
- Voltage: 120V (Note: Product specifications mention 220V (DC) but feature bullets state 120V. Please verify with product label.)
- Power: 200W
- Product Dimensions: 3.7"L x 10.8"W x 7.5"H
- Item Weight: 2.88 pounds
- Bean Capacity: 80g (Expandable to 120g)
- Cup Capacity: 2-12 Cups
- Grind Settings: 25

Image: The Wancle grinder with its compact dimensions (3.7"L x 10.8"W x 7.5"H) highlighted.
8. Warranty and Support
Wancle products are designed for reliability and performance. For warranty information, technical support, or service inquiries, please refer to the contact information provided with your purchase or visit the official Wancle website.
Keep your purchase receipt as proof of purchase for any warranty claims.
Ask a question about this manual
Ask about setup, troubleshooting, compatibility, parts, safety, or missing instructions. Manuals+ will review the question and use this page’s manual context to help answer it.