Introduction
The BeAndge Telegraph STEM Kit (Model BA1027) provides an engaging hands-on experience for children aged 8 and up to explore basic principles of electricity, communication, and engineering. This kit allows users to build a functional telegraph system that transmits coded messages using both sound and light signals. It is designed to foster logical thinking, creativity, and teamwork skills through practical application.

This image illustrates the educational benefits of the BeAndge Telegraph STEM Kit, highlighting how it fosters hands-on learning, logical thinking, creativity, and teamwork.
Safety Information
WARNING: CHOKING HAZARD - This toy contains small parts and functional sharp edges/points. It is not suitable for children under 3 years of age. Adult supervision is required during assembly and operation to ensure safety.
What's in the Box
Each BeAndge Telegraph STEM Kit includes the following components:
- Transmitter unit components
- Receiver unit components
- Buzzer
- LED (Light Emitting Diode)
- Connecting Wires
- Mini Screwdriver
- Instruction Manual
Note: 4xAA batteries are required per set and are not included.

A clear view of all the parts included in one BeAndge Telegraph STEM Kit, showing the circuit boards, battery compartments, connecting wires, LED lights, buzzers, and switches necessary for assembly.
Setup Instructions
Follow these steps to assemble your BeAndge Telegraph STEM Kit:
- Unpack Components: Carefully remove all parts from the packaging. Refer to the 'What's in the Box' section to identify each component.
- Battery Installation: Each telegraph unit (transmitter and receiver) requires 4xAA batteries. Open the battery compartment on each unit and insert the batteries, ensuring correct polarity (+/-). Close the compartment securely.
- Connect Wires: Using the provided mini screwdriver, connect the wires to their respective terminals on the circuit boards. Ensure connections are firm.
- Connect the buzzer to the designated terminals on the receiver unit.
- Connect the LED to its designated terminals on the receiver unit.
- Connect the main power wires from the battery holder to the circuit board.
- Secure Components: Attach the circuit boards and battery holders to the base plates as indicated in the manual. Ensure all components are stable.
- Final Check: Before operation, double-check all wire connections and battery installations to ensure they are secure and correctly oriented.

This image shows a parent guiding a child through the assembly process of the telegraph kit, demonstrating the use of the included manual for step-by-step construction.
Operating Instructions
Once assembled, your BeAndge Telegraph STEM Kit is ready for use:
- Power On: Ensure batteries are installed. The telegraph system is typically active once all connections are made and batteries are inserted.
- Sending Messages: Use the button on the transmitter unit to send signals. Pressing the button completes a circuit, sending an electrical pulse.
- A short press represents a 'dot' (dit).
- A longer press represents a 'dash' (dah).
- These dots and dashes form Morse code, which can be used to spell out words.
- Receiving Messages: The receiver unit will translate the electrical pulses into audible beeps from the buzzer and flashes from the LED.
- A short beep/flash indicates a 'dot'.
- A longer beep/flash indicates a 'dash'.
- Practice decoding messages by listening to the sounds and observing the light patterns.
- Communication: With two assembled kits, two individuals can communicate by sending and receiving Morse code messages.
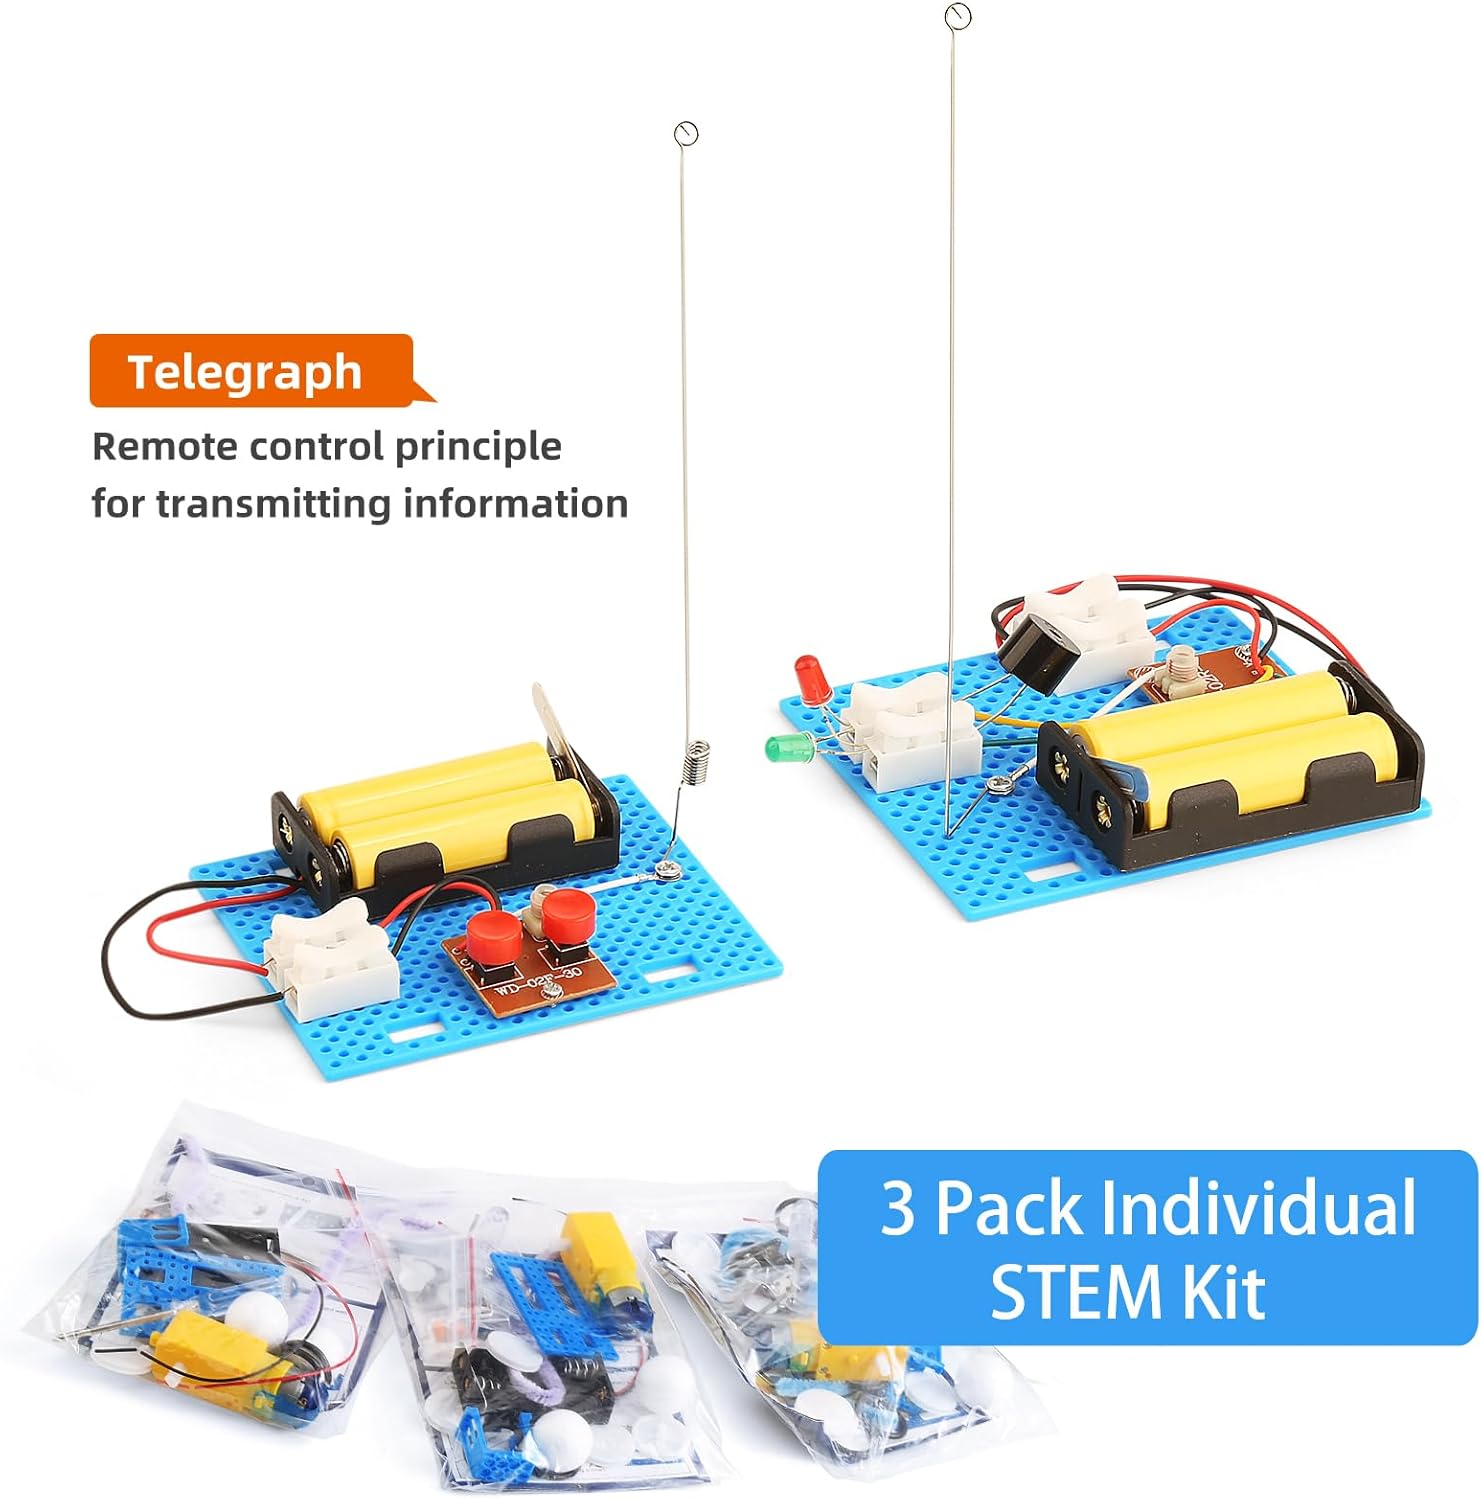
This image displays three complete telegraph kits, each featuring a transmitter and receiver unit, illustrating the final product after successful assembly and ready for sending messages.
Maintenance
To ensure the longevity and proper function of your telegraph kit:
- Cleaning: Wipe components with a dry, soft cloth. Avoid using liquids or abrasive cleaners.
- Storage: Store the kit in a dry place, away from direct sunlight and extreme temperatures.
- Battery Care: Remove batteries if the kit will not be used for an extended period to prevent leakage. Replace old batteries with new ones when performance declines.
Troubleshooting
If your BeAndge Telegraph STEM Kit is not functioning as expected, consider the following:
- Kit Not Turning On:
- Check if batteries are installed correctly with the correct polarity.
- Ensure batteries are fresh and not depleted.
- Verify all wire connections are secure and not loose.
- No Sound or Light from Receiver:
- Confirm the transmitter button is being pressed correctly.
- Check the connections for the buzzer and LED on the receiver unit.
- Ensure the receiver unit has its own set of working batteries.
- Intermittent Connection:
- Inspect all wires for damage or fraying.
- Tighten any loose screw terminals.
- Ensure components are firmly seated on the base.
Specifications
Key specifications for the BeAndge Telegraph STEM Kit (Model BA1027):
| Product Dimensions | 3.5 x 3 x 8.2 inches |
| Item Weight | 9.6 ounces |
| Model Number | BA1027 |
| Manufacturer Recommended Age | 8 years and up |
| Batteries Required | 4xAA per kit (not included) |
Warranty and Support
Specific warranty details for the BeAndge Telegraph STEM Kit (Model BA1027) are not provided in the product information. For any support inquiries or issues, please refer to the contact information provided by the retailer or manufacturer at the point of purchase.