1. Introduction
Thank you for choosing the FULODE STUDIO22+ UHF Wireless In-Ear Monitor System. This system provides reliable, high-quality mono audio monitoring for musicians, singers, and stage performers. Operating on the UHF 550–579.25 MHz band with 100 preset frequencies, it ensures stable performance and freedom of movement. Please read this manual thoroughly before operation to ensure proper setup and optimal performance.
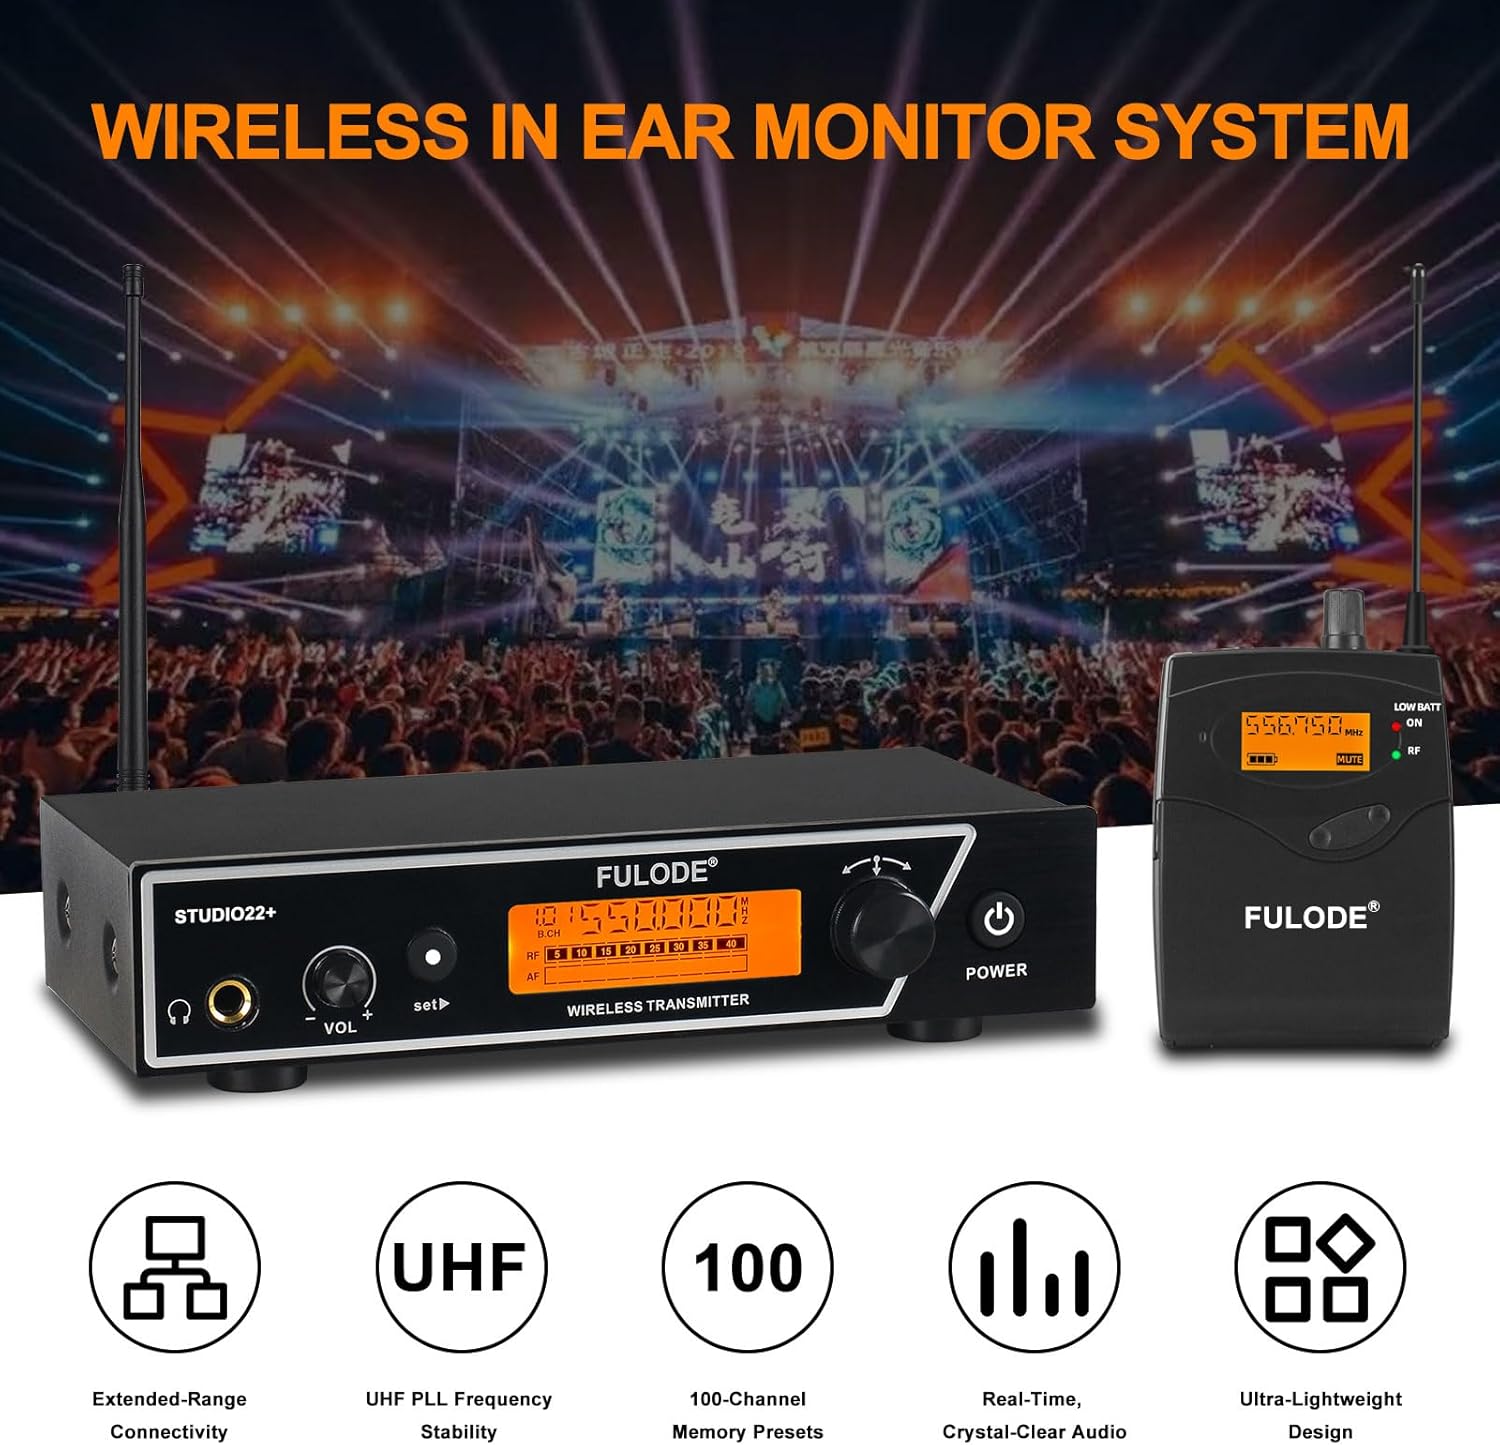
Image 1.1: Overview of the FULODE STUDIO22+ Wireless In-Ear Monitor System, showing the transmitter, bodypack receiver, and in-ear headphones.
2. Package Contents
Verify that all items listed below are included in your package:
- 1 x Wireless Desktop Transmitter
- 2 x Wireless Bodypack Receivers
- 2 x In-Ear Headphones
- 2 x Enhanced Antennas
- 1 x 6.35mm Audio Cable
- 1 x Power Adapter
- 1 x User Manual (this document)

Image 2.1: Detailed view of the package contents and dimensions of the main units.
3. Setup Instructions
3.1. Transmitter Setup
- Connect Power: Connect the included power adapter to the DC 12V input on the rear panel of the transmitter and plug it into a power outlet.
- Attach Antennas: Screw the two enhanced antennas onto the ANTENNA connectors on the rear panel of the transmitter. Position them vertically for optimal signal reception.
- Audio Input: Connect your audio source (e.g., mixer, audio interface) to the transmitter's audio input jacks (AF IN L/R) using XLR or 6.35mm cables. The rear panel also provides a 6.35mm mixed input and an independent audio input.
- Rackmount Installation (Optional): If desired, attach the included rackmount brackets to the sides of the transmitter for secure installation in a standard equipment rack.
3.2. Bodypack Receiver Setup
- Install Batteries: Open the battery compartment on the back of the bodypack receiver and insert two AA batteries (not included), ensuring correct polarity.
- Connect Earphones: Plug the in-ear monitoring headphones into the 3.5mm PHONES jack on the top of the bodypack receiver.

Image 3.1: Wiring schematic illustrating connections for the transmitter, audio mixer, and bodypack receiver.
4. Operating Instructions
4.1. Power On/Off
- Transmitter: Long press the POWER button on the front panel to turn the unit on or off.
- Bodypack Receiver: Rotate the VOLUME potentiometer clockwise to turn the receiver on. Rotate counter-clockwise until it clicks to turn off.
4.2. Frequency and Channel Selection
The system operates on 100 preset frequencies within the UHF 550–579.25 MHz band. Ensure the transmitter and receiver are set to the same group and channel for proper communication.
4.2.1. Transmitter Channel Setting
- Group Selection: Press the SET button once. Use the left or right arrow buttons to select the desired group.
- Channel Selection: Press the SET button twice. Use the left or right arrow buttons to select the desired channel within the chosen group.

Image 4.1: Controls and display for adjusting group and channel settings on the transmitter unit.
4.2.2. Bodypack Receiver Channel Setting
- Group Selection: Press the SET button once. Use the UP/DOWN buttons to select the desired group. Press ESC to confirm or exit.
- Channel Selection: Press the SET button twice. Use the UP/DOWN buttons to select the desired channel. Press ESC to confirm or exit.

Image 4.2: Controls and display for adjusting group and channel settings on the bodypack receiver.
4.3. Volume Adjustment
Adjust the monitoring volume using the VOLUME potentiometer on the bodypack receiver. Start with a low volume and gradually increase to a comfortable listening level.
4.4. Monitoring Performance
The system provides stable mono in-ear monitoring with clear, low-latency audio. The centered sound helps reduce phase issues, feedback, and ambient interference, making it ideal for reliable stage monitoring, vocals, and speech applications. The wireless range extends up to 262 feet (80 meters) in optimal conditions.

Image 4.3: Illustration of the system's wireless reception range, indicating up to 260ft.
5. Maintenance
- Cleaning: Use a soft, dry cloth to clean the surfaces of the transmitter and receivers. Avoid using liquid cleaners or solvents.
- Storage: Store the system in a dry, cool place away from direct sunlight and extreme temperatures.
- Battery Care: Remove batteries from the bodypack receivers if the system will not be used for an extended period to prevent leakage and damage.
- Antenna Care: Handle antennas carefully to avoid bending or breaking.
6. Troubleshooting
| Problem | Possible Cause | Solution |
|---|---|---|
| No sound from earphones |
|
|
| Interference or poor signal |
|
|
| Low battery indicator on receiver | Batteries are running low | Replace with fresh AA batteries. |
7. Specifications
| Feature | Description |
|---|---|
| Brand | FULODE |
| Model Number | STUDIO22+ |
| Wireless Technology | UHF |
| Frequency Band | 550–579.25 MHz |
| Number of Frequencies | 100 preset frequencies |
| Wireless Range | Up to 262 feet (80 meters) |
| Ear Placement | In Ear |
| Impedance | 16 Ohms |
| Enclosure Material | ABS Plastic, Metal |
| Receiver Power | 2 x AA Batteries (not included) |
| Headphone Jack | 3.5 mm (Receiver), 6.35 mm (Transmitter output) |
| Additional Features | Volume Control, LCD Screen, Rackmount capability |
8. Warranty Information
The FULODE STUDIO22+ In-Ear Monitor System comes with a 2-Year Warranty from the date of purchase. This warranty covers manufacturing defects and ensures the product is free from defects in material and workmanship under normal use. Please retain your proof of purchase for warranty claims. For detailed warranty terms and conditions, please refer to the official FULODE website or contact customer support.
9. Customer Support
If you encounter any issues or have questions regarding your FULODE STUDIO22+ In-Ear Monitor System that are not addressed in this manual, please contact FULODE customer support. You can typically find contact information on the official FULODE website or through the retailer where you purchased the product.
Please have your model number (STUDIO22+) and purchase details ready when contacting support.