1. Introduction
This manual provides detailed instructions for the safe and effective operation of your Aicevoos R9-60M Laser Distance Meter. Please read this manual thoroughly before using the device to ensure proper functionality and to prevent damage or injury. Keep this manual for future reference.

Figure 1: Front view of the Aicevoos R9-60M Laser Distance Meter, showing its display and control buttons.
2. Safety Information
WARNING: Laser Radiation. Avoid direct eye exposure.
- Do not stare directly into the laser beam.
- Do not aim the laser beam at people or animals.
- Do not disassemble or modify the device. Repairs should only be performed by authorized personnel.
- Keep the device out of reach of children.
- Use the device only for its intended purpose as described in this manual.
- Avoid using the device in explosive environments or near flammable materials.
3. Product Overview and Features
The Aicevoos R9-60M is a versatile 3-in-1 measurement tool combining a laser distance meter, a traditional tape measure, and a cross laser with an electronic angle device. It is designed for accurate and efficient measurements in various applications.
3.1 Key Features
- Laser Distance Measurement: Measures distances up to 60 meters (196 feet) with high accuracy.
- Integrated Tape Rule: A physical tape measure extends up to 2 meters (6.56 feet) for short-distance measurements.
- Cross Laser Function: Projects horizontal and vertical laser lines for alignment tasks.
- Electronic Angle Device: Provides real-time angle readings to assist with leveling and alignment.
- Automatic Calculations: Supports single distance, continuous measurement, area, volume, and Pythagorean calculations.
- Data Storage: Stores up to 99 sets of measurement data.
- Unit Switching: Easily switch between meters (m), inches (in), feet (ft), and feet/inches.
- Rechargeable Battery: Built-in 600mAh lithium battery for extended use.
- Multiple Reference Points: Measurements can be taken from the front or rear of the device.
- Auto Power Off: Conserves battery life by automatically shutting down after a period of inactivity.
3.2 Feature Details with Illustrations
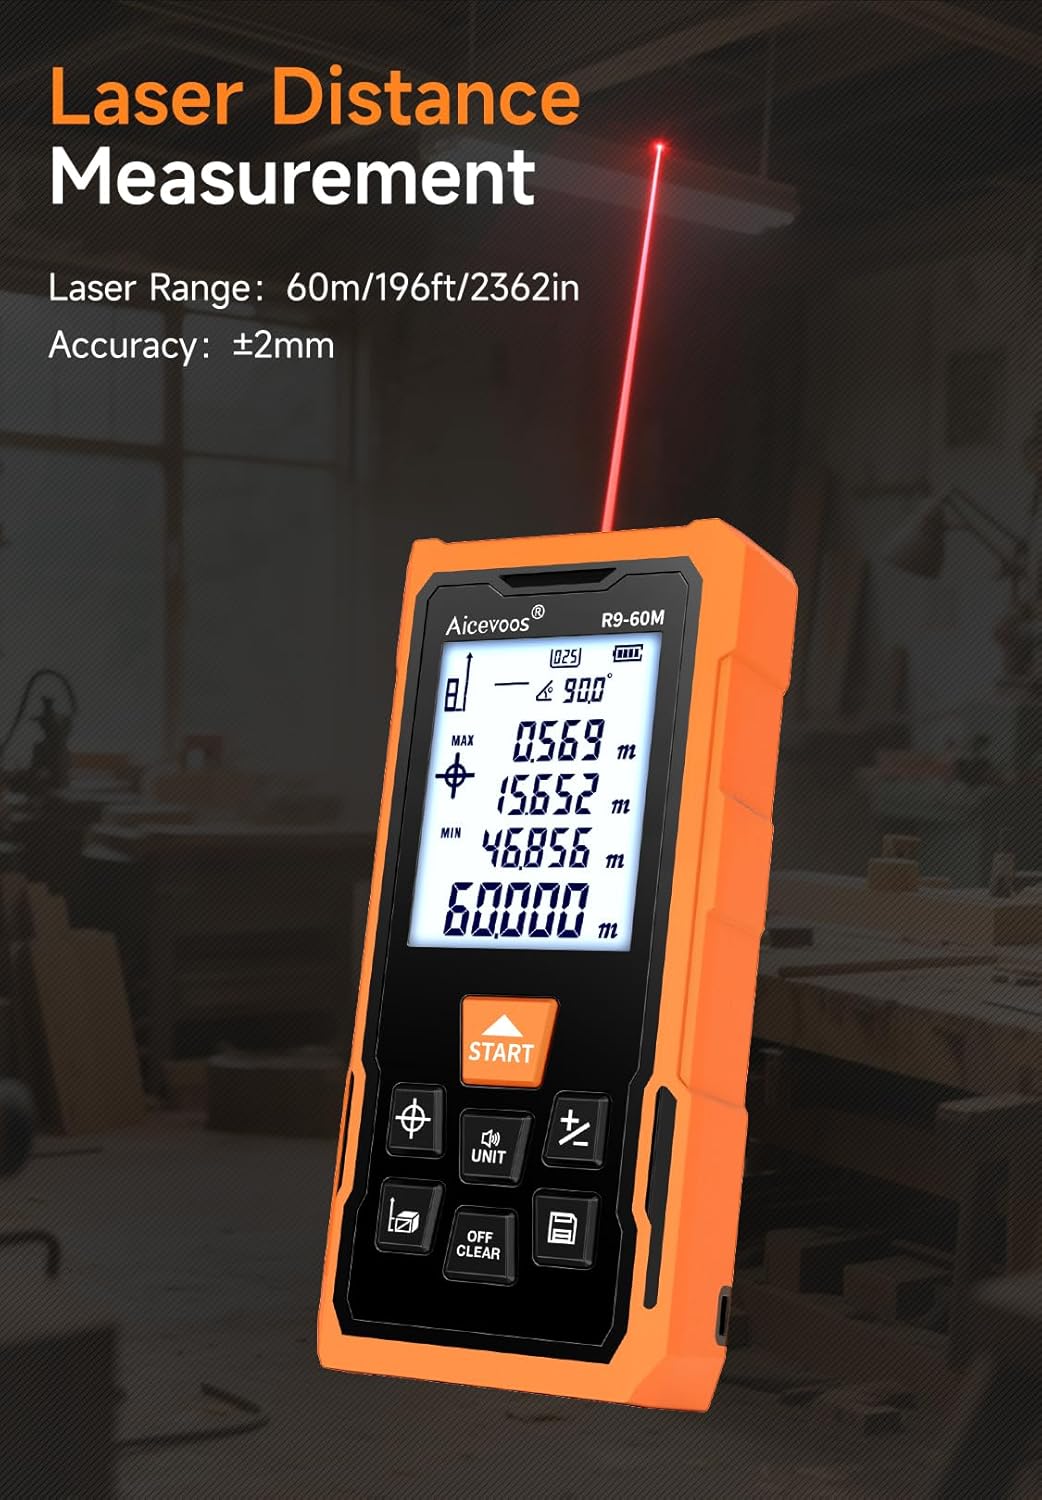
Figure 2: The device performing a laser distance measurement, showing the laser beam extending from the unit. The laser range is up to 60m with an accuracy of ±2mm.

Figure 3: The cross laser function projects precise horizontal and vertical lines, useful for alignment tasks. Laser line accuracy is ±1mm.

Figure 4: The integrated tape rule, extending up to 2 meters (6.56 feet), provides a convenient option for short-distance measurements.

Figure 5: The electronic angle device displays the current tilt angle, assisting in determining horizontal or vertical positions. Here, it shows a 45-degree angle.

Figure 6: The device features a USB-C charging port for its 600mAh rechargeable lithium battery, ensuring convenient power replenishment.

Figure 7: The device incorporates filtering algorithms and spectroscopic lens technology for rapid and accurate measurement responses.

Figure 8: The data storage function allows saving up to 99 sets of measurement data for later review.
4. Setup
4.1 Charging the Battery
Before first use, fully charge the device. Connect the provided USB cable to the device's USB-C port and to a standard USB power adapter (not included). The battery indicator on the display will show charging status.
4.2 Power On/Off
- To power on: Press the START button.
- To power off: Press and hold the OFF/CLEAR button for a few seconds, or the device will automatically power off after a period of inactivity.
5. Operating Instructions
5.1 Unit Switching
Press the UNIT button to cycle through measurement units: meters (m), inches (in), feet (ft), and feet/inches (ft'in").
5.2 Reference Point Selection
The device can measure from its front edge or its rear edge. Press the reference point button (often indicated by an icon with an arrow pointing from the front or rear) to switch between these modes. The current reference point is displayed on the screen.
5.3 Laser Distance Measurement
- Power on the device.
- Ensure the desired reference point is selected.
- Point the laser at the target.
- Press the START button once for a single measurement. The result will appear on the display.
- For continuous measurement, press and hold the START button. The display will update in real-time, showing current, maximum, and minimum values. Press START again to stop.
5.4 Tape Rule Measurement
Pull out the yellow tape measure from the side of the device. The tape extends up to 2 meters. Use it like a traditional tape measure for short-distance measurements. The digital display does not integrate with the tape rule measurement.
5.5 Cross Laser Function
Press the cross laser button (often indicated by a target or crosshair icon) to activate the horizontal and vertical laser lines. These lines can be used for visual alignment on surfaces.
5.6 Electronic Angle Measurement
The device automatically displays the current tilt angle on the screen. Place the device on a surface or against an object to read its angle relative to the horizontal plane.
5.7 Area and Volume Calculations
- Press the function button (often indicated by a square or cube icon) to select Area or Volume mode.
- Follow the on-screen prompts to take the required measurements (e.g., length, width for area; length, width, height for volume).
- The device will automatically calculate and display the result.
5.8 Pythagorean Measurement
This mode allows indirect measurement of heights or distances using the Pythagorean theorem. Press the function button to select Pythagorean mode and follow the on-screen instructions to take the necessary measurements (e.g., two sides of a right triangle to find the third).
5.9 Data Storage and Recall
- After a measurement, the result is automatically stored. The device can store up to 99 sets of data.
- Press the memory button (often indicated by a folder or list icon) to view stored measurements. Use the arrow buttons (if available) to navigate through the records.
6. Maintenance
- Cleaning: Use a soft, damp cloth to clean the device. Do not use abrasive cleaners or solvents.
- Storage: Store the device in a dry, cool place, away from direct sunlight and extreme temperatures.
- Battery: Recharge the battery regularly, even if the device is not in use, to maintain battery health.
- Calibration: If you suspect accuracy issues, refer to the troubleshooting section or contact customer support.
7. Troubleshooting
- Device does not power on: Ensure the battery is charged. Connect to a USB charger and try again.
- Inaccurate measurements: Check the selected reference point. Ensure the laser target is clear and stable. Perform a calibration if available (refer to specific device settings or contact support).
- Laser beam not visible: The laser beam may be difficult to see in bright sunlight. Use a target plate if available.
- Error message on display: Refer to the specific error code in the full user manual (if provided separately) or contact customer support.
8. Specifications
| Specification | Value |
|---|---|
| Product Name | R9-60M |
| Laser Range | 60m / 196ft / 2362in |
| Ruler Range (Tape Measure) | 2m / 6.56ft / 78.7in |
| Cross Laser | Yes |
| Data Storage | Up to 99 sets |
| Electronic Angle Device | Yes |
| Battery | 600mAh Lithium Battery (Rechargeable) |
| Addition/Subtraction Measurement | Yes |
| Pythagorean Measurement | Yes |
| Area/Volume Measurement | Yes |
| Continuous Measurement | Yes |
| Dimensions (Package) | 16.1 x 9.1 x 5.8 cm |
| Weight (Package) | 290 g |
| Material | Plastic |
| Color | Orange |
9. Package Contents
The following items are included in the product package:
- Aicevoos R9-60M Laser Distance Meter (1 pc)
- User's Manual (1 pc)
- Cloth Bag (1 pc)
- Lanyard (1 pc)
- USB Cable (1 pc)

Figure 9: Illustration of the items included in the Aicevoos R9-60M product package.
10. Warranty and Support
For warranty information and technical support, please refer to the documentation provided with your purchase or contact Aicevoos customer service. Keep your proof of purchase for warranty claims.