Important Safety Instructions
Please read all instructions carefully before using the appliance and retain for future reference.
- Always ensure the blender is unplugged from the power outlet before assembling, disassembling, or cleaning.
- Do not immerse the motor base in water or any other liquid. Clean with a damp cloth only.
- Keep hands and utensils out of the pitcher while blending to reduce the risk of severe personal injury and/or damage to the blender.
- Never blend hot liquids in the blender. Allow hot ingredients to cool before processing.
- Ensure the lid is securely locked in place before operating the blender.
- Do not operate the blender with a damaged cord or plug, or after the appliance malfunctions or has been damaged in any manner.
- This appliance is not intended for use by persons (including children) with reduced physical, sensory or mental capabilities, or lack of experience and knowledge, unless they have been given supervision or instruction concerning use of the appliance by a person responsible for their safety.
- Supervise children to ensure they do not play with the appliance.
- Place the blender on a stable, level, and dry surface during operation.
Product Overview
The Pukomc KT-Y10 Countertop Blender is a high-performance kitchen appliance designed for efficient blending of various ingredients. Featuring a powerful motor and durable 6-leaf 3D blades, it is ideal for preparing smoothies, crushing ice, making juices, and more. Its generous 65-ounce capacity makes it suitable for both individual and family use.

Setup and Assembly
Follow these steps to correctly set up your Pukomc KT-Y10 Countertop Blender:
- Unpack Components: Carefully remove all parts from the packaging. Ensure all components are present: motor base, pitcher (cup), lid, and tamper (if included).
- Position the Motor Base: Place the motor base on a clean, dry, and stable countertop surface. Ensure there is adequate space around the blender for ventilation.
- Clean the Pitcher and Lid: Before first use, wash the pitcher and lid with warm, soapy water. Rinse thoroughly and dry.
- Assemble the Pitcher: Place the clean pitcher onto the motor base. Align the pitcher's base with the motor base's coupling until it sits securely.
- Secure the Lid: Place the lid onto the pitcher and ensure it is firmly seated and locked. The lid typically has a pour spout and a removable cap for adding ingredients during blending.
- Connect to Power: Plug the blender's power cord into a grounded electrical outlet. The blender is now ready for use.
Operating Instructions
Controls and Functions
Refer to Figure 1 for a visual guide to the control panel.
- Screen: Displays the remaining blending time during operation.
- Preset (Dial): A 9-level rotary dial for manual speed adjustment, allowing precise control over blending consistency. Turn clockwise to increase speed, counter-clockwise to decrease.
- Power (Start/Stop): Press this button to start or stop the blending process.
- Pulse: Press and hold for short bursts of high-speed blending. Useful for chopping, quick mixing, or breaking down stubborn ingredients. Release to stop.
- Models (Pre-settings): Dedicated buttons for specific blending tasks:
- Ice Crush: Optimized for crushing ice cubes into fine snow.
- Smoothie: Ideal for blending fruits and vegetables into smooth, consistent drinks.
- Ice Cream: Designed for making creamy frozen desserts.
- Juice: Perfect for extracting fresh juices from fruits and vegetables.
General Operation
- Add Ingredients: Place your desired ingredients into the pitcher. For best results, add liquids first, then soft ingredients, followed by harder ingredients and ice. Do not exceed the maximum fill line.
- Secure Lid: Place the lid firmly onto the pitcher and ensure it is locked.
- Select Mode or Speed:
- For pre-programmed blending, press one of the Models buttons (Ice Crush, Smoothie, Ice Cream, Juice). The blender will run for a preset time and speed.
- For manual control, turn the Preset dial to your desired speed level.
- Start Blending: Press the Power (Start/Stop) button to begin blending. If using a preset, the blender will automatically stop when the cycle is complete. For manual blending, press Power again to stop.
- Use Pulse (Optional): For quick bursts of power or to break down larger pieces, press and hold the Pulse button. Release to stop.
- Serve: Once blending is complete, unplug the blender, remove the lid, and pour out the contents.
Maintenance and Cleaning
Regular cleaning ensures optimal performance and extends the life of your blender.
Self-Cleaning Function
- After use, rinse the pitcher.
- Fill the pitcher halfway with warm water and add a drop of dish soap.
- Secure the lid and place the pitcher on the motor base.
- Run the blender on a low speed setting for 30-60 seconds.
- Empty the pitcher and rinse thoroughly with clean water.
Manual Cleaning
- Motor Base: Unplug the blender. Wipe the motor base with a damp cloth. Do not immerse the motor base in water or any other liquid.
- Pitcher and Lid: For a more thorough clean, disassemble the pitcher and lid. Wash them with warm, soapy water using a non-abrasive sponge or brush. Be extremely careful when handling the blades as they are very sharp. Rinse all parts thoroughly.
Dishwasher Safe Components
The pitcher and lid are dishwasher safe. It is recommended to place them on the top rack of your dishwasher for best results.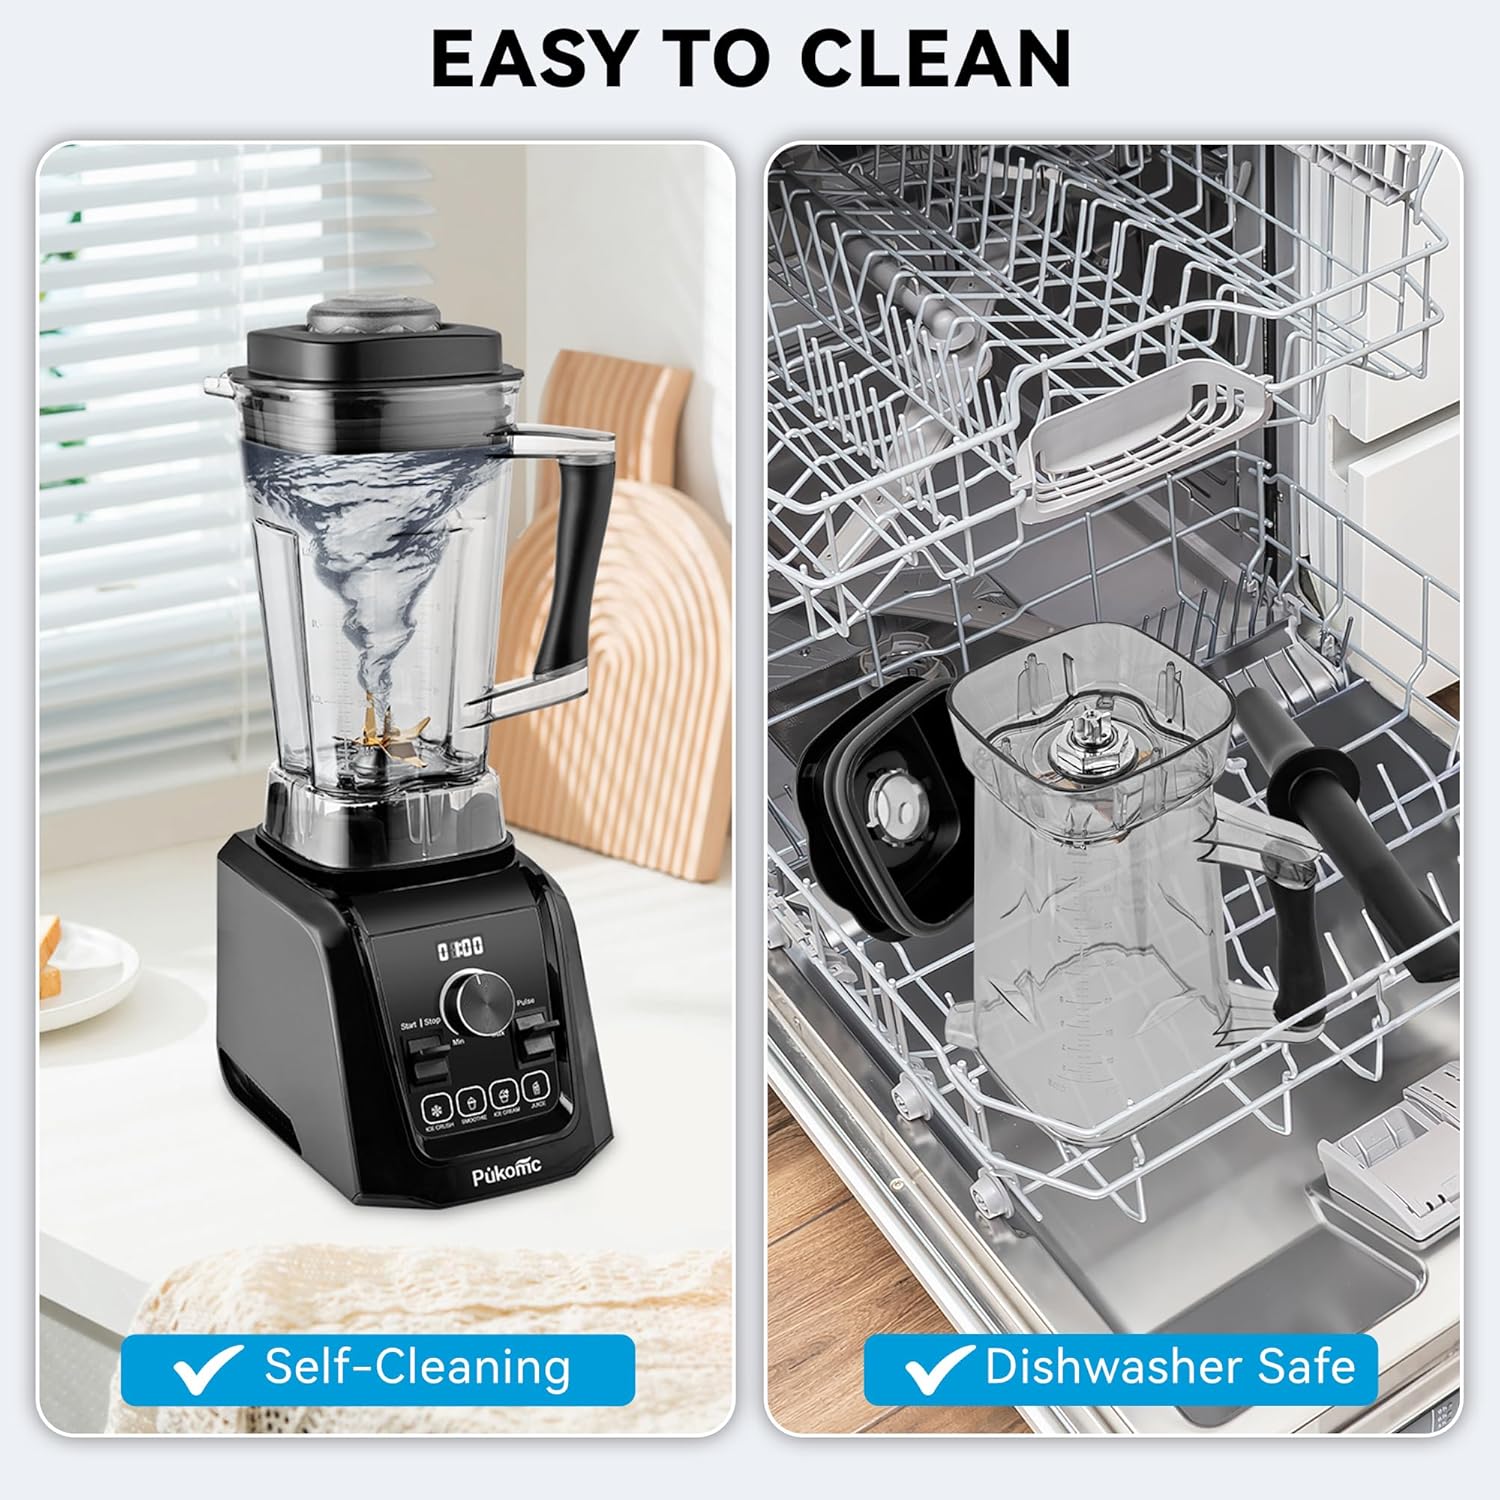
Troubleshooting Guide
If you encounter any issues with your blender, refer to the following table for common problems and solutions:
| Problem | Possible Cause | Solution |
|---|---|---|
| Blender does not start. | Not plugged in; Pitcher or lid not correctly assembled; Overload protection activated. | Ensure power cord is securely plugged in. Verify pitcher is seated correctly and lid is locked. Unplug, wait 15 minutes for motor to cool, then try again. |
| Motor stops during operation. | Overheating due to excessive load or continuous use. | Unplug the blender and allow it to cool down for at least 15 minutes. Reduce the amount of ingredients or add more liquid. |
| Ingredients are not blending smoothly. | Too little liquid; Ingredients are too large or dense; Air pocket around blades. | Add more liquid. Cut ingredients into smaller pieces. Use the Pulse function or stop the blender and stir ingredients with a spatula (ensure blender is unplugged). |
| Loud noise or vibration. | Pitcher not seated correctly; Foreign object in pitcher; Blender on an uneven surface. | Ensure pitcher is securely placed on the motor base. Check for any foreign objects and remove them (unplug first). Place blender on a flat, stable surface. |
Technical Specifications
- Brand: Pukomc
- Model: KT-Y10
- Color: Black
- Product Dimensions: 16.51 x 23.5 x 48.79 cm (approximately 6.5 x 9.25 x 19.21 inches)
- Capacity: 65 Ounces (approximately 1.9 liters)
- Special Features: Adjustable Speed Control, Self-cleaning, Pulse Technology
- Product Weight: 5.05 kg (approximately 11.13 lbs)
- Material: Stainless Steel, Polypropylene
- Included Components: Pitcher (Cup)
- Style: Countertop Blender
- Recommended Uses: Blending
- Power Source: Electric

Warranty and Customer Support
For warranty information, please refer to the documentation provided with your purchase or visit the official Pukomc website. If you have any questions, require technical assistance, or need to report a problem, please contact Pukomc customer support through their official channels. Keep your purchase receipt as proof of purchase for warranty claims.


