1. Introduction
Thank you for choosing the Garvee 14" x 40" Benchtop Wood Lathe Machine. This manual provides essential information for the safe operation, maintenance, and troubleshooting of your new wood lathe. Please read this manual thoroughly before operating the machine to ensure proper use and to prevent injury or damage.
This wood lathe is designed for turning wood workpieces, offering variable speed control and a robust construction for various woodworking projects.
2. Safety Instructions
WARNING: Failure to follow these safety instructions may result in serious injury or property damage.
- Always wear appropriate personal protective equipment (PPE), including safety glasses, hearing protection, and a dust mask.
- Ensure the work area is clean, well-lit, and free from obstructions.
- Keep children and bystanders at a safe distance from the operating machine.
- Securely mount the lathe to a stable workbench before operation.
- Never wear loose clothing, gloves, or jewelry that could get caught in moving parts. Tie back long hair.
- Always ensure the workpiece is securely mounted and balanced before starting the lathe.
- Do not operate the lathe if you are tired or under the influence of drugs, alcohol, or medication.
- Disconnect power before making adjustments, changing accessories, or performing maintenance.
- Use only accessories and attachments recommended by the manufacturer.
- Regularly inspect the power cord for damage. Do not use if damaged.
- Maintain proper footing and balance at all times.
3. Product Overview
3.1 Components and Included Accessories
The Garvee Wood Lathe comes with the following components and accessories:

Figure 3.1: Garvee Wood Lathe and Included Accessories. This image displays the main wood lathe unit, two wrenches, an instruction manual, various bolts and washers for mounting, and two woodturning chisels.
- Benchtop Wood Lathe Unit
- 1 x Rod Injection (likely referring to a drive center or live center)
- 2 x Wrenches
- 1 x Faceplate
- Mounting Hardware (bolts, washers, hex key)
- Instruction Manual
- 2 x Chisels (for woodworking)
3.2 Key Features
- Spacious Workbench: 40-inch (1000mm) maximum operating length for various projects.
- Powerful Motor: 400W high-frequency motor with a maximum speed of 2980 RPM.
- Adjustable Speeds: 4 selectable speeds (1040, 1480, 2130, 2980 RPM) for versatility with different materials.
- Sturdy Construction: Premium aluminum alloy base and robust steel headstock for minimal vibrations and stable operation.
- MT2 Tapers: Headstock and tailstock feature MT2 tapers for compatibility with a wide range of lathe accessories.

Figure 3.2: Powerful Motor System. This image illustrates the high-frequency motor and its performance capabilities, including maximum speed.
3.3 Technical Specifications

Figure 3.3: Technical Specifications. This image provides a visual summary of the lathe's dimensions and performance parameters.
| Specification | Value |
|---|---|
| Model Number | WL1000 |
| Motor Power | 400W (0.5 HP) |
| Input Voltage/Frequency | 110V~120V, 60Hz |
| Variable Speed Range | 1040 / 1480 / 2130 / 2980 RPM |
| Max Workpiece Length | 1000mm (approx. 40 inches) |
| Max Workpiece Diameter (Swing Over Bed) | 350mm (approx. 14 inches) |
| Bed Height | 150mm |
| Spindle Head Thread | M18 x 2.5mm |
| Product Dimensions | 32.68 x 11.42 x 16.54 inches (approx. 83 x 29 x 42 cm) |
| Item Weight | 49.2 pounds (approx. 22.3 kg) |
4. Setup and Assembly
Before assembly, ensure all parts are present and undamaged. Refer to Figure 3.1 for a visual guide of components.
- Unpacking: Carefully remove all components from the packaging. Retain packaging for future storage or transport.
- Mounting the Lathe:
- Choose a sturdy, level workbench capable of supporting the lathe's weight and operational forces.
- Position the lathe on the workbench.
- Using the provided mounting hardware (bolts, washers), secure the lathe base to the workbench through the pre-drilled holes. Ensure all fasteners are tightened securely.
- Installing the Tool Rest:
- Insert the tool rest post into the tool rest base.
- Slide the tool rest assembly onto the lathe bed.
- Adjust the height and position of the tool rest as needed for your workpiece, then lock it in place using the locking levers.

Figure 4.1: Tool Rest and Workbench. This image shows the adjustable tool rest and the overall length of the lathe bed, indicating the maximum workpiece length.
- Installing Drive and Live Centers:
- Insert the drive center (rod injection) into the headstock spindle taper.
- Insert the live center into the tailstock spindle taper.
- Ensure both centers are firmly seated.
- Electrical Connection:
- Ensure the power switch is in the "OFF" position.
- Plug the power cord into a grounded 110V~120V, 60Hz electrical outlet.
5. Operation
5.1 Preparing the Workpiece
- Select a suitable piece of wood, free from knots, cracks, or defects that could cause it to break during turning.
- Roughly shape the workpiece to a cylindrical or square form, ensuring it is balanced.
- Mark the center points on both ends of the workpiece.
5.2 Mounting the Workpiece
- Engage the drive center into one end of the workpiece.
- Slide the tailstock towards the workpiece until the live center engages the other end.
- Tighten the tailstock quill to apply firm pressure, securing the workpiece between the centers. Do not overtighten.
- Lock the tailstock base firmly to the lathe bed.
- Rotate the workpiece by hand to ensure it clears the tool rest and other parts of the lathe.
5.3 Adjusting Speed
The Garvee Wood Lathe offers 4 adjustable speeds to accommodate different wood types and turning operations. Refer to the speed adjustment mechanism on the headstock.
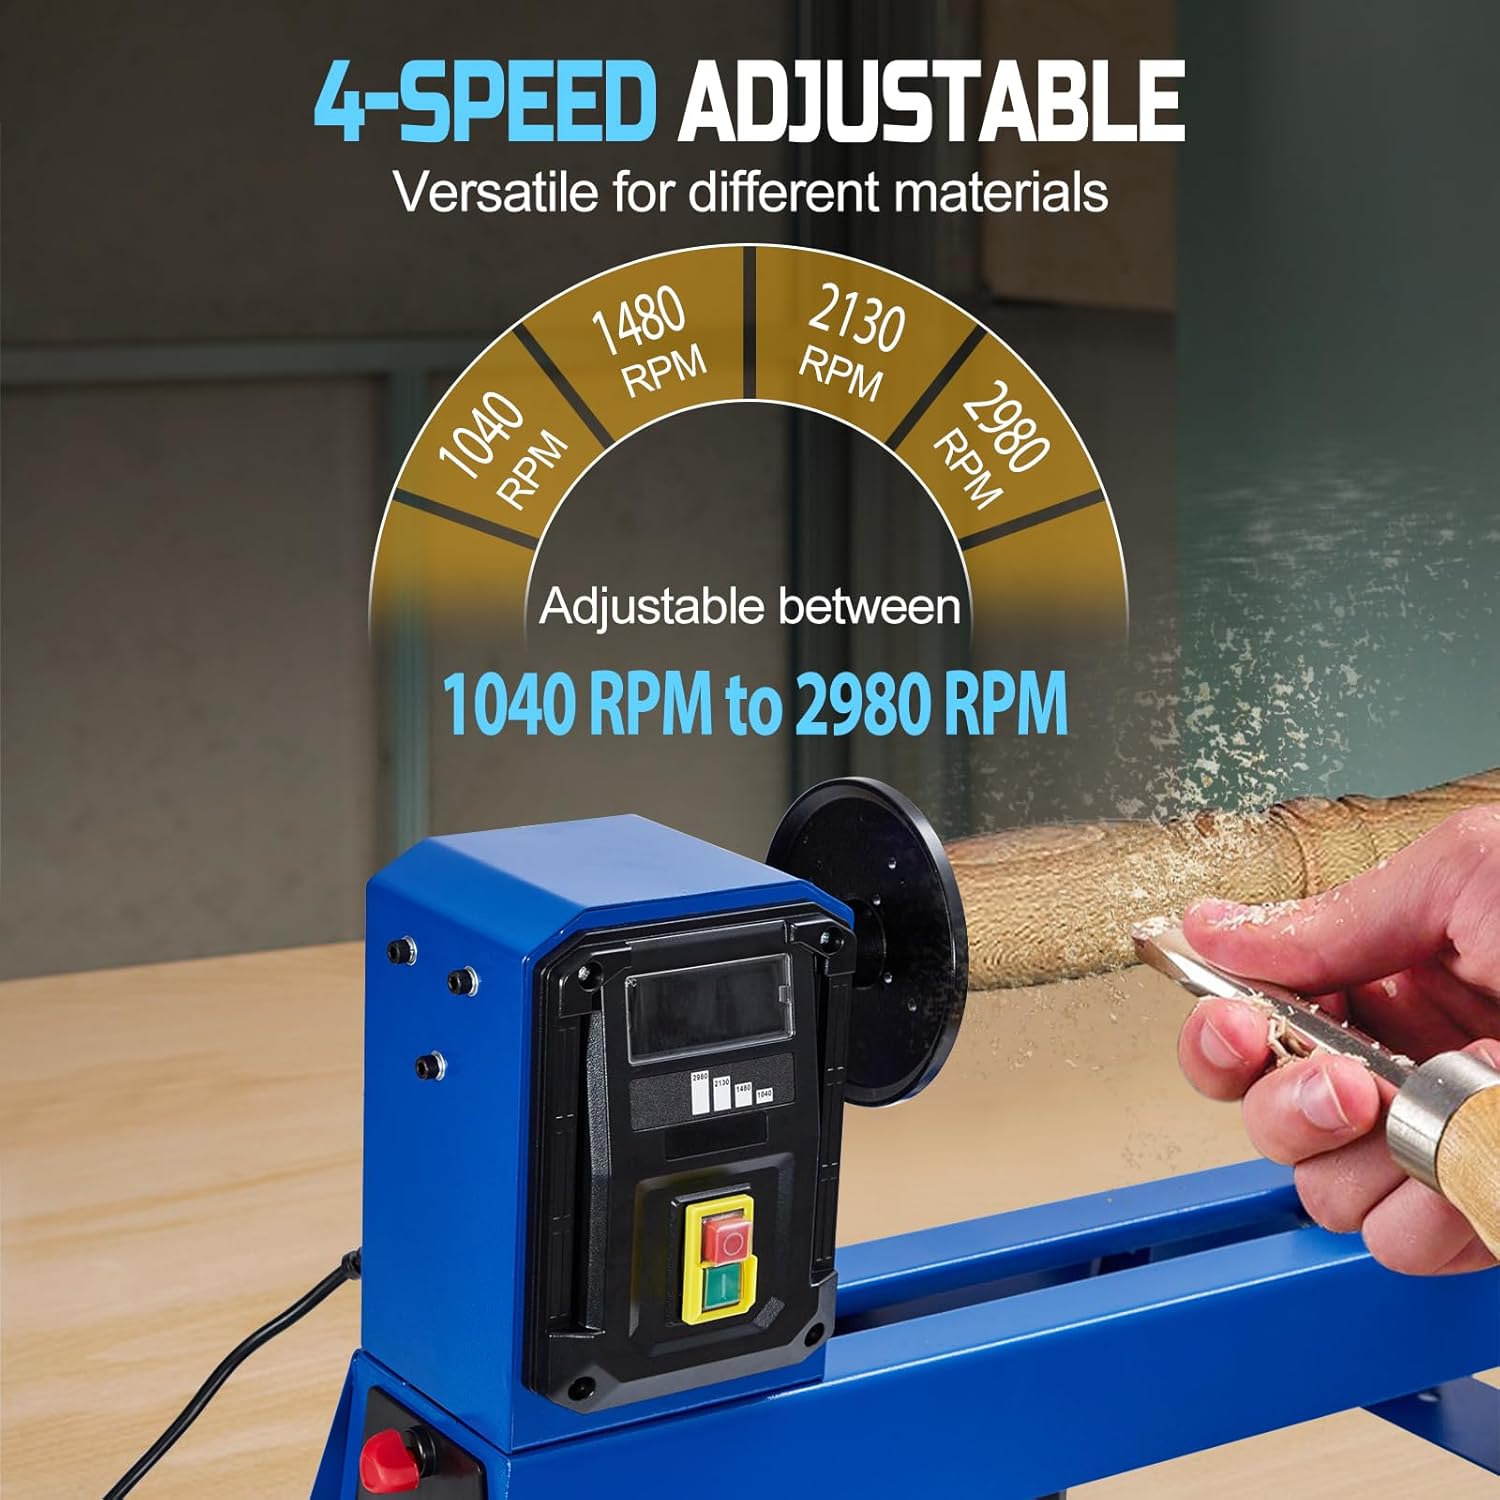
Figure 5.1: Speed Adjustment Dial. This image illustrates the four distinct speed settings available on the lathe, ranging from 1040 RPM to 2980 RPM.
- Lower Speeds (1040-1480 RPM): Recommended for larger diameter workpieces, roughing out, or when starting a new piece.
- Higher Speeds (2130-2980 RPM): Suitable for smaller diameter workpieces, finishing cuts, and sanding.
- Always start at a lower speed and gradually increase as needed, ensuring the workpiece is stable.
5.4 Turning Operations

Figure 5.2: Wood Turning in Progress. This image shows the lathe in operation, with a workpiece being shaped by a chisel, surrounded by wood shavings.
- Ensure the tool rest is positioned close to the workpiece, slightly below its center line.
- Turn on the lathe using the power switch.
- Using appropriate woodturning chisels, gently bring the cutting edge into contact with the rotating workpiece.
- Apply steady, controlled pressure to remove material. Always cut from a larger diameter to a smaller diameter.
- Regularly adjust the tool rest position as the workpiece diameter changes to maintain proper support.
- When finished, turn off the lathe and allow the workpiece to stop completely before removing it.

Figure 5.3: Wide Application Examples. This collage demonstrates the versatility of the Garvee Wood Lathe for different types of woodworking projects, from spindle work to bowl turning.
6. Maintenance
Regular maintenance ensures the longevity and safe operation of your Garvee Wood Lathe.
- Cleaning: After each use, clean the lathe thoroughly. Remove all wood shavings and dust from the bed, headstock, tailstock, and motor area. Use compressed air or a brush.
- Lubrication: Periodically apply a light machine oil to the moving parts, such as the tailstock quill and bedways, to ensure smooth operation.
- Belt Inspection: Check the drive belt for wear, cracks, or tension. Replace if necessary. (Note: This model appears to be direct drive or electronic speed control, but general lathe maintenance includes belt checks if applicable).
- Fastener Check: Regularly inspect all nuts, bolts, and screws for tightness. Tighten any loose fasteners.
- Electrical Cord: Inspect the power cord for any signs of damage, cuts, or fraying. Replace immediately if damaged.
- Storage: Store the lathe in a clean, dry environment when not in use.
7. Troubleshooting
| Problem | Possible Cause | Solution |
|---|---|---|
| Lathe does not start | No power supply; Power switch off; Emergency stop engaged; Motor overload. | Check power connection and outlet; Ensure power switch is ON; Disengage emergency stop; Allow motor to cool, then restart. |
| Excessive vibration | Workpiece unbalanced; Lathe not securely mounted; Loose components; Worn bearings. | Re-balance workpiece; Securely mount lathe to workbench; Tighten all fasteners; Contact customer support if bearings are suspected. |
| Motor overheats | Overloading the motor; Insufficient ventilation. | Reduce cutting pressure; Use appropriate speed for workpiece size; Ensure adequate airflow around the motor. |
| Workpiece slips | Workpiece not securely mounted; Drive center not gripping. | Ensure tailstock pressure is adequate; Check drive center for wear or proper engagement. |
If you encounter problems not listed here or if solutions do not resolve the issue, please contact Garvee customer support.
8. Warranty and Support
Garvee products are manufactured to high-quality standards. This product is covered by a manufacturer's warranty against defects in materials and workmanship. Please refer to your purchase documentation for specific warranty terms and duration.
For technical assistance, replacement parts, or warranty claims, please contact Garvee customer support through the retailer where the product was purchased or visit the official Garvee website.
Manufacturer: Garvee
Model: WL1000
ASIN: B0FBRZ5P1F