1. Product Overview
The ENVENTOR PV11 Laser Level Adapter is a versatile accessory designed to enhance the functionality and precision of your laser level. It features a 360° rotating base, micro-adjustment capabilities, and multiple mounting options to suit various work environments.

Figure 1: ENVENTOR PV11 Laser Level Adapter
Package Contents:
- 1 x L-shaped Magnetic Laser Level Bracket
- 1 x Auxiliary Back Clip
- 1 x User Manual
2. Product Features
The PV11 adapter is engineered for precision and adaptability, offering several key features:
- Fine-Tuning Knobs: Four adjustment knobs allow for precise positioning of the laser in all directions (horizontal, vertical, front-back, left-right).
- 360° Horizontal Rotation: Enables full rotation for accurate alignment.
- Universal Thread Compatibility: Features a 1/4"-20 male thread for attaching to laser levels and 1/4"-20 and 5/8"-11 female threads for mounting on tripods or laser poles.
- Multifunctional Magnetic Base: Strong magnets allow secure attachment to metal surfaces.
- Adjustable Auxiliary Back Clip: The clip can be adjusted to mount on objects up to 5 cm thick, providing additional versatility. The back plate of the clip is metal, allowing it to attach magnetically to the main bracket.
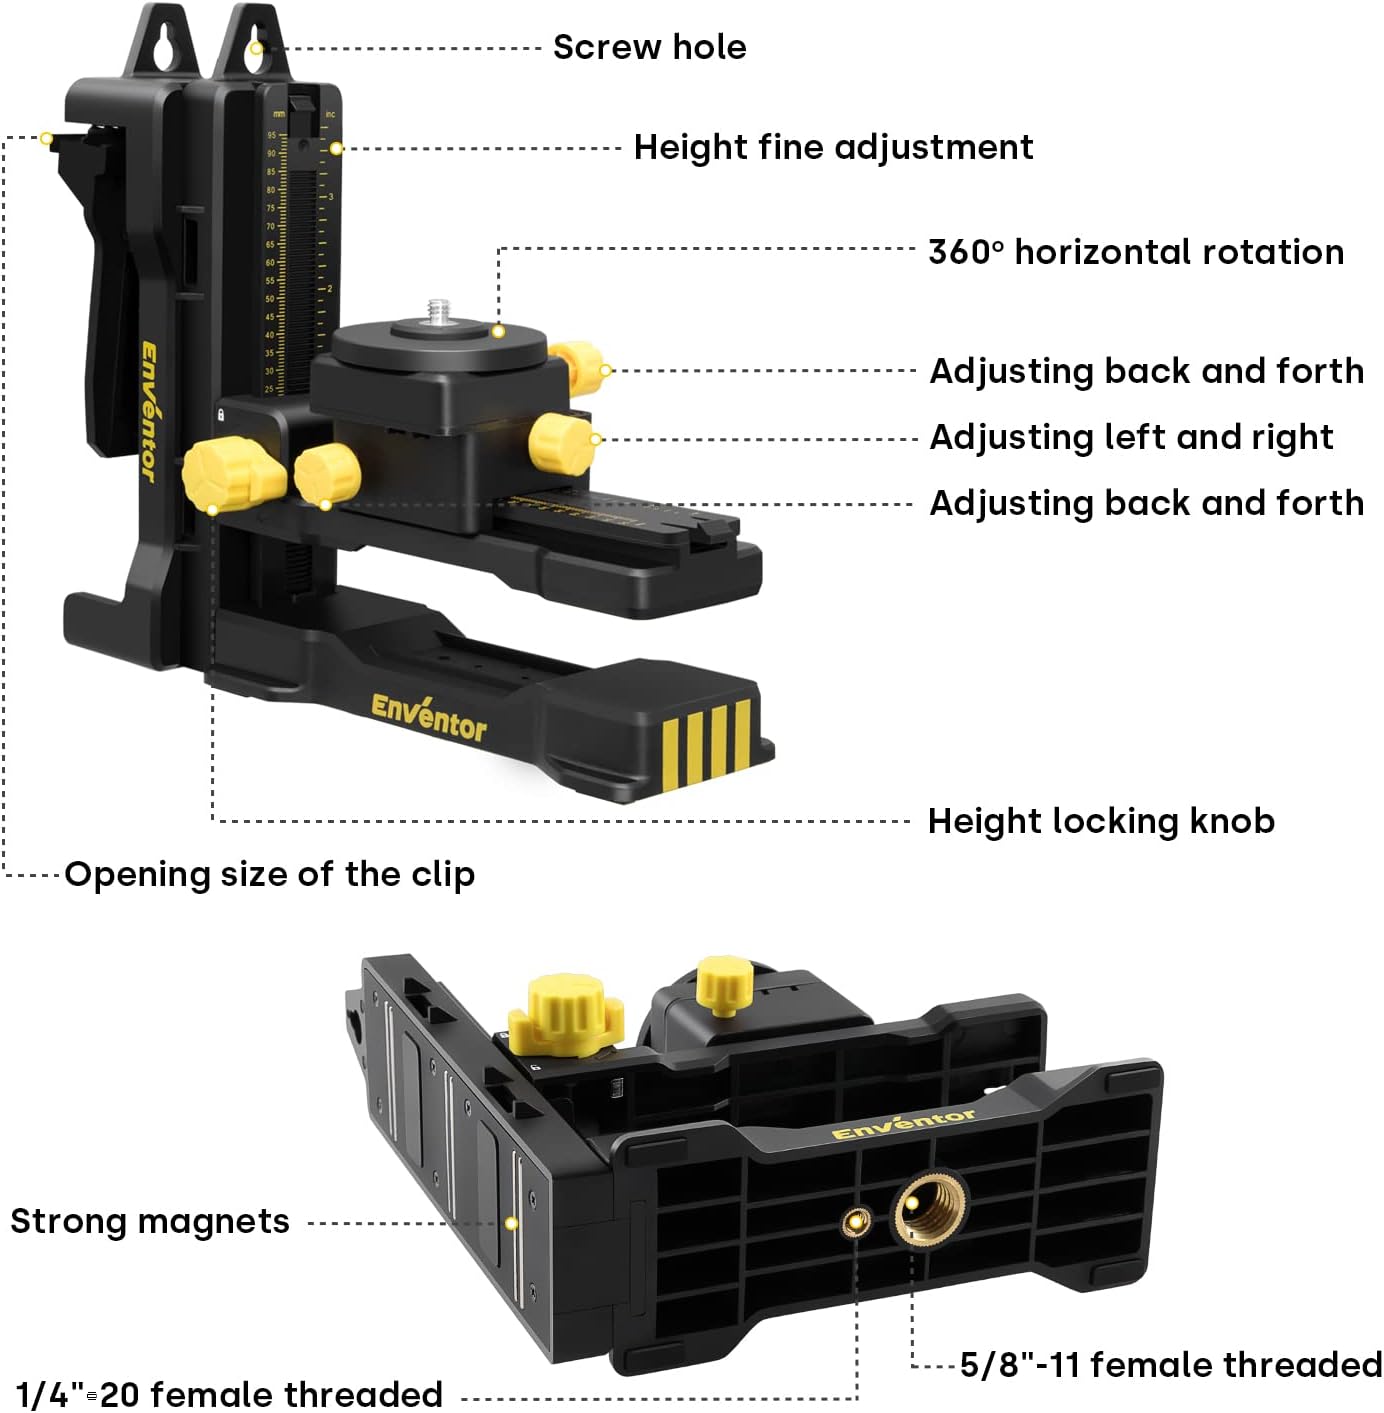
Figure 2: Key components and adjustment points of the PV11 adapter.

Figure 3: Details of the auxiliary back clip and its various uses.
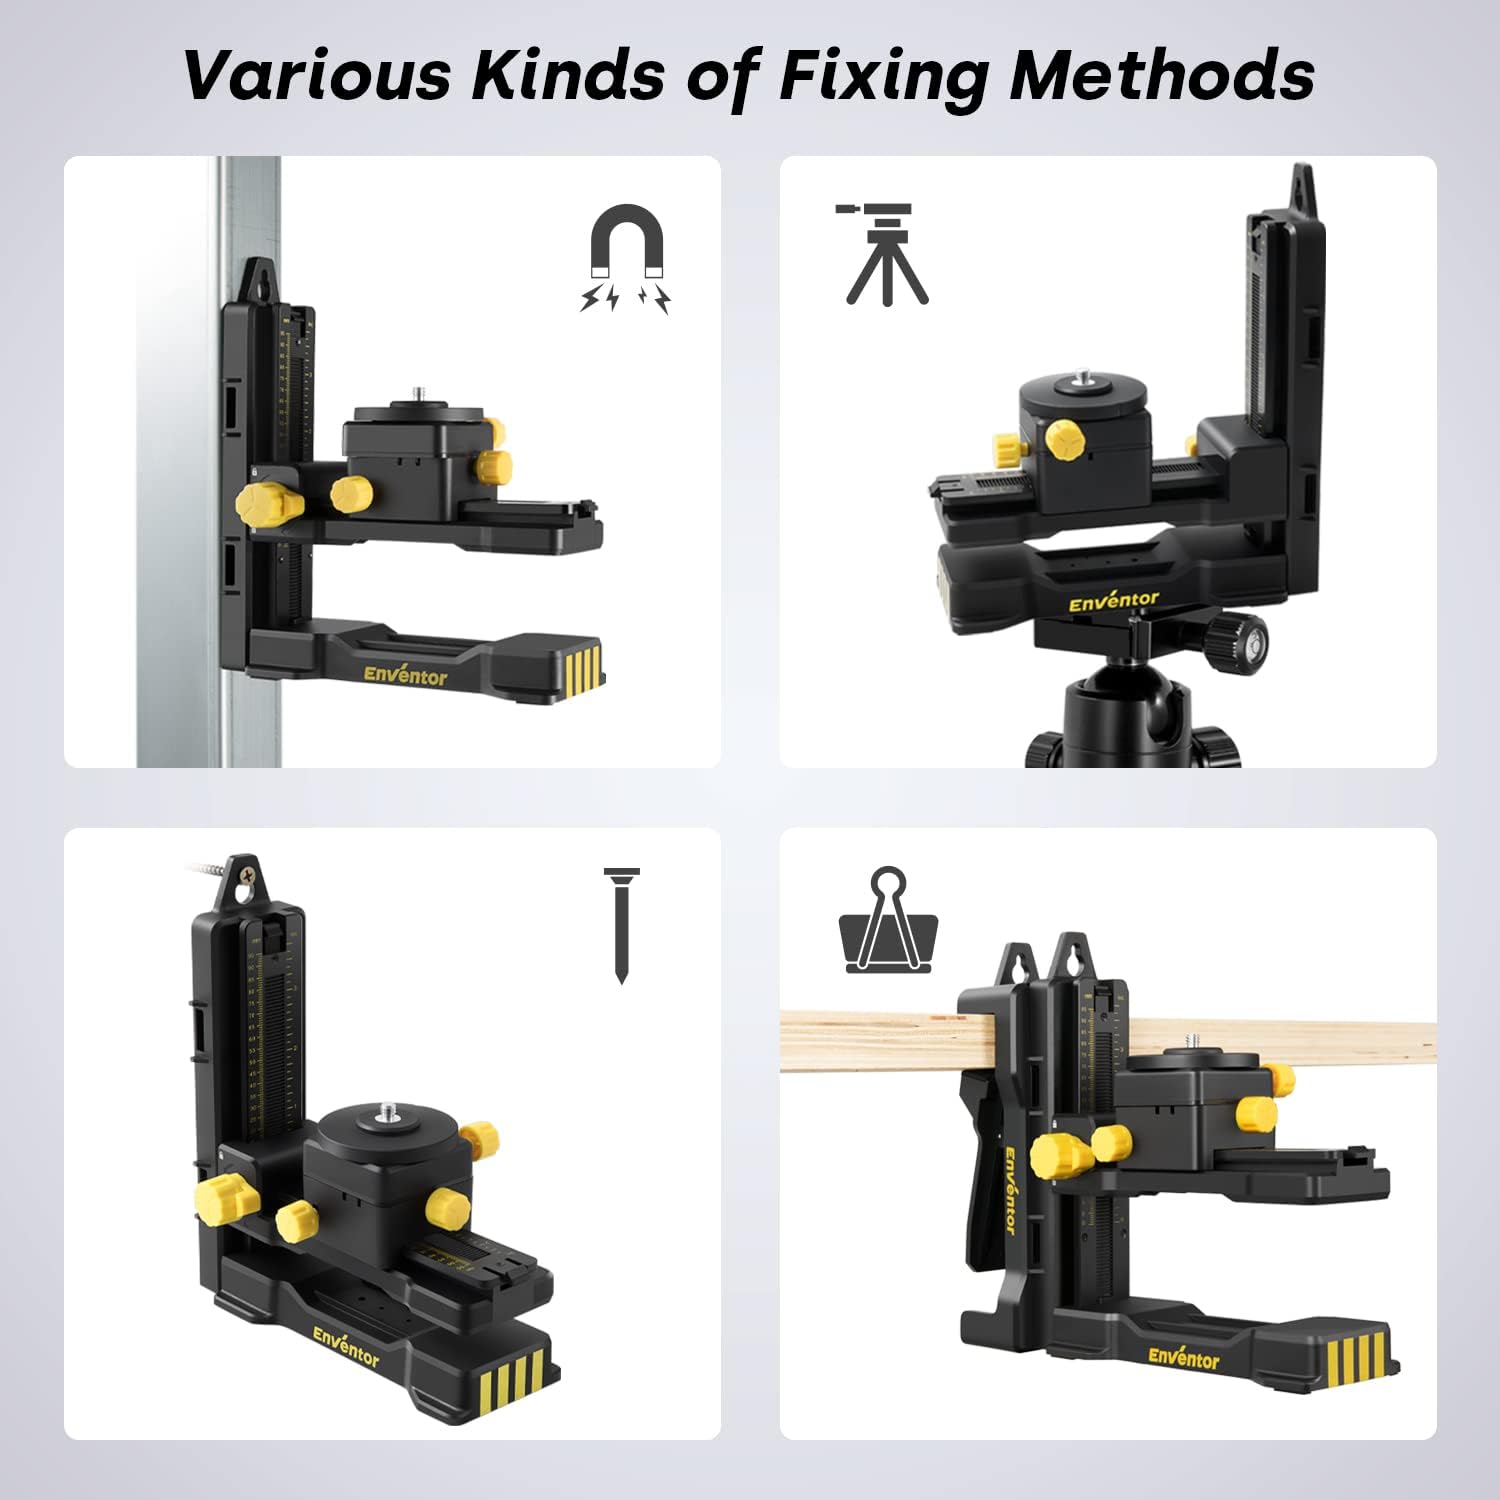
Figure 4: Multiple installation methods for the laser level adapter.
3. Installation and Usage
Follow these steps to properly install and use your ENVENTOR PV11 Laser Level Adapter:
- Attach the Laser Level: Secure your laser level (with a 1/4" female thread) onto the 1/4"-20 male thread on the adapter's platform.
- Mounting Options:
- Magnetic Attachment: Use the strong magnets on the back of the main bracket or the auxiliary back clip to attach the adapter to metal surfaces.
- Clamp Mounting: Attach the auxiliary back clip to the main bracket. Adjust the clip's opening size (1-5 cm) to securely clamp it onto a table, beam, or other suitable object.
- Tripod/Pole Mounting: Utilize the 1/4"-20 or 5/8"-11 female threads on the bottom of the adapter to mount it onto a tripod or laser pole.
- Screw/Nail Mounting: The back clip features screw holes, allowing it to be nailed or screwed to a wall or wooden surface. The main bracket can then be magnetically attached to the back clip.
- Rope Binding: The design includes grooves on both sides of the back clip, allowing it to be secured with a rope for temporary mounting.
- Adjusting Height: Use the height locking knob and fine adjustment mechanism on the vertical bar to set the desired working height. The height can be adjusted up to 9.5 cm.
- Fine Positioning: Use the four fine-tuning knobs to precisely adjust the laser line's horizontal position (left/right within 3 cm) and front-back position (within 5.5 cm) to align with your measurement points. The 360° rotation knob allows for full horizontal adjustment.

Figure 5: Detailed view of the adjustment knobs for precise laser positioning.

Figure 6: Examples of the laser level adapter in practical use.
Instructional Video:
Video 1: Demonstrates the installation, adjustment, and various mounting methods of the ENVENTOR PV11 Laser Level Adapter, including magnetic attachment, clamping, and tripod use.
4. Maintenance
To ensure the longevity and optimal performance of your ENVENTOR PV11 Laser Level Adapter, follow these maintenance guidelines:
- Cleaning: Wipe the adapter with a soft, dry cloth after each use to remove dust and debris. Avoid using harsh chemicals or abrasive cleaners.
- Storage: Store the adapter in a clean, dry place away from direct sunlight and extreme temperatures.
- Inspection: Periodically check all moving parts, knobs, and threads for any signs of wear or damage. Ensure all connections are secure.
5. Troubleshooting
If you encounter any issues with your ENVENTOR PV11 Laser Level Adapter, refer to the following common troubleshooting tips:
- Adapter not holding position: Ensure all adjustment knobs are tightened securely. Check that the mounting surface is stable and clean if using magnetic or clamp methods.
- Laser level not fitting: Verify that your laser level has a 1/4" female thread. If not, an additional adapter may be required.
- Difficulty with adjustments: Ensure no debris is obstructing the moving parts. Apply a small amount of silicone lubricant if movement is stiff.
For further assistance, please contact Enventor customer support.
6. Specifications
| Feature | Specification |
|---|---|
| Model Number | PV11 |
| Product Dimensions (L x W x H) | 24.5 x 10.6 x 22.5 cm |
| Item Weight | 990 Grams |
| Material | Acrylonitrile Butadiene Styrene (ABS) |
| Operating Mode | Manual |
| Laser Level Thread Compatibility | 1/4"-20 Male Thread |
| Mounting Thread Compatibility | 1/4"-20 and 5/8"-11 Female Threads |
| Back Clip Opening Size | Adjustable up to 5 cm |
| Height Adjustment Range | Up to 9.5 cm |

Figure 7: Product dimensions and weight.
7. Warranty and Support
The ENVENTOR PV11 Laser Level Adapter comes with a 12-month warranty from the date of purchase. This warranty covers manufacturing defects and material flaws under normal use.
For warranty claims, technical support, or any questions regarding your product, please contact Enventor customer service through the retailer where you purchased the product or visit the official Enventor website.