1. Introduction
Thank you for choosing the ELIVED EV3235B-G Single Monitor Desk Mount. This monitor arm is designed to enhance your workspace by providing ergonomic positioning for your display. It supports screens from 13 to 34 inches, weighing up to 12 kg, and is compatible with VESA 75x75mm and 100x100mm mounting patterns. This manual provides detailed instructions for safe installation, operation, and maintenance of your monitor mount.
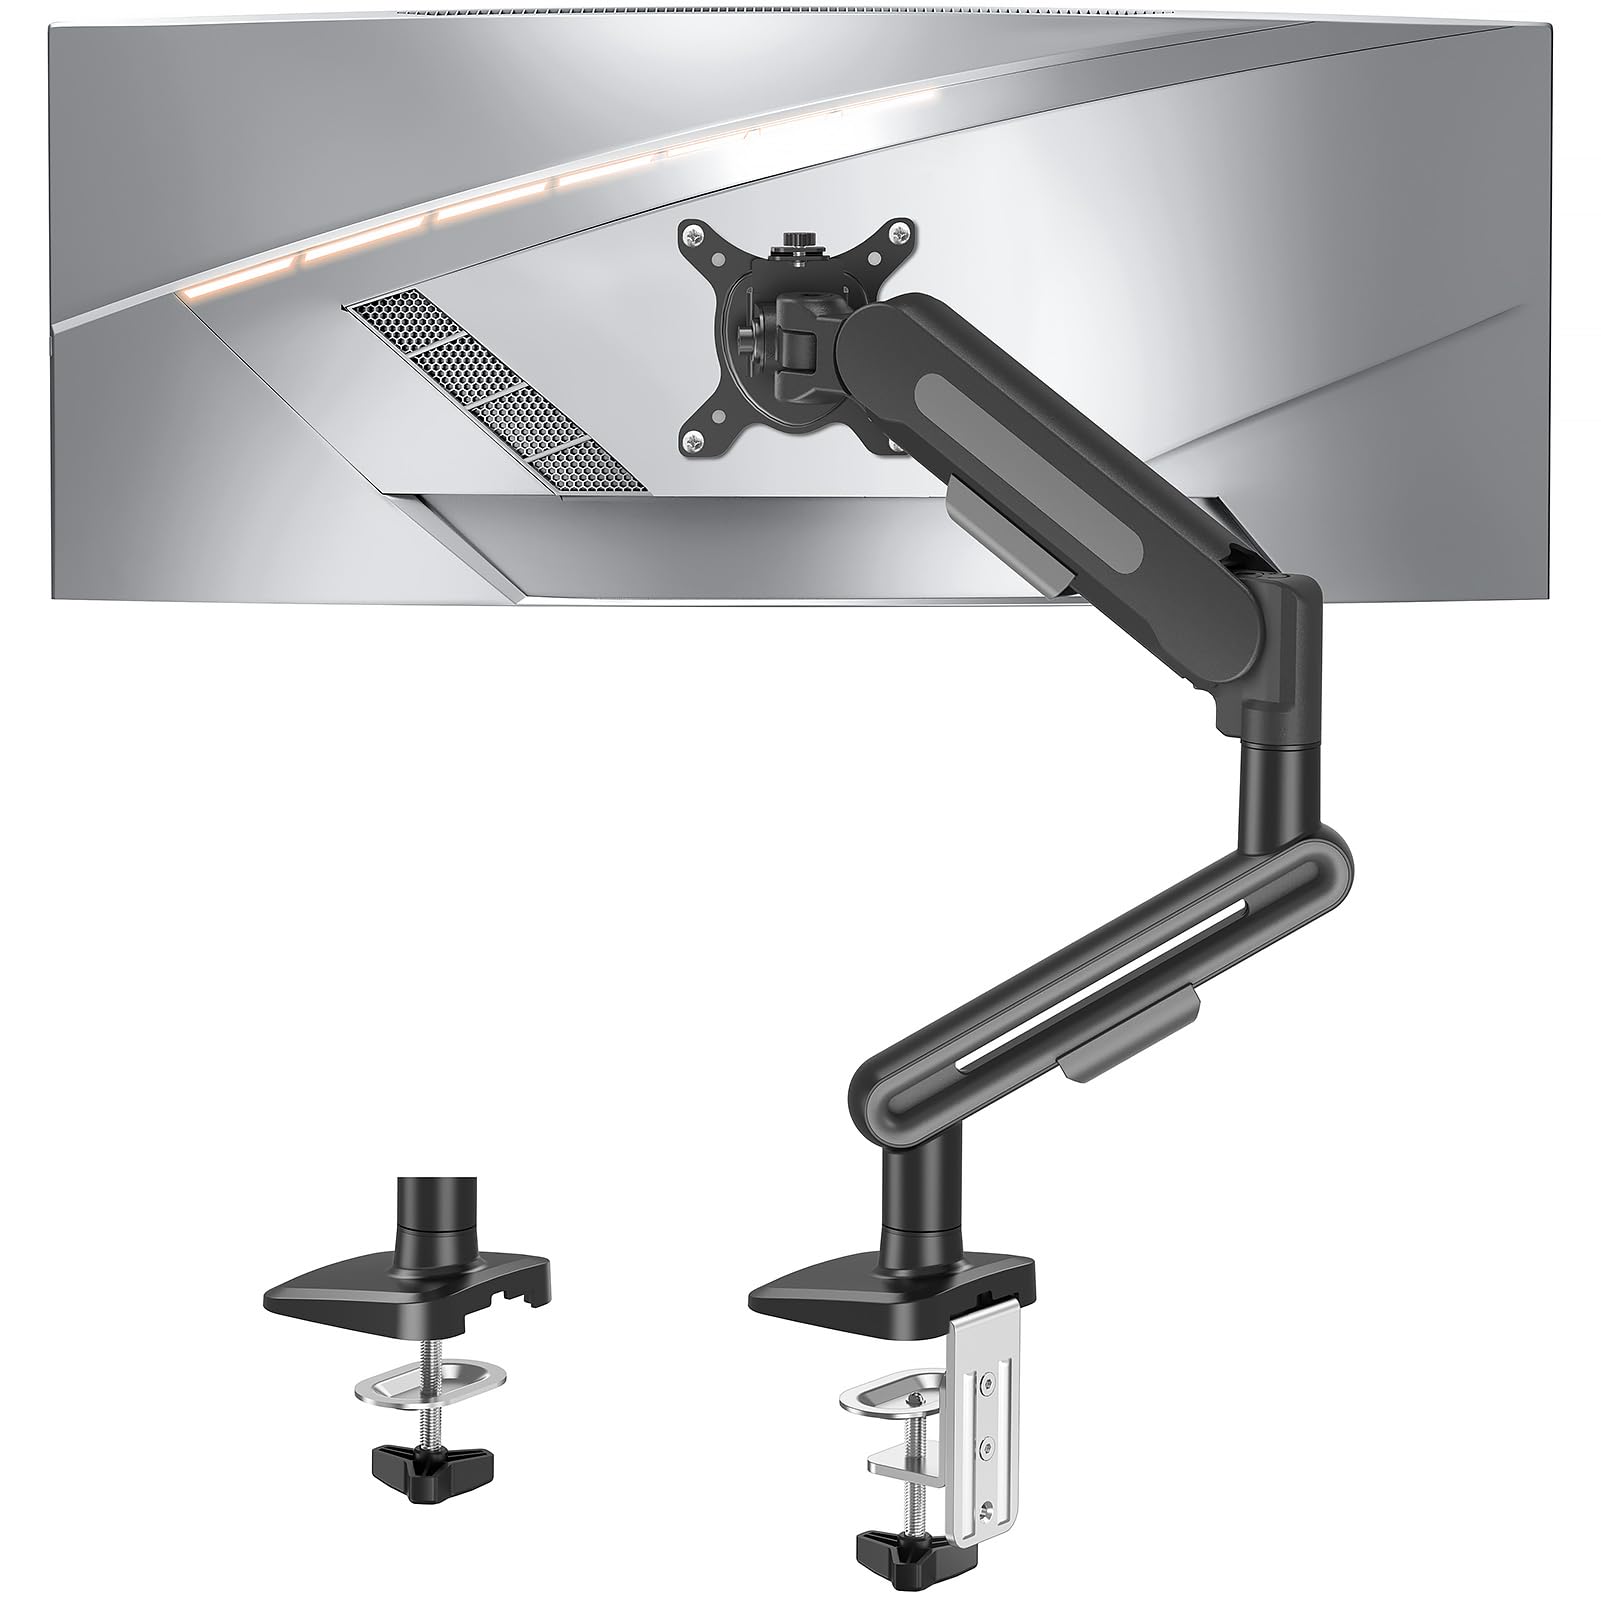
Figure 1: ELIVED EV3235B-G Single Monitor Desk Mount supporting a monitor.
2. Safety Information
- Read all instructions carefully before installation and use. Failure to do so may result in personal injury or product damage.
- Ensure your desk surface is strong enough to support the combined weight of the mount and your monitor.
- Do not exceed the maximum weight capacity of 12 kg (26.4 lbs).
- Ensure the VESA mounting pattern of your monitor is 75x75mm or 100x100mm.
- Keep children and pets away during installation. Small parts may be a choking hazard.
- Tighten all screws firmly but do not overtighten. Overtightening can damage the product.
- If you have any doubts about installation, consult a qualified professional.
3. Package Contents
Verify that all components are present and undamaged before proceeding with installation. If any parts are missing or damaged, contact ELIVED customer support.
- Monitor Arm Assembly
- C-clamp Base
- Grommet Base
- VESA Plate
- Hardware Kit (screws, washers, Allen keys)
- Instruction Manual
4. Setup and Installation
The ELIVED EV3235B-G offers two mounting options: C-clamp and Grommet. Choose the method best suited for your desk.

Figure 2: C-clamp and Grommet mounting options with desk thickness requirements.
4.1 C-Clamp Installation
- Attach the C-clamp base to the edge of your desk. Ensure the desk thickness is between 10-85mm.
- Tighten the clamp screw until the base is securely fastened to the desk.
- Insert the main pole of the monitor arm into the C-clamp base and secure it with the provided screw.
4.2 Grommet Installation
- Ensure your desk has a grommet hole with a diameter between 10-60mm and a desk thickness between 10-70mm.
- Assemble the grommet base components as per the diagram in the package.
- Pass the grommet bolt through the desk hole and secure it from underneath with the washer and nut.
- Insert the main pole of the monitor arm into the grommet base and secure it with the provided screw.
4.3 Attaching the Monitor
- Attach the VESA plate to the back of your monitor using the appropriate screws from the hardware kit. Ensure the screws are tightened securely.
- Carefully slide the monitor (with the attached VESA plate) onto the monitor arm's VESA head. Ensure it clicks into place or is secured with the locking mechanism.
- Once the monitor is attached, you can proceed to adjust the gas spring tension.
5. Operating Instructions (Adjustments)
The ELIVED EV3235B-G monitor arm offers a wide range of adjustments for optimal ergonomic positioning.
5.1 Flexible Angle Adjustment
- Swivel: The arm can swivel 90° left and 90° right.
- Tilt: The monitor can tilt 75° upwards and 45° downwards.
- Rotate: The VESA plate allows for 360° rotation, enabling seamless switching between landscape and portrait orientations.

Figure 3: Illustration of swivel, tilt, and rotate capabilities.
5.2 Height and Extension Adjustment
The gas spring arm allows for smooth vertical height adjustment up to 470mm and horizontal extension up to 562.5mm to achieve your desired viewing distance and height.

Figure 4: Maximum height adjustment (470mm) and extension (562.5mm).
5.3 Gas Spring Tension Adjustment
The gas spring tension needs to be adjusted to match the weight of your monitor. This ensures the monitor stays at the desired height and moves smoothly.
- Important: Keep the arm in a horizontal position during adjustment.
- If the monitor lifts up on its own: Turn the adjustment screw (located on the arm joint) counter-clockwise towards the "-" sign (360° per circle) to decrease tension for a lighter monitor.
- If the monitor falls down on its own: Turn the adjustment screw clockwise towards the "+" sign (360° per circle) to increase tension for a heavier monitor.
- Adjust gradually until the monitor stays in position when released.
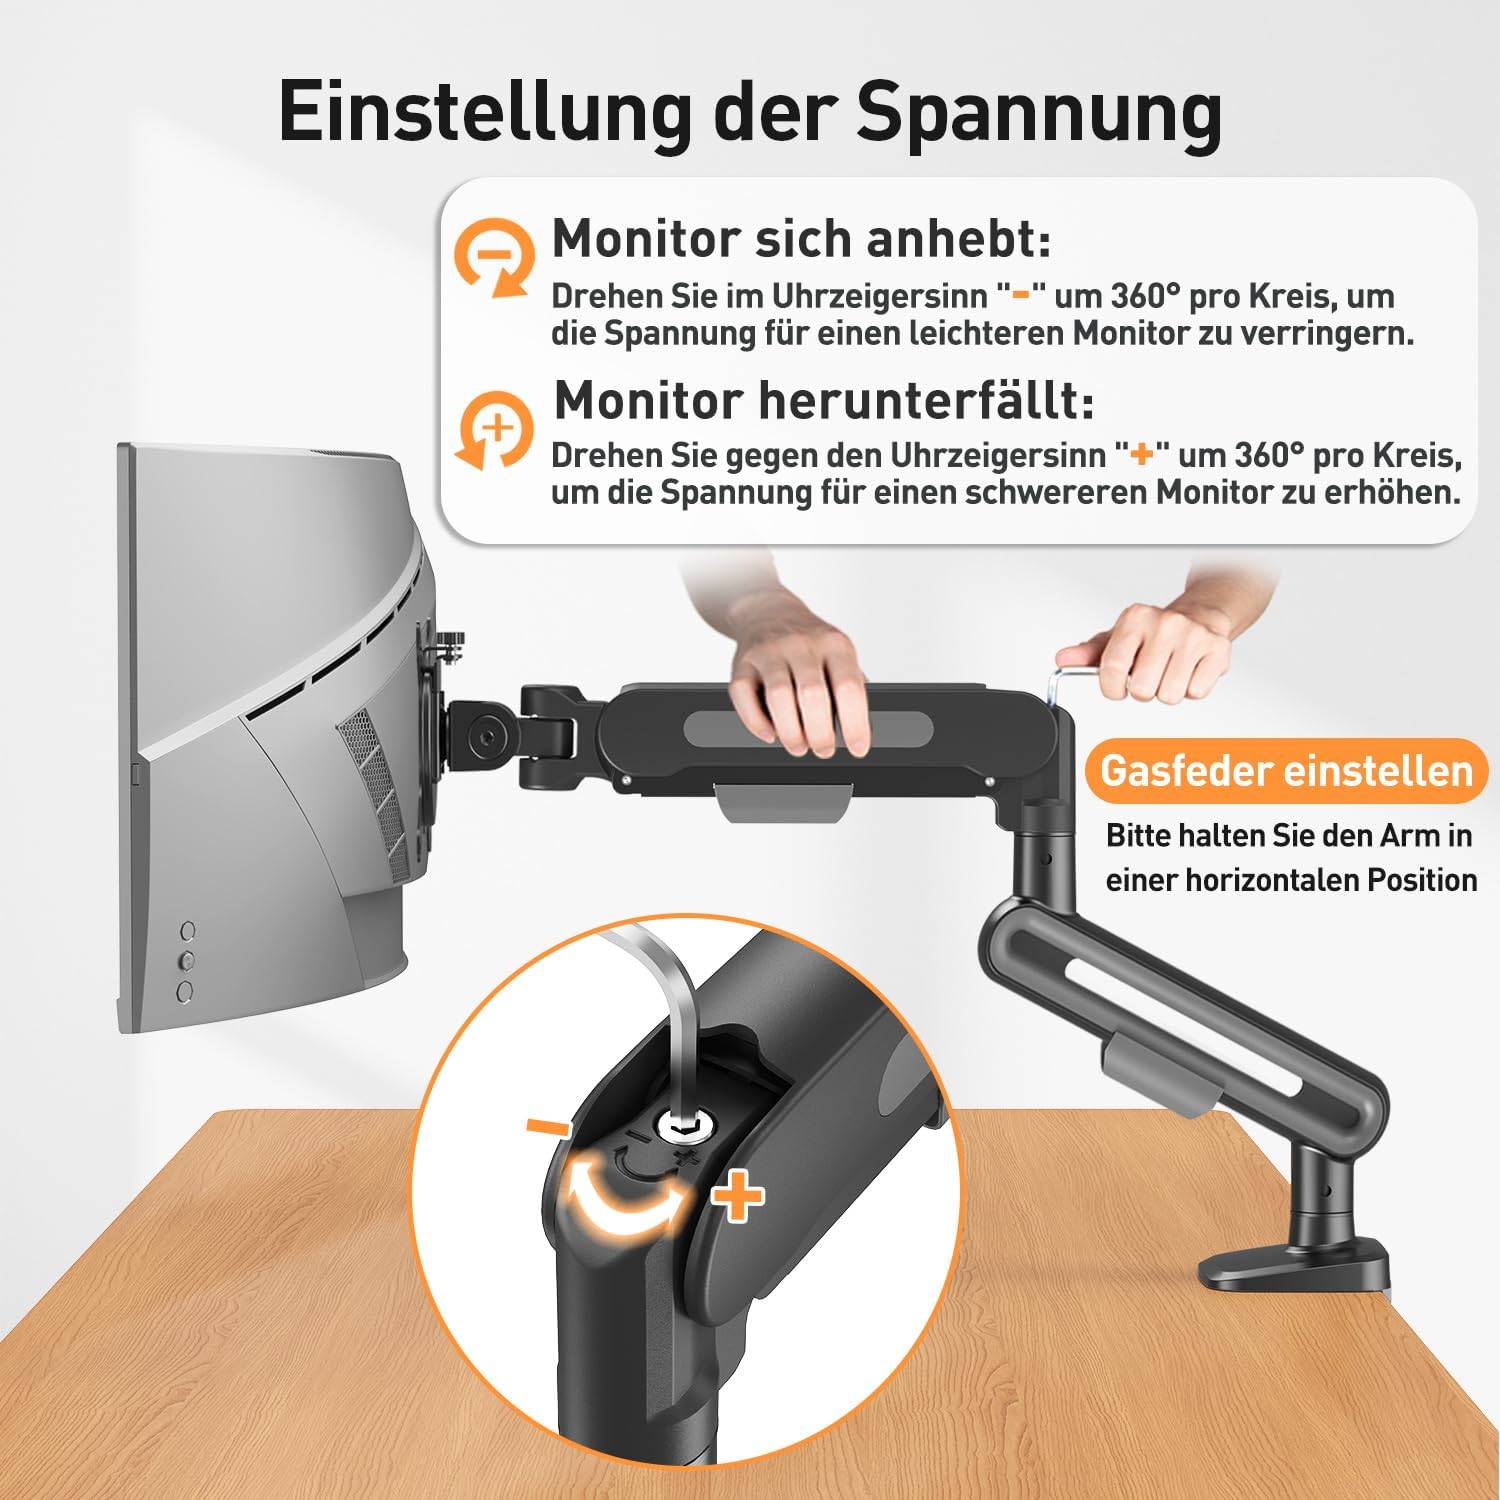
Figure 5: Gas spring tension adjustment for monitor stability.
5.4 Cable Management
Route your monitor cables through the integrated cable management clips or channels on the arm to maintain a tidy and organized workspace.

Figure 6: Cable management system for a clutter-free desk.
6. Maintenance
- Cleaning: Wipe the monitor arm with a soft, damp cloth. Avoid abrasive cleaners or solvents.
- Periodic Checks: Periodically check all screws and connections to ensure they remain tight and secure. Re-tighten if necessary.
- Gas Spring: The gas spring is designed for long-term use and generally requires no maintenance. If the arm's movement becomes stiff or loose, re-adjust the tension as described in Section 5.3.
7. Troubleshooting
- Monitor does not stay at desired height:
- The gas spring tension is incorrect. Adjust the tension screw as described in Section 5.3.
- Ensure your monitor's weight is within the 12 kg limit.
- Arm is too stiff or too loose:
- Adjust the gas spring tension (Section 5.3).
- Check if all joint screws are tightened correctly.
- Monitor wobbles:
- Ensure the desk clamp or grommet base is securely fastened to the desk.
- Verify that the VESA plate is tightly attached to both the monitor and the arm.
8. Specifications
| Feature | Specification |
|---|---|
| Model | EV3235B-G |
| Brand | ELIVED |
| Screen Size Compatibility | 13 - 34 inches |
| Weight Capacity | Max 12 kg (26.4 lbs) |
| VESA Compatibility | 75x75mm, 100x100mm |
| Tilt Angle | +75° / -45° |
| Swivel Angle | ±90° |
| Rotation | 360° (Portrait/Landscape) |
| Max Height Adjustment | 470mm |
| Max Extension | 562.5mm |
| C-Clamp Desk Thickness | 10-85mm |
| Grommet Desk Thickness | 10-70mm |
| Grommet Hole Diameter | 10-60mm |
| Material | Metal |
| Color | Silver Gray |
9. Warranty and Support
ELIVED products are designed for durability and performance. For warranty information, please refer to the warranty card included with your product or visit the official ELIVED website. If you encounter any issues or require technical assistance, please contact ELIVED customer support through their official channels.
ELIVED Store Link: Visit the ELIVED Store on Amazon


