Introduction
This manual provides detailed instructions for the assembly, operation, maintenance, and troubleshooting of your GarveeLife All-Aluminum Louvered Pergola. Please read this manual thoroughly before beginning assembly or operation to ensure safe and correct usage. Keep this manual for future reference.
Safety Information
Your safety is paramount. Please adhere to the following guidelines:
- Ensure the pergola is securely anchored to a stable foundation. Follow the assembly instructions carefully to avoid injury or damage.
- Assembly requires at least 2-3 individuals. Prepare necessary tools such as electric drills, gloves, and ladders.
- Inspect all parts for damage or missing components before assembly. Contact customer service immediately if any issues are found.
- Do not attempt to modify the pergola structure or components, as this may compromise its stability and void the warranty.
- In strong winds or heavy snow, ensure louvers are closed to protect the structure.
Package Contents
Your 12x24 FT pergola is packaged in 9 boxes and may arrive separately. Please wait patiently for all packages to arrive before starting the installation. Verify all parts against the packing list provided in the box.

This image displays various components of a pergola, including beams, posts, louvers, and hardware, laid out for inspection prior to assembly.
- Aluminum Posts and Beams
- Adjustable Louvered Roof Panels
- Integrated Drainage System Components
- Crank Handle for Louver Adjustment
- Hardware (screws, bolts, anchors)
- Base Plates and Post Covers
Setup and Assembly
Assembly typically requires 4-6 hours with 2-3 people. Ensure you have adequate space and all necessary tools before beginning.
Assembly Video Guide
Video 1: Official GarveeLife assembly guide for the louvered pergola.
This video provides a step-by-step visual guide on how to construct the GarveeLife louvered pergola, covering key assembly stages.
Step-by-Step Instructions
- Prepare the Area: Choose a level surface for installation. Clear any obstructions and ensure sufficient working space.
- Assemble the Posts and Bases: Attach the base plates to the bottom of each post using the provided hardware. Ensure they are securely fastened.
- Construct the Main Frame: Connect the horizontal beams to the top of the posts. Follow the labeled parts and pre-drilled holes for correct alignment. Do not fully tighten all screws until the entire frame is assembled and squared.
- Install Louver Mechanisms: Attach the louver control mechanisms to the designated beams. These mechanisms will allow for the adjustment of the roof panels.
- Insert Louver Panels: Carefully place each louver panel into its respective position within the frame and connect it to the adjustment mechanism.
- Integrate Drainage System: Ensure all internal drainage components are correctly installed within the beams and posts to allow rainwater to flow discreetly to the ground.
- Final Tightening and Anchoring: Once the entire structure is assembled and aligned, tighten all screws and bolts. Securely anchor the pergola to your patio or deck using the included expansion screws for maximum stability.
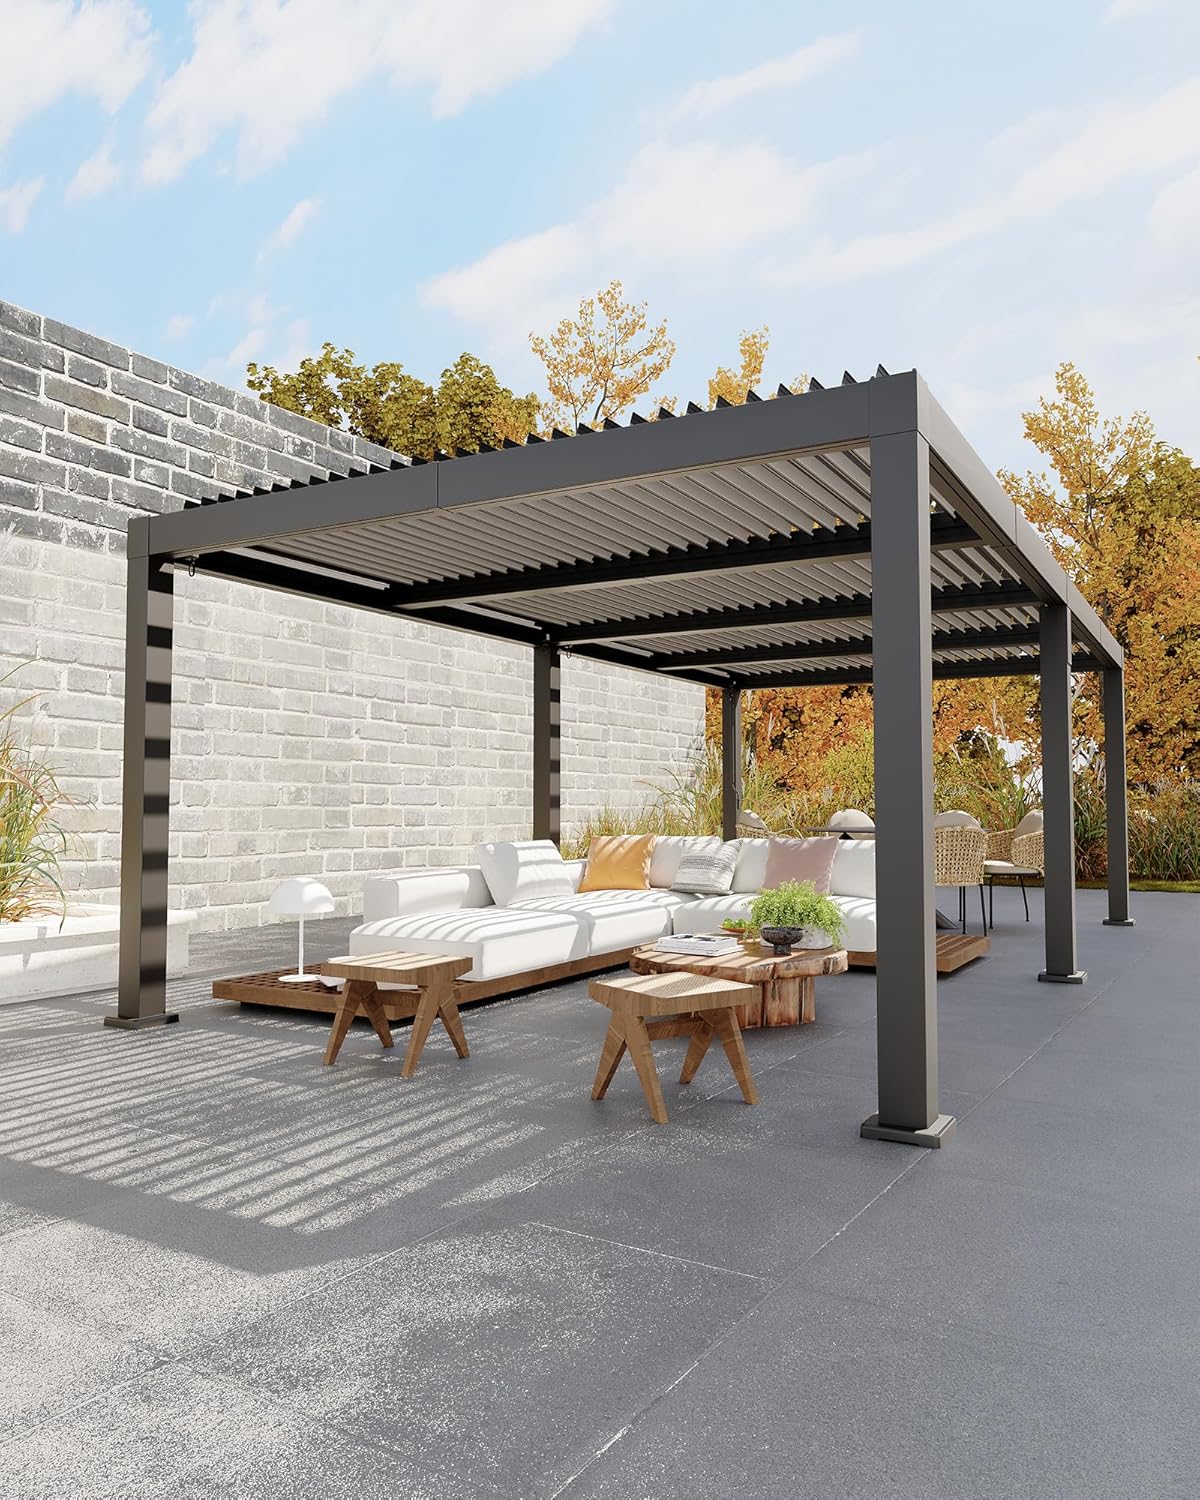
This image shows the complete pergola structure, highlighting its robust aluminum frame and louvered roof design.

A close-up view of a pergola post being secured to the ground with expansion screws, demonstrating the stability features.
Operating Instructions
Adjusting Louvers
The GarveeLife Louvered Pergola features an adjustable roof system, allowing you to control sunlight and airflow. Use the provided crank handle to adjust the louvers from 0° to 90°.
- To Open Louvers: Insert the crank handle into the designated slot and turn it to open the louvers. This allows sunlight and maximum airflow.
- To Close Louvers: Turn the crank handle in the opposite direction to close the louvers. This provides full shade and rain protection.

This image illustrates the crank handle mechanism used to manually adjust the angle of the louvered roof panels.
Integrated Drainage System
The pergola is equipped with an integrated drainage system. When the louvers are closed, rainwater flows seamlessly through hidden gutters into reinforced columns, exiting discreetly at ground level. This prevents pooling and keeps the area dry.

A visual representation of how rainwater is channeled through the pergola's internal gutters and down the support columns.
Video 2: Demonstration of adjustable rainproof and gutter system.
This video showcases the adjustable louvered roof and the effectiveness of the integrated gutter system in managing rainwater.
Maintenance
Regular maintenance will extend the life and appearance of your pergola.
- Cleaning: Clean the aluminum frame and louvers periodically with mild soap and water. Avoid abrasive cleaners or harsh chemicals that could damage the finish.
- Inspection: Annually inspect all bolts, screws, and connections to ensure they remain tight. Re-tighten as necessary. Check the drainage system for any blockages and clear them.
- Winterization: In areas with heavy snowfall, it is recommended to keep the louvers closed to prevent snow accumulation and potential damage.
Troubleshooting
Here are solutions to common issues you might encounter:
- Louvers not adjusting smoothly: Check for any obstructions in the louver mechanism or tracks. Ensure the crank handle is properly engaged. Apply a silicone-based lubricant if necessary.
- Water pooling on roof: Ensure louvers are fully closed. Check the drainage channels for blockages (leaves, debris) and clear them. Verify that the pergola is installed on a level surface.
- Pergola feels unstable: Re-check all anchor bolts and frame connections. Ensure they are tightened to specification. Confirm the foundation is solid and level.
- Missing or damaged parts: If you find any parts missing or damaged during transportation or assembly, please contact GarveeLife customer service without hesitation for assistance.
Specifications

This image provides a diagram with key dimensions of the pergola, including length, width, and height.
| Feature | Detail |
|---|---|
| Brand | GarveeLife |
| Model Number | WY-AP-1224Smmcfn |
| Material | All-Aluminum |
| Product Dimensions | 144"L x 278"W x 89"H (12 ft x 24 ft) |
| Item Weight | 604 Pounds |
| Frame Material | Alloy Steel (Note: Product description states All-Aluminum, this may refer to internal components) |
| Water Resistance Level | Water Repellent |
| Ultraviolet Light Protection | YES |
| Assembly Required | Yes |
| Color | Gray |
| Floor Area | 288 Square Feet |
Warranty and Support
For any inquiries regarding your GarveeLife All-Aluminum Louvered Pergola, including missing parts, damaged components, or assembly assistance, please contact GarveeLife customer service. Refer to the contact information provided with your product packaging or visit the official GarveeLife store on Amazon for support.