Retevis H777D
Retevis H777D Walkie Talkies User Manual
Model: H777D
Brand: Retevis
1. Introduction
The Retevis H777D Walkie Talkie is an upgraded communication device designed for reliable and clear two-way radio communication. Featuring an intuitive LCD screen, Type-C charging, and robust functionality, it is suitable for various applications including outdoor activities, business operations, and emergency preparedness. This manual provides detailed instructions to help you effectively set up, operate, and maintain your H777D walkie talkie.
2. What's in the Box
Upon unpacking your Retevis H777D Walkie Talkie, please ensure all the following items are present:
- H777D walkie talkie X1
- 1200mAh Battery X1
- Data Cable & Charger Cable X1
- Charge Base X1
- Belt Clip & Strap X1
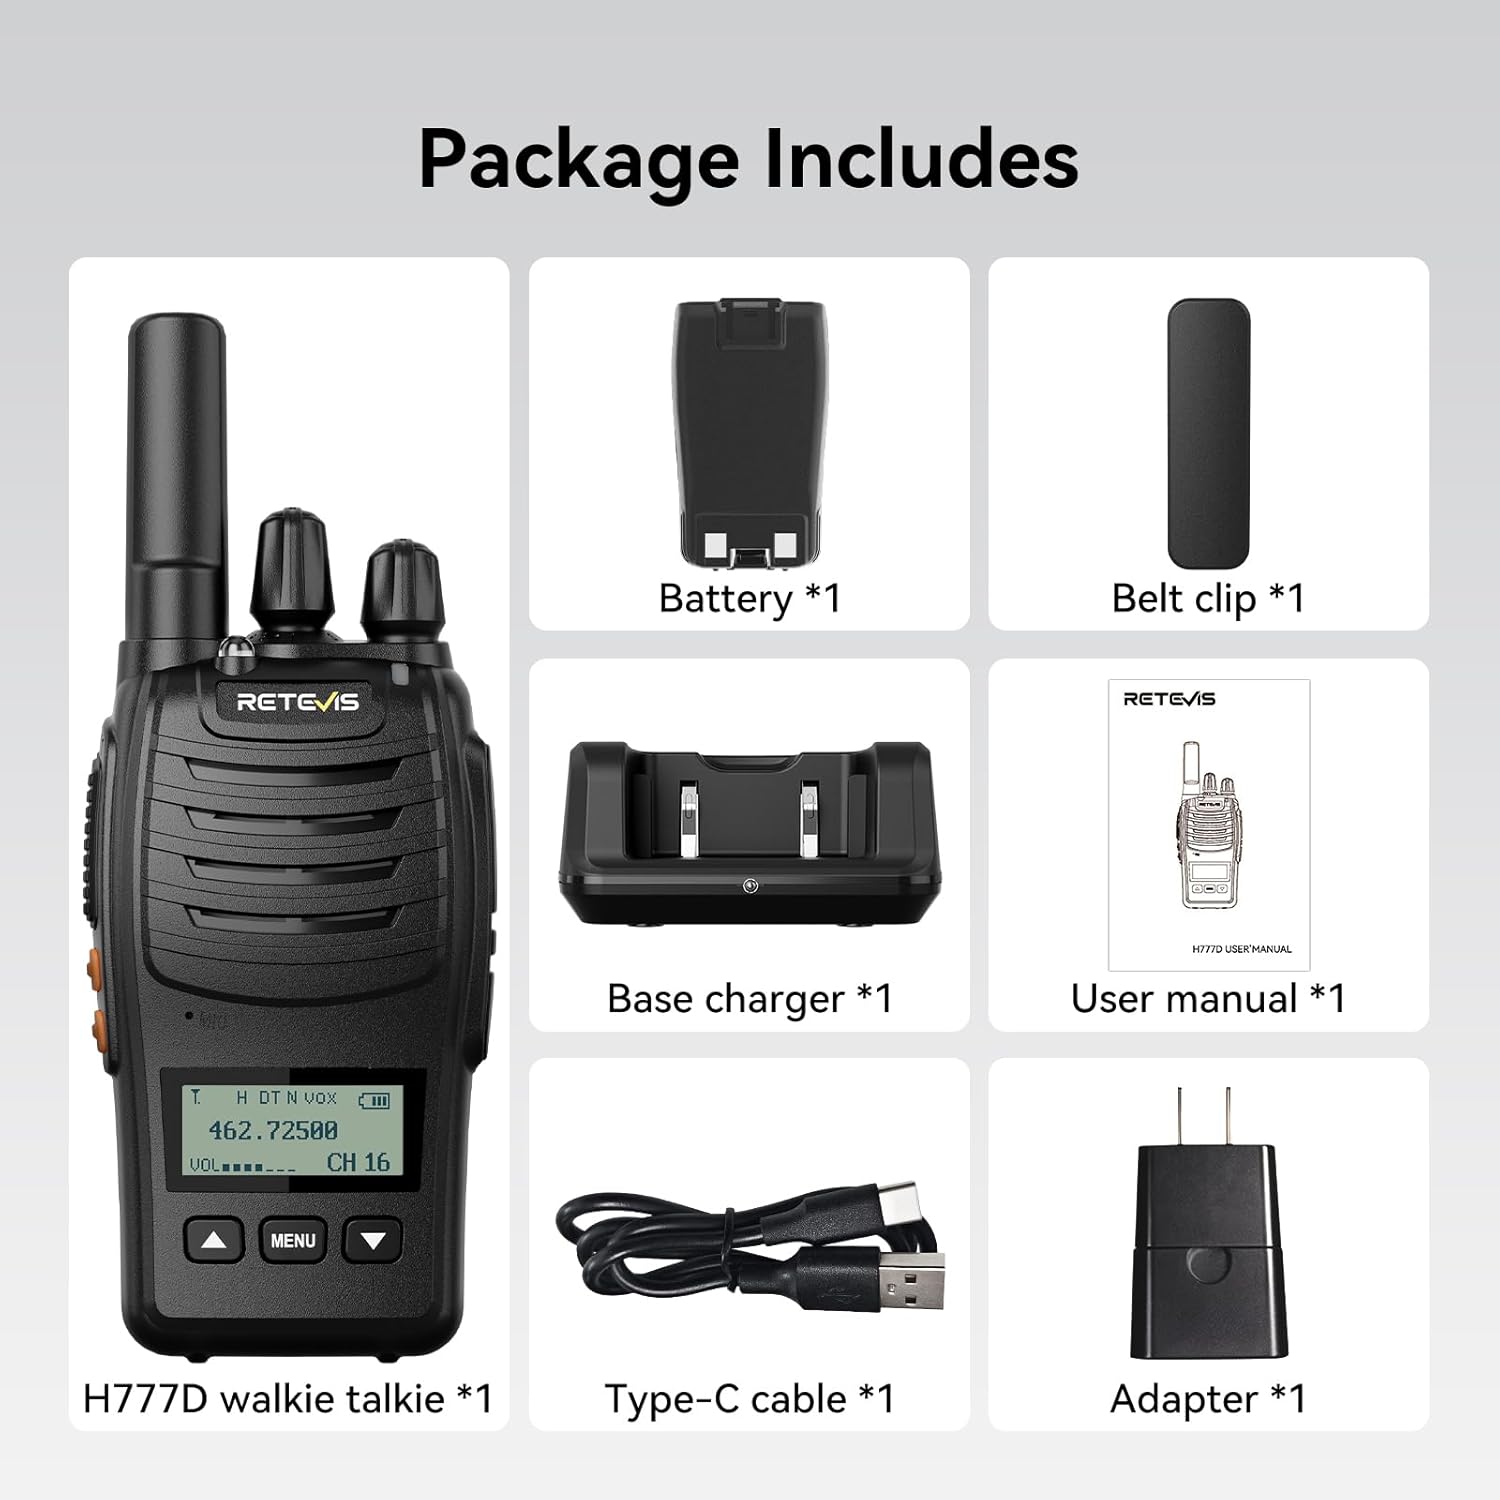
Figure 2.1: Package Contents. This image displays the H777D walkie talkie, battery, charging base, Type-C cable, adapter, belt clip, and user manual included in the package.
3. Product Overview
Familiarize yourself with the various components and controls of your Retevis H777D walkie talkie:
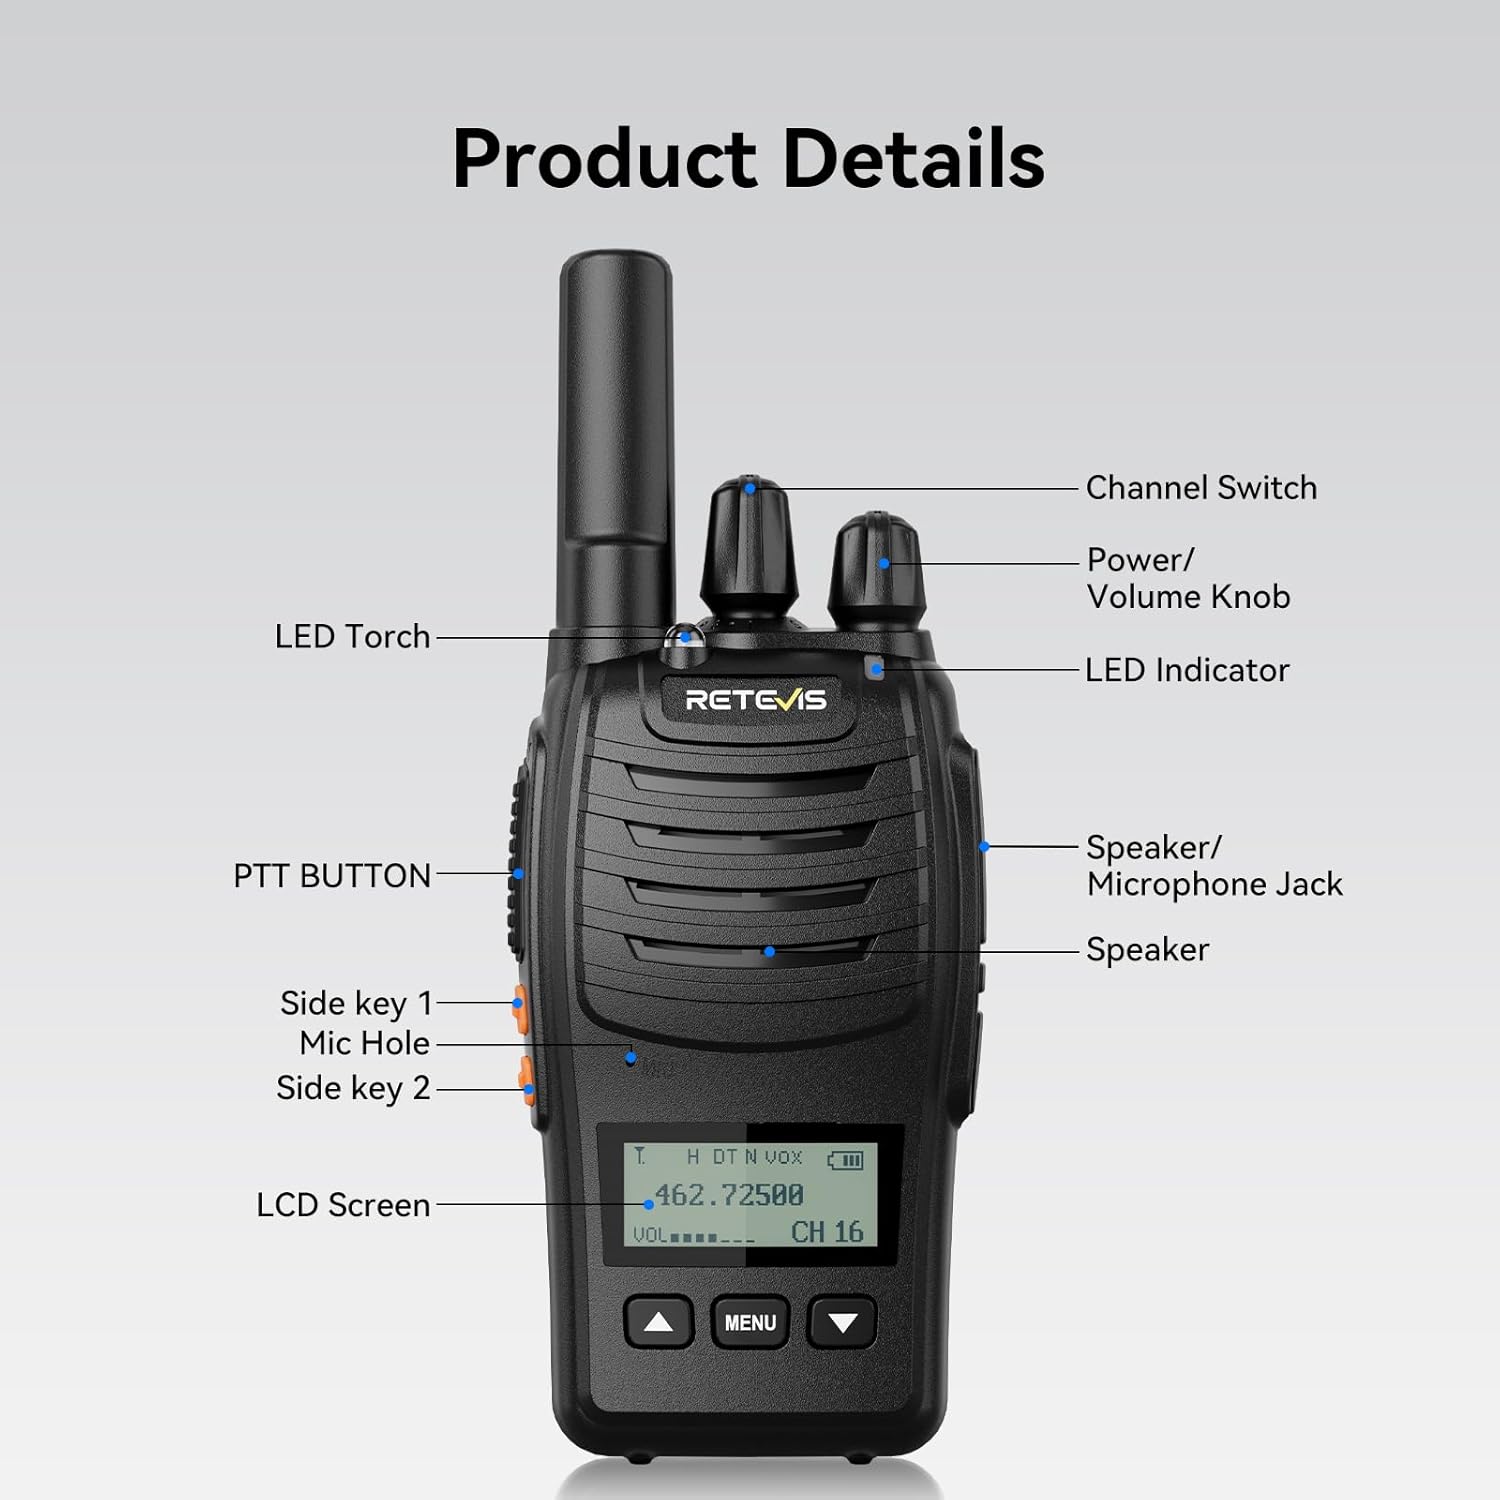
Figure 3.1: Product Details. This diagram highlights key components including the Channel Switch, Power/Volume Knob, LED Indicator, Speaker, LCD Screen, PTT Button, Side Key 1, Side Key 2, Mic Hole, and LED Torch.
Video 3.1: Retevis H777D Walkie Talkies Overview. This video provides a visual tour of the walkie talkie, pointing out the speaker/microphone jack, channel switch, power/volume knob, LED indicator, speaker, LCD screen, LED torch, mic hole, PTT button, and side keys.
4. Setup
4.1 Battery Installation
- Align the battery with the battery compartment on the back of the walkie talkie.
- Gently press the battery into place until it clicks securely.
4.2 Charging the Battery
The H777D supports both Type-C direct charging and base charging.
- Base Charging: Place the walkie talkie into the charging base. Ensure the charging contacts align. The indicator light on the base will show charging status.
- Type-C Charging: Connect the provided Type-C cable to the walkie talkie's Type-C port and a compatible USB power source.
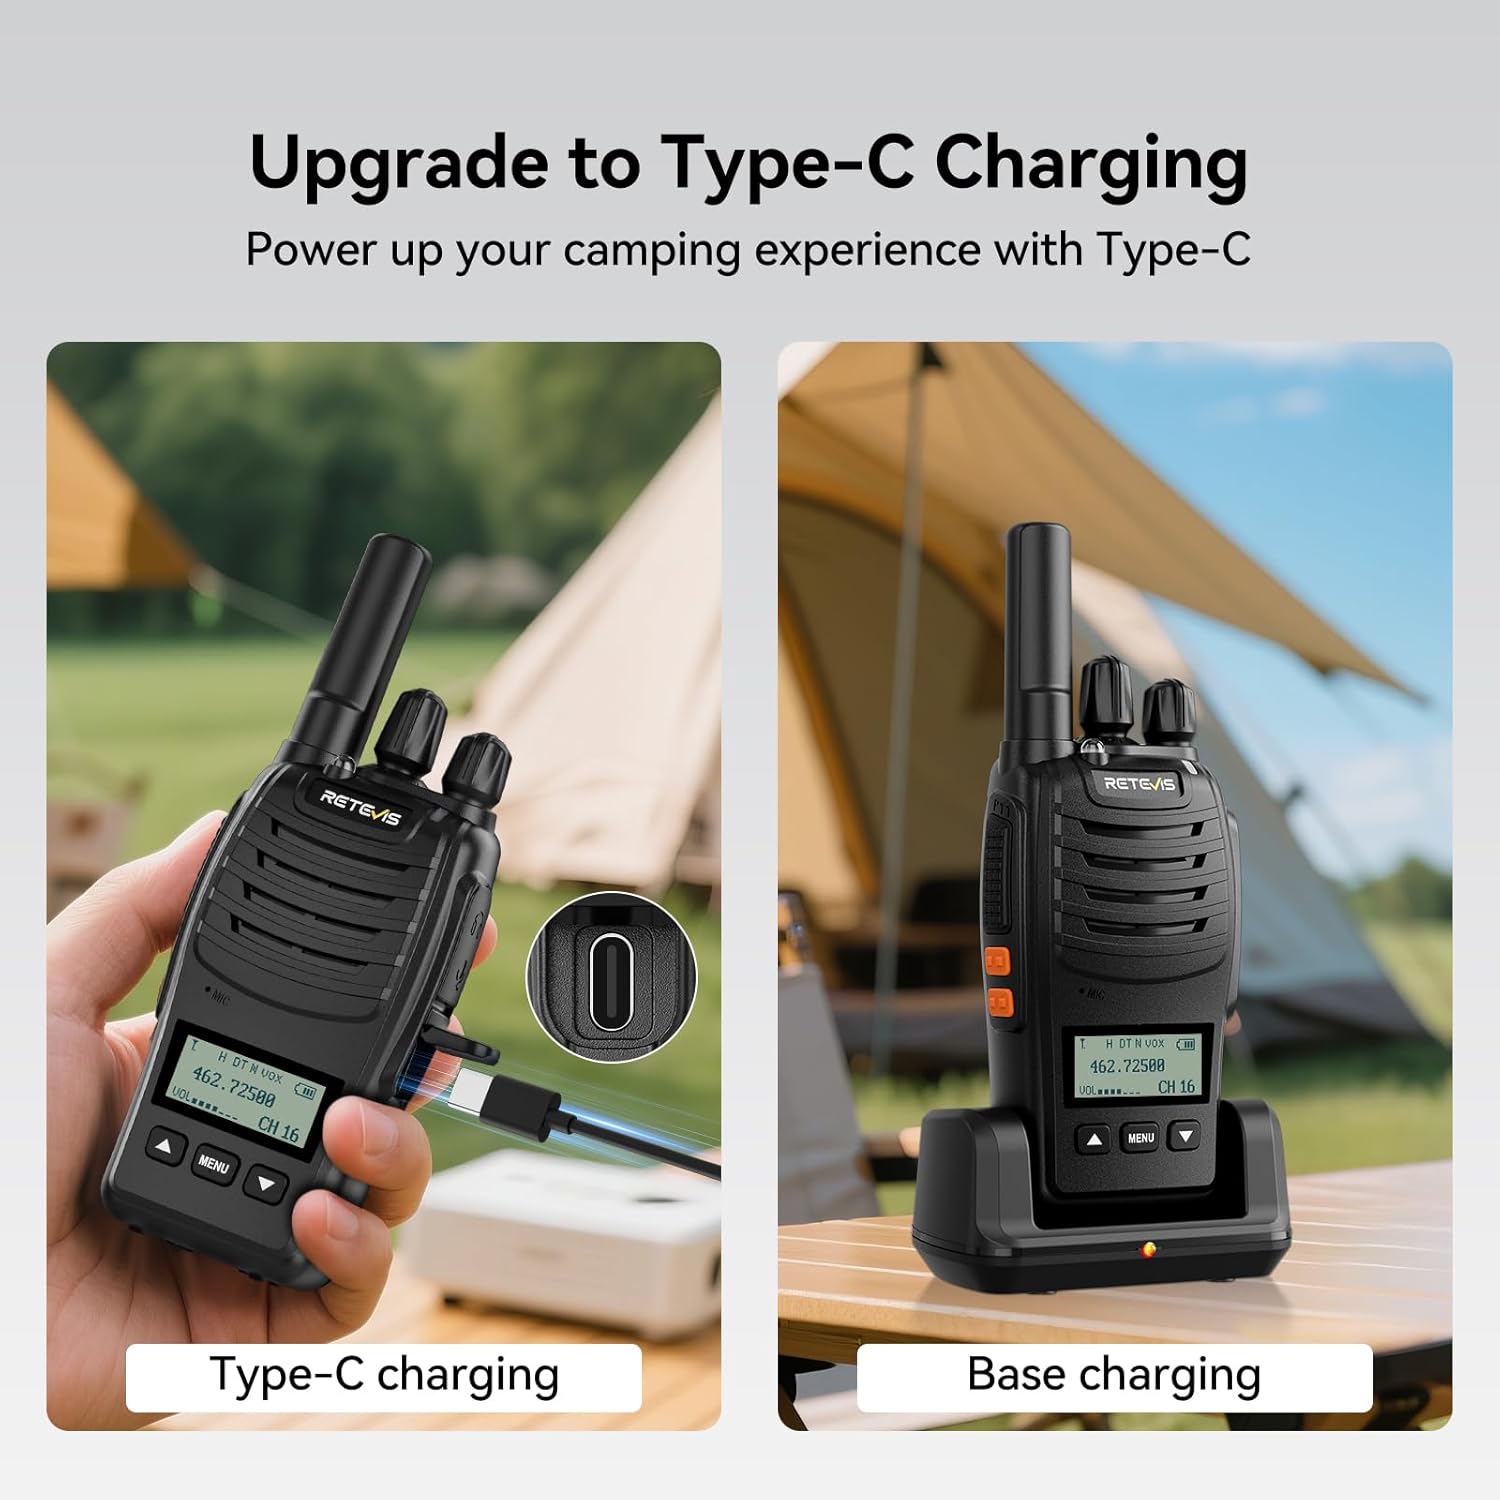
Figure 4.1: Flexible Charging Options. This image illustrates both Type-C direct charging and traditional base charging methods for the H777D walkie talkie.

Figure 4.2: Easy Charging. This image shows the convenience of both Type-C and base charging options, allowing you to charge your device whether you are on the go or at home.
4.3 Powering On/Off
Rotate the Power/Volume Knob clockwise to power on the walkie talkie. Rotate it counter-clockwise until it clicks to power off.
5. Operating Instructions
5.1 Channel Selection
Use the Channel Switch (top knob) to select your desired communication channel. The LCD screen will display the current channel number.
5.2 Volume Adjustment
Rotate the Power/Volume Knob to adjust the listening volume. Turn clockwise to increase volume, counter-clockwise to decrease.
5.3 Push-to-Talk (PTT) Button
Press and hold the PTT button on the side of the walkie talkie to transmit your voice. Release the button to listen.
5.4 VOX Function (Voice Operated Exchange)
The VOX function allows for hands-free communication. To activate VOX, long-press Side Key 2. The LCD screen will indicate its status. Adjust VOX sensitivity levels via the Menu button.

Figure 5.1: Hands-Free Communication. This image shows a user wearing the walkie talkie on their backpack strap, indicating hands-free operation via VOX, with the LCD screen displaying VOX status.

Figure 5.2: VOX Function. This image visually represents the VOX function, enabling voice-activated transmission without needing to press the PTT button.
5.5 Flashlight Function
The built-in flashlight provides enhanced visibility in dark environments. Activate it by twice short pressing Side Key 2. The flashlight also includes an emergency light mode.

Figure 5.3: Enhanced Visibility. This image shows the H777D walkie talkie's built-in flashlight illuminating a dark area, highlighting its utility for visibility.
5.6 Emergency Alarm
To activate the emergency alarm, long-press Side Key 1. To deactivate the alarm, press the PTT key.

Figure 5.4: Emergency Alarm. This image depicts the emergency alarm function, providing a visual cue for its activation.
5.7 Wireless Pairing / Synchronization
For effortless synchronization with other H777 series walkie talkies, tune to channel 1, then hold down the Up button while powering on to enter pairing mode. For quick replication of settings across multiple H777D units, tune to channel 2, then hold down the Up button while powering on.

Figure 5.5: One-key Pairing. This image illustrates the simple one-key pairing process between two H777D walkie talkies, showing the channel and button presses required.
5.8 Adjustable Squelch Control
The H777D features 1-9 level squelch control to ensure clear communication by filtering out weak signals or background noise. Adjust the squelch level via the Menu settings to optimize audio clarity in various environments.

Figure 5.6: 1-9 Squelch Levels. This image visually represents the squelch function, indicating its role in filtering out noise for clearer communication.
5.9 NOAA Weather Alerts
Stay informed about weather conditions and receive weather-related emergency alerts through the integrated NOAA function. This feature helps you manage weather-related emergencies effectively.

Figure 5.7: NOAA Weather Alerts. This image shows the H777D walkie talkie with icons representing various weather conditions, emphasizing its NOAA weather alert capability.
5.10 LCD Screen and Button Design
The H777D features an upgraded LCD screen that displays signal strength, volume, channel, and battery life at a glance, providing intuitive information and real-time status. The new button design (Up, Menu, Down) allows for easy navigation and simplified operations.
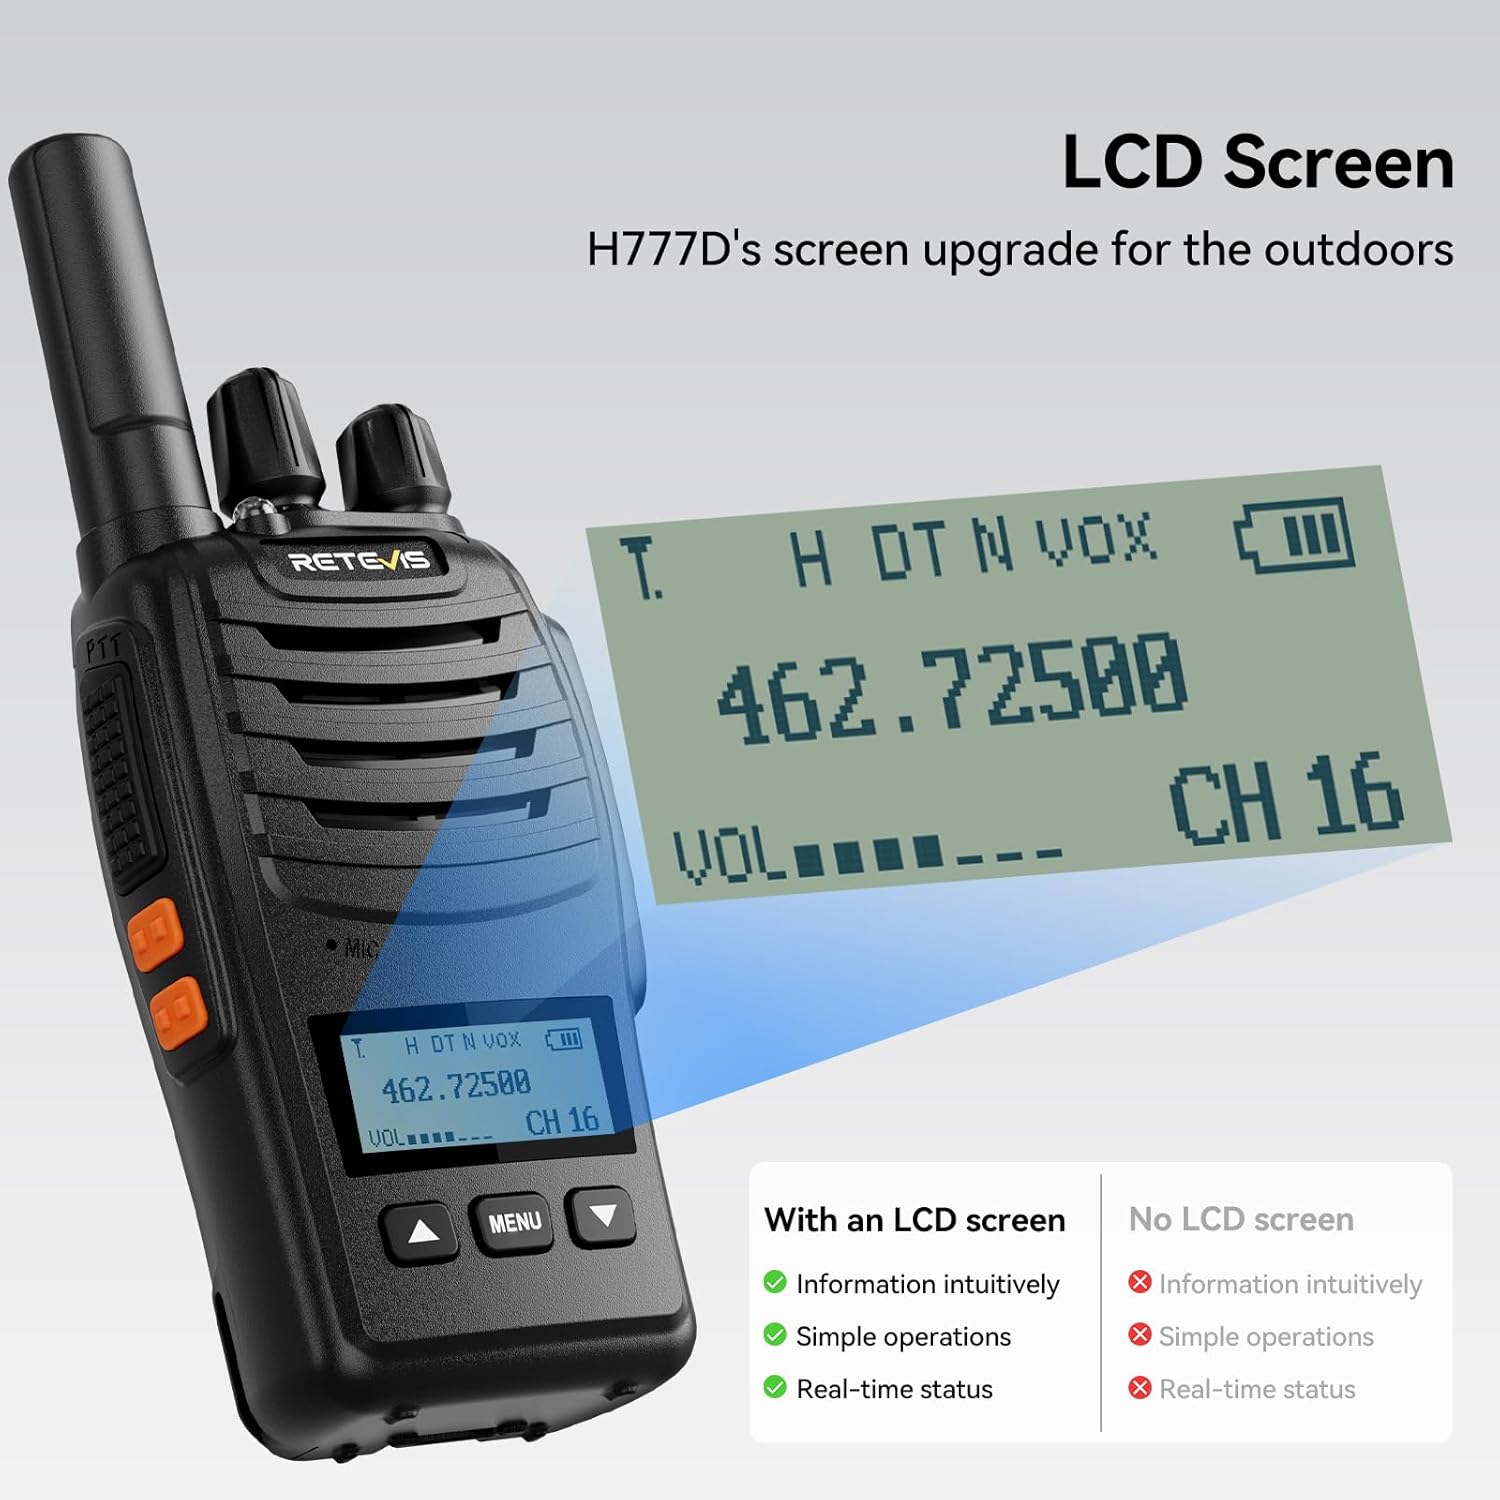
Figure 5.8: Intuitive LCD Screen. This image highlights the H777D's LCD screen, showing displayed information such as frequency, channel, signal strength, volume, and battery level.

Figure 5.9: Intuitive LCD Screen. This image compares the H777D's LCD screen benefits (battery levels, signal strength, CTCSS/DCS, high/low power, channel) against models without a screen.

Figure 5.10: New Button Design. This image showcases the upgraded button design, featuring clearly labeled Up, Menu, and Down buttons for easy navigation.

Figure 5.11: Easy to Use. This image contrasts the H777D's upgraded features (LCD screen, Up/Menu/Down buttons, intuitive display, simplified operations) with older models, emphasizing ease of use.
6. Maintenance
6.1 General Care
- Keep the walkie talkie dry. Avoid exposure to rain, moisture, or liquids.
- Clean the device with a soft, damp cloth. Do not use harsh chemicals or abrasive cleaners.
- Avoid extreme temperatures. Do not store the device in very hot or cold environments.
6.2 Battery Care
- Charge the battery fully before first use.
- Do not overcharge or deep discharge the battery.
- If storing the device for an extended period, charge the battery to about 50% capacity.

Figure 6.1: Extended Battery Performance. This image compares the H777D's 1200mAh battery and 11 hours of usage to the H777's 1000mAh battery and 10-12 hours of usage, highlighting the improved endurance.
7. Troubleshooting
| Problem | Possible Cause | Solution |
|---|---|---|
| No Power | Battery low or not installed correctly. | Charge the battery. Ensure battery is securely installed. |
| Cannot Transmit or Receive | Incorrect channel selected. Out of range. | Verify both radios are on the same channel. Move closer to the other radio. |
| Poor Audio Quality | Squelch level too high. Interference. | Adjust squelch level. Move away from sources of interference. |
| VOX not working | VOX not activated or sensitivity too low. | Long-press Side Key 2 to activate VOX. Adjust VOX sensitivity in Menu. |
8. Specifications
| Feature | Detail |
|---|---|
| Model Number | H777D |
| Item Weight | 10.9 ounces |
| Package Dimensions | 8.35 x 6.6 x 1.89 inches |
| Batteries | 1 Nonstandard Battery (included) |
| Number of Channels | 16 |
| Special Feature | Long Range, Lightweight, with LCD Screen |
| Frequency Range | FRS |
| Water Resistance Level | Not Water Resistant |
9. Warranty and Support
Retevis provides a 2-year warranty for the radio body and a 1-year warranty for accessories. Additionally, there is a 30-day no-reason return policy. Beyond the warranty period, maintenance services are still offered, with buyers responsible for associated costs.
For any inquiries or support needs, please contact Retevis customer service on Amazon. They aim to reply within 12 hours.