1. Product Overview
The Driauto Double Din Car Stereo is a 7-inch touch screen multimedia player designed for vehicle integration. It features wireless connectivity for Apple CarPlay and Android Auto, Bluetooth for hands-free communication and audio streaming, FM radio, and various multimedia input options. This unit also supports a backup camera and steering wheel controls for enhanced convenience and safety.

Image: Front view of the Driauto Double Din Car Stereo displaying the Apple CarPlay interface, along with a backup camera, external microphone, and smartphone icons representing connectivity features.
2. Package Contents
Before installation, verify that all components are present in the package:
- Driauto Double Din Car Stereo Unit
- Power Cable Harness
- Horn Cable Harness
- Mounting Brackets (2)
- User Manual
- Rear Camera
- Frame
- External Microphone (if included)

Image: A visual representation of the package contents, including the 7-inch stereo unit, power and horn cables, mounting brackets, user manual, rear camera, and frame. A detailed wiring diagram is also shown.
3. Setup and Installation
Important: Professional installation is recommended for optimal performance and to avoid damage to your vehicle or the stereo unit. Ensure the vehicle's battery is disconnected before beginning installation.
3.1 Wiring Connections
Refer to the provided wiring diagram for correct connections. The main wiring harness includes connections for power, ground, speakers, and control signals. Ensure all connections are secure and properly insulated.
- Power (Yellow): Connect to constant 12V power.
- Accessory (Red): Connect to switched 12V power (ignition).
- Ground (Black): Connect to vehicle chassis ground.
- Speaker Wires: Connect to corresponding vehicle speaker wires (e.g., White/White-Black for Front Left, Gray/Gray-Black for Front Right, Green/Green-Black for Rear Left, Purple/Purple-Black for Rear Right).
- Reverse Input (Brown): Connect to the vehicle's reverse light circuit for automatic backup camera display.
- Steering Wheel Control (Key1/Key2): Connect to vehicle's steering wheel control wires (if applicable).
- Antenna: Connect to vehicle's radio antenna.
3.2 Backup Camera Installation
Mount the backup camera at the rear of your vehicle, ensuring a clear view. Connect the camera's video output to the "CAMIN" input on the stereo unit. Connect the camera's power wire to the vehicle's reverse light circuit and ground.
3.3 Physical Installation
- Remove the existing car stereo and dashboard trim.
- Connect the wiring harnesses from the vehicle to the stereo unit.
- Secure the stereo unit into the double din opening using the provided mounting brackets.
- Reinstall dashboard trim.
- Reconnect the vehicle battery.
4. Operating Instructions
4.1 Basic Controls
- Power Button: Press to turn on/off.
- Volume Knob: Rotate to adjust volume. Press to mute/unmute.
- Home Button: Returns to the main menu.
- Previous/Next Track Buttons: Navigate media tracks or radio stations.

Image: Close-up view of the car stereo's front panel, highlighting the various multimedia input options including USB, Type-C charging, AUX socket, USB socket, and TF card slot. It also shows the seven-color backlight options.
4.2 Wireless Connectivity (CarPlay, Android Auto, MirrorLink)
The unit supports wireless Apple CarPlay, Android Auto, and MirrorLink for seamless smartphone integration. Connect your smartphone via Bluetooth to access navigation, music, calls, and other apps directly on the stereo's display.
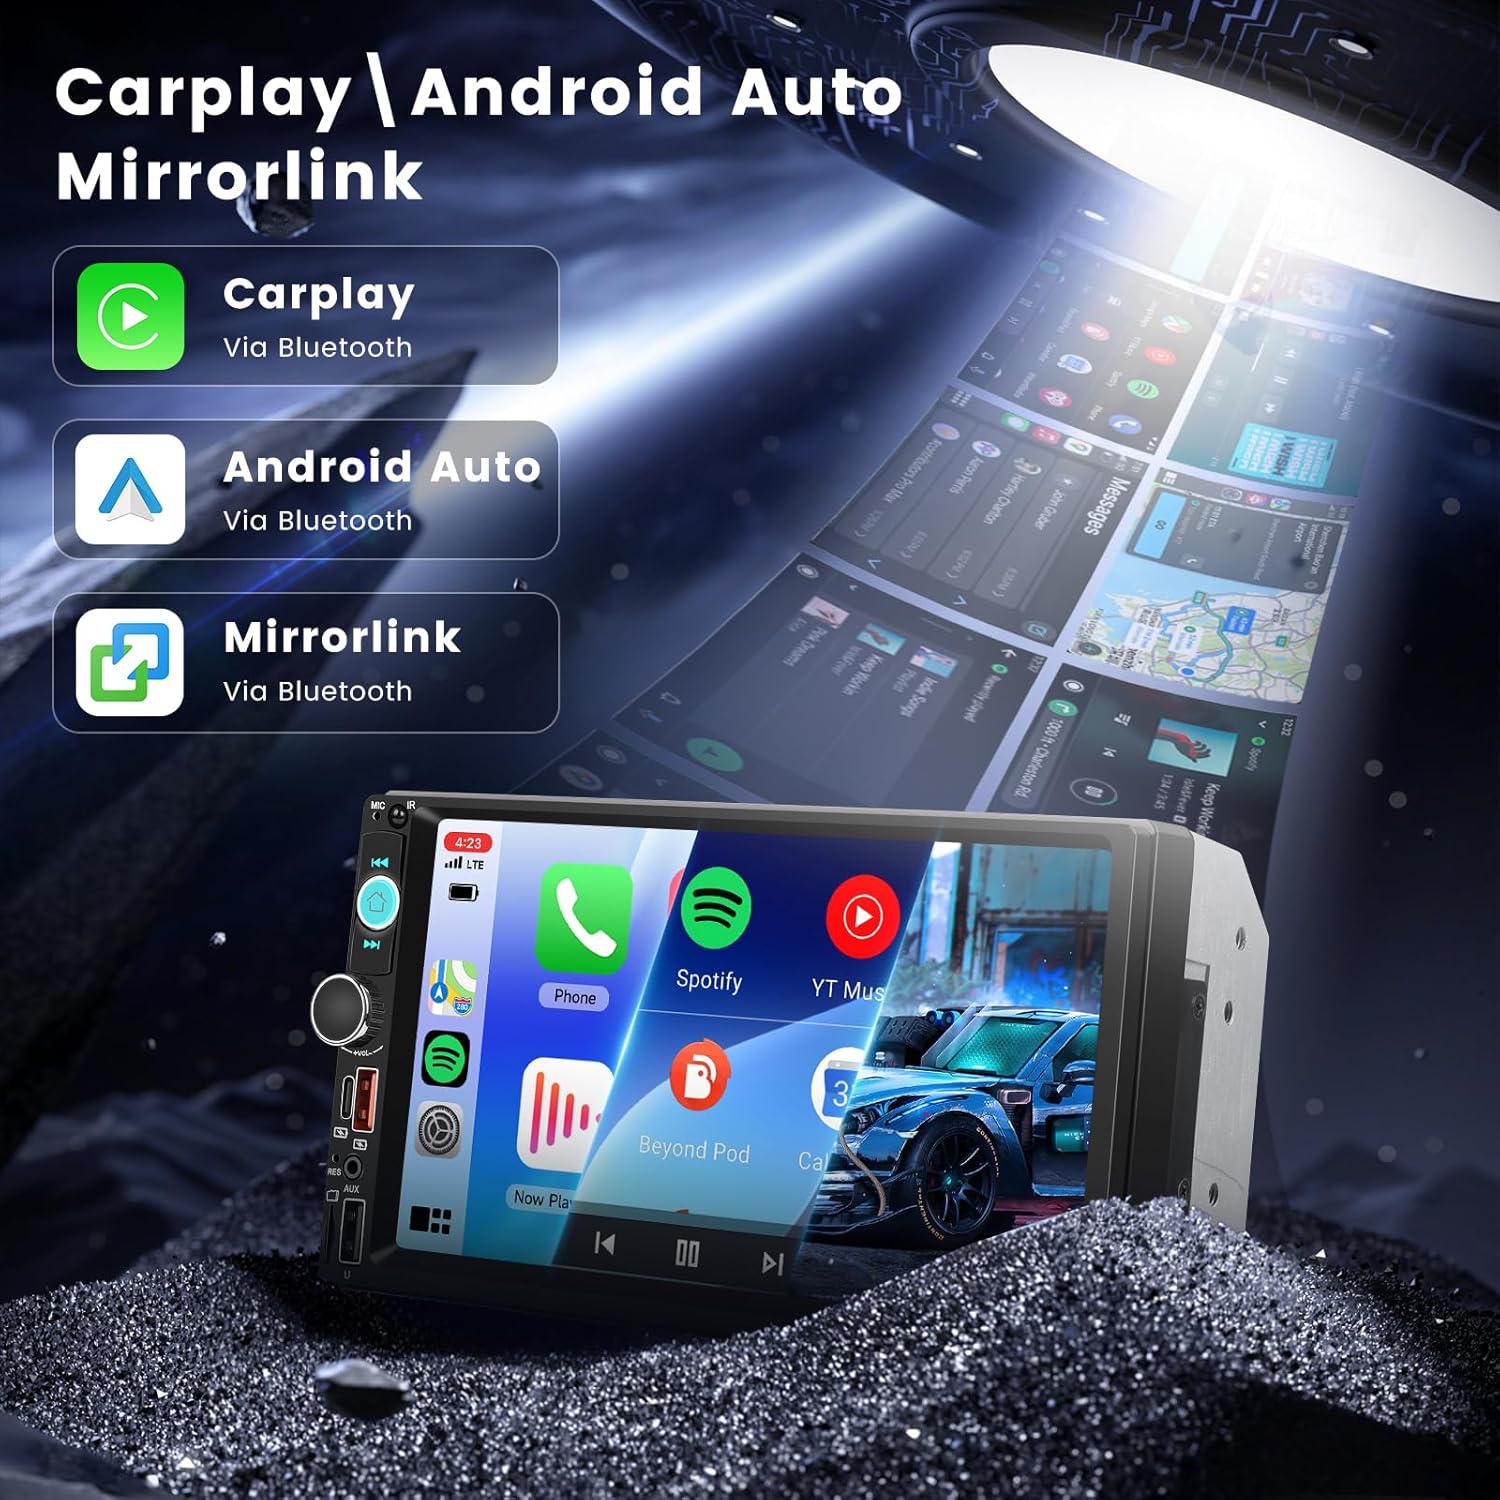
Image: Illustrates the wireless connectivity features including CarPlay, Android Auto, and MirrorLink, showing how a smartphone's interface is mirrored on the car stereo screen.
4.3 Bluetooth Functions
Pair your phone via Bluetooth for hands-free calling and music streaming. The included external microphone ensures clear call quality.
- Go to the Bluetooth menu on the stereo.
- Enable Bluetooth on your smartphone and search for the stereo unit.
- Select the stereo unit from the list and confirm pairing.
4.4 FM Radio
Access the FM radio function to listen to local broadcasts. Use the touch screen or physical buttons to scan for stations or manually tune.

Image: Displays the features of lossless sound quality, Bluetooth for hands-free calling and music, FM radio interface, and a graphic equalizer (EQ) for audio customization.
4.5 Multimedia Playback
The unit supports various media sources:
- USB Drives: Insert a USB drive into the USB port for music and video playback.
- SD Card: Insert an SD card into the TF card slot for media playback.
- Type-C: Use the Type-C port for faster data transfer and efficient power delivery for compatible devices.
- YouTube Playback: The 7-inch IPS touch screen supports YouTube video playback, offering entertainment for passengers. Video output to rear headrest screens is also supported.

Image: Shows the 7-inch screen displaying YouTube content and an illustration of video being shared to rear headrest screens for passenger entertainment.
4.6 Backup Camera and Steering Wheel Controls
When the vehicle is in reverse, the backup camera view will automatically display on the screen, complete with reverse assist lines. Steering wheel controls allow for convenient operation of key functions without taking your hands off the wheel.
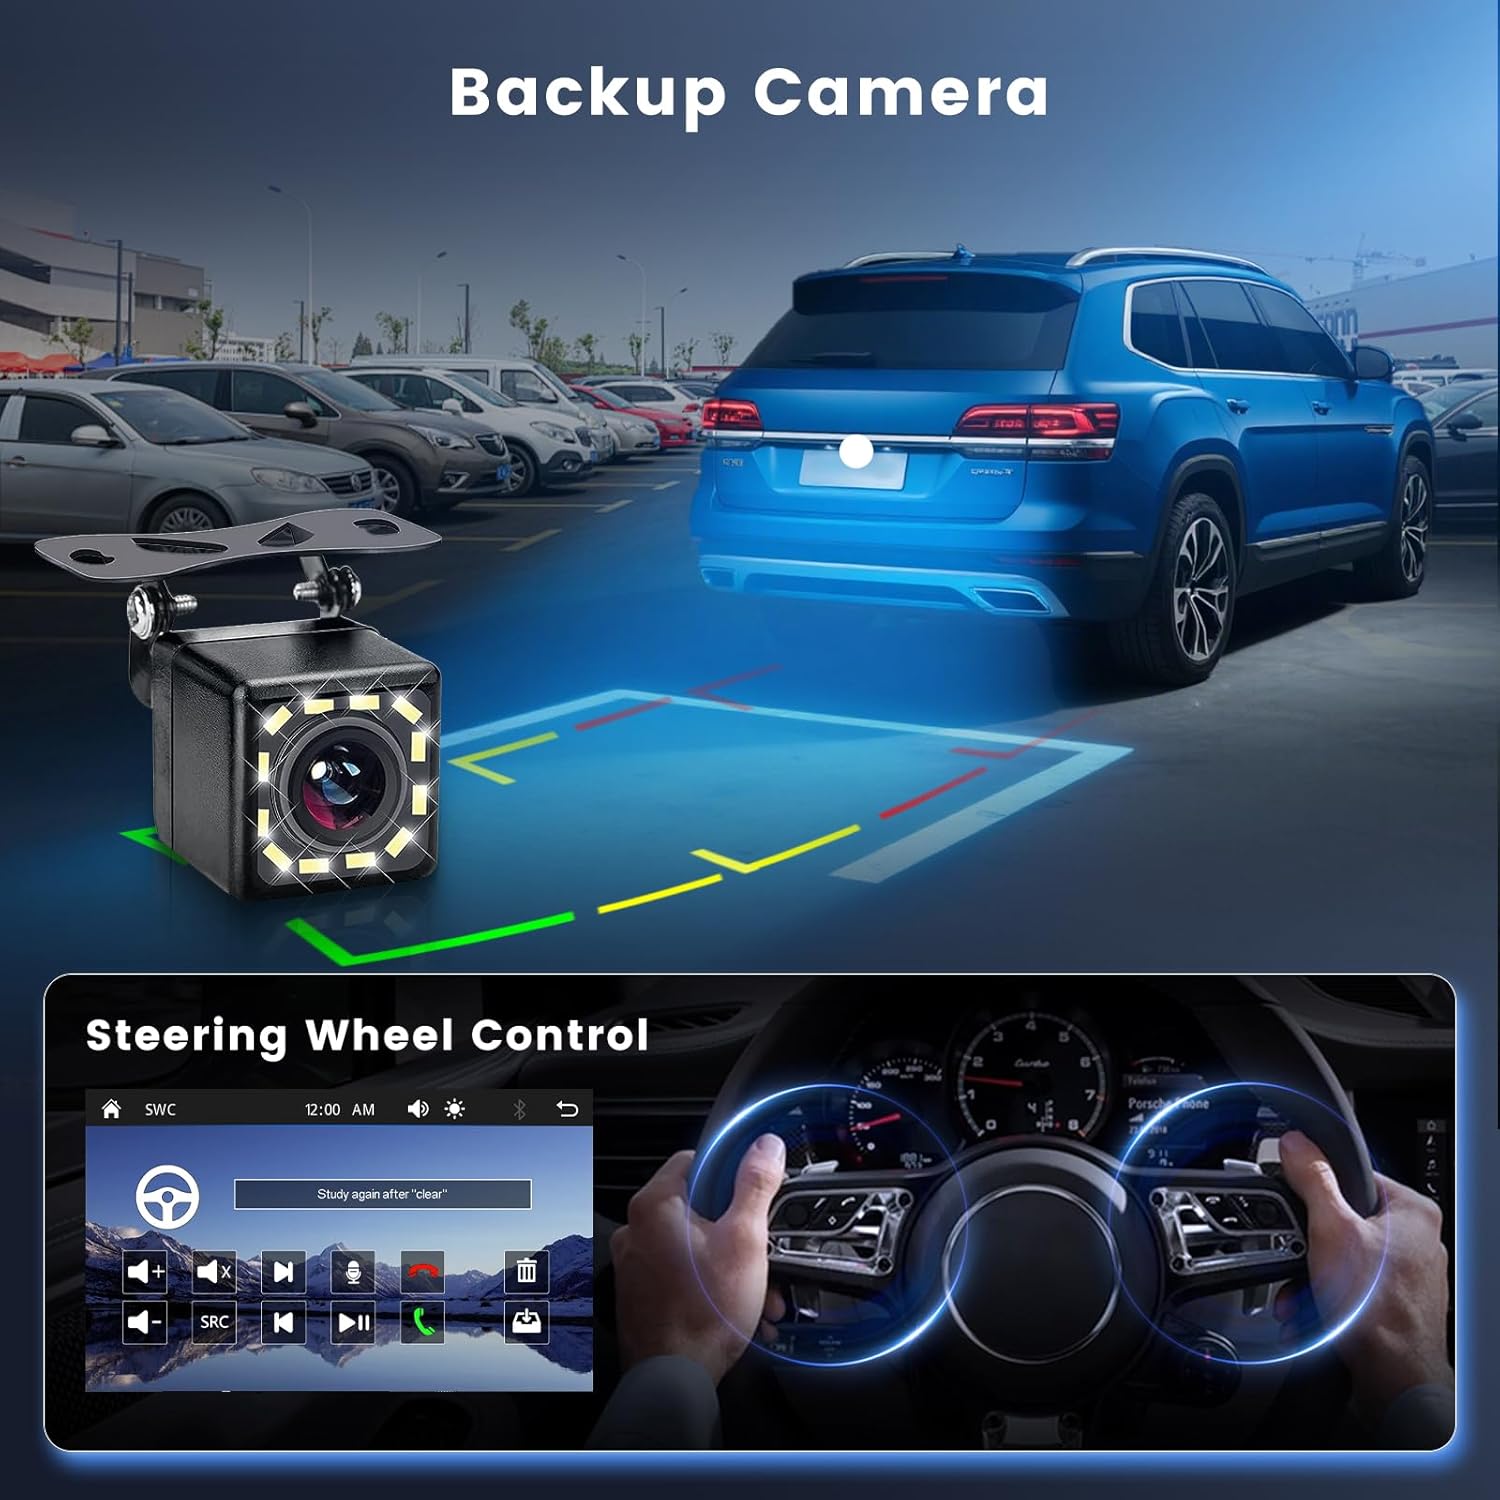
Image: Depicts the backup camera providing a clear view with parking assist lines, and a separate inset showing the steering wheel control interface on the stereo screen.
4.7 Sound Settings (EQ)
Access the Equalizer (EQ) settings to customize the audio output to your preference. Adjust bass, treble, and other frequency bands for a personalized listening experience.
5. Maintenance
- Screen Cleaning: Use a soft, lint-free cloth to gently wipe the touch screen. Avoid abrasive cleaners or solvents.
- General Care: Keep the unit free from dust and moisture. Ensure proper ventilation around the unit to prevent overheating.
- Software Updates: Check the manufacturer's website periodically for any available software or firmware updates.
6. Troubleshooting
| Problem | Possible Cause | Solution |
|---|---|---|
| No Power | Incorrect wiring; Blown fuse; Vehicle battery disconnected. | Check power and ground connections. Inspect vehicle fuses. Ensure battery is connected. |
| No Sound | Speaker wires incorrectly connected; Volume too low; Mute function active. | Verify speaker wiring. Increase volume. Check if mute is active. |
| Bluetooth Not Connecting | Bluetooth not enabled on phone/stereo; Incorrect pairing process. | Ensure Bluetooth is active on both devices. Re-attempt pairing. |
| Backup Camera Not Displaying | Camera not powered; Video cable loose; Reverse trigger wire not connected. | Check camera power and video connections. Verify reverse trigger wire connection. |
| Unit Overheating or Unusual Odor | Improper installation; Internal electrical issue; Inadequate ventilation. | Immediately disconnect power. Consult a professional technician. Ensure proper ventilation around the unit. |
7. Specifications
- Screen Size: 7-inch IPS Touch Screen
- Connectivity: Bluetooth, Wireless Apple CarPlay, Wireless Android Auto, MirrorLink, USB, Type-C, SD Card, AUX
- Output Power: 45 Watts (per channel, typical)
- Video Encoding Support: MP4, MKV, MOV
- Audio Output Mode: Stereo
- Surround Sound Channel Configuration: 5.1 (via RCA outputs)
- Special Features: Equalizer, Hands-Free Calling, Backup Camera Support, Steering Wheel Control (SWC)
- Item Weight: 1.76 pounds
- Package Dimensions: 3.94 x 3.94 x 3.94 inches (approximate)
8. Warranty and Support
Driauto provides the following support for this product:
- Replacement: 2 Years
- Support: Lifetime Technical Support
For technical assistance, warranty claims, or further inquiries, please contact Driauto customer support through the retailer where the product was purchased or visit the official Driauto website.