1. Introduction
This manual provides detailed instructions for the installation, operation, and maintenance of your XORLINK 4K/8MP Solar Security Camera (Model: rt1220). This outdoor surveillance camera features dual lenses for comprehensive coverage, solar power for continuous operation, smart PIR detection, two-way audio, and robust weather resistance. Please read this manual thoroughly before using the product to ensure proper functionality and safety.
2. Setup
2.1 Package Contents
Before beginning installation, verify that all components are present:
- 1x Solar PTZ Camera
- 1x Solar Panel
- 1x Solar Panel Racking
- 1x Mounting Base
- 1x Screws Bag
- 1x User Manual (this document)

Image: Contents of the XORLINK Solar Security Camera package.
2.2 Physical Installation
The camera and solar panel are designed for outdoor wall mounting. Choose a location that provides optimal sunlight exposure for the solar panel and a clear view for the camera. Ensure the mounting surface is sturdy enough to support the device.
- Attach the mounting base to your desired location using the provided screws.
- Secure the camera to the mounting base.
- Mount the solar panel using its racking, ensuring it faces direct sunlight for maximum charging efficiency.
- Connect the solar panel cable to the camera.
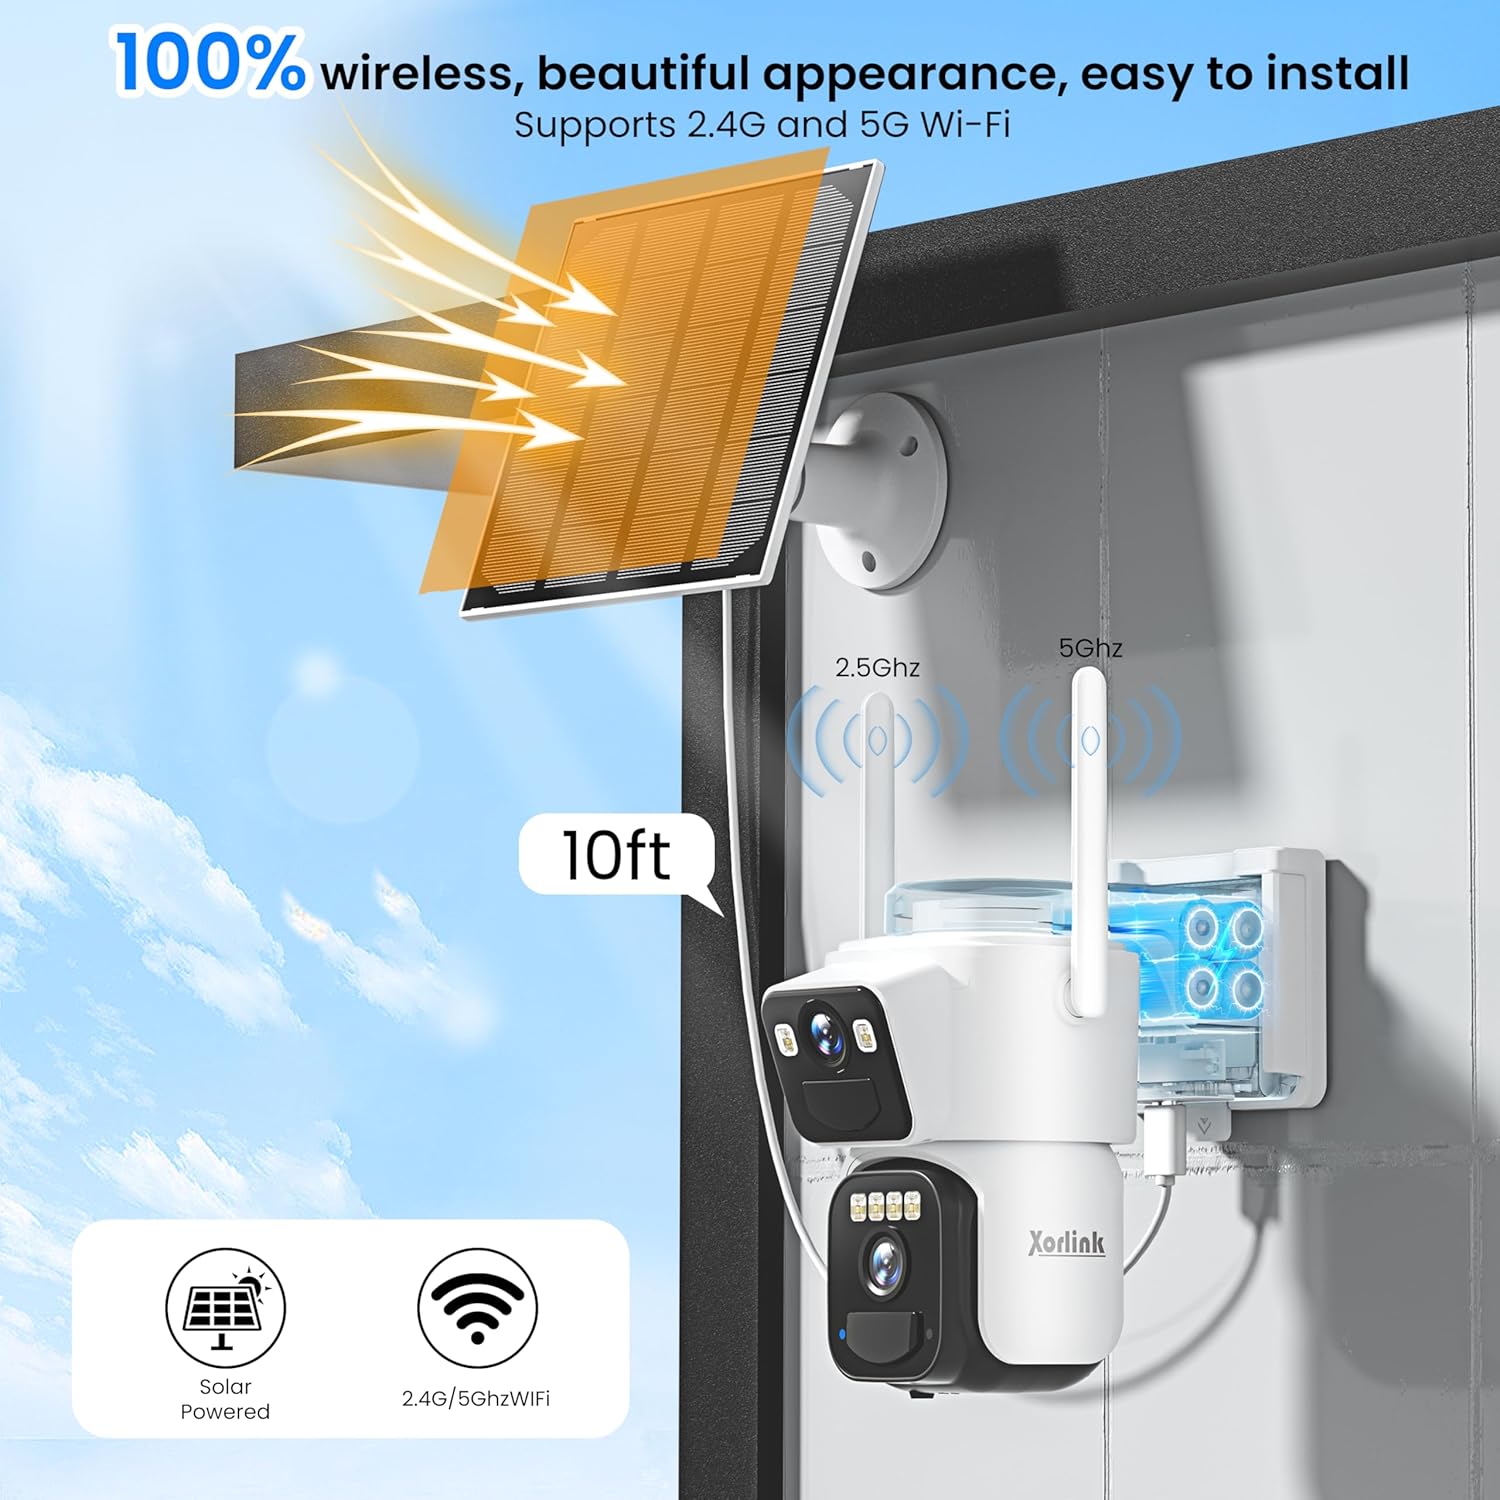
Image: Wireless installation of the XORLINK Solar Security Camera, showing solar panel and Wi-Fi antennas.

Image: Visual guide for the four-step setup process, including app download and mounting.
2.3 App Installation and Connection
To operate your camera, you will need to download the companion mobile application.
- Download the XORLINK app from your device's app store.
- Register for an account and log in.
- Turn on the camera and ensure your phone's Bluetooth is enabled.
- Follow the in-app instructions to connect the camera to your home's 2.4GHz or 5GHz Wi-Fi network.
- Once connected, you should be able to view the live feed and control camera functions.
3. Operating Instructions
3.1 Camera Features
Your XORLINK camera is equipped with advanced features for comprehensive surveillance:
- 4K Dual Lens HD Image & 360° View: The camera features two lenses providing a panoramic view, eliminating blind spots. The PTZ (Pan-Tilt-Zoom) functionality allows for 355° horizontal pan and 90° vertical tilt control via the app.
- Smart Siren Alarm and Spotlights: When unexpected motion is detected, the camera can activate a siren and powerful spotlights to deter intruders.
- Two-way Audio: Communicate with visitors or deter unwanted guests using the built-in microphone and speaker.
- Smart PIR Human Detection: Receive instant notifications on your phone when human motion is detected, reducing false alarms.
- Night Vision: Enjoy clear surveillance in low-light conditions with both infrared (IR) night vision and color night vision, enabled by six powerful spotlights.
- Cloud/SD Card Storage: Video recordings can be stored on an optional SD card (up to 128GB, not included) or via 3-day free cloud storage. Optional US-based cloud service is available for extended storage.

Image: Dual lens camera providing simultaneous views of a driveway and an entrance.

Image: Camera illustrating its 355-degree pan and 90-degree tilt rotation for comprehensive coverage.

Image: Motion detection triggering siren, two-way audio, and spotlight alarm to deter an intruder.

Image: Two-way audio feature allowing communication with a person at the door.
3.2 App Interface and Controls
The mobile application provides a user-friendly interface to manage your camera. Key functions include:
- Live View: Access real-time video streams from both lenses.
- PTZ Control: Use the on-screen joystick to pan and tilt the camera.
- Motion Detection Settings: Adjust sensitivity and define specific detection zones.
- Two-Way Audio: Initiate voice communication.
- Recording & Playback: View recorded footage from cloud storage or SD card.
- Siren & Spotlight Activation: Manually trigger alarms.
Video: Demonstration of the XORLINK 4K/8MP Solar Security Camera's app interface, showing live view, PTZ controls, and various settings.
3.3 Motion Detection Zone Setup
To optimize motion detection and reduce unwanted alerts, you can define specific areas within the camera's view for monitoring.
- In the app, navigate to the camera settings.
- Select "Motion Detection Zone" or a similar option.
- Drag and resize the detection area on the live view to cover only the regions you wish to monitor.
- Save your changes.

Image: Customizable motion detection zone displayed over a residential area.
3.4 Scheduling Sleep Mode
The camera can be scheduled to enter a sleep mode during specific times to conserve battery or for privacy reasons.
- Access the camera settings within the app.
- Look for "Schedule Management" or "Sleep Mode" options.
- Set your desired start and end times for the camera to be inactive.
- Confirm the schedule.
4. Maintenance
4.1 Cleaning
Regular cleaning helps maintain optimal performance:
- Gently wipe the camera lenses and solar panel surface with a soft, damp cloth to remove dust and debris.
- Avoid using harsh chemicals or abrasive materials that could scratch the surfaces.
4.2 Battery Care and Solar Charging
The camera is powered by a built-in rechargeable battery, continuously charged by the solar panel. Ensure the solar panel is positioned to receive maximum direct sunlight throughout the day. In periods of prolonged cloudy weather or low sunlight, the battery may require manual charging via a USB cable (not included) if power levels become critically low.

Image: Solar panel charging the camera's internal battery.
4.3 Weather Resistance
The XORLINK camera boasts an IP66 weatherproof rating, making it suitable for various outdoor conditions, including wind, rain, and snow. It is designed to operate within a temperature range of -4°F to 140°F (-20°C to 60°C).

Image: Camera demonstrating IP66 weather resistance in rainy conditions.
5. Troubleshooting
If you encounter issues with your XORLINK Solar Security Camera, please refer to the following common solutions:
- Camera Not Connecting to Wi-Fi: Ensure your Wi-Fi network is 2.4GHz or 5GHz and the signal strength at the camera's location is adequate. Try restarting your router and the camera.
- No Live View: Check your internet connection and ensure the camera's battery is charged. Restart the app and the camera.
- Poor Image Quality: Clean the camera lenses. Ensure there are no obstructions in the camera's field of view.
- Motion Detection Not Working: Verify that motion detection is enabled in the app and that detection zones are correctly configured. Adjust sensitivity settings if necessary.
- Battery Not Charging: Ensure the solar panel is clean and positioned to receive direct sunlight. Check the connection cable between the solar panel and the camera.
- Two-Way Audio Issues: Check microphone and speaker permissions for the app on your phone. Ensure volume levels are adequate.
For further assistance, please contact US-based support via phone or email.
6. Specifications
| Feature | Detail |
|---|---|
| Indoor/Outdoor Usage | Outdoor |
| Compatible Devices | Laptop (for viewing/management) |
| Power Source | Battery Powered (Solar Rechargeable) |
| Connectivity Protocol | Wi-Fi (2.4GHz/5GHz) |
| Controller Type | Apple HomeKit (Compatibility) |
| Mounting Type | Wall Mount |
| Video Capture Resolution | 1920p (2K) |
| Number of Items | 1 |
| Included Components | Camera Body |
| Item Dimensions L x W x H | 6 x 8 x 6 inches |
| Batteries Required? | No (Built-in rechargeable) |
| Video Capture Format | AVI |
| Unit Count | 1.0 Count |
| Smart Home Compatibility | Smart Home Compatible |
| Item Weight | 2.66 pounds |
| Item Model Number | rt1220 |
| Manufacturer | Xorlink |
| Recommended Uses For Product | Outdoor Security |
| Brand | XORLINK |
| Model Name | 2kSpo |
| Connectivity Technology | Wireless |
| Special Feature | 2-Way Audio |
7. Warranty and Support
XORLINK provides US-based support and service via phone and email. For any product-related inquiries, technical assistance, or warranty claims, please contact our support team. Specific warranty details are typically provided with your purchase documentation or can be obtained by contacting customer service.