1. Introduction
This manual provides detailed instructions for the safe and effective use of your AnyTone BT03 Wireless Bluetooth Microphone. The BT03 is designed to enhance your communication experience with compatible AnyTone mobile radios, particularly the AT-D578UV series, by offering wireless convenience and clear audio.
Please read this manual thoroughly before operating the device and retain it for future reference.
2. Safety Information
- Do not expose the device to extreme temperatures, direct sunlight, or high humidity.
- Avoid dropping or subjecting the device to severe impact.
- Do not attempt to disassemble or modify the microphone. This may void the warranty and cause damage.
- Use only the specified charging cable and power adapter to prevent damage to the battery and device.
- Keep the device away from medical devices that may be affected by radio frequency interference.
3. Package Contents
Verify that all items are present in your package:
- AnyTone BT03 Wireless Bluetooth Base Microphone
- USB Type-C Charging Cable
- User Manual (this document)
4. Product Features
- Perfect Compatibility: Specifically designed for the AnyTone AT-D578UV series base stations, ensuring seamless connectivity and optimal performance.
- Convenient Push-to-Talk Operation: Features easy-to-use Push-to-Talk (PTT) buttons for quick and reliable communication.
- User-Friendly Design: Ergonomically designed for comfortable handling and simple operation during extended use.
- Wireless Connectivity: Functions as a wireless base station microphone, providing flexibility and freedom of movement with stable signal transmission.
- Durable & Reliable Build: Constructed with high-quality materials for long-lasting durability and consistent performance.
- Long Battery Life: Built-in 1200mAh rechargeable battery offers up to 12 hours of continuous use.
5. Product Overview and Components
Familiarize yourself with the various parts of your AnyTone BT03 Wireless Bluetooth Microphone.

Image: Labeled diagram of the AnyTone BT03 Wireless Bluetooth Microphone, showing the Speaker, Mic, Power/NRC Switch, Channel/Volume Down, Channel/Volume Up, Bluetooth (BT) indicator, Status (S) indicator, Charge (C) indicator, Charging/Updating port, Restart button, Monitor button, and PTT (Push-to-Talk) button.
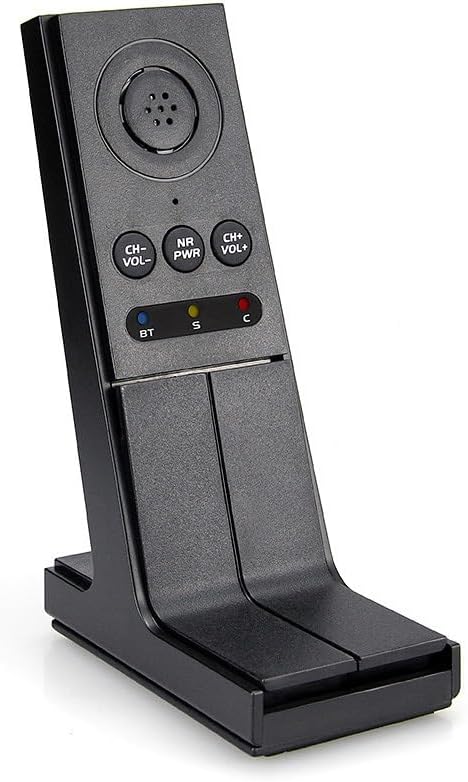
Image: Front view of the AnyTone BT03 Wireless Bluetooth Microphone, showcasing its ergonomic design and control buttons.

Image: Close-up view of the USB Type-C charging port located on the side of the AnyTone BT03 microphone.
6. Setup
6.1 Charging the Microphone
- Connect the provided USB Type-C cable to the charging port on the side of the BT03 microphone.
- Connect the other end of the USB cable to a compatible USB power adapter (not included) or a computer's USB port.
- The Charge (C) indicator LED will illuminate during charging. It will change color or turn off when fully charged.
- A full charge typically takes approximately 3-4 hours.
6.2 Pairing with AnyTone AT-D578UV Radio
Ensure your AT-D578UV radio has its Bluetooth function enabled.
- Power on the BT03 microphone by pressing and holding the NR/PWR button until the Bluetooth (BT) indicator flashes.
- On your AT-D578UV radio, navigate to the Bluetooth settings menu.
- Select 'Search for Devices' or 'Pair New Device'.
- Locate 'BT03' in the list of available devices and select it to pair.
- Once successfully paired, the Bluetooth (BT) indicator on the BT03 will stop flashing and remain steadily lit.
6.3 Pairing with Other Compatible Devices (e.g., Smartphones)
The BT03 can also pair with other Bluetooth-enabled devices, such as smartphones, for general audio use.
- Ensure the BT03 microphone is powered on and in pairing mode (Bluetooth (BT) indicator flashing). If it's already paired, you may need to unpair it from the previous device or restart it to enter pairing mode.
- On your smartphone or other device, go to Bluetooth settings and enable Bluetooth.
- Search for available devices and select 'BT03'.
- Confirm pairing if prompted. The BT indicator on the microphone will become solid once connected.
7. Operating Instructions
7.1 Power On/Off
- Power On: Press and hold the NR/PWR button for approximately 2 seconds until the indicators light up.
- Power Off: Press and hold the NR/PWR button for approximately 3 seconds until the indicators turn off.
7.2 Push-to-Talk (PTT) Function
- To transmit, press and hold the PTT button located on the side of the microphone.
- Speak clearly into the microphone.
- Release the PTT button to stop transmitting and return to receive mode.
7.3 Channel/Volume Control
- Channel/Volume Up (CH+/VOL+): Press this button to increase the volume or change the channel upwards (functionality depends on the paired radio's settings).
- Channel/Volume Down (CH-/VOL-): Press this button to decrease the volume or change the channel downwards (functionality depends on the paired radio's settings).
7.4 Noise Reduction (NR) Function
- Press the NR/PWR button briefly (while the device is on) to toggle the Noise Reduction feature on or off.
- When Noise Reduction is active, the audio quality may be improved in noisy environments.
7.5 Monitor Function
- Press the MONITOR button to open the squelch and listen to weak signals or monitor the channel without receiving a call.
- Press it again to close the squelch.
8. Maintenance
8.1 Cleaning
- Wipe the microphone with a soft, dry cloth.
- Do not use harsh chemicals, cleaning solvents, or strong detergents.
8.2 Battery Care
- To prolong battery life, avoid fully discharging the battery frequently.
- Charge the device regularly, even if not in use, to maintain battery health.
- Store the device in a cool, dry place when not in use for extended periods.
9. Troubleshooting
- Microphone does not power on: Ensure the battery is charged. Connect to a power source and try again.
- Cannot pair with radio/device:
- Ensure both the microphone and the radio/device have Bluetooth enabled.
- Make sure the microphone is in pairing mode (BT indicator flashing).
- Move the devices closer to each other.
- Restart both the microphone and the radio/device and try pairing again.
- Poor audio quality:
- Check the distance between the microphone and the paired device; reduce interference sources.
- Ensure the microphone is not obstructed.
- Try enabling the Noise Reduction (NR) function.
- Buttons are unresponsive: Try restarting the microphone by pressing the RESTART button (if available, refer to diagram) or by powering it off and on again.
10. Specifications
| Feature | Specification |
|---|---|
| Model Name | AT-BT03 |
| Connectivity Technology | Bluetooth |
| Connector Type | USB Type-C |
| Power Source | Battery Powered |
| Battery Type | 1 Nonstandard Battery (Built-in 1200mAh rechargeable) |
| Item Weight | 15 ounces (426 Grams) |
| Product Dimensions (L x W x H) | 4.5 x 2.5 x 11 inches |
| Color | Black |
| Compatible Devices | AnyTone Radio (specifically AT-D578UV series), Bluetooth-enabled smartphones |
11. Warranty Information
AnyTone products are manufactured to high-quality standards. For specific warranty terms and conditions, please refer to the warranty card included with your purchase or visit the official AnyTone website. Keep your proof of purchase for warranty claims.
12. Support
If you encounter any issues or have questions not covered in this manual, please contact AnyTone customer support through their official website or the retailer from whom you purchased the product. For the latest information and support resources, visit the AnyTone Store on Amazon.