1. Introduction
This manual provides detailed instructions for the installation, operation, and maintenance of your Blaupunkt Orlando 750 Car Stereo System. This package includes the Orlando 750 Double DIN Receiver, 6.5" 3-Way Speakers, speaker harnesses, speaker adapters, speaker wire, and a radio installation kit designed for select GM vehicles.
2. Setup and Installation
Proper installation is crucial for optimal performance. It is recommended that installation be performed by a qualified professional.
2.1. Blaupunkt Orlando 750 Receiver Installation
The Orlando 750 is a Double DIN receiver. Ensure your vehicle's dashboard opening is compatible with a Double DIN unit. The included radio install kit is designed for select GM models from 1994-2012.

Image: Front view of the Blaupunkt Orlando 750 Double DIN Receiver, showing the 6.9-inch touchscreen display and control buttons.

Image: Components of the radio installation kit, including the mounting frame and brackets for securing the receiver in the dashboard.
2.2. Speaker Installation
The package includes four 6.5" 3-Way speakers. Use the provided speaker harnesses (GM 88-Up) and speaker adapters (GM Full Size P/U, SUV 1995-2015) for proper fitment in your vehicle's door locations.

Image: A pair of Blaupunkt 6.5-inch 3-Way Car Speakers with black grilles.

Image: Black plastic speaker adapters designed for GM Full Size P/U and SUV models, facilitating the installation of 5 1/4 or 6 1/2 inch speakers.
2.3. Wiring Connections
Utilize the included radio wiring harness and 50 feet of 16-gauge speaker wire for all electrical connections. Ensure all connections are secure and correctly matched to avoid damage to the unit or vehicle's electrical system.
- Connect the radio wiring harness to the vehicle's factory harness.
- Connect the speaker harnesses to the speakers and then to the vehicle's factory speaker wiring.
- Connect the 16-gauge speaker wire from the receiver to the speakers, ensuring correct polarity.
- Connect the rearview camera input, steering wheel control input, and external microphone (if applicable).
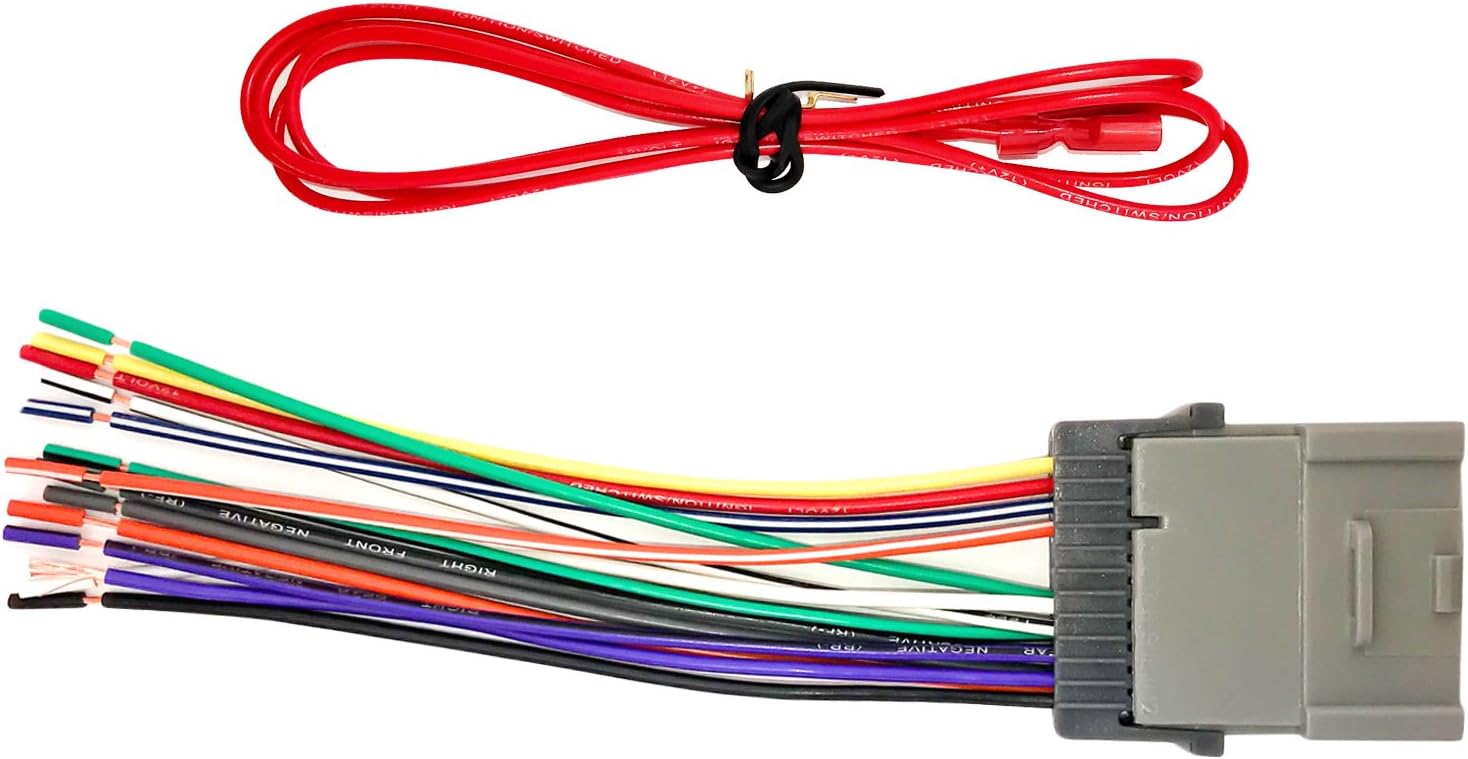
Image: A multi-colored radio wiring harness with a gray connector, used to integrate the aftermarket receiver with the vehicle's electrical system.

Image: Two speaker harnesses with black connectors and red/white wires, designed for GM vehicles from 1988 onwards.
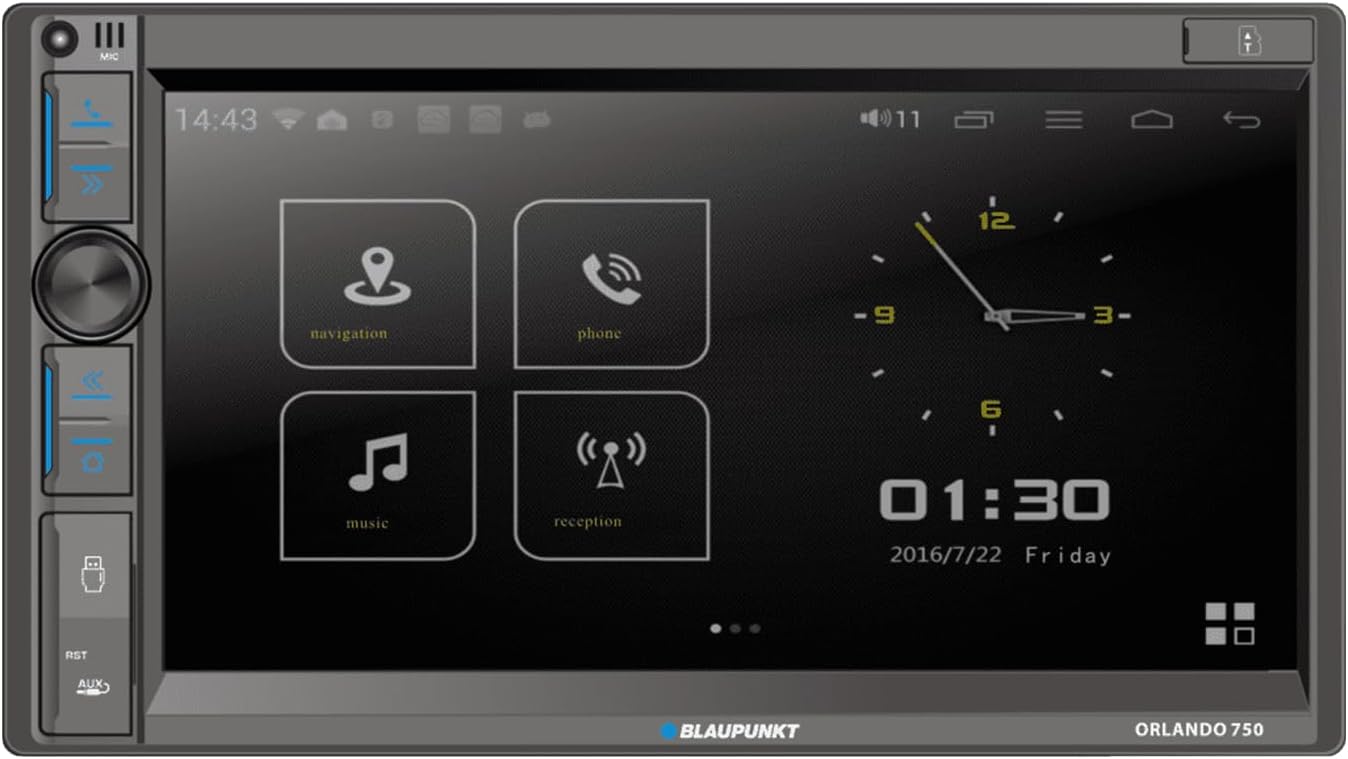
Image: A spool of 50 feet of 16-gauge copper clad aluminum (CCA) speaker wire.
3. Operating Instructions
3.1. Receiver Functions
- Touchscreen Display: Navigate menus and control functions using the 6.9" touchscreen.
- AM/FM Radio: Tune into your favorite radio stations.
- Wireless Apple CarPlay & Android Auto: Connect your smartphone wirelessly for navigation, music, and communication.
- Bluetooth: Pair your device for hands-free calling and audio streaming.
- USB Playback: Insert a USB drive to play audio or video files.
- Aux-in & SD Card: Connect external audio devices or play media from an SD card.
- Rearview Camera: Connect a rearview camera for enhanced safety during parking.
- Steering Wheel Control: Integrate with your vehicle's steering wheel controls for convenient operation.
- DVD/CD Player: Play your favorite DVDs and CDs.
- Remote Control: Use the included remote for convenient control of the receiver.
3.2. Audio Settings
Adjust equalizer settings, balance, and fader to optimize sound output from the 6.5" 3-Way speakers. The speakers are designed for clear audio with 40W peak and 20W RMS power handling per pair.
4. Maintenance
- Cleaning the Display: Use a soft, dry cloth to clean the touchscreen. Avoid abrasive cleaners.
- General Cleaning: Keep the receiver and speakers free from dust and debris.
- Connection Checks: Periodically check all wiring connections to ensure they remain secure.
- Temperature: Avoid exposing the unit to extreme temperatures or direct sunlight for extended periods.
5. Troubleshooting
- No Power: Check the vehicle's fuse box and the receiver's power connections. Ensure the ignition is on.
- No Sound: Verify speaker connections and settings. Check the volume level and mute function.
- Bluetooth Connectivity Issues: Ensure Bluetooth is enabled on both the receiver and your device. Try unpairing and re-pairing the device.
- CarPlay/Android Auto Not Connecting: Ensure your phone's operating system is up to date. Check USB cable connection if using wired mode (though this unit supports wireless). Restart both the receiver and your phone.
- Display Not Responding: Try resetting the unit (refer to the specific reset procedure in the full product manual if available).
6. Specifications
6.1. Blaupunkt Orlando 750 Receiver
- Display: 6.9" Touchscreen
- Power Output: 60 watts x 4 (Maximum), 4 Ohms Load Impedance
- Connectivity: Bluetooth, Wireless Apple CarPlay, Wireless Android Auto, USB, Aux-in, SD Card
- Inputs: Rearview Camera, Steering Wheel Control
- Media: AM/FM Radio, DVD/CD Player
6.2. Blaupunkt BPS-E653 6.5" 3-Way Speakers
- Type: 6.5" 3-Way
- Power Handling: 40W Peak, 20W RMS (per pair)
- Woofer Material: Polypropylene
- Tweeter Type: PET dome with Neodymium magnet
6.3. General
- Brand: BLAUPUNKT
- Model: Orlando 750
- Item Weight (Receiver): 3.39 pounds
- UPC: 840440917496
7. Warranty Information
Please refer to the manufacturer's official website or the product packaging for detailed warranty information regarding the Blaupunkt Orlando 750 Car Stereo System and its components.
8. Support
For technical support, troubleshooting assistance, or further inquiries, please visit the official Blaupunkt website or contact their customer service department. Keep your product model number (Orlando 750) and UPC (840440917496) available when seeking support.


