1. Safety Information
Always observe basic safety precautions when using power tools to reduce the risk of fire, electric shock, and personal injury. Read all instructions before operating this tool.
General Power Tool Safety Warnings
- Work Area Safety: Keep your work area clean and well-lit. Cluttered or dark areas invite accidents. Do not operate power tools in explosive atmospheres, such as in the presence of flammable liquids, gases, or dust.
- Electrical Safety: Power tool plugs must match the outlet. Never modify the plug in any way. Do not expose power tools to rain or wet conditions.
- Personal Safety: Stay alert, watch what you are doing, and use common sense when operating a power tool. Do not use a power tool while you are tired or under the influence of drugs, alcohol, or medication. Always wear appropriate personal protective equipment, including eye protection, hearing protection, and gloves.
- Tool Use and Care: Do not force the power tool. Use the correct power tool for your application. Disconnect the battery pack from the power tool before making any adjustments, changing accessories, or storing power tools.
- Service: Have your power tool serviced by a qualified repair person using only identical replacement parts. This will ensure that the safety of the power tool is maintained.
2. Product Overview
The Generic 2904-20 Cordless 18V 1/2" Hammer Drill/Driver is a versatile tool designed for drilling and driving applications in various materials, including wood, metal, and masonry. It features a robust design for demanding tasks.

Figure 2.1: Front view of the Generic 2904-20 Cordless Hammer Drill/Driver. This image shows the main body of the drill, including the chuck, gear selector, and handle.
Key Features
- Performance: Delivers significant torque and rotational force, enabling drilling of large diameter holes (up to 2-9/16 inch) in dense materials like hardwoods and masonry, maintaining speed under load.
- Compact Design: With a length of just 6.9 inches, this tool offers enhanced maneuverability in confined spaces while maintaining a robust construction suitable for various applications.
- Secure Bit Retention: Equipped with a metal chuck featuring a ratcheting mechanism for superior strength and long-term durability, ensuring bits remain securely in place during operation.
- Efficient Motor Technology: Utilizes a brushless motor system that optimizes power output and reduces heat buildup, contributing to extended tool life and efficiency.
- Safety Feature: Includes an automatic function that detects binding and instantly stops rotation to prevent user injury and potential tool damage.
3. Components and Controls
Familiarize yourself with the various parts and controls of your hammer drill/driver for safe and effective operation.

Figure 3.1: Annotated diagram of the drill's components. This image highlights key features such as the chuck, side handle, speed control, brushless motor, forward/reverse switch, LED worklight, AUTOSTOP mode light, belt clip, and lanyard loop.
- Chuck: 1/2 inch metal chuck with carbide-enhanced gripping teeth for improved bit retention and durability.
- Side Handle: Provides additional control and stability, especially during high-torque applications.
- Two Speed Control: Allows selection between 0-500 RPM for high-torque applications and 0-2100 RPM for high-speed drilling.
- POWERSTATE Brushless Motor: Efficient motor technology for optimized power and reduced heat.
- Forward/Reverse Control Switch: Used to change the direction of rotation and to lock the trigger.
- LED Worklight: Illuminates the work area for better visibility.
- AUTOSTOP Mode Light: Indicates when the AUTOSTOP protection event occurs, stopping rotation instantly.
- Belt Clip: For convenient tool belt portability.
- Lanyard Loop: Attachment point for a lanyard for added security.
4. Setup
4.1 Battery Installation
This tool requires an 18V battery (not included). Ensure the battery is fully charged before use.
- Align the battery pack with the battery port on the base of the drill handle.
- Slide the battery pack into the port until it clicks securely into place.
- To remove, press the release button on the battery pack and slide it out.
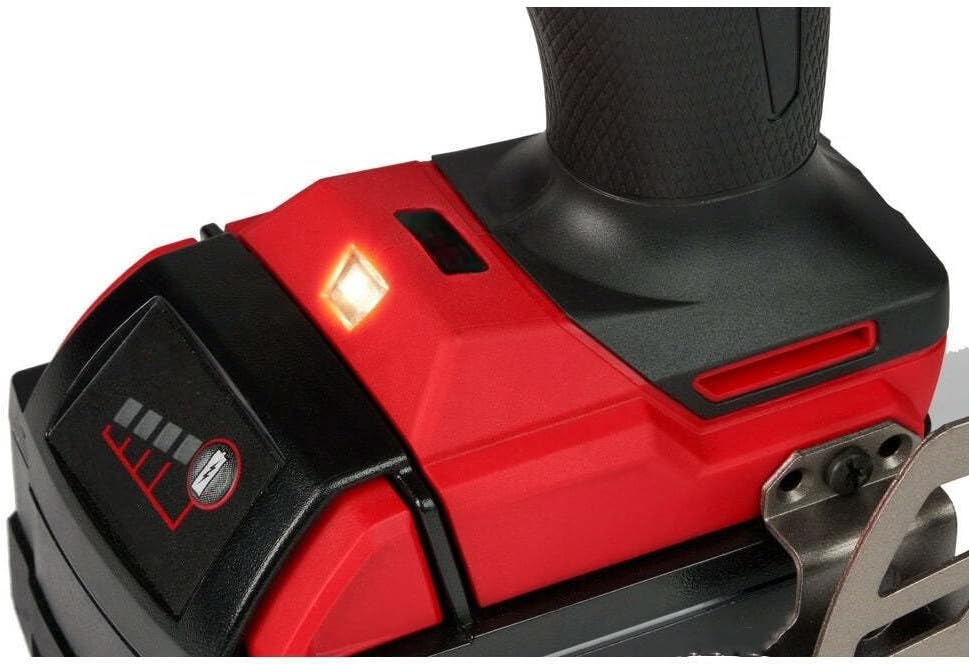
Figure 4.1: Close-up view of the battery connection area and LED worklight. This image shows where the battery connects to the tool and the location of the integrated LED light.
4.2 Attaching the Side Handle
The side handle provides additional control, especially when drilling large holes or in hammer drill mode.
- Loosen the side handle by rotating it counter-clockwise.
- Slide the handle over the chuck and onto the front of the drill housing.
- Adjust the handle to your desired position and tighten it by rotating clockwise until secure.
4.3 Installing Drill Bits or Accessories
Ensure the drill is off and the forward/reverse switch is in the center (locked) position before changing bits.
- Rotate the chuck collar counter-clockwise to open the chuck jaws.
- Insert the drill bit or accessory into the chuck, ensuring it is centered and fully seated.
- Rotate the chuck collar clockwise to tighten the jaws firmly around the bit. Hand-tighten until the ratcheting mechanism engages, ensuring a secure grip.
5. Operating Instructions
5.1 Powering On/Off and Speed Control
- To Start: Push the forward/reverse switch to the desired direction (forward or reverse) and pull the trigger. The LED worklight will illuminate when the trigger is pulled.
- To Stop: Release the trigger.
- Variable Speed: The trigger provides variable speed control. Pressing the trigger further increases the speed.
- Two Speed Selector: Use the speed selector switch on top of the drill to choose between low speed (0-500 RPM) for high-torque applications and high speed (0-2100 RPM) for faster drilling.
5.2 Forward/Reverse Control
The forward/reverse switch is located above the trigger. Push it to the left for forward rotation (drilling/driving) and to the right for reverse rotation (removing screws/bits). When centered, the switch locks the trigger, preventing accidental startup.
5.3 Drilling and Driving
Select the appropriate mode (drill or hammer drill) and speed for your application. For drilling into masonry, use the hammer drill mode. For wood, metal, or driving screws, use the drill mode.

Figure 5.1: User operating the drill to create a large diameter hole in a wooden stud. This demonstrates the tool's capability for demanding drilling tasks.

Figure 5.2: User operating the drill for a standard drilling application in a wooden beam. This illustrates the tool's use in general construction tasks.
5.4 AUTOSTOP Feature
The AUTOSTOP feature is designed to protect the user and the tool by instantly stopping rotation if the drill binds during operation. When activated, the AUTOSTOP mode light will illuminate. Release the trigger and clear the obstruction before resuming work.
6. Maintenance
Regular maintenance ensures optimal performance and extends the life of your tool. Always disconnect the battery before performing any maintenance.
- Cleaning: Keep the tool's ventilation openings clean and free of debris to prevent overheating. Use a soft, damp cloth to clean the exterior. Do not use harsh chemicals or abrasive cleaners.
- Chuck Maintenance: Periodically clean the chuck jaws to ensure proper gripping. Remove any dust or debris that may accumulate.
- Inspection: Regularly inspect the tool for any signs of damage, loose screws, or worn parts. If any damage is found, have the tool repaired by a qualified service technician before further use.
- Storage: Store the tool in a dry, secure place out of reach of children. Remove the battery pack before storing for extended periods.
7. Troubleshooting
If you encounter issues with your drill, refer to the following common problems and solutions:
| Problem | Possible Cause | Solution |
|---|---|---|
| Tool does not start | Battery not charged or improperly installed; Forward/reverse switch in locked position. | Charge and properly install battery; Move forward/reverse switch to forward or reverse. |
| Reduced power or speed | Low battery charge; Incorrect speed setting. | Recharge battery; Select high-speed setting for faster operation. |
| Bit slips in chuck | Chuck not tightened sufficiently; Dirty chuck jaws. | Retighten chuck firmly; Clean chuck jaws. |
| Tool stops unexpectedly (AUTOSTOP) | Tool binding or overloading. | Release trigger, clear obstruction, and restart. Reduce pressure or use a larger bit. |
| Overheating | Blocked ventilation slots; Prolonged heavy use. | Clean ventilation slots; Allow tool to cool down. |
8. Specifications
| Feature | Detail |
|---|---|
| Brand | Generic |
| Model Number | 2904-20 |
| Power Source | Battery Powered (18V) |
| Chuck Size | 1/2 inch |
| No-Load Speed (Low) | 0-500 RPM |
| No-Load Speed (High) | 0-2100 RPM |
| Peak Torque | 1400 in-lbs |
| Product Dimensions | 6.95"L x 1"W x 1"H |
| Item Weight | 3.3 pounds |
| Batteries Included | No |
| Included Components | Hammer Drill/Driver (Tool Only) |
9. Warranty and Support
For warranty information or technical support regarding your Generic 2904-20 Cordless Hammer Drill/Driver, please refer to the documentation provided at the point of purchase or contact the seller directly. Specific warranty terms may vary.