1. Introduction
The Ortis WiFi Pool Timer Switch (Model KJ-071) provides smart control for your pool equipment and outdoor devices. This device features remote control via the GeniLife APP, dual waterproof outlets, and an integrated LCD display for convenient operation. It is designed for use with pool pumps, filters, outdoor lights, and other compatible 120V/15A/60Hz appliances.
Key features include:
- APP-Enabled Smart Control: Manage your pool equipment remotely using the GeniLife APP, compatible with 2.4G and 5G WiFi networks.
- Flexible Scheduling Options: Customize daily repeat schedules or countdown intervals through the GeniLife APP for precise energy management.
- Dual Outlets: Two individually covered outlets allow simultaneous control of multiple devices, such as a pool pump and a salt chlorinator.
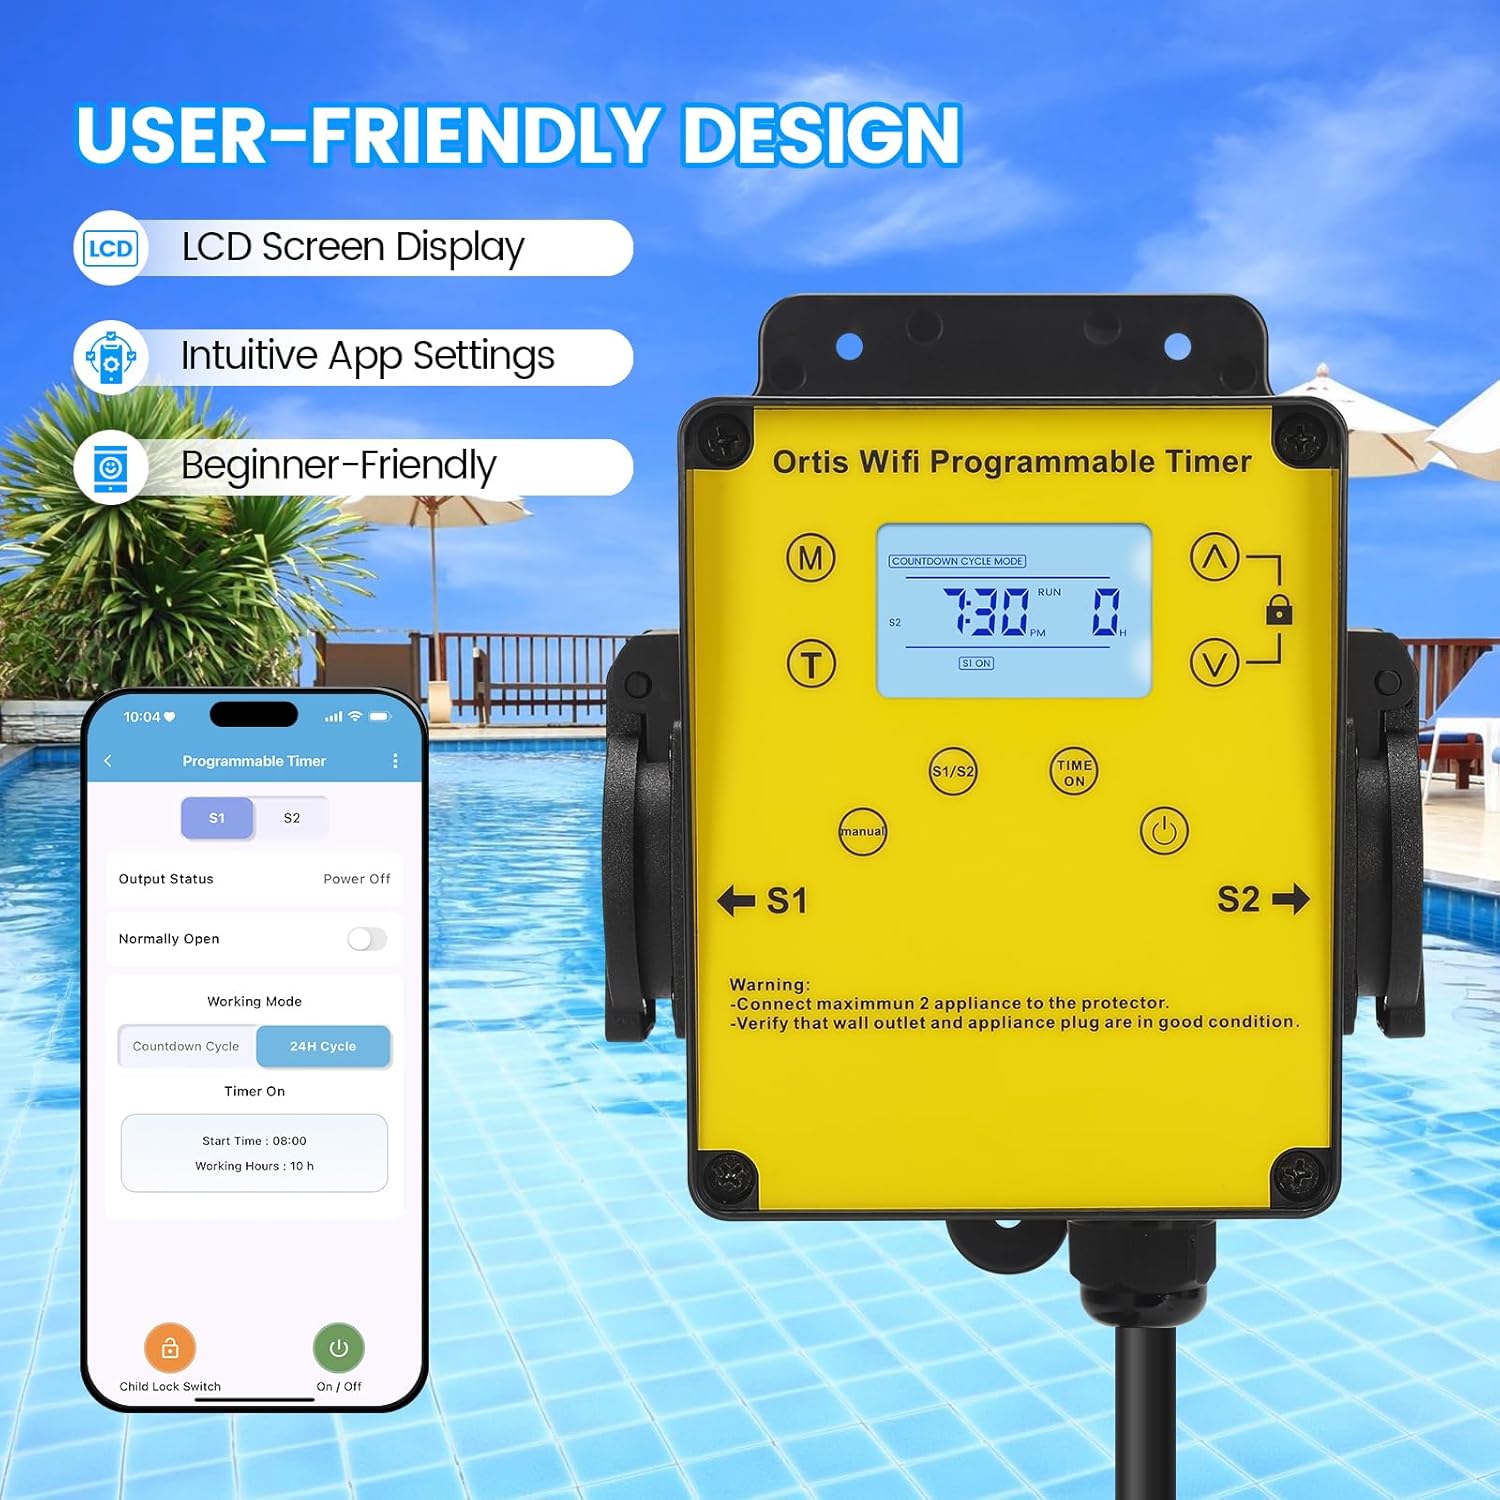
- Intuitive Display & Easy Setup: Features a clear LCD screen for real-time feedback and a user-friendly interface for straightforward installation and programming.
- Universal Outdoor Application: Suitable for various outdoor gear including pool pumps, pond lights, automatic cleaners, and garden fountains.

2. Safety Information
Please read and understand all safety instructions before installation and operation. Failure to follow these instructions may result in electric shock, fire, or serious injury.
- Ensure the total load connected to the timer does not exceed 15A (1800W at 120V).
- Always connect the timer to a properly grounded 120V/60Hz outlet.
- Do not immerse the device in water. It is designed for outdoor use but should be protected from direct heavy rainfall if possible.
- Keep children away from the device and connected appliances.
- Inspect the timer and connected appliance plugs for damage before each use. Do not use if damaged.
- Disconnect power before performing any maintenance or cleaning.

3. Product Overview
The Ortis WiFi Pool Timer Switch is a robust outdoor device designed for durability and ease of use. It features a bright yellow casing for visibility and black waterproof outlet covers.
3.1 Components
- LCD Display: Shows current time, operating mode, and output status.
- Control Buttons: Manual (M), Time (T), Up (▲), Down (▼), Lock, Time On/Off.
- Dual Outlets (S1, S2): Two independent, covered outlets for connecting appliances.
- Power Cord: Integrated power cord with a standard 3-prong plug.


4. Setup
4.1 Physical Installation
- Choose a suitable outdoor location for the timer, ensuring it is protected from direct heavy rain and easily accessible.
- Mount the timer securely using appropriate hardware (not included) through the mounting holes on the device.
- Plug the timer's power cord into a grounded 120V/60Hz outdoor electrical outlet.
- Connect your pool pump, filter, or other appliances to the S1 and S2 outlets. Ensure the total load does not exceed 15A.

4.2 GeniLife APP Installation
- Download the "GeniLife" APP from your smartphone's app store (iOS or Android).
- Register for a new account or log in if you already have one.
4.3 WiFi Connection
- Ensure your smartphone is connected to a 2.4GHz or 5GHz WiFi network.
- Open the GeniLife APP and tap "Add Device" or the "+" icon.
- Follow the in-app instructions to connect your Ortis WiFi Pool Timer Switch. This typically involves putting the device into pairing mode (refer to the device's LCD or manual for specific button presses to initiate pairing mode, usually holding a button for a few seconds until an indicator flashes).
- Once connected, you can rename the device for easier identification.

5. Operating Instructions
5.1 Manual Control
You can manually turn the outlets ON or OFF directly from the device:
- Press the "Time On/Off" button to cycle through ON, OFF, or AUTO modes for the connected outlets.
- The LCD display will indicate the current status.
5.2 Scheduling via GeniLife APP
The GeniLife APP offers comprehensive scheduling options:
- Daily Cycle Mode: Set specific ON/OFF times for each day of the week.
- Timer Cycle Mode: Configure repeating ON/OFF intervals (e.g., 2 hours ON, 2 hours OFF).
- Countdown Timer: Set a countdown for the device to turn ON or OFF after a specified duration.
- Weekly Schedule: Create custom schedules for different days or groups of days.
To set a schedule:
- Open the GeniLife APP and select your Ortis Pool Timer Switch.
- Navigate to the "Programmable Timer" section.
- Choose your desired working mode (e.g., Countdown Cycle, 24H Cycle).
- Enter the start time, working hours, or specific ON/OFF times as prompted by the app.
- Confirm your settings to activate the schedule.

5.3 Dual Outlet Control
The timer allows independent control of each outlet (S1 and S2) through the GeniLife APP. You can set separate schedules or manually control each outlet as needed, provided the total load does not exceed the device's maximum capacity.
6. Maintenance
- Cleaning: Periodically wipe the device with a soft, damp cloth. Do not use harsh chemicals or abrasive cleaners. Ensure the device is unplugged before cleaning.
- Inspection: Regularly check the power cord, plug, and outlets for any signs of wear or damage. Replace the device if any damage is found.
- Storage: If storing the timer for an extended period, disconnect it from power and store it in a dry, protected area.
7. Troubleshooting
| Problem | Possible Cause | Solution |
|---|---|---|
| Device does not power on. | No power from outlet; damaged cord/plug. | Check the wall outlet with another device. Inspect the timer's cord and plug for damage. |
| Cannot connect to WiFi. | Incorrect WiFi password; device not in pairing mode; router issues. | Ensure correct WiFi password. Put the device into pairing mode (refer to app instructions). Restart your router. Ensure your phone is on a 2.4GHz or 5GHz network. |
| Scheduled events not working. | Incorrect schedule settings; device in manual mode; power interruption. | Verify schedule settings in the GeniLife APP. Ensure the device is in AUTO mode. Check for power outages. |
| Outlets not turning ON/OFF. | Overload; faulty appliance; device malfunction. | Ensure total load does not exceed 15A. Test with a different appliance. If issues persist, contact support. |
| Cannot set different schedules for each outlet. | App setting misunderstanding. | In the GeniLife APP, ensure you are selecting and configuring schedules for S1 and S2 independently. Some app interfaces may require switching between outlet views. |
8. Specifications
| Feature | Detail |
|---|---|
| Model Number | KJ-071 |
| Brand | Ortis |
| Input Voltage | 120V AC, 60Hz |
| Max Load Current | 15A |
| Max Power | 1800W |
| Number of Outlets | 2 (Individually controlled) |
| WiFi Compatibility | 2.4G & 5G |
| App Control | GeniLife APP |
| Material | Plastic |
| Color | Yellow |
| Dimensions (approx.) | 4.9 inches (height) x 3.9 inches (width) x 3.3 inches (depth) |

9. Warranty and Support
For warranty information or technical support, please refer to the documentation included with your purchase or contact Ortis customer service. Keep your purchase receipt as proof of purchase.


