1. Safety Information
Please read and understand all safety instructions before operating the WAINLUX X2 Laser Engraver Machine. Failure to follow these instructions may result in injury or damage to the device.
- Eye Protection: Always wear the provided protective glasses when the laser is operating. The laser protective cover filters 97% of ultraviolet rays, but additional eye protection is crucial.
- Ventilation: Operate the machine in a well-ventilated area to dissipate smoke and fumes produced during engraving and cutting.
- Fire Hazard: Do not leave the machine unattended during operation. Some materials can ignite. Keep a fire extinguisher nearby.
- Material Compatibility: Only engrave or cut materials specified as safe for laser use. Avoid highly reflective, flammable, or unknown materials.
- Emergency Stop: The machine is equipped with an emergency stop function. If tilted at an abnormal angle, the laser cutting machine will stop running. After entering the protection state, the machine must be restarted to restore normal functions.
- Children and Pets: Keep children and pets away from the operating area.
2. Product Overview
The WAINLUX X2 is a powerful and precise 10W laser engraver and cutter designed for various materials. It features a high-precision laser module, mobile app control, and offline operation capabilities.
Key Features:
- Powerful Laser: 60000mW machine power and 10000mW output power, capable of cutting 5-8mm plywood or 8-10mm pine boards in a single pass.
- High Precision: Engraving accuracy of 0.05mm, focus of 0.12 * 0.15mm, and a wavelength of 455nm for 1:1 photo-level realistic engraving.
- Large Engraving Area: 200 x 150mm working area.
- Efficient Mobile App: Proprietary app for mobile phone connection, supporting conventional engraving and offline reproduction.
- Offline Reproduction: Designed for efficient large-scale reproduction work without a constant connection.
- User-friendly Design: Supports TF cards for flexible online or offline engraving. Features interfaces for air assist, roller connections, and a height increase module.
- Safety Features: One-button switch, semi-transparent UV-resistant protective cover, and included protective glasses.
- Pre-assembled: Ready to use out of the box, no installation required.
Product Components:

Figure 1: WAINLUX X2 Laser Engraver with labeled components including power, offline engrave button, USB Type-B port, DC 24V input, TF card slot, roller connection port, fan connection port, and goggles.

Figure 2: The WAINLUX X2 Laser Engraver shown with examples of engraved items like wooden art, a tumbler, a slate coaster, leather keychains, and a wooden box.
3. Setup
3.1 Laser Module Installation
The WAINLUX X2 comes pre-assembled, but the laser module needs to be secured. Ensure the module is correctly seated and fastened.
- Carefully slide the laser module into its designated slot on the gantry.
- Tighten the screws to secure the module in place.
- Plug in the laser head connection cable. Note the anti-misplacement design for correct orientation.
Video 1: Demonstrates the installation of the laser module and connecting its cable (segment from 0:45 to 0:57).
3.2 Software Installation (Computer)
To operate the engraver via a computer, install the CutLabX software and necessary drivers.
- Open your web browser and navigate to www.cutlabx.com.
- Download the Windows version of the CutLabX software.
- Extract the installation package.
- Install the CH341SER driver first, then proceed with the CutLabX software installation.
Video 2: Illustrates the process of downloading and installing the CutLabX software and drivers on a computer (segment from 0:05 to 0:44).
3.3 Connecting the Device
- Plug the power cord into the DC 24V port on the machine and into a power outlet.
- For computer control, connect the USB Type-B cable from the machine to your computer's USB port.
- For mobile app control, power on the device. On your mobile device, go to WLAN settings, find 'Wainlux X2', enter the default password, and connect.
- Short press the 'Power' button on the device to turn it on.
3.4 Focus Adjustment
Accurate focusing is critical for optimal engraving and cutting results.
- Rotate the focusing pin of the protective cover downwards until it touches the material surface.
- Loosen the screw to allow the focusing pin to make contact with the surface of the carved object.
- Tighten the screw and retract the focusing pin. The focusing is complete when the pin just touches the material and is then retracted.
Video 3: Demonstrates the manual focus adjustment process using the focusing pin (segment from 2:37 to 2:47).
4. Operating the Engraver
4.1 Mobile App Usage (CutLabX)
The WAINLUX X2 can be controlled conveniently via its dedicated mobile application.
- Ensure the device is powered on and your mobile phone is connected to the 'Wainlux X2' WLAN network.
- Open the CutLabX app. Click 'Connect' and enter the default IP '192.168.0.1', then click 'Connect' again.
- From the creation interface, you can choose to enter text ('Word') or load an image ('Gallery').
- Adjust the image size and position as needed. Use 'Image Processing' for further adjustments like contrast or transformation.
- Click 'Parameter' to set carving parameters (speed, power, frequency, spacing, overscan). These parameters vary based on the material.
- Click 'Preview'. The laser will draw a rectangular box to indicate the carving position. You can adjust the object's position or the pattern's position for precise alignment.
- Once satisfied with the preview, click 'Engraving' to start the carving process.
Video 4: A detailed guide on using the mobile application for connecting, creating designs, setting parameters, and initiating engraving.
4.2 Computer Software Usage (CutLabX)
Control the WAINLUX X2 using the CutLabX software on your computer for more advanced design and control options.
- Ensure the device is powered on and connected to your computer via the USB Type-B cable.
- Open the CutLabX software on your computer. The interface will display the carving material.
- Click on the left toolbar to create graphics (shapes, text) or open an image file.
- Adjust the image size and position on the canvas.
- Select the image and set the corresponding carving parameters (speed, power, interval, overscan).
- Click 'Preview'. The laser will outline the engraving area on your material.
- Click 'Start' to begin the engraving process.
Video 5: Shows the computer software interface, creating graphics, importing images, setting parameters, and starting an engraving job (segment from 1:10 to 3:09).
4.3 Using the Roller Accessory
For engraving cylindrical objects like glasses or tumblers, the roller accessory is essential.
- Insert the connecting wire of the roller into the designated port on the roller accessory.
- Place the roller accessory under the main machine.
- Insert the roller connecting wire into the 'Roller' USB port on the machine.
- Place the cylindrical object (e.g., glass cup) onto the roller. Adjust the height of the machine or the roller accessory to ensure the object is level and stable.
- In the software, open the roller settings interface and set the roller configuration parameters (e.g., rotation axis, roller diameter, object diameter).
- Import your desired image. Rotate the image to align its orientation with the cup's opening direction. Adjust the size and position.
- Modify carving parameters as needed for the material.
- Adjust the laser height and focus the laser onto the surface of the cylindrical object.
- Click 'Start' to begin carving.
Video 6: Comprehensive guide on setting up and using the roller accessory for engraving cylindrical items.
4.4 Engraving on Various Materials
The WAINLUX X2 is versatile and can engrave on a wide range of non-transparent materials.
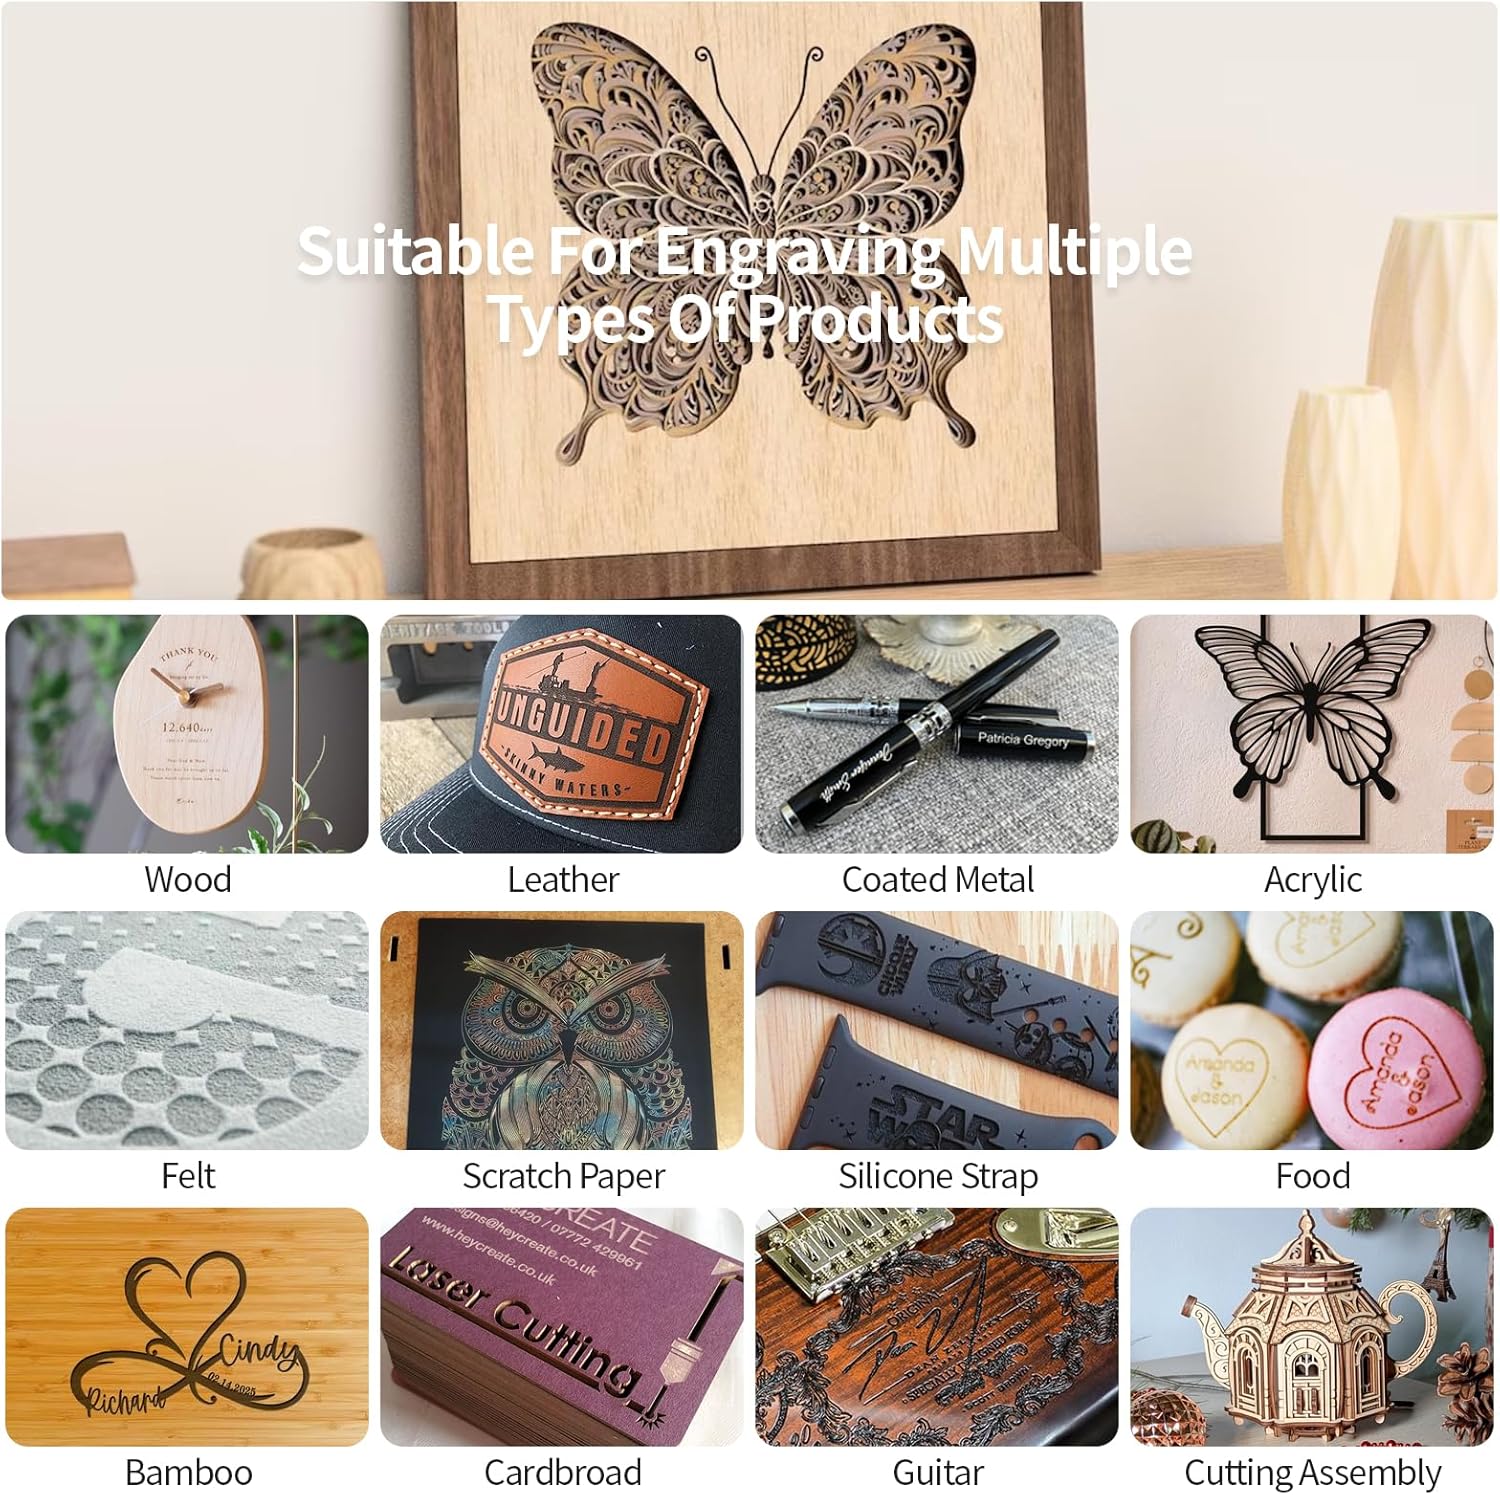
Figure 3: Examples of materials suitable for engraving, including wood, leather, coated metal, acrylic, felt, scratch paper, silicone strap, food, bamboo, cardboard, and guitar picks.
Video 7: Demonstrates the WAINLUX X2 engraving a design onto a piece of wood.
Video 8: Shows the WAINLUX X2 engraving a design onto a piece of cloth.
5. Maintenance
Regular maintenance ensures the longevity and optimal performance of your WAINLUX X2 Laser Engraver.
- Cleaning the Lens: Periodically clean the laser lens with a soft, lint-free cloth and lens cleaning solution to prevent residue buildup that can affect laser performance.
- Cleaning the Machine: Keep the engraving area and rails free from dust and debris. Use a soft brush or compressed air.
- Firmware Updates: Check the official WAINLUXPRO website or app for any available firmware updates to ensure your machine has the latest features and improvements.
- Laser Module Lifespan: The laser module has a lifespan of over 10,000 hours. It is recommended to turn off the machine power for 10 minutes after 4 hours of engraving and 10 minutes after 1 hour of cutting to prolong its life.
6. Troubleshooting
If you encounter issues with your WAINLUX X2, refer to the following common troubleshooting tips:
- Machine Not Powering On: Ensure the power cord is securely connected to both the machine and the power outlet. Check if the power button is pressed.
- Connection Issues (App/PC): Verify that the machine is powered on. For mobile app, ensure your phone is connected to the 'Wainlux X2' WLAN and the correct IP address is entered. For PC, ensure the USB cable is securely connected and drivers are installed.
- Poor Engraving Quality: Check the laser focus. Ensure carving parameters (speed, power) are appropriate for the material. Clean the laser lens if necessary.
- Laser Not Firing: Confirm the laser module is correctly installed and its cable is securely connected. Check if the protective cover is properly in place.
- Emergency Stop Activated: If the machine stops unexpectedly, check for tilting or abnormal movement. Restart the machine after ensuring it is stable.
7. Specifications
| Feature | Specification |
|---|---|
| Product Dimensions | 13.39 x 5.83 x 11.42 inches |
| Item Model Number | X2 |
| Item Weight | 5.73 pounds |
| Manufacturer | WAINLUXPRO |
| Engraving Speed | 7000mm/min |
| Engraving Area | 200 x 150mm |
| Laser Output Power | 10W |
| Laser Wavelength | 455nm |
| Engraving Accuracy | 0.05mm |
8. Warranty and Support
For warranty information, technical support, or service inquiries, please refer to the documentation included with your product or visit the official WAINLUXPRO website. Contact details for customer service are typically provided in the product packaging or on the manufacturer's support page.


