1. Introduction
This manual provides essential information for the safe and efficient operation, setup, and maintenance of your VEVOR Electric Wire Stripping Machine. This robust machine is designed for stripping various types of wires, including hard cover, soft cover, multi-conductor, and mono-filament wires, making it suitable for cable/wire manufacturers, recycling plants, and copper product factories.

Figure 1: VEVOR Electric Wire Stripping Machine and accessories.
2. Safety Instructions
Always adhere to the following safety precautions to prevent injury and damage to the machine.
- Read the Manual: Fully understand all instructions before operation.
- Personal Protective Equipment (PPE): Always wear safety glasses and gloves (a pair of gloves is included) when operating the machine. Avoid loose clothing or jewelry that could get caught in moving parts.
- Work Area: Ensure your work area is clean, well-lit, and free from obstructions. Keep children and bystanders away from the machine during operation.
- Power Source: Connect the machine only to a grounded power outlet with the correct voltage (370W). Disconnect power before performing any adjustments, maintenance, or when the machine is not in use.
- Machine Stability: Place the machine on a stable, level surface to prevent tipping.
- Blade Safety: The blades are sharp. Exercise extreme caution when handling or adjusting them. Never touch the blades while the machine is powered on.
- Wire Feeding: Keep hands clear of the wire feeding channels and blades. Use the provided manual crank for precise control if needed.
- Overload Protection: Do not force wires that are too large for the machine's capacity. This can damage the motor and blades.
- Emergency Stop: Familiarize yourself with the location and operation of the emergency stop button.
3. Product Components
The VEVOR Electric Wire Stripping Machine comes with the following main components and accessories:
- Main Stripping Unit with Motor
- 11 Stripping Channels with 10 Blades (65 Mn Spring Steel)
- Emergency Stop Button
- Power Switch (On/Off)
- Manual Crank Handle
- Hexagonal Spanner
- Pair of Gloves
- User Manual (this document)
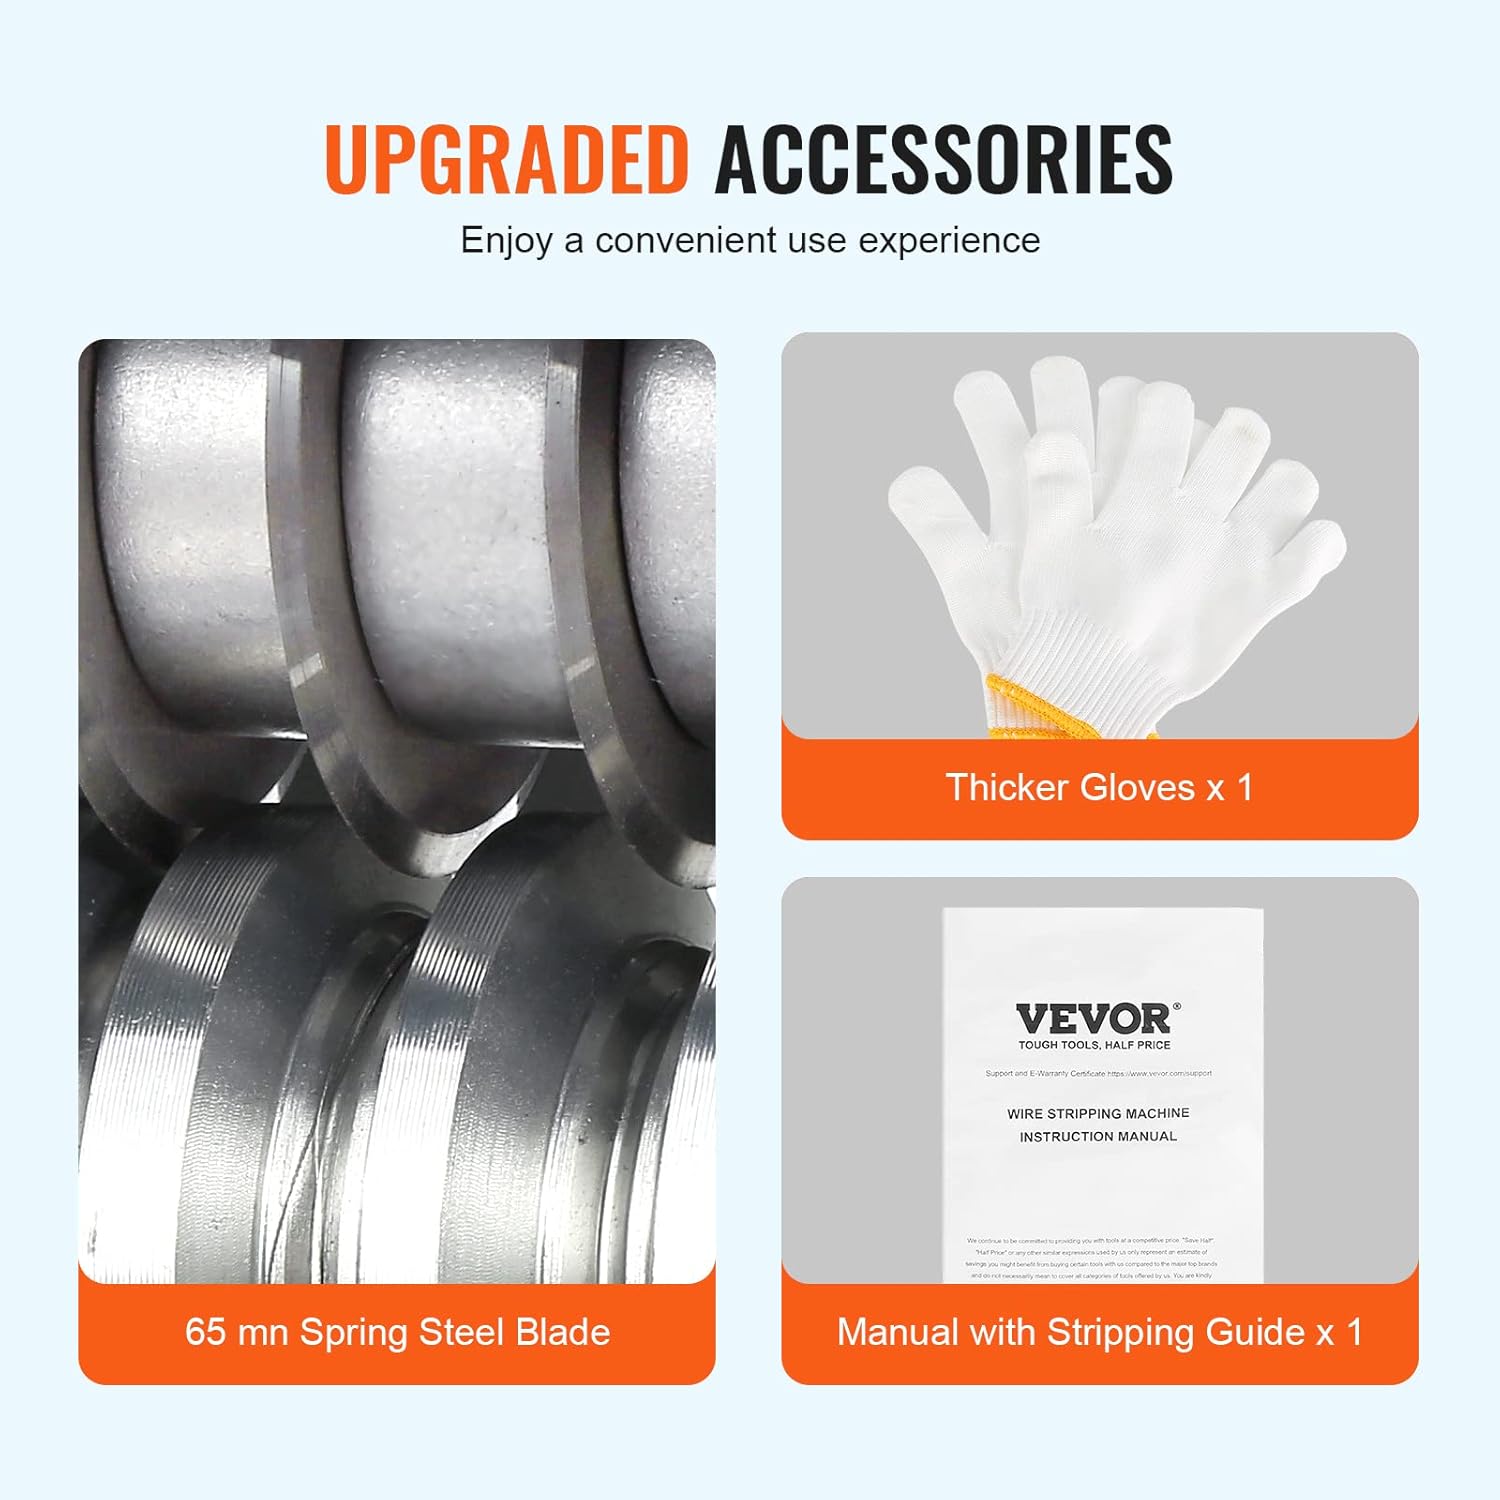
Figure 2: Key accessories including the durable blade, protective gloves, and user manual.
4. Specifications
Refer to the table below for detailed technical specifications of your wire stripping machine:
| Specification | Value |
|---|---|
| Brand | VEVOR |
| Model Number | BXJDD370 |
| Rated Power | 370 W |
| Wire Gauge Range | 0.06'' - 1.57'' (1.5 mm - 40 mm) |
| Stripping Speed | 88 ft/min |
| Number of Channels | 11 |
| Number of Blades | 10 |
| Blade Material | 65 Mn Spring Steel |
| Machine Material | Cast Iron |
| Item Weight | 81.4 pounds (36.9 kg) |
| Product Dimensions | 24.4''L x 11''W (620mm L x 280mm W) |

Figure 3: Product dimensions and core specifications.
5. Setup
- Unpacking: Carefully remove the machine and all accessories from the packaging. Inspect for any shipping damage.
- Placement: Choose a sturdy, level workbench or surface capable of supporting the machine's weight (81.4 lbs). Ensure adequate space around the machine for safe operation and wire handling.
- Power Connection: Before plugging in, ensure the power switch is in the "OFF" position. Connect the power cord to a grounded electrical outlet that matches the machine's voltage requirements.
- Blade Adjustment: The machine features adjustable blades. Before first use, or when changing wire sizes, adjust the blade height using the adjustment knob to match the diameter of the wire you intend to strip. The goal is for the blade to cut through the insulation without damaging the inner conductor. The machine has hole-size markings to assist with precise adjustment.
6. Operating Instructions
The VEVOR wire stripping machine offers both electric and manual operation modes.
6.1 Electric Operation
- Preparation: Ensure the machine is properly set up and connected to power. Wear appropriate PPE.
- Select Channel: Identify the appropriate stripping channel based on the diameter of the wire you are stripping. The machine has clear diameter markings for each channel.
- Power On: Press the green "ON" button to start the motor. The machine will begin operating at a speed of 88 ft/min.
- Feed Wire: Carefully feed the end of the wire into the selected channel. The machine will automatically pull the wire through and strip the insulation.
- Collect Stripped Wire: Collect the stripped wire and insulation as they exit the machine.
- Power Off: Press the red "OFF" or emergency stop button when finished or in case of an emergency.

Figure 4: Two operation ways: electric one-button start and manual control.
6.2 Manual Operation
The manual crank handle allows for operation during power failures or for more precise control.
- Preparation: Ensure the machine is not connected to power if you intend to use it manually.
- Attach Crank: Securely attach the manual crank handle to the designated shaft on the machine.
- Feed Wire: Feed the wire into the appropriate channel.
- Crank: Turn the manual crank handle to pull the wire through the stripping blades.

Figure 5: Wire being stripped by the machine.
7. Maintenance
Regular maintenance ensures the longevity and optimal performance of your wire stripping machine.
- Cleaning: After each use, disconnect power and clean the machine, especially the stripping channels and blades, to remove any wire debris or insulation residue. Use a brush or compressed air.
- Blade Inspection: Periodically inspect the blades for wear, dullness, or damage. Sharp blades are crucial for efficient stripping. Replace blades if they become dull or damaged. The blades are made of 65 Mn spring steel for durability.
- Lubrication: Apply a light coat of machine oil to moving parts and gears as needed to ensure smooth operation and prevent rust.
- Storage: Store the machine in a dry, clean environment when not in use.

Figure 6: Durable 65 Mn Spring Steel blades.
8. Troubleshooting
Here are some common issues and their potential solutions:
| Problem | Possible Cause | Solution |
|---|---|---|
| Machine does not start. | No power; Emergency stop engaged; Loose connection. | Check power cord and outlet; Disengage emergency stop button; Ensure all connections are secure. |
| Wire not stripping cleanly or completely. | Incorrect blade adjustment; Dull or damaged blades; Incorrect channel selected. | Adjust blade height; Replace blades if necessary; Select the correct channel for the wire diameter. |
| Machine jams or motor struggles. | Wire too large for channel/machine; Debris in channels; Overload. | Use appropriate wire size; Clean channels; Reduce load or allow motor to cool. |
| Excessive noise or vibration. | Loose components; Lack of lubrication; Worn parts. | Check and tighten all fasteners; Lubricate moving parts; Inspect for worn components. |
9. Warranty and Support
VEVOR is committed to providing quality products. This product is typically covered by a 30-day easy returns policy. For any questions, technical assistance, or warranty claims, please contact VEVOR customer support. Refer to your purchase documentation or the VEVOR website for the most current contact information.
Customer Support: For assistance, please visit the VEVOR official website or refer to the contact details provided with your purchase.