1. Introduction
This manual provides detailed instructions for the safe and effective use of your AukonVee ES05 Handheld Endoscope Camera. Please read this manual thoroughly before operating the device and retain it for future reference. This endoscope is designed for real-time visual inspection in hard-to-reach areas, offering a clear display and robust features for various industrial and household applications.
2. Package Contents
Verify that all items listed below are present in your package:
- Endoscope Camera with 4.3-inch IPS Screen (main unit)
- 16.5FT Semi-Rigid Snake Cable with Camera Probe
- Essential Accessories: Hook, Magnet, Side Mirror
- Type-C Data Cable (for charging)
- User Manual (this document)

Image: AukonVee ES05 Endoscope Camera with its main components and accessories.
3. Product Overview
3.1 Key Features
- 4.3-Inch HD IPS Display: Provides live HD viewing with a 178° wide-angle view. Features adjustable image flip and contrast settings. No Wi-Fi, apps, or smartphone pairing required.
- 1080P HD Inspection Camera: Equipped with an upgraded CMOS sensor and 8 adjustable LED lights for bright images in dark environments. Optimal focal range of 1.2-3.9 inches.
- IP67 Waterproof Probe: Designed to resist rain, humidity, and harsh conditions, ensuring reliability in various environments.
- 16.5FT Semi-Rigid Cable: The flexible yet rigid cable allows access to narrow spaces and maintains its shape for precise maneuvering.
- Handheld Ergonomic Design: Features a comfort-designed handle with a lightweight, slip-resistant grip for one-handed operation.
- Rechargeable High-Capacity Battery: Enables 3-4 hours of continuous runtime with fast USB charging.
- Functionality Note: This model focuses on real-time inspection and does not support photo/video recording.
3.2 Components and Controls
Familiarize yourself with the device's layout and controls:

Image: Detailed view of the 4.3-inch IPS screen highlighting HD clarity, vibrant colors, sunlight readability, and 178° viewing angle.

Image: Illustration of the high-capacity rechargeable battery, indicating 3.5-hour continuous runtime and 3-hour fast charging.

Image: Comparison highlighting the standalone operation of the AukonVee endoscope, requiring no external devices or apps.
4. Setup
4.1 Charging the Device
- Locate the Type-C charging port on the side of the main unit.
- Connect the provided Type-C data cable to the charging port and a compatible USB power adapter (not included).
- The charging indicator light will illuminate during charging. A full charge typically takes 3 hours.
4.2 Connecting the Camera Probe
- Align the connector of the 16.5FT semi-rigid snake cable with the quick-connect port at the top of the main unit.
- Gently push and twist the connector clockwise until it is securely fastened.
4.3 Powering On/Off
- To power on: Press and hold the power button (located near the quick-connect port) for a few seconds until the screen illuminates.
- To power off: Press and hold the power button again until the screen turns off.
5. Operating Instructions
5.1 Basic Controls
The main unit features intuitive buttons for controlling the display and camera probe:
- Brightness Adjustment: Use the up/down arrow buttons (often marked with a lightbulb icon) to adjust the intensity of the 8 LED lights on the camera probe. There are 8 levels of brightness.
- Image Flip (180° Rotation): Press the button with the double-arrow icon to rotate the image 180 degrees, useful when the probe is inverted.
- Zoom In/Out: Use the magnifying glass icons to zoom the image (1.0X, 1.5X, 2.0X).
- Contrast/Saturation: Access the menu (button with three horizontal lines) to adjust contrast and saturation settings for optimal image clarity.
- Color/Black & White Mode: Within the menu, you can switch between color and black & white display modes.
5.2 Using Essential Accessories
The included accessories attach to the camera probe for enhanced functionality:
- Hook: Use to retrieve small objects from hard-to-reach places.
- Magnet: Ideal for picking up metallic items like screws or nuts.
- Side Mirror: Provides a side view, allowing inspection of areas not directly in front of the camera lens.
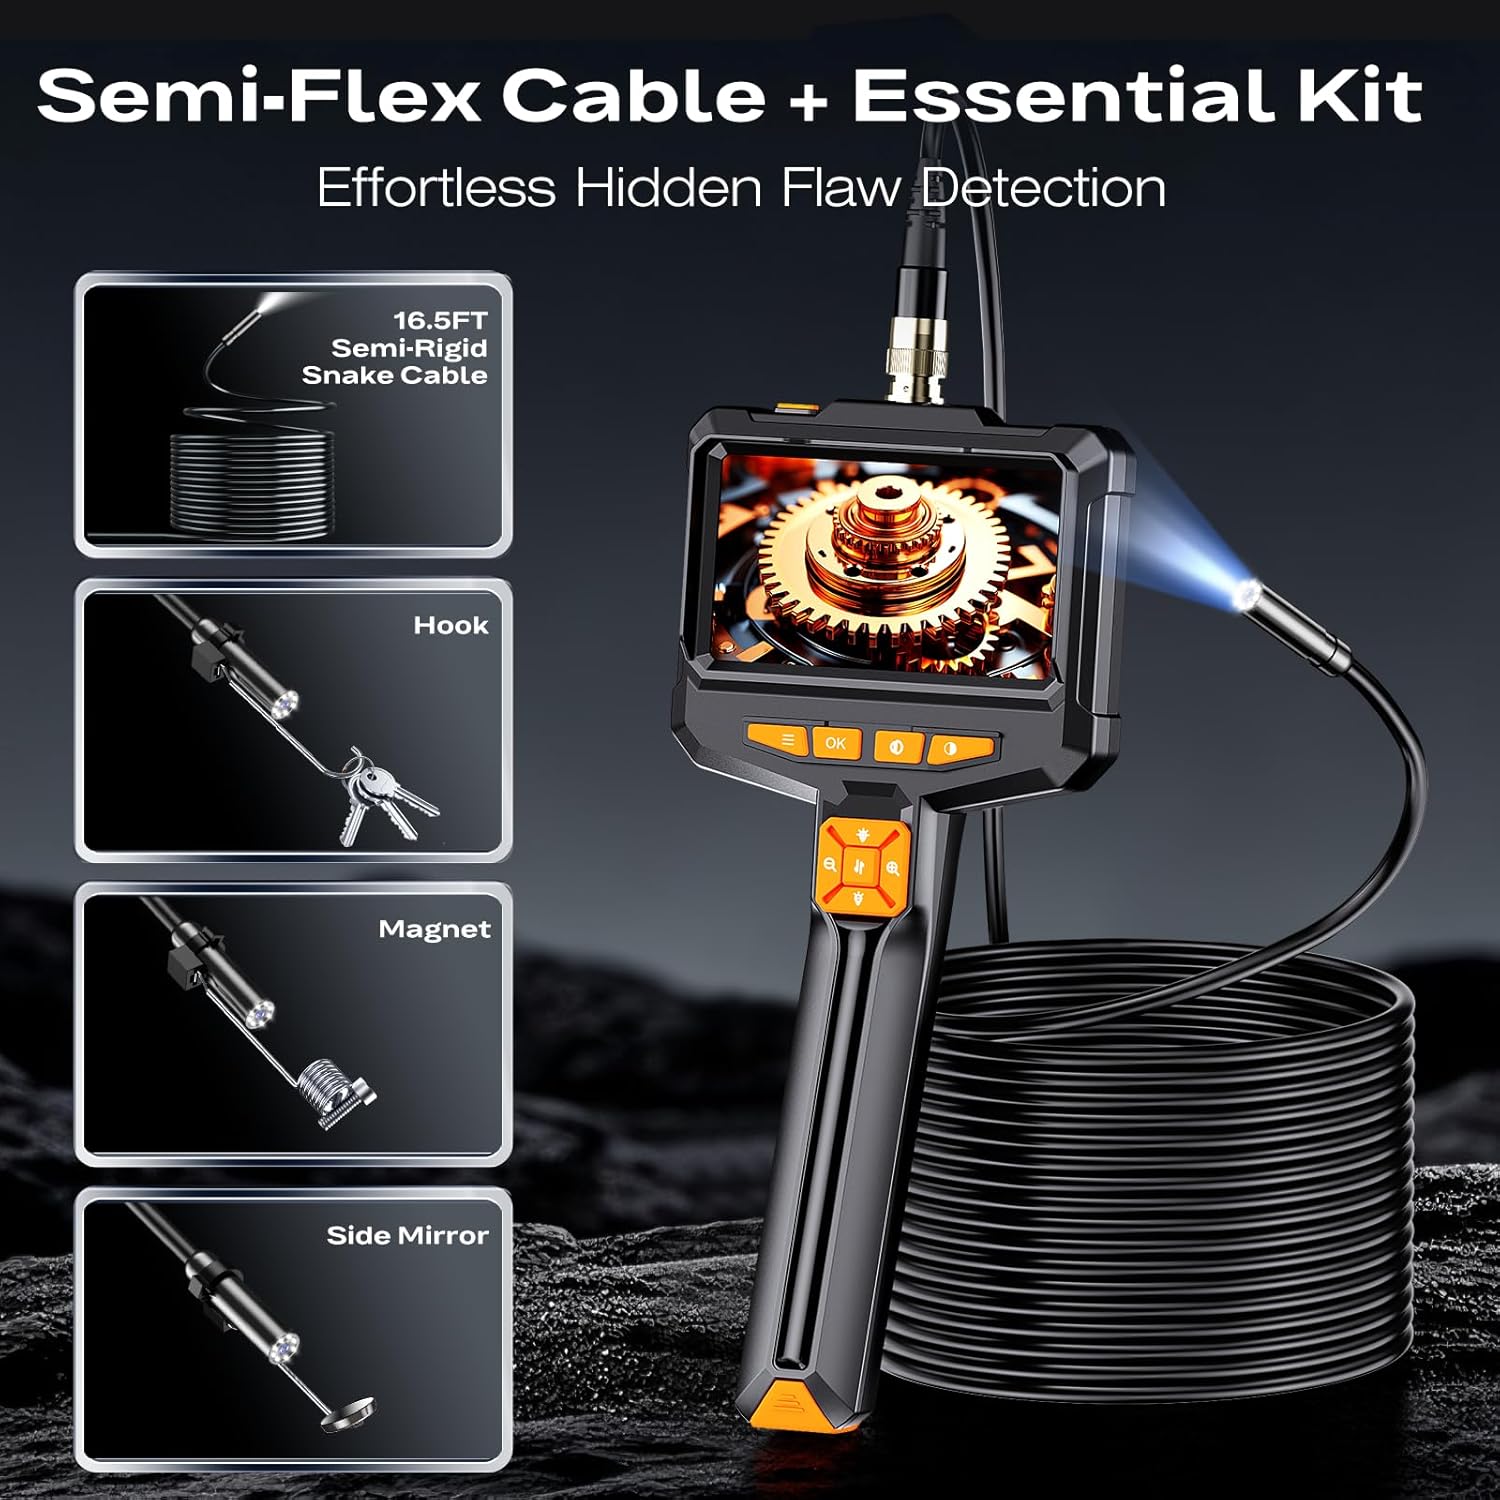
Image: The 16.5FT semi-rigid cable and the essential kit including hook, magnet, and side mirror attachments.
5.3 Application Examples
The AukonVee ES05 endoscope is suitable for a wide range of inspection tasks:
- Automotive Maintenance: Inspect engine components, spark plug holes, and other tight spaces for issues like leaks or wear.
- Pipe & Sewer Inspection: Examine blockages, corrosion, or damage in plumbing systems.
- HVAC Checks: Inspect ducts, vents, and internal components of heating, ventilation, and air conditioning units.
- Wall Inspections: Look inside wall cavities for wiring, insulation, or pest issues without extensive demolition.
- General Household Use: Retrieve dropped items, inspect behind appliances, or check hard-to-reach areas.

Image: Various application scenarios including auto diagnostics, wall cavity inspection, cabinet gap scanning, and pipe assessment.
5.4 Official Product Video
Video: A brief overview demonstrating the AukonVee ES05 Endoscope Camera with Light, showcasing its features and ease of use in various inspection tasks.
6. Maintenance
6.1 Cleaning the Probe
- The camera probe is IP67 waterproof. After use in wet or dirty environments, wipe the probe clean with a damp cloth.
- Ensure the probe is dry before storing. Do not use harsh chemicals or abrasive materials for cleaning.
6.2 Battery Care
- Charge the device fully before first use.
- Avoid completely draining the battery to prolong its lifespan.
- If storing for an extended period, charge the battery to approximately 50% every 3-6 months.
6.3 Storage
- Store the endoscope in a cool, dry place, away from direct sunlight and extreme temperatures.
- Keep the camera lens and screen free from dust and scratches.
7. Troubleshooting
If you encounter issues with your endoscope, refer to the following common solutions:
- No Image on Screen: Ensure the camera probe is securely connected to the main unit. Check if the device is powered on and fully charged.
- Poor Image Quality: Adjust the LED brightness using the dedicated buttons. Clean the camera lens if it appears dirty. Adjust contrast and saturation settings via the menu.
- Device Not Turning On: Ensure the battery is charged. Connect the device to a power source using the Type-C cable. If unresponsive, try pressing the reset button (located near the charging port) with a thin pin.
- Short Battery Life: Ensure the device is fully charged before use. Battery performance may degrade over time with extensive use.
8. Specifications
| Feature | Detail |
|---|---|
| Display Size | 4.3-inch IPS Color Screen |
| Camera Resolution | 1080P HD |
| LED Lights | 8 Adjustable LEDs |
| Waterproof Rating | IP67 (Probe) |
| Cable Length | 16.5FT (Semi-Rigid) |
| Optimal Focal Range | 1.2 - 3.9 inches |
| Battery Type | 1 Lithium Ion (included) |
| Continuous Runtime | 3-4 hours |
| Charging Time | Approx. 3 hours |
| Item Weight | 1.26 pounds |
| Color | Black |
9. Warranty and Support
AukonVee is committed to providing high-quality products and excellent customer service.
- Warranty: This product comes with a 24-month free warranty from the date of purchase.
- Customer Support: For any questions, concerns, or technical assistance, please contact our professional and friendly after-sales service team. We offer 24-hour support. Refer to your purchase documentation for contact details.