Introduction
This manual provides detailed instructions for the safe installation, operation, and maintenance of your Fanbulous 52-Inch Farmhouse Ceiling Fan with Light and Remote. Please read all instructions carefully before beginning installation and retain this manual for future reference.

Image: The Fanbulous 52-inch Farmhouse Ceiling Fan, showcasing its five dual-finish blades, caged light fixture, and accompanying remote control.
Safety Information
WARNING: To reduce the risk of fire, electric shock, or personal injury, always follow these instructions:
- Ensure power is turned off at the circuit breaker before installation or servicing.
- All wiring must be in accordance with national and local electrical codes.
- Consult a qualified electrician if you are unsure about wiring procedures.
- Mount the fan only to an outlet box marked "Acceptable for Fan Support of 35 lbs (15.9 kg) or less" and use the mounting screws provided with the outlet box.
- Do not operate the fan with damaged blades or housing.
- Keep hands, clothing, and other objects clear of rotating fan blades.
- This fan is designed for indoor use only.
Package Contents
Carefully unpack your ceiling fan and check that all contents are included. If any parts are missing or damaged, contact customer service.
- Ceiling Fan Motor Housing
- Fan Blades (5)
- Downrods (4-inch and 8-inch options)
- Mounting Bracket
- Caged Light Fixture
- Remote Control with Wall Mount Holder
- Hardware Pack (screws, washers, wire nuts)
- Instruction Manual
Specifications
| Feature | Detail |
|---|---|
| Brand | Fanbulous |
| Model Name | F-HL52BK-1D04 |
| Product Dimensions | 52"D x 52"W x 10"H |
| Color | Black |
| Style | Farmhouse |
| Power Source | AC/DC |
| Motor Type | DC (Reversible) |
| Number of Power Levels | 6 Speeds |
| Noise Level | 35 Decibels |
| Wattage | 45 watts |
| Voltage | 120 Volts |
| Switch Type | Remote Control |
| Installation Type | Flush Mount or Downrod Mount |
| Recommended Room Size | 10 x 20 FT |
| Indoor/Outdoor Usage | Indoor (Damp Rated for covered patios) |

Image: Diagram illustrating the 52-inch diameter, 13.8"/17.7" height with different downrod options, and suitable room sizes (10x20ft). Shows flush mount, 4-inch downrod, and 8-inch downrod installations.
Setup & Installation
Important: Installation requires two people for safety and ease of assembly. Ensure power is disconnected at the circuit breaker before starting.
- Prepare the Mounting Location: Ensure the electrical box is securely mounted and rated for ceiling fan support.
- Install the Mounting Bracket: Attach the mounting bracket to the electrical box using the provided screws.
- Assemble Downrod and Motor: Select the appropriate downrod (4-inch for low ceilings, 8-inch for high ceilings). Feed the electrical wires through the downrod and attach it to the motor housing.
- Hang the Fan: Carefully lift the fan assembly and hang it from the mounting bracket. This step typically requires two people.
- Wire the Fan: Connect the electrical wires according to the wiring diagram in the full manual (not provided here, but implied). Ensure all connections are secure with wire nuts.
- Attach Fan Blades: Secure each of the five fan blades to the motor housing. The blades feature a dual-color finish, allowing you to choose between a black or dark oak appearance.
- Install Light Fixture: Attach the caged light fixture to the bottom of the motor housing.
- Install Light Bulbs: Insert two E26 base light bulbs (not included) into the sockets within the caged fixture.
- Restore Power: Once installation is complete, restore power at the circuit breaker.

Image: Close-up of hands attaching a fan blade to the ceiling fan's motor housing, demonstrating the installation process.

Image: A detailed view of the caged light fixture, showing the mesh design and the two E26 bulb sockets inside.

Image: A close-up view of an empty E26 light bulb socket within the fan's light kit, indicating where bulbs should be installed.
Operating Instructions
Your Fanbulous ceiling fan is controlled by the included remote control. Ensure the remote has working batteries.

Image: The remote control for the Fanbulous ceiling fan, highlighting buttons for light control, 6 fan speeds, reversible DC motor, and timer settings (1/4/8 hours).
- Power On/Off: Press the power button to turn the fan and light on or off.
- Fan Speed: Select from 6 fan speeds (1-6) to adjust airflow intensity.
- Light Control: Press the light button to turn the light on or off.
- Reversible Motor: Use the reverse button to change the direction of the fan blades.
- Summer Mode (Forward): Blades rotate counter-clockwise to push air down, creating a cooling breeze.
- Winter Mode (Reverse): Blades rotate clockwise to draw air up, circulating warm air trapped near the ceiling.
- Timer Function: Set the fan to automatically turn off after 1, 2, or 4 hours using the timer buttons.
- Quiet Operation: The DC motor operates at a low noise level (35dB or lower), ensuring a peaceful environment.

Image: Visual representation of the fan's reversible function, showing downward airflow for cooling in summer and upward airflow for circulating warm air in winter.
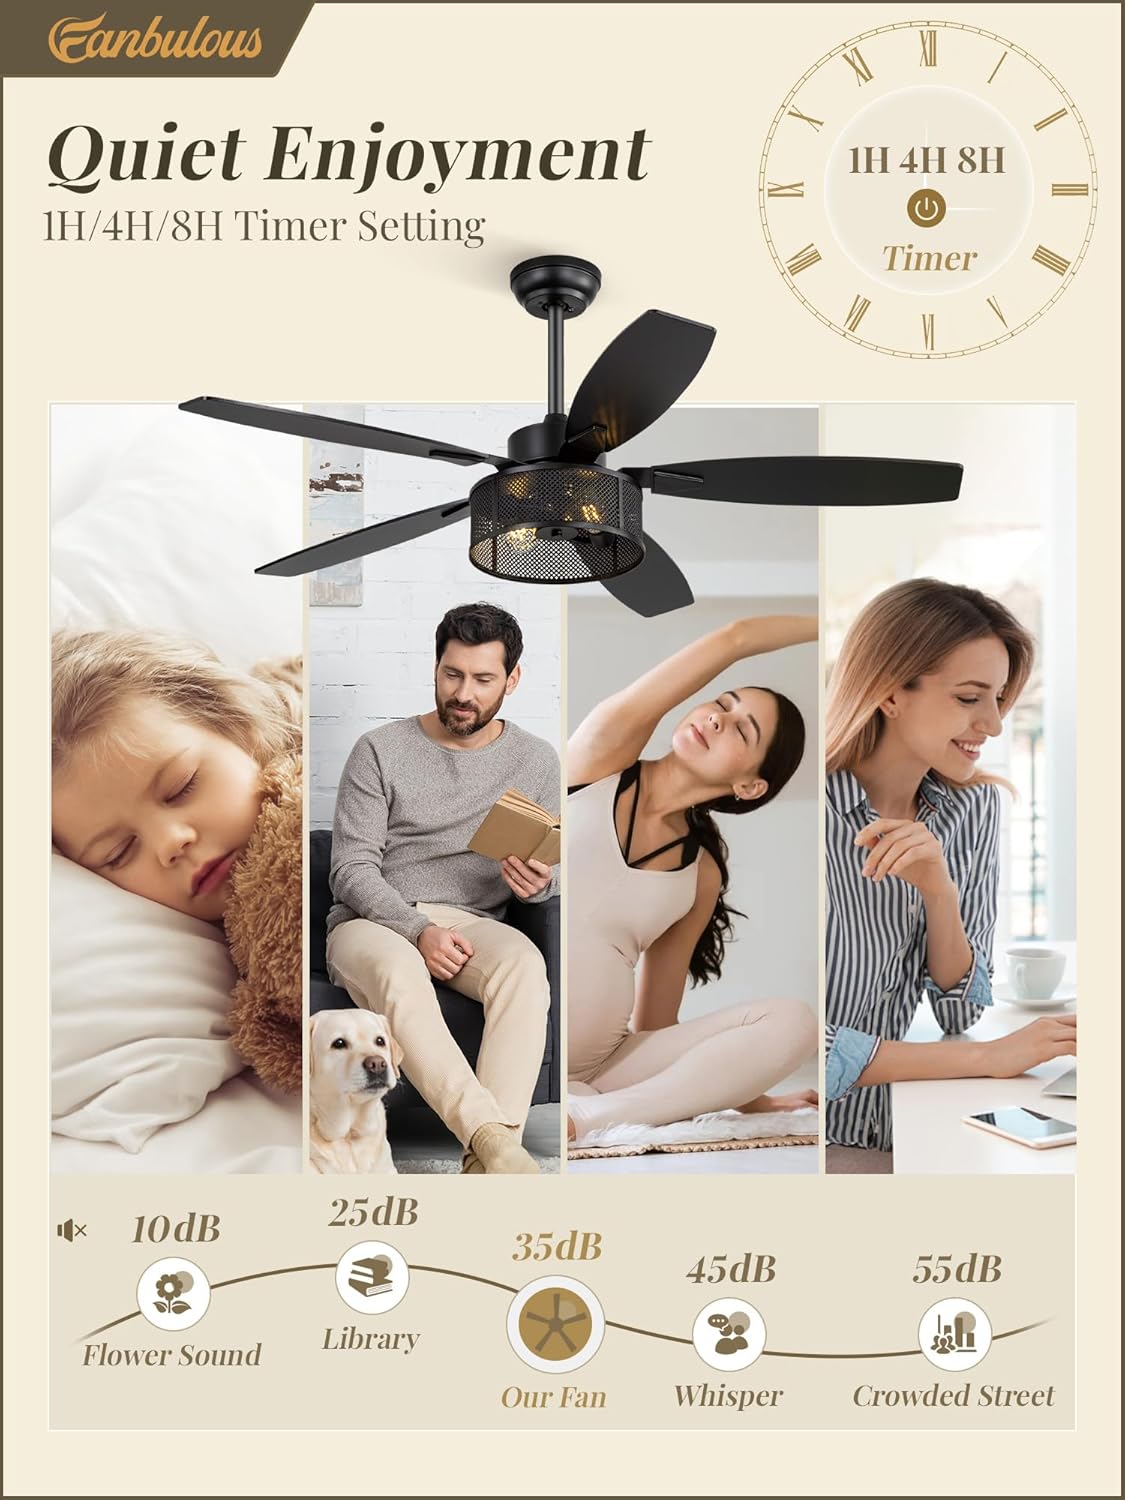
Image: An infographic comparing the fan's noise level (35dB) to common sounds like a library (25dB) or a whisper (50dB), emphasizing its quiet performance.
Maintenance
Regular maintenance ensures optimal performance and longevity of your ceiling fan.
- Cleaning: Use a soft, damp cloth to clean the fan blades and motor housing. Do not use abrasive cleaners or solvents.
- Dusting: Regularly dust the fan blades and light fixture to prevent buildup.
- Tighten Screws: Periodically check and tighten all screws on the fan blades and mounting hardware to ensure secure operation.
- Light Bulb Replacement: Ensure power is off before replacing light bulbs. Use E26 base bulbs.
Troubleshooting
If you encounter issues, refer to the following common problems and solutions:
| Problem | Possible Cause | Solution |
|---|---|---|
| Fan does not start | No power, loose wiring, remote control issue. | Check circuit breaker. Verify all wire connections. Replace remote batteries. |
| Light does not work | Bulb faulty, loose wiring, remote control issue. | Replace light bulbs. Check wiring connections. Ensure remote light button is pressed. |
| Fan wobbles | Loose blades, improper mounting, unbalanced blades. | Ensure all blade screws are tight. Verify mounting bracket is secure and level. Use balancing kit if necessary. |
| Fan makes excessive noise | Loose screws, motor issue, blades hitting an obstruction. | Check and tighten all screws. Ensure no obstructions are in the fan's path. If motor noise persists, contact support. |
| Fan beeps when turned on/off | This is a common operational sound for some DC motor fans, indicating a command received. | This is typically normal operation. If the beeping is unusually loud or persistent, contact customer service. |
Warranty & Support
Fanbulous offers a two-year after-sales service for this product. We are committed to providing high-quality products and ensuring your satisfaction.
If you encounter any issues during use or require technical assistance, please contact Fanbulous customer service. We aim to resolve all inquiries within 24 hours.
For further assistance, please refer to the contact information provided with your purchase or visit the official Fanbulous store on Amazon.