1. Introduction
This manual provides detailed instructions for the installation, operation, and maintenance of your Kviflon 36-inch Modern Flush Mount Ceiling Fan with Light. This fan features a low-profile design, 5 reversible curved blades, 6 speed settings, 3 CCT dimmable LED lights, and convenient control via remote or smartphone application. Please read this manual thoroughly before installation and use to ensure safe and efficient operation.
2. Important Safety Information
Always follow basic safety precautions when installing and operating electrical appliances to reduce the risk of fire, electric shock, and personal injury.
- Ensure the power is turned off at the circuit breaker before installation or maintenance.
- All wiring must be in accordance with national and local electrical codes.
- Consult a qualified electrician if you are unsure about wiring or installation.
- Mount the fan to a ceiling joist or support structure capable of supporting the fan's weight.
- Do not operate the fan if any part is damaged.
- Keep hands, hair, and clothing away from moving blades.
3. What's in the Box
Verify that all components are present before beginning installation:
- Fan Motor Assembly
- Hanging Board
- 5 Fan Blades
- Lampshade
- Receiver
- Remote Control
- Screw Bag
- Instruction Manual
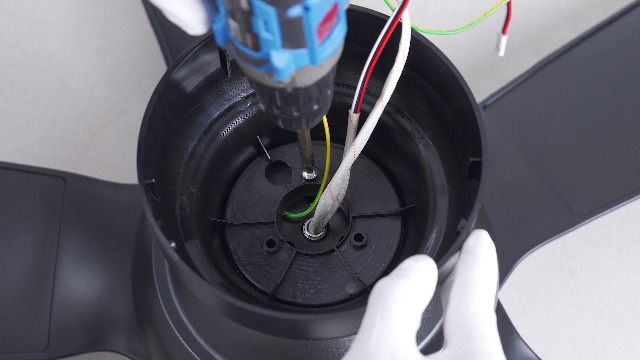
Figure 1: Included components of the Kviflon 36-inch ceiling fan. This image displays the fan body assembly, hanging board, five fan blades, lampshade, receiver, remote control, screw bag, and the instruction manual.
4. Setup and Installation
Follow these steps for proper installation. It is recommended to install the fan blades and light fixtures first, then mount the fan to the ceiling.
- Prepare the Fan Body: Attach the LED light board to the fan motor assembly using the provided screws. Ensure the screws are tightened securely.
- Attach Fan Blades: The screws for the blades are pre-installed on the motor. Align each of the 5 fan blades with the designated holes on the motor assembly and secure them.
- Install Lampshade: Carefully place the lampshade onto the fan body, twisting or clicking into place as per the design.
- Mount the Hanging Board: Secure the hanging board to the ceiling junction box using appropriate screws. Ensure it is firmly attached to a structural support.
- Wiring Connections: Connect the household wiring to the fan's wiring. Typically, this involves connecting live, neutral, and ground wires. Refer to the wiring diagram in the included instruction manual for specific color codes.
- Hang the Fan: Carefully lift the fan assembly and hang it onto the safety hook of the ceiling mounting bracket. This allows for hands-free wiring.
- Secure the Fan: Once wiring is complete, align the fan body with the hanging board and secure it with the remaining screws.
- Wall Control Compatibility: This fan is designed for use with conventional wall switches for light on/off control. It is not compatible with dimmer switches or fan gear switches.
Video 1: Installation steps for the Kviflon 8922 ceiling fan light, demonstrating LED board and blade attachment.

Figure 2: Detailed view of the fan's components and wiring connections for installation.

Figure 3: Illustration of wall switch compatibility. The fan works with standard on/off switches but not dimmer or gear switches.
5. Operating Instructions
Your Kviflon ceiling fan can be controlled using the included remote control or the dedicated smartphone application.
5.1 Remote Control
The remote control allows for easy adjustment of fan speed, light settings, and other functions from anywhere in the room.

Figure 4: Layout of the remote control, detailing buttons for power, light on/off, fan off, 6 speed settings, color temperature adjustment, night light, brightness control, forward/reverse function, 2-hour timer, and code matching.
- Power On/Off: Press the power button to turn the fan and light on or off.
- Light Control: Use the light on/off button to toggle the light. Adjust brightness (20%-100%) and color temperature (3000K Warm, 4500K Natural, 6000K White) using the dedicated buttons. A night light mode is also available.
- Fan Speed: Select from 6 fan speeds using the numbered buttons (1-6). Speed 1-2 is suitable for sleep, 3-4 for leisure, and 5-6 for fitness/strong airflow.
- Reverse Function: Press the F/R (Forward/Reverse) button to change the direction of the fan blades. This function helps circulate air efficiently in both summer (downward airflow) and winter (upward airflow to redistribute warm air). The fan will stop completely for 5-8 seconds before reversing direction.
- Timer: Set the fan to turn off automatically after 2 hours using the 2H timer button.

Figure 5: The fan's LED light offers three color temperatures (Warm, Natural, Cool) and adjustable brightness from 20% to 100%.
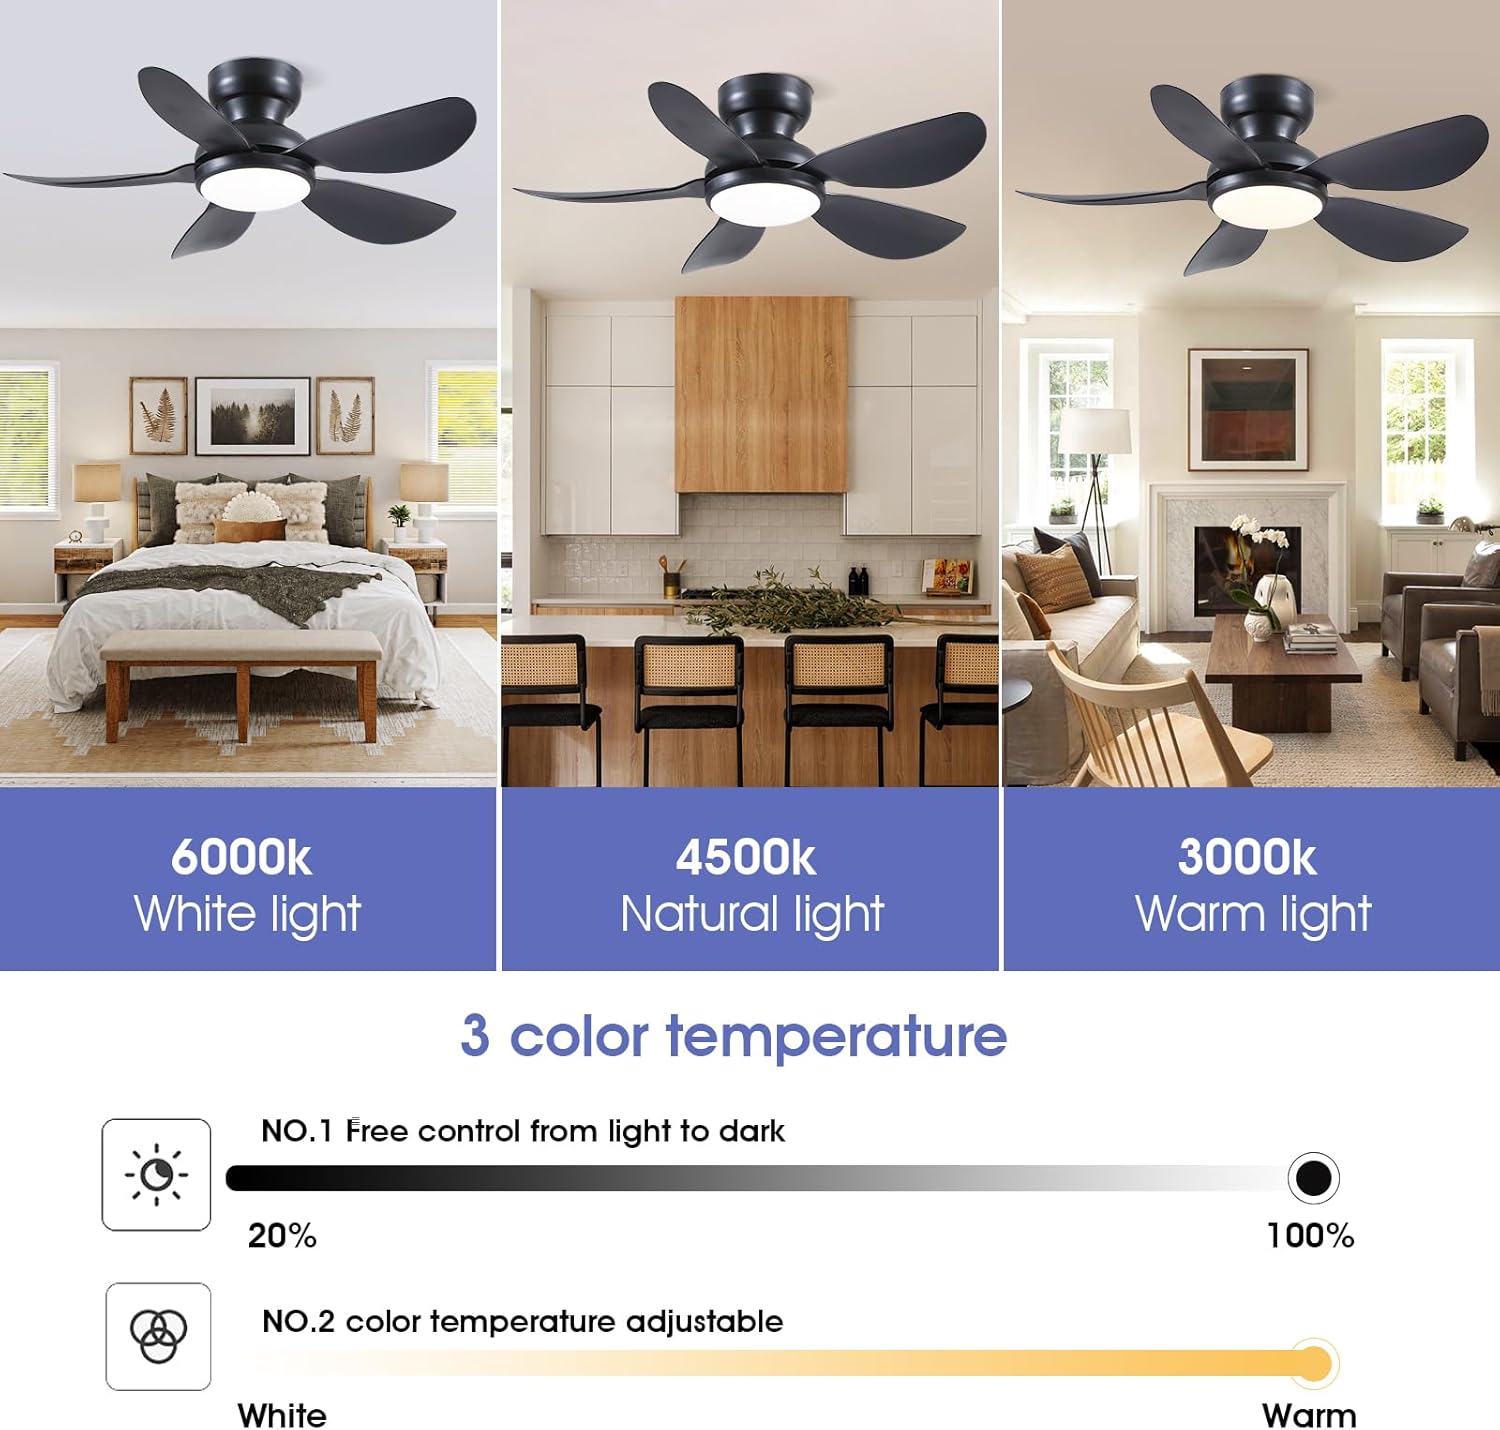
Figure 6: The fan provides 6 adjustable speeds to suit various activities and comfort levels.

Figure 7: Reversible motor function for year-round comfort, providing downward airflow in summer and upward airflow in winter.
5.2 App Control
Control your fan conveniently from your smartphone using the "Fan Lamp Pro" application.
- Download the App: Scan the QR code provided in the manual or on the product page to download the "Fan Lamp Pro" app. You can also visit http://www.jasonghost.com/fanlamppro/.
- Enable Bluetooth: Turn on Bluetooth on your smartphone.
- Open App and Add Device: Open the "Fan Lamp Pro" app, navigate to the main page, and tap the "+" icon to add a new fan lamp.
- Pairing: Turn on the main power to the fan. Within 5 seconds, repeatedly click the connecting button in the app until the fan light blinks twice or beeps, indicating a successful connection.
- Control Functions: Once paired, you can control fan speed, light brightness, color temperature, and set timers directly from the app interface.
Video 2: Demonstrates the process of connecting and controlling the ceiling fan via the smartphone application.
6. Maintenance
Regular maintenance ensures the longevity and optimal performance of your ceiling fan.
- Cleaning: To avoid damage to the finish, clean the fan with a soft, damp cloth. Do not use abrasive cleaners or solvents.
- Blade Cleaning: Dust the fan blades regularly to prevent dust buildup, which can affect airflow and balance.
- Tighten Screws: Periodically check all screws for tightness. Due to the fan's movement, some connections may loosen over time.
- LED Light: The integrated LED light is designed for long-term use and is not user-replaceable.
7. Troubleshooting
If you encounter issues with your fan, refer to the following common solutions:
| Problem | Possible Cause | Solution |
|---|---|---|
| Fan does not start | No power to the fan; loose wiring; remote/app not paired. | Check circuit breaker. Ensure all wiring connections are secure. Re-pair remote/app following instructions in Section 5. |
| Light does not work | No power to the light; incorrect light setting; remote/app issue. | Check power supply. Verify light is turned on via remote/app. Ensure brightness is not set to minimum. |
| Fan wobbles | Loose blades; improper mounting; unbalanced blades. | Ensure all blade screws are tight. Verify mounting bracket is securely fastened to the ceiling. Check for bent or damaged blades. |
| Remote/App not responding | Low battery in remote; app not connected; interference. | Replace remote batteries. Re-pair the app with the fan. Ensure no strong interference sources are nearby. |
| Fan makes noise | Loose screws; motor issue; blades hitting an obstruction. | Check all screws for tightness. Ensure no objects are in the path of the blades. If noise persists, contact customer support. |
8. Specifications
| Feature | Detail |
|---|---|
| Brand | Kviflon |
| Model Number | 8922 |
| Product Dimensions | 36"D x 36"W x 9.8"H |
| Electric Fan Design | Ceiling Fan |
| Power Source | DC |
| Style | Modern |
| Special Features | App Operable, LED Light, Remote Control, Reversible |
| Mounting Type | Flush Mount |
| Controller Type | App Control, Button Control, Remote Control |
| Number of Speeds | 6 |
| Noise Level | 30 Decibels |
| Wattage | 24 watts |
| Number of Blades | 5 |
| Voltage | 110 Volts |
| Material | Metal, Plastic |
| Blade Material | Plastic |
9. Warranty Information
This Kviflon ceiling fan comes with a 1-year limited warranty from the date of purchase. This warranty covers manufacturing defects in materials and workmanship under normal use. It does not cover damage resulting from improper installation, accident, misuse, abuse, or unauthorized modifications. Please retain your proof of purchase for warranty claims.
10. Customer Support
For further assistance, technical support, or warranty inquiries, please contact Kviflon customer service:
- Email: support@kviflon.com
- Website: Visit the Kviflon Store on Amazon for FAQs and additional resources.