1. Introduction
This manual provides essential information for the installation, operation, and maintenance of the IHFMPFKJ RR52C.03A LCD TV Motherboard Drive Board. This board is designed to replace or upgrade existing TV motherboards, supporting DVB-T and DVB-T2 digital television standards. Proper installation can restore TV functionality, extend its lifespan, and allow for precise screen parameter adjustments.
2. Safety Information
- Professional Installation Recommended: Installation of this motherboard requires technical knowledge and experience with electronic components. Incorrect installation can damage the product or the television.
- Power Disconnection: Always disconnect the TV from the main power supply before attempting any installation or maintenance.
- Static Electricity: Take precautions against electrostatic discharge (ESD) when handling the motherboard. Use an anti-static wrist strap or work on an anti-static mat.
- Component Handling: Handle the board by its edges to avoid touching sensitive components.
- Ventilation: Ensure adequate ventilation around the TV after installation to prevent overheating.
3. Package Contents
The IHFMPFKJ RR52C.03A LCD TV Motherboard Drive Board package typically includes the following components:
- 1 x RR52C.03A LCD TV Motherboard Drive Board
- 1 x Remote Control
- 1 x Button Panel with connecting cables

Image 3.1: Overview of the RR52C.03A LCD TV Motherboard Drive Board, remote control, and button panel included in the package.
4. Setup and Installation
Follow these general steps for installing the RR52C.03A motherboard. Specific steps may vary depending on your TV model.
- Prepare the TV: Disconnect the TV from all power sources and external devices. Carefully open the TV casing to access the existing motherboard.
- Remove Old Motherboard: Disconnect all cables and screws securing the old motherboard. Carefully remove it from the TV chassis.
- Install New Motherboard: Position the RR52C.03A motherboard in the TV chassis, aligning it with the mounting holes. Secure it with screws.
- Connect Cables: Reconnect all necessary cables to the new motherboard, including power, display panel, and input/output ports. Ensure all connections are firm and correct.

Image 4.1: Detailed view of the RR52C.03A motherboard's connection ports.

Image 4.2: Additional view of motherboard connections.
- Connect Button Panel: Attach the provided button panel to the motherboard using the ribbon cables.
- Initial Power On and Configuration: After reassembling the TV casing, connect the TV to power. Power on the TV and access the service menu or settings to adjust screen parameters such as brightness and resolution for optimal display.
5. Operating Instructions
The included remote control provides full functionality for navigating your TV's features after the motherboard installation.
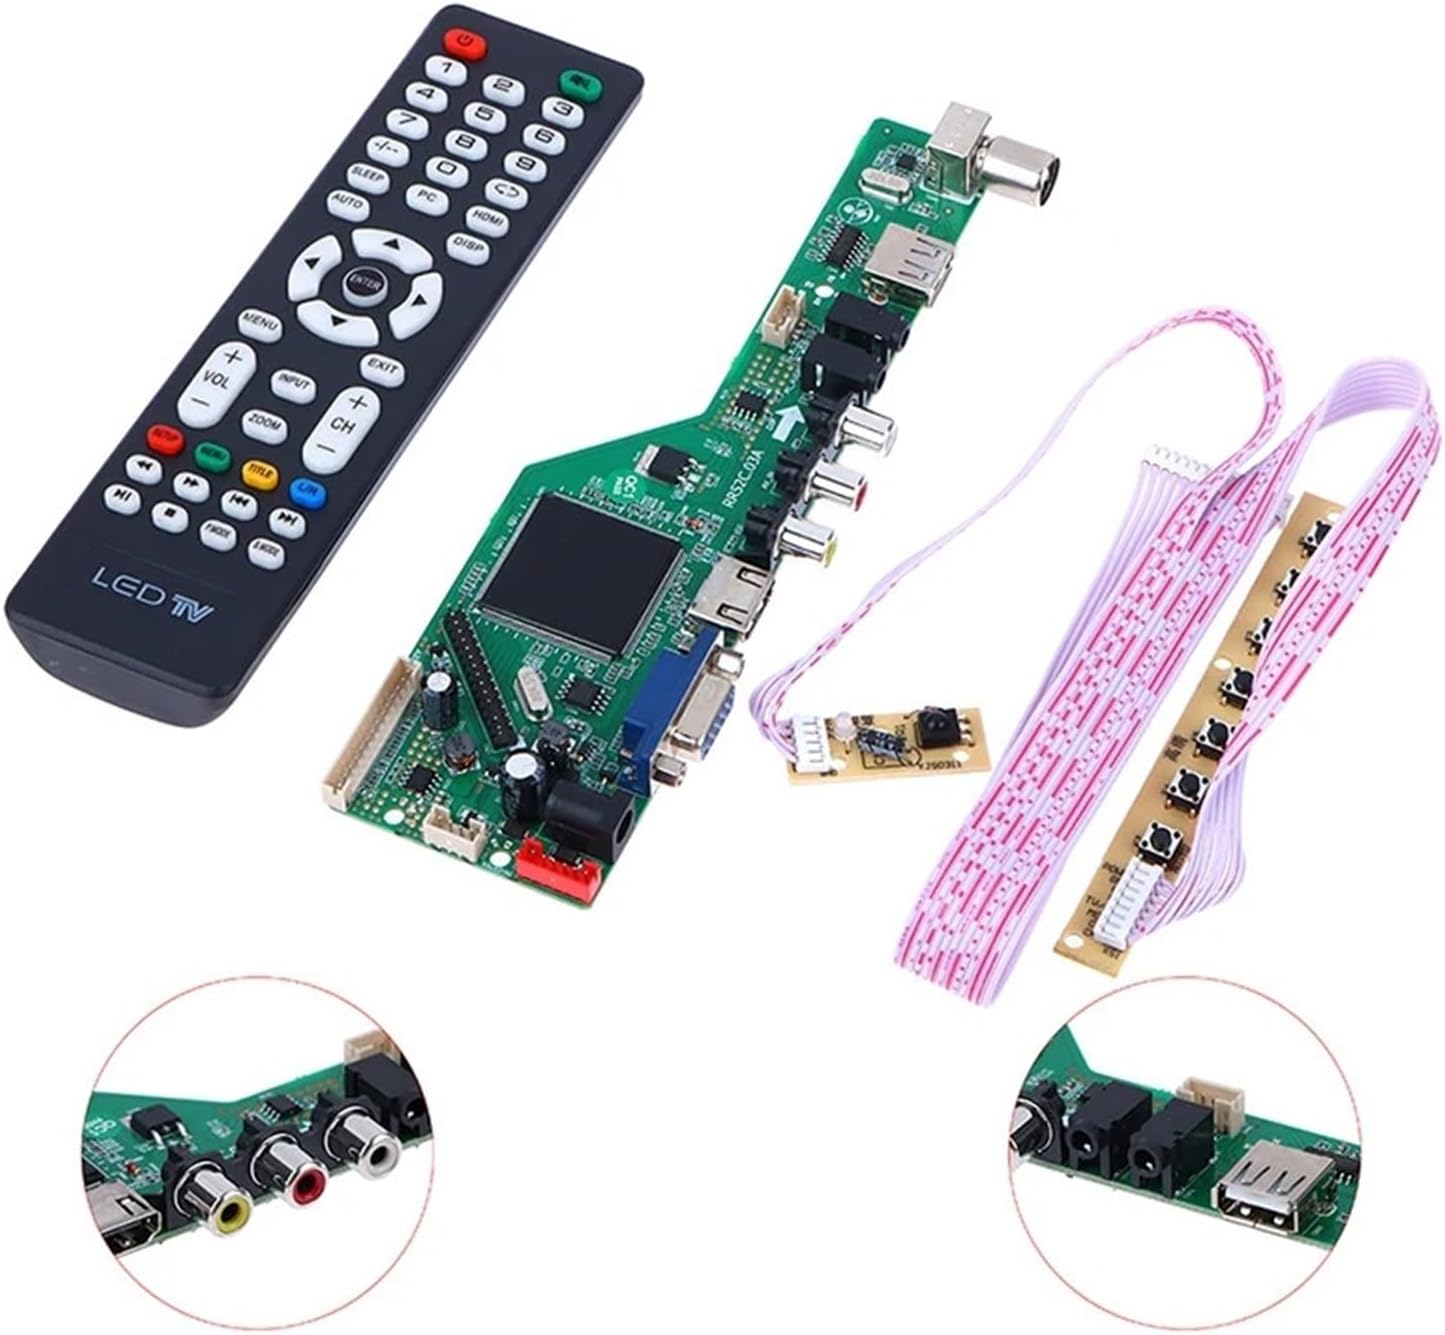
Image 5.1: Remote control for the RR52C.03A motherboard.
- Power Button: Turns the TV on or off.
- Channel Buttons (+/-): Changes TV channels.
- Volume Buttons (+/-): Adjusts the audio volume.
- Menu Button: Accesses the TV's main menu for settings and adjustments.
- Input Button: Selects different input sources (HDMI, VGA, AV, DVB-T/T2).
- Navigation Buttons (Up/Down/Left/Right/Enter): Used to navigate through menus and confirm selections.
- DVB-T/DVB-T2 Functionality: The motherboard supports DVB-T and DVB-T2 digital broadcasting. Use the remote to scan for channels and access digital TV features.
6. Maintenance
The RR52C.03A motherboard is designed for durability. Minimal maintenance is required.
- Keep Dry: Avoid exposing the TV to moisture or liquids, which can damage electronic components.
- Cleanliness: Periodically clean the TV's vents to ensure proper airflow and prevent dust buildup, which can lead to overheating.
- Avoid Impact: Protect the TV from physical shocks or impacts.
7. Troubleshooting
If you encounter issues after installing the motherboard, consider the following troubleshooting steps:
| Problem | Possible Cause | Solution |
|---|---|---|
| TV does not power on | Loose power connection, faulty power supply, incorrect installation. | Check all power connections. Ensure the TV is plugged into a working outlet. Verify motherboard installation. |
| No signal / Blank screen | Incorrect input source selected, loose signal cables, antenna issues. | Press the 'Input' button on the remote to cycle through sources. Check HDMI, VGA, AV, or antenna cable connections. Perform a channel scan for DVB-T/T2. |
| Distorted or poor picture quality | Incorrect screen parameters, signal interference, faulty display panel connection. | Access the TV menu to adjust brightness, contrast, and resolution settings. Check display panel cable connection to the motherboard. |
| Remote control not working | Dead batteries, obstructed sensor, remote not paired (if applicable). | Replace remote control batteries. Ensure a clear line of sight to the TV's IR sensor. |
If problems persist after attempting these solutions, it is recommended to consult with a qualified technician.
8. Specifications
Key specifications for the IHFMPFKJ RR52C.03A LCD TV Motherboard Drive Board:
- Model: RR52C.03A
- Supported Standards: DVB-T, DVB-T2
- Board Dimensions (Approx.): Length 18.7 cm (7.36 in), Width 6 cm (2.36 in)
- Remote Control Dimensions (Approx.): Length 17.5 cm (6.8 in), Width 4.5 cm (1.7 in)
- Item Weight (Approx.): 1.76 ounces (50 grams)
- Compatible Audio/Video Equipment Style: Display Equipment

Image 8.1: Dimensions of the RR52C.03A motherboard and remote control.
9. Warranty Information
For warranty details regarding the IHFMPFKJ RR52C.03A LCD TV Motherboard Drive Board, please refer to the specific warranty policy provided by your seller or the manufacturer at the time of purchase. Warranty terms typically cover manufacturing defects for a specified period.
10. Support
If you require further assistance or have questions not covered in this manual, please contact the seller or manufacturer directly. Provide your product model (RR52C.03A) and a detailed description of your issue for efficient support.