
SHARDOR CM9429D-UL
SHARDOR 3-in-1 Single Serve Coffee Maker
Model: CM9429D-UL
Instruction Manual
Introduction
Thank you for choosing the SHARDOR 3-in-1 Single Serve Coffee Maker. This appliance is designed to provide a convenient and versatile brewing experience for K-Cup pods, ground coffee, and loose-leaf teas. Please read this manual thoroughly before operation to ensure proper use, maintenance, and safety.

Image: The SHARDOR 3-in-1 Single Serve Coffee Maker in white, showcasing its compact design and the three different brewing methods: K-Cup pod, ground coffee adapter, and loose-leaf tea adapter.
Important Safety Instructions
- Read all instructions before using the appliance.
- Do not touch hot surfaces. Use handles or knobs.
- To protect against fire, electric shock, and injury to persons, do not immerse cord, plugs, or appliance in water or other liquid.
- Close supervision is necessary when any appliance is used by or near children.
- Unplug from outlet when not in use and before cleaning. Allow to cool before putting on or taking off parts, and before cleaning the appliance.
- Do not operate any appliance with a damaged cord or plug or after the appliance malfunctions, or has been damaged in any manner.
- The use of accessory attachments not recommended by the appliance manufacturer may result in fire, electric shock, or injury to persons.
- Do not use outdoors.
- Do not let cord hang over edge of table or counter, or or touch hot surfaces.
- Do not place on or near a hot gas or electric burner, or in a heated oven.
- Always attach plug to appliance first, then plug cord into the wall outlet. To disconnect, turn any control to "off", then remove plug from wall outlet.
- Do not use appliance for other than intended use.
- Scalding may occur if the lid is removed during the brewing cycle.
Product Components
- Main Unit
- 40oz Detachable Water Reservoir
- K-Cup Pod Holder
- Ground Coffee Adapter (Reusable Filter)
- Removable Drip Tray
- Power Cord
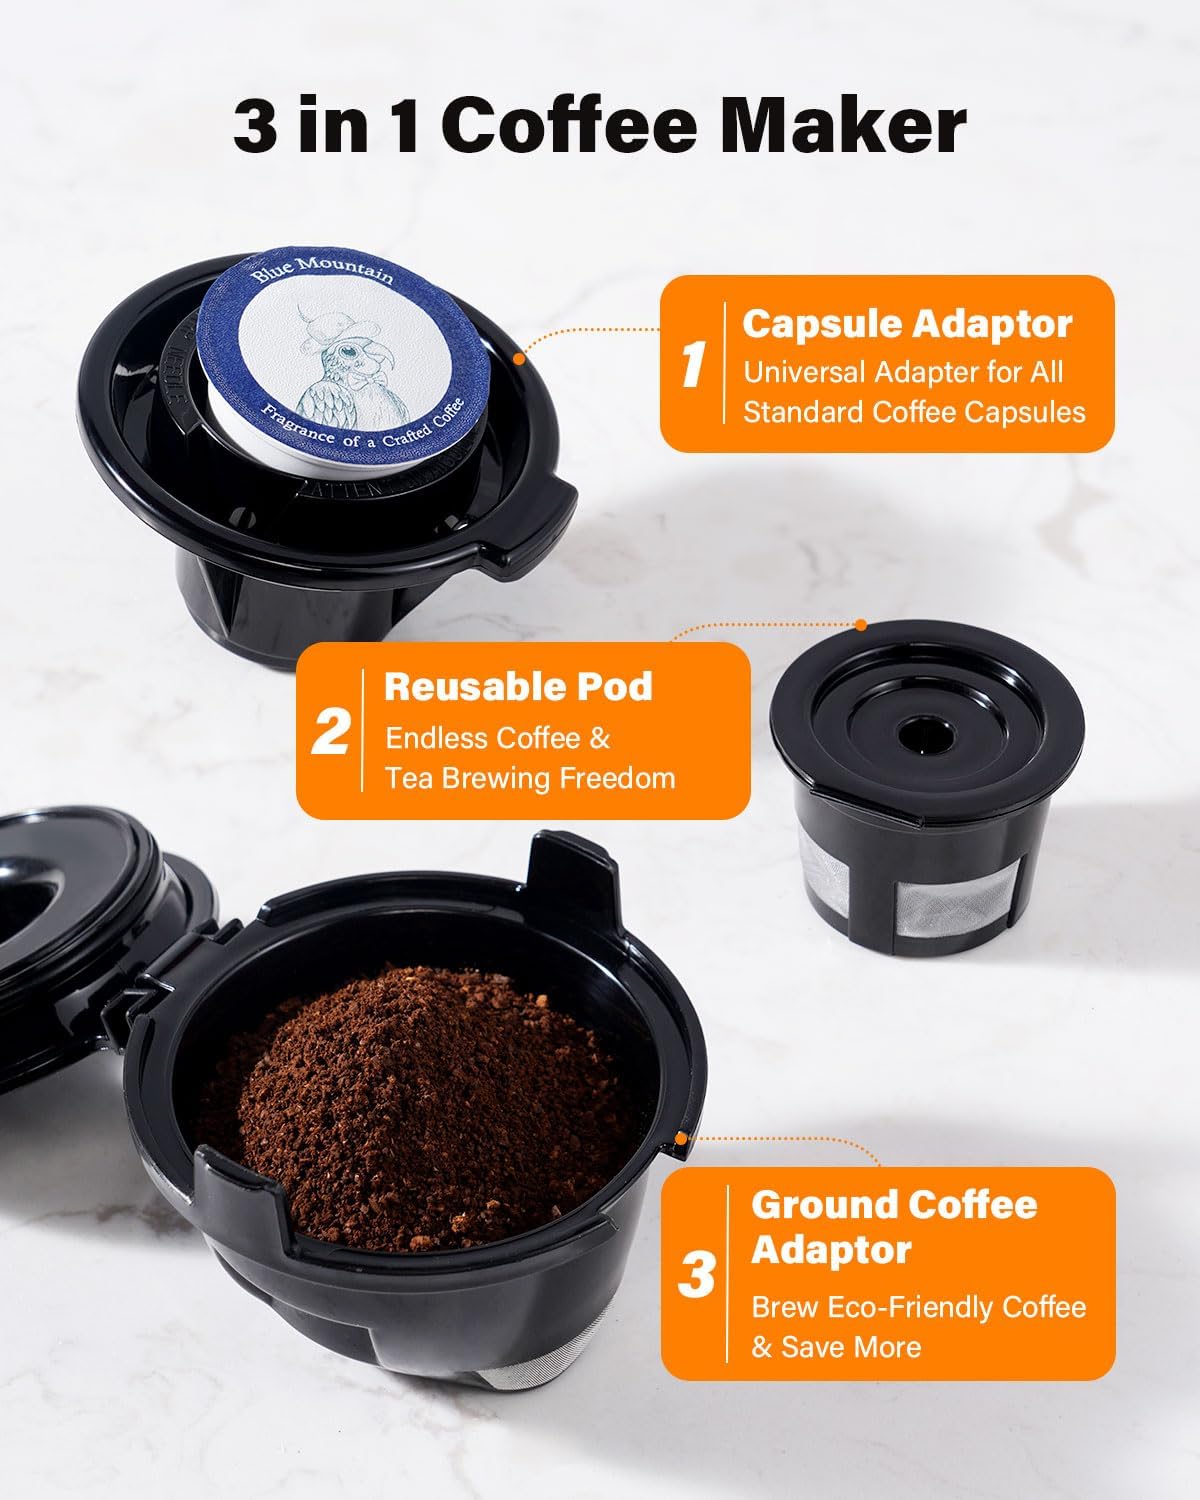
Image: Detailed view of the three brewing options: a capsule adapter for standard coffee capsules, a reusable pod for endless coffee and tea brewing, and a ground coffee adapter for eco-friendly brewing.
Setup and First Use
- Unpack: Carefully remove all packaging materials and components.
- Clean: Wash the water reservoir, K-Cup pod holder, ground coffee adapter, and drip tray in warm, soapy water. Rinse thoroughly and dry.
- Position: Place the coffee maker on a flat, stable surface. Ensure it is near a power outlet and away from heat sources.
- Fill Water Reservoir: Fill the 40oz detachable water reservoir with fresh, cold water up to the MAX line. Place it securely back onto the unit.
- Initial Rinse Cycle:
- Ensure no pod or ground coffee is in the holder.
- Place an empty mug on the drip tray.
- Press the "ON/OFF" button to power on.
- Select the largest brew size (e.g., 14oz) using the "SIZE" button.
- Press the "BREW" button to start a hot water cycle.
- Discard the hot water. Repeat this process 2-3 times to thoroughly clean the internal components.
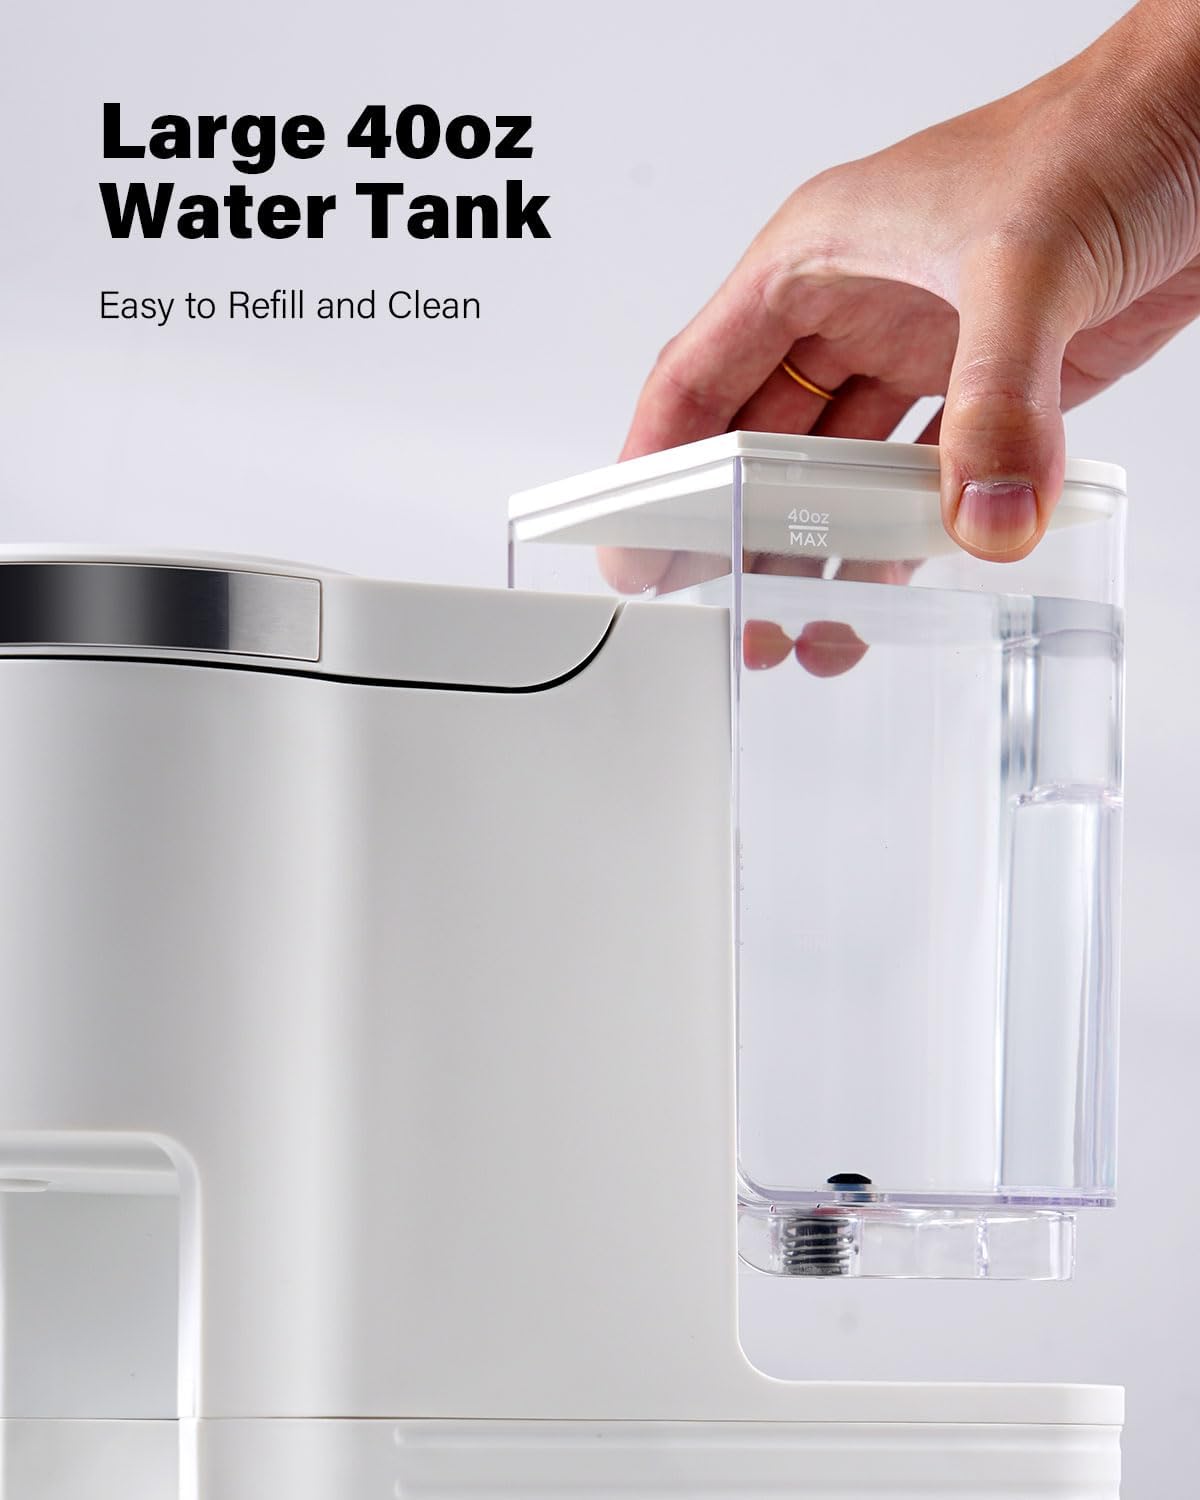
Image: A hand demonstrating how to place the large 40oz detachable water tank onto the coffee maker, highlighting its ease of refilling and cleaning.
Operating Instructions
Brewing with K-Cup Pods
- Fill Water Reservoir: Ensure the water reservoir is filled with fresh, cold water.
- Insert K-Cup Pod: Open the lid of the coffee maker. Place a K-Cup pod into the K-Cup pod holder. Close the lid firmly.
- Place Mug: Position your mug on the drip tray. For taller mugs (up to 7.2 inches), the drip tray can be removed.
- Power On: Press the "ON/OFF" button.
- Select Brew Size: Press the "SIZE" button repeatedly to choose your desired brew size (6oz, 8oz, 10oz, 12oz, or 14oz). The corresponding indicator light will illuminate.
- Start Brewing: Press the "BREW" button. The coffee maker will begin brewing.
- Enjoy: Once brewing is complete, carefully remove your mug. The machine will automatically shut off after 5 minutes of inactivity.

Image: A finger pressing the "ON/OFF" button on the intuitive touchscreen control panel, showing the various brew size options and the "ADD & CLEAN" button.
Brewing with Ground Coffee or Loose-Leaf Tea
- Fill Water Reservoir: Ensure the water reservoir is filled with fresh, cold water.
- Prepare Adapter: Open the lid of the coffee maker. Insert the ground coffee adapter (reusable filter) into the holder. Fill the adapter with your desired amount of ground coffee or loose-leaf tea. Do not overfill. Close the lid firmly.
- Place Mug: Position your mug on the drip tray.
- Power On: Press the "ON/OFF" button.
- Select Brew Size: Press the "SIZE" button repeatedly to choose your desired brew size (6oz, 8oz, 10oz, 12oz, or 14oz).
- Start Brewing: Press the "BREW" button.
- Enjoy: Once brewing is complete, carefully remove your mug. The machine will automatically shut off after 5 minutes of inactivity.

Image: A close-up of the ground coffee adapter, designed for use with your own ground coffee or loose-leaf tea.

Image: The SHARDOR coffee maker with different sized cups (6oz, 8oz, 10oz, 12oz, 14oz) demonstrating the multiple brew size options available.
Maintenance and Cleaning
Daily Cleaning
- Empty and Rinse: After each use, remove and empty the K-Cup pod or ground coffee adapter. Rinse it under running water.
- Drip Tray: Empty and rinse the drip tray as needed.
- Wipe Down: Wipe the exterior of the coffee maker with a damp cloth.
Auto Clean Function
The coffee maker features an "ADD & CLEAN" function for internal cleaning and descaling. It is recommended to perform this cycle periodically, especially if you notice reduced water flow or mineral buildup.
- Prepare Solution: Fill the water reservoir with a mixture of water and descaling solution (or white vinegar) according to the descaling solution's instructions.
- Start Clean Cycle: Ensure no pod or ground coffee is in the holder. Place an empty mug on the drip tray. Press the "ON/OFF" button, then press the "ADD & CLEAN" button. The machine will run a cleaning cycle.
- Rinse Cycles: After the cleaning cycle, empty the mug and rinse the water reservoir. Fill the reservoir with fresh, clean water. Run 2-3 full water cycles (using the "BREW" button with the largest size selected) to rinse out any remaining descaling solution.

Image: The "ADD & CLEAN" button on the control panel, indicating the auto-clean function for descaling and maintenance.
Troubleshooting
| Problem | Possible Cause | Solution |
|---|---|---|
| Coffee not brewing. | No water in reservoir; lid not closed properly; machine not powered on. | Fill water reservoir; ensure lid is securely closed; press ON/OFF button. |
| Weak coffee. | Too little coffee grounds; incorrect brew size selected; old coffee. | Increase coffee grounds; select smaller brew size; use fresh coffee. |
| Coffee grounds in cup. | Ground coffee adapter overfilled; fine grind used; adapter not seated correctly. | Do not overfill adapter; use medium to coarse grind; ensure adapter is properly seated. |
| Slow brewing or reduced flow. | Mineral buildup (scaling). | Perform the "ADD & CLEAN" descaling cycle. |
| Machine not turning on. | Not plugged in; power outage; faulty outlet. | Check power connection; verify power supply; try a different outlet. |
Specifications
- Brand: SHARDOR
- Model Name: UL-CM9429D-UL-WT-KDHK2506US
- Item Model Number: CM9429D-UL
- Color: White
- Product Dimensions: 10.8"D x 4.93"W x 12.6"H
- Item Weight: 3.52 ounces
- Water Reservoir Capacity: 40oz
- Brew Sizes: 6oz, 8oz, 10oz, 12oz, 14oz
- Coffee Input Type: Capsule, Ground, Pod
- Special Features: Auto Clean Function, Auto Shut-Off, Permanent Filter, Removable Tank
- Operation Mode: Fully Automatic
- Power Source: AC adapter
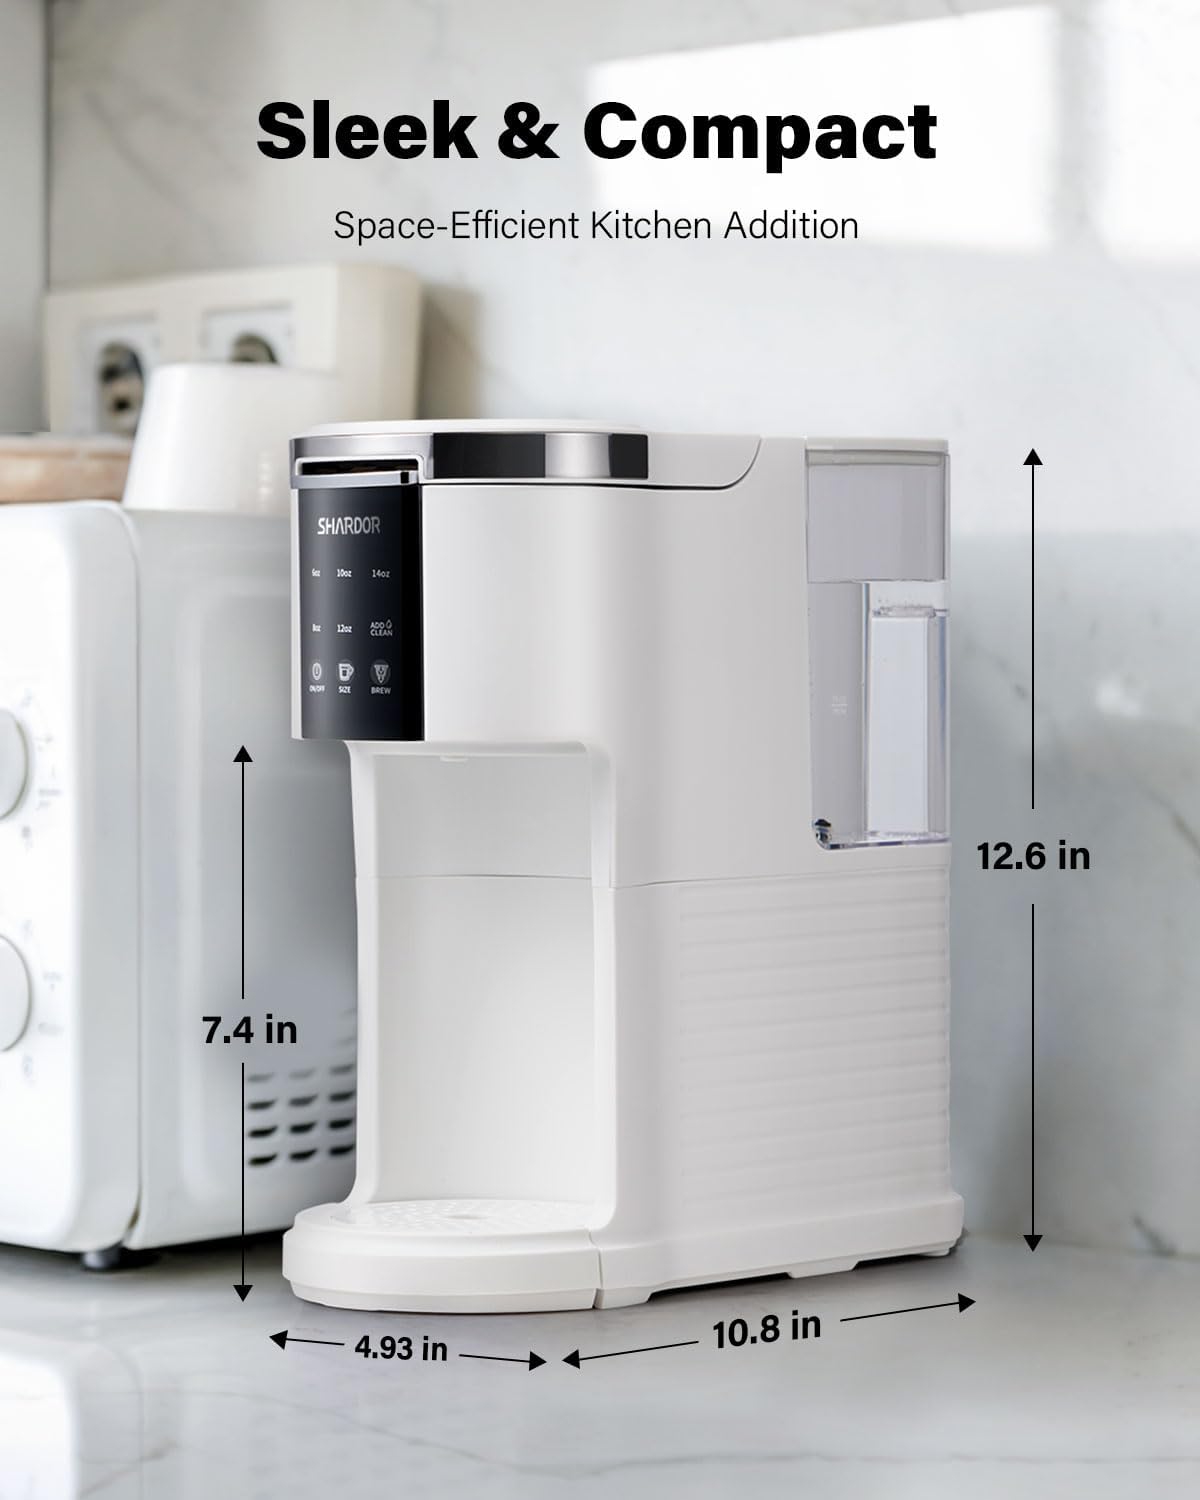
Image: The SHARDOR coffee maker positioned on a counter next to a microwave, with its compact dimensions (4.93" W x 10.8" D x 12.6" H) clearly labeled.
Warranty Information
This SHARDOR product is covered by a manufacturer's warranty. Please refer to the warranty card included in your product packaging for specific terms, conditions, and registration details. Keep your purchase receipt as proof of purchase for any warranty claims.
Customer Support
For any questions, assistance, or troubleshooting not covered in this manual, please contact SHARDOR customer support. Contact information can typically be found on the product packaging, the official SHARDOR website, or your purchase platform.
Ask a question about this manual
Ask about setup, troubleshooting, compatibility, parts, safety, or missing instructions. Manuals+ will review the question and use this page’s manual context to help answer it.