HQHAOTWU 2SC-10.5
HQHAOTWU Commercial Ultrasonic Humidifier User Manual
Model: 2SC-10.5
1. Introduction
This manual provides essential information for the safe and efficient operation of your HQHAOTWU Commercial Ultrasonic Humidifier, Model 2SC-10.5. This industrial-grade unit is designed for uniform humidification in large spaces such as warehouses, greenhouses, and commercial facilities, ensuring optimal humidity levels for various applications including plant growth and dust reduction.
The humidifier utilizes ultrasonic high-frequency oscillation to atomize water into ultra-fine particles (1-5 microns), which are then diffused into the air by a pneumatic device. It features a fog volume of ≥ 10.5kg/h and offers both humidity and time control methods for precise environmental management.
2. Safety Information
Please read all safety instructions carefully before operating the device. Failure to follow these instructions may result in electric shock, fire, or serious injury.
- Ensure the power supply matches the unit's requirements (110V).
- Do not operate the humidifier with a damaged power cord or plug.
- Keep the unit away from water sources other than its intended water inlet.
- Do not immerse the unit in water or spray water directly onto electrical components.
- Always unplug the unit before cleaning, maintenance, or when not in use.
- Keep out of reach of children and unauthorized personnel.
- Ensure proper ventilation around the unit during operation.
- Use only purified water or softened tap water to prevent mineral buildup and ensure optimal performance.
3. Package Contents
Upon unpacking, please verify that all components are present and undamaged. If any items are missing or damaged, contact your supplier immediately.
- HQHAOTWU Commercial Ultrasonic Humidifier Unit
- Power Cord
- User Manual
- Water Inlet/Drainage Accessories (if applicable)
4. Product Overview
Familiarize yourself with the main components and features of your humidifier.

Figure 4.1: Front view of the humidifier, showing the main control panel, power switch, and mist outlets on top.

Figure 4.2: Rear view of the humidifier, highlighting the water inlet, overflow, and drain outlets, along with the power cord connection.

Figure 4.3: Top-front perspective, detailing the digital control panel, power switch, and the protective grilles for the internal fans.

Figure 4.4: Internal view with the top cover open, showing the water reservoir and the float valve mechanism responsible for maintaining the water level.

Figure 4.5: Dimensional diagram illustrating the length (23.23 inches), width (16.54 inches), and height (16.14 inches) of the humidifier unit.
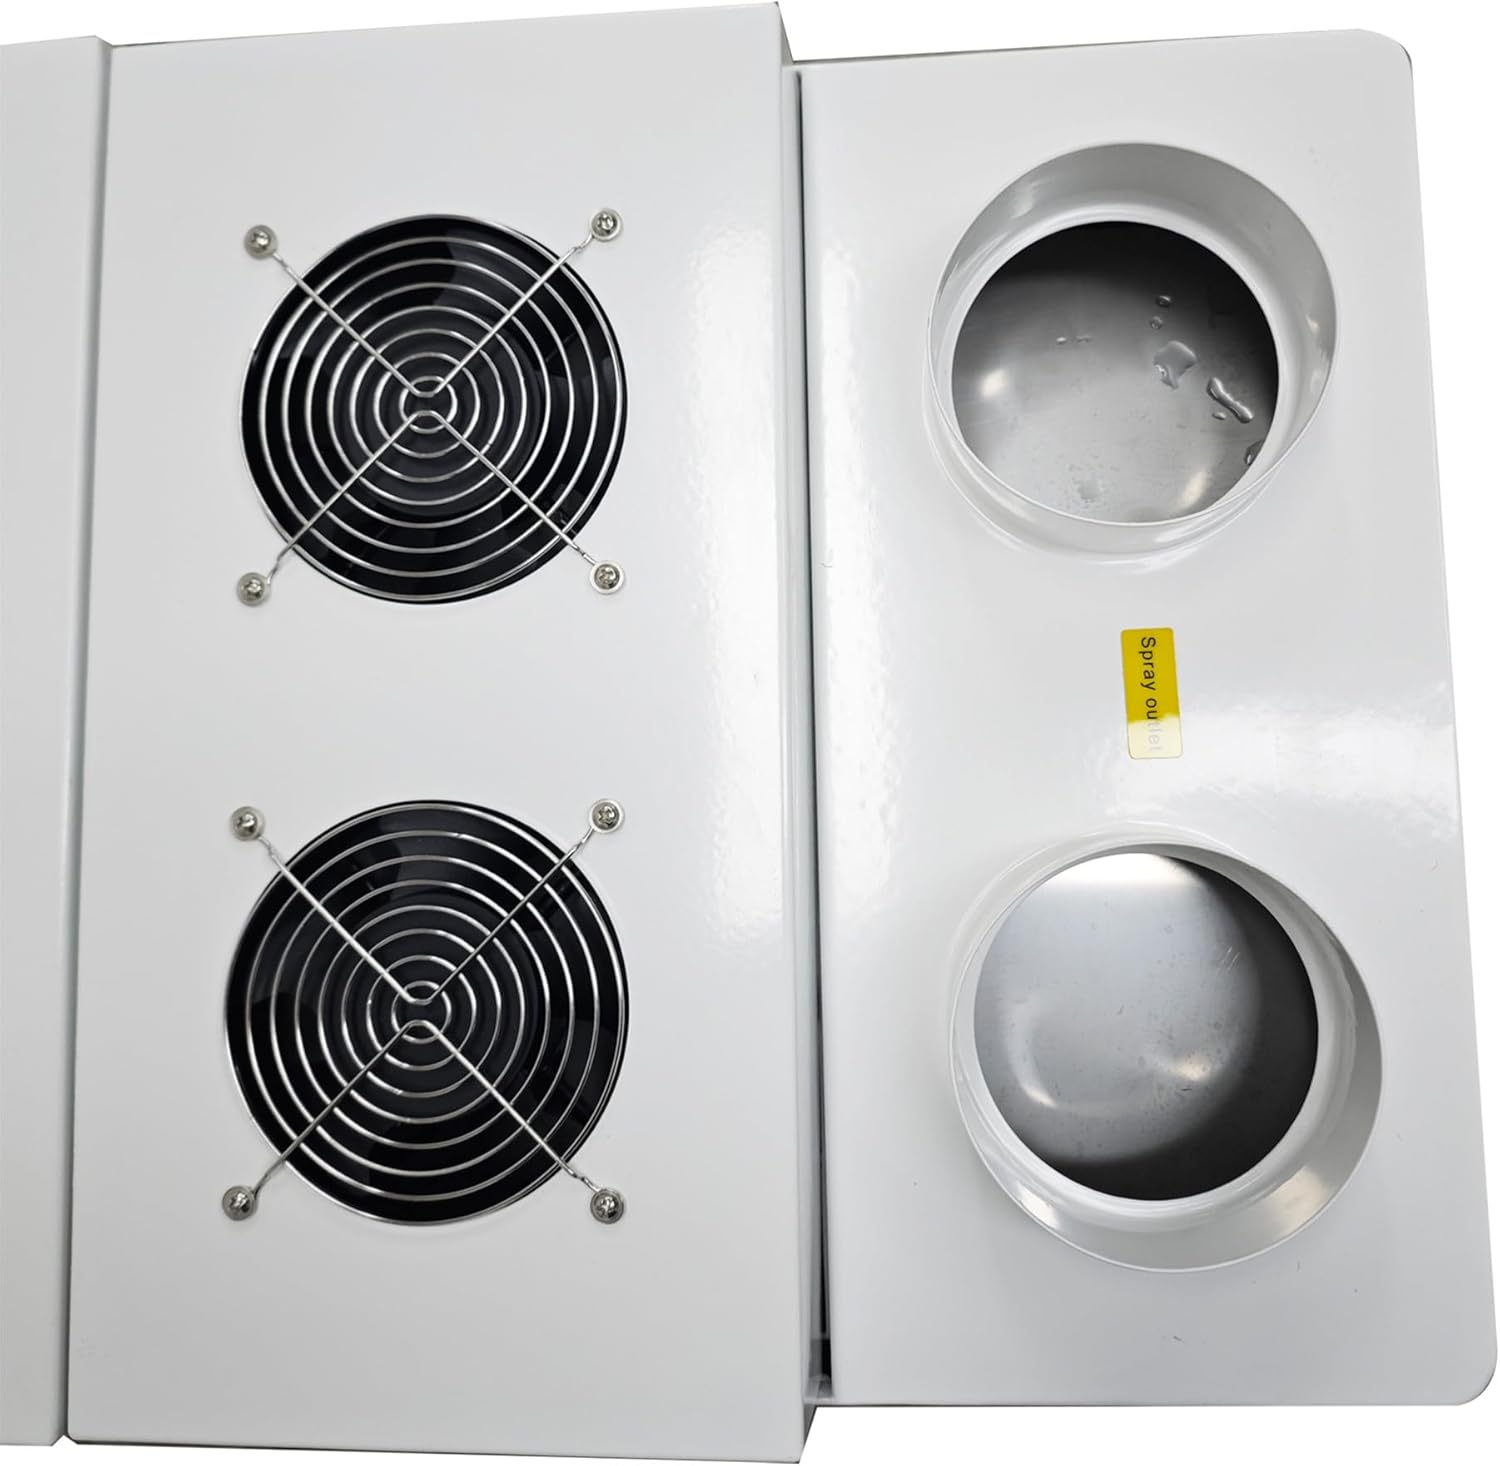
Figure 4.6: Close-up of the top panel, showing the two mist outlets and the two fan grilles, which facilitate mist dispersion.
5. Specifications
| Parameter | Value |
|---|---|
| Model | 2SC-10.5 |
| Fog Volume | ≥ 10.5 kg/h |
| Humidity Range | 1% - 99% |
| Power Supply | 110V |
| Power Consumption | 1000W |
| Control Method | Humidity control, Time control |
| Reference Usage Space | 280-300 m³ (9888.12-10594.42 cu.ft) |
| Mist Outlet Holes | 2 x 4.33 inch (110mm) |
| Water Supply Quality | Purified water, softened tap water |
| Air Volume | 320 m³/h |
| Product Dimensions (L x W x H) | 23.23 x 16.54 x 16.14 inches |
| Item Weight | 70.1 pounds |
| UPC | 198462670913 |
6. Setup
6.1 Placement
- Place the humidifier on a stable, level surface in the desired area.
- Ensure adequate space around the unit for air circulation and mist dispersion.
- The unit is equipped with wheels for easy movement. Lock the wheels once positioned.
6.2 Water Connection
The humidifier offers two methods for water supply:
- Manual Fill: Open the top cover and directly pour purified or softened tap water into the water sink until the float valve indicates a full level. Close the cover securely.
- Automatic Connection: Connect a 1/2-inch water pipe to the designated water inlet on the rear of the unit. Ensure the connection is secure and leak-free. The internal float valve will automatically regulate the water level.
Ensure the overflow and drain outlets are properly connected or positioned to prevent water damage in case of overfilling or for drainage during maintenance.
6.3 Power Connection
- Plug the power cord into a grounded 110V electrical outlet.
- Ensure the power switch on the unit is in the OFF position before plugging in.
7. Operating Instructions
7.1 Power On/Off
- Flip the main power switch to the ON position. The digital display will illuminate.
- To turn off, flip the main power switch to the OFF position.
7.2 Control Panel Overview
The intelligent control panel allows for precise management of humidification.
- Digital Display: Shows current humidity, set humidity, or timer settings.
- Humidity Control Buttons: Use these to set the desired humidity level.
- Time Control Buttons: Use these to set the operating duration or cycle times.
7.3 Setting Humidity
- Press the 'Humidity Set' button (or equivalent) on the control panel.
- Use the '+' and '-' buttons to adjust the desired humidity percentage (1% - 99%).
- The unit will automatically operate to maintain the set humidity level.
7.4 Setting Timer (Cycle Time)
- Press the 'Time Set' button (or equivalent) on the control panel.
- Use the '+' and '-' buttons to set the desired operating duration or cycle intervals.
- The humidifier will operate according to the programmed schedule.
8. Maintenance
Always unplug the humidifier from the power outlet before performing any maintenance.
8.1 Cleaning the Water Tank
- Regularly drain and clean the water tank to prevent mineral buildup and bacterial growth.
- Open the drain outlet to empty the tank.
- Wipe the interior surfaces with a soft cloth and a mild cleaning solution. Rinse thoroughly.
- For stubborn mineral deposits, use a descaling solution suitable for humidifiers.
8.2 Cleaning the Atomization Module
- The atomization module is designed for easy replacement. Refer to Figure 4.4 for its location.
- Gently clean the ceramic disc of the atomization module with a soft brush to remove any mineral residue. Do not use abrasive materials.
- If the module's performance degrades significantly, consider replacing it with an authorized spare part.
8.3 Exterior Cleaning
- Wipe the exterior of the unit with a soft, damp cloth.
- Do not use harsh chemicals or abrasive cleaners.
9. Troubleshooting
| Problem | Possible Cause | Solution |
|---|---|---|
| No mist output | No power Low water level Atomization module dirty/faulty | Check power connection and switch Refill water tank Clean or replace atomization module |
| Unit not turning on | Power cord loose Power outlet faulty Main switch off | Ensure power cord is securely plugged in Test outlet with another device Turn main power switch to ON |
| Water leakage | Improper water inlet/drain connection Cracked tank/housing | Check all connections for tightness Inspect unit for damage; contact support if found |
| Unpleasant odor from mist | Stagnant water Mineral buildup/bacteria | Drain and clean water tank thoroughly Use purified or softened water |
| Humidity not reaching set level | Room too large Mist outlets obstructed Atomization module issue | Verify unit capacity for room size Ensure outlets are clear Clean or replace atomization module |
10. Warranty and Support
This HQHAOTWU product is covered by a manufacturer's warranty against defects in materials and workmanship. Please refer to your purchase documentation for specific warranty terms and duration. For technical support, replacement parts, or warranty claims, please contact your retailer or the manufacturer directly.
Keep your purchase receipt as proof of purchase for warranty purposes.
Ask a question about this manual
Ask about setup, troubleshooting, compatibility, parts, safety, or missing instructions. Manuals+ will review the question and use this page’s manual context to help answer it.