1. Introduction
Thank you for choosing the ROCAM Emergency Solar Radio CR1030. This versatile device is designed to provide reliable communication, light, and power in various situations, including emergencies, outdoor activities, and power outages. It features multiple charging methods, a powerful LED flashlight, a reading lamp, an SOS alarm, and a robust power bank function.
Please read this manual thoroughly before using the product to ensure proper operation and to maximize its lifespan.
2. Product Overview
The ROCAM CR1030 is an essential tool for preparedness, offering a range of features to keep you informed and powered.
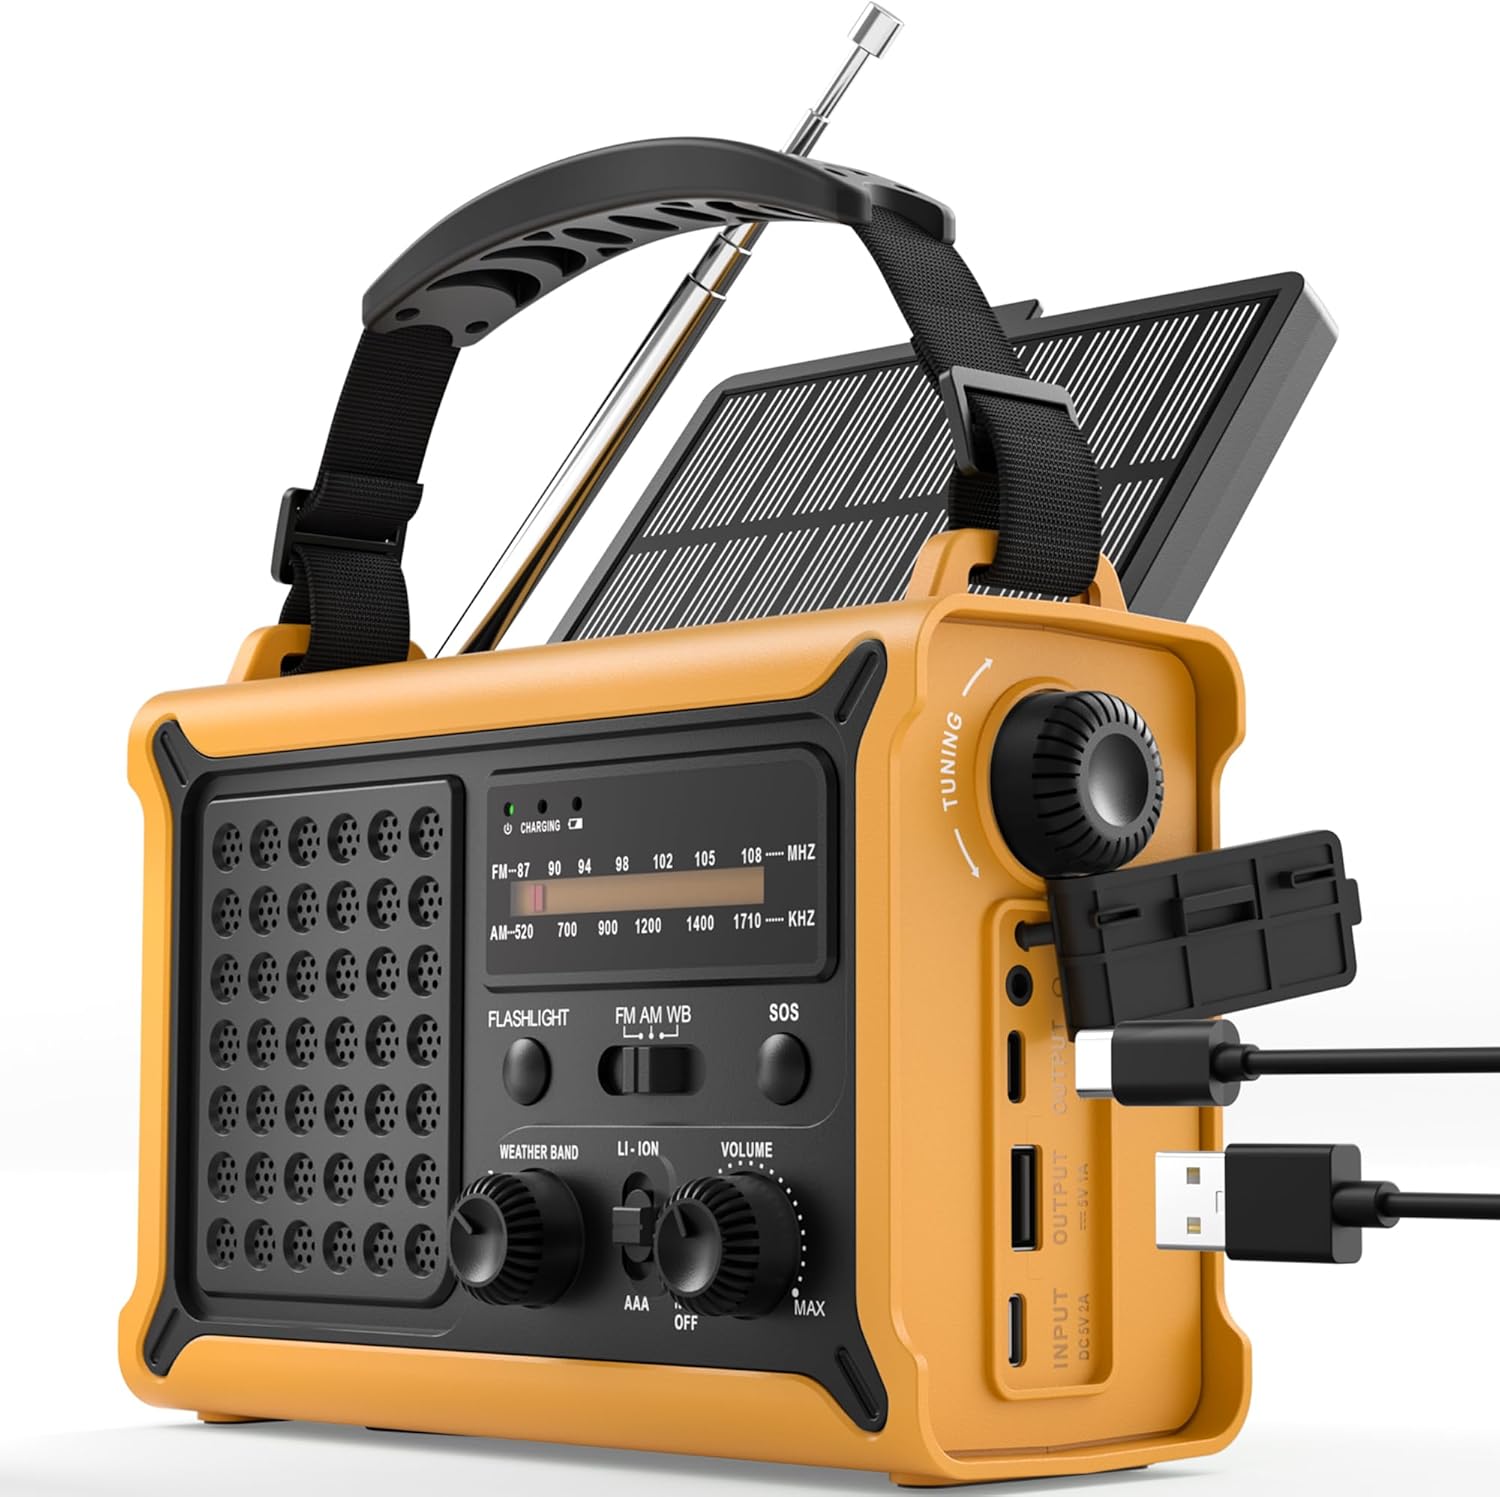
Figure 1: Front view of the ROCAM Emergency Solar Radio CR1030, showcasing its compact and rugged design with integrated solar panel and controls.
Key Features:
- Multiple Power Sources: Rechargeable via solar panel, hand crank, USB-C input, or 3 AAA batteries (not included).
- High-Capacity Power Bank: Integrated 12000mAh battery to charge smartphones and other USB devices.
- AM/FM Radio: Enhanced reception with a high-sensitivity chip and 360° antenna for clear audio.
- Dual Lighting: Powerful 5W LED flashlight and a soft reading lamp for versatile illumination.
- Emergency SOS Alarm: 120 dB siren with flashing light for signaling in distress.
- Durable Design: IPX6 waterproof rating and ergonomic, full-size construction for easy handling.

Figure 2: Illustration of the radio's dual power capabilities, highlighting the solar panel and hand crank for emergency charging.

Figure 3: Depicts the SOS alarm function, the 12000mAh power bank charging a phone, and the radio's role in staying informed during emergencies.
3. Setup
3.1 Included Components

Figure 4: The radio, Type-C charging cable, user manual, and portable strap are included in the package.
Before first use, please ensure all components are present:
- ROCAM Emergency Solar Radio CR1030
- Type-C Charging Cable
- User Manual
- Portable Strap
3.2 Initial Charging
It is recommended to fully charge the radio via the USB-C port before its first use. Connect the provided Type-C cable to the radio's input port and a standard USB power adapter (not included). The charging indicator will illuminate.
3.3 AAA Battery Installation (Optional Backup)
For an additional backup power source, you can install 3 AAA batteries (not included) in the designated battery compartment. Ensure correct polarity (+/-) when inserting the batteries.
4. Operating Instructions
4.1 Power On/Off and Volume Control
Rotate the VOLUME knob clockwise to turn the radio on and increase the volume. Rotate counter-clockwise to decrease volume and turn the radio off.
4.2 Radio Operation (AM/FM)
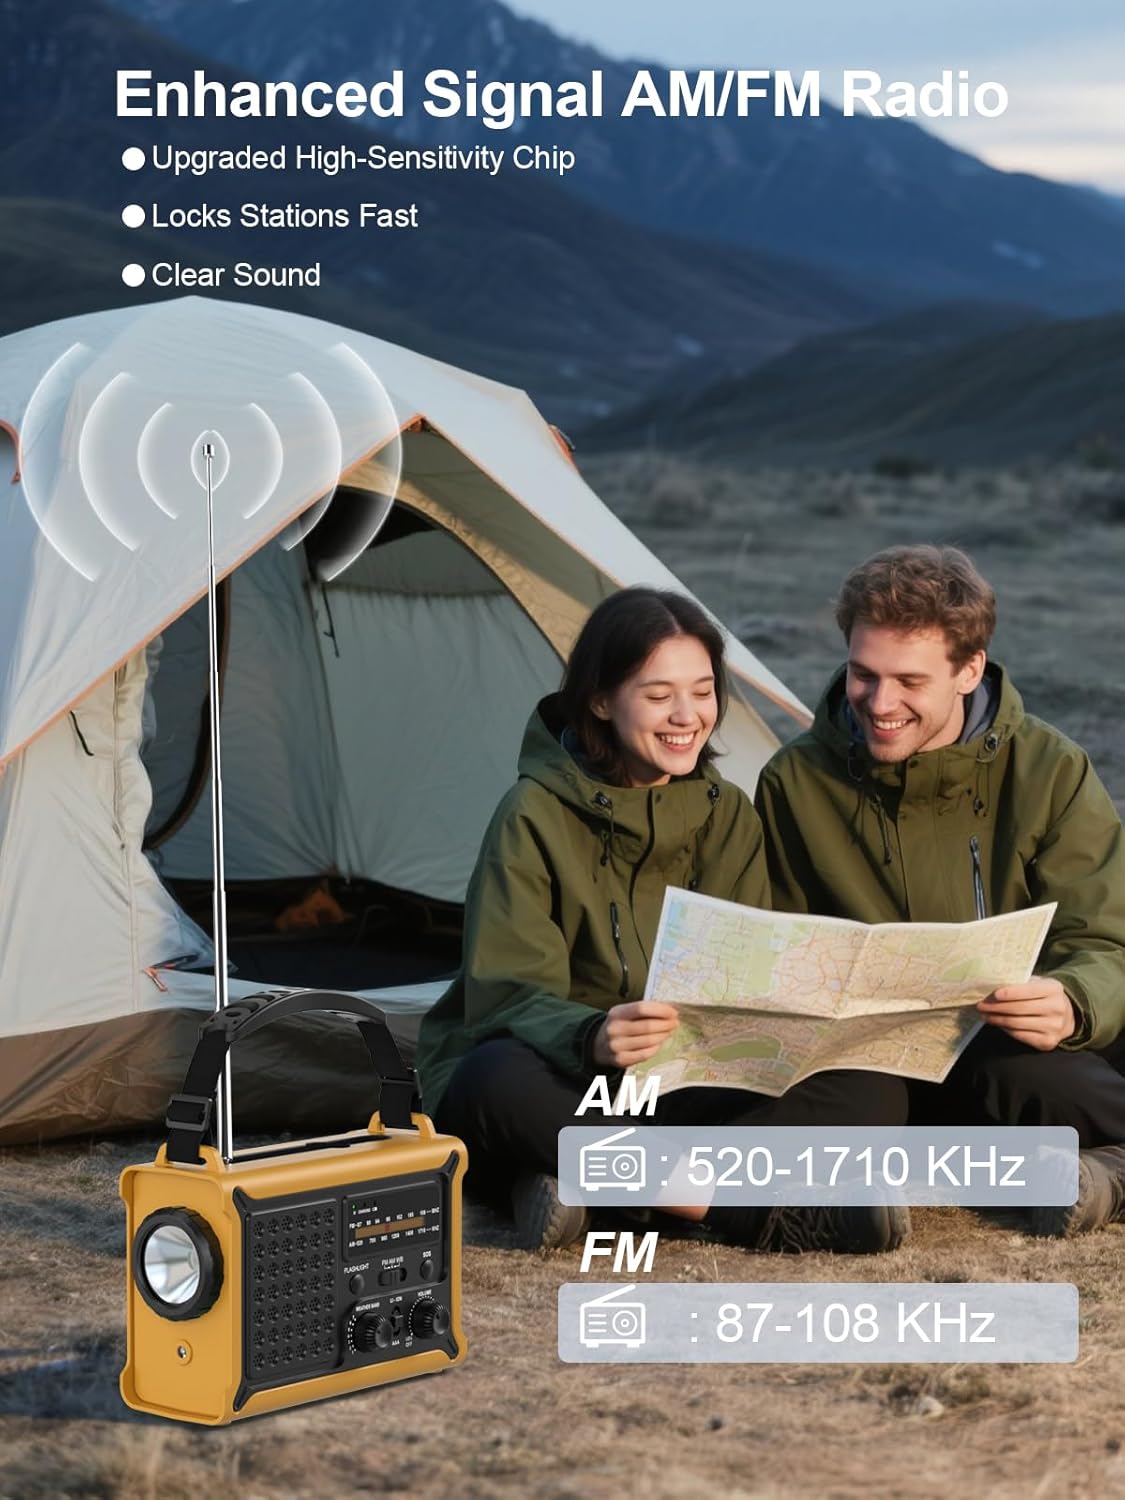
Figure 5: The radio features an extendable antenna for improved AM/FM reception, covering frequencies AM: 520-1710 KHz and FM: 87-108 KHz.
- Extend the telescopic antenna for optimal FM reception. For AM reception, the internal antenna is generally sufficient.
- Use the BAND switch to select between AM and FM.
- Rotate the TUNING knob to scan for radio stations. The frequency display will show the current station.
4.3 Lighting Functions

Figure 6: The radio offers both a powerful 5W LED flashlight and a softer reading lamp for various lighting needs.
The radio features two lighting modes:
- Flashlight: Press the FLASHLIGHT button once to turn on the 5W LED flashlight. Press again to turn it off.
- Reading Lamp: Press the READING LAMP button once to activate the soft reading light. Press again to turn it off.
4.4 SOS Alarm

Figure 7: The SOS alarm provides a loud 120 dB siren and a flashing light to attract attention in emergency situations.
To activate the SOS alarm, press and hold the SOS button for 2 seconds. The radio will emit a loud 120 dB siren and a flashing light. To deactivate, press the SOS button again.
4.5 Charging External Devices (Power Bank)

Figure 8: The radio features two USB output ports, allowing it to charge multiple devices simultaneously with its high-capacity power supply.
The built-in 12000mAh battery can be used to charge your mobile devices:
- Connect your device's USB charging cable to the radio's USB OUTPUT port.
- The radio will begin charging your device.
- Note: The maximum output is 5V/1A.
4.6 Charging the Radio
The radio offers multiple ways to recharge its internal battery:
- USB-C Charging: Connect the provided Type-C cable to the USB INPUT port and a USB power source. This is the fastest charging method.
- Solar Charging: Place the radio with the solar panel facing direct sunlight. The solar charging indicator will light up. This method is ideal for maintaining battery charge or slow charging in emergencies.
- Hand Crank Charging: Unfold the hand crank handle and rotate it clockwise or counter-clockwise at a steady pace (approximately 130-150 RPM). A few minutes of cranking can provide power for radio use or a short burst of light.

Figure 9: The radio features a large 8500 mm² solar panel for efficient solar charging.

Figure 10: The high-torque hand crank generator provides efficient power generation with minimal effort.
5. Maintenance
5.1 Cleaning
Wipe the radio with a soft, damp cloth. Do not use abrasive cleaners or solvents, as they may damage the surface. Ensure all ports are dry before use or charging.
5.2 Storage
When storing the radio for extended periods, ensure it is fully charged. Store in a cool, dry place away from direct sunlight and extreme temperatures. If using AAA batteries, remove them during long-term storage to prevent leakage.
5.3 Battery Care
To prolong the life of the internal rechargeable battery, avoid fully discharging it frequently. Recharge the radio at least once every three months if not in regular use.
6. Troubleshooting
- Radio not turning on: Ensure the volume knob is rotated clockwise. Check battery level. If using AAA batteries, ensure they are correctly installed and not depleted.
- Poor radio reception: Extend the telescopic antenna fully. Try repositioning the radio. For AM, rotate the radio for better signal.
- Device not charging from USB output: Ensure the radio's internal battery has sufficient charge. Check the charging cable and connection. The output is 5V/1A; some devices may require higher current.
- Solar charging not working: Ensure the solar panel is exposed to direct sunlight. Solar charging is slower than USB-C and may not register immediately if the battery is very low.
- Hand crank not generating power: Ensure the crank is rotating smoothly and at a consistent speed. Check for any obstructions.
7. Specifications
| Feature | Specification |
|---|---|
| Brand | ROCAM |
| Model Number | CR1030 |
| Color | Yellow |
| Product Dimensions | 17.3L x 12.1W x 7.4H cm |
| Power Source | Solar, Hand Crank, USB-C, 3x AAA Batteries |
| Battery Capacity | 12000mAh (Internal Rechargeable) |
| Solar Panel Size | 8500 mm² |
| Dynamo Output | 650mA (Hand Crank) |
| Radio Bands | AM (520-1710 KHz), FM (87-108 MHz) |
| Flashlight | 5W LED |
| SOS Alarm | 120 dB with Flashing Light |
| USB Output | 5V/1A |
| Connectivity | USB (for charging external devices) |
| Waterproof Rating | IPX6 |
| Compatible Devices | Smartphones, Headphones |
| Included Components | Radio, Type-C Charging Cable, User Manual, Portable Strap |
8. Warranty and Support
8.1 Manufacturer Warranty
This ROCAM product is covered by an 18-month manufacturer's warranty from the date of purchase. This warranty covers defects in materials and workmanship under normal use. It does not cover damage caused by misuse, accidents, unauthorized modifications, or normal wear and tear.
8.2 Customer Support
If you encounter any issues or have questions regarding your ROCAM Emergency Solar Radio CR1030, please refer to the troubleshooting section of this manual first. If the problem persists, please contact the seller or ROCAM customer support for assistance. Please have your purchase receipt and model number (CR1030) ready when contacting support.