IMVDF-IP
IMVDF-IP EZ-Pack iKall Digital Entry Panel Video Keypad – Flush Mount User Manual
Model: IMVDF-IP
Introduction
This manual provides comprehensive instructions for the installation, operation, and maintenance of the Generic IMVDF-IP EZ-Pack iKall Digital Entry Panel Video Keypad. This flush-mounted unit combines high-resolution video communication with secure digital keypad access, designed for modern residential and commercial access control systems.
Please read this manual thoroughly before installation and operation to ensure proper functionality and safety.
Important Safety Information
- Ensure all electrical connections are made by a qualified professional and comply with local electrical codes.
- Disconnect power before performing any installation or maintenance procedures.
- Do not expose the unit to excessive moisture or extreme temperatures beyond its specified operating range.
- Use only manufacturer-approved replacement parts and accessories.
- Keep the unit away from strong electromagnetic fields.
Package Contents
Verify that all items are present in the package:
- IMVDF-IP EZ-Pack iKall Digital Entry Panel
- Mounting Hardware
- Installation Template
- Quick Start Guide (refer to this manual for full details)
Setup and Installation
1. Site Preparation
Select a suitable location for the flush mount installation. Ensure the wall cavity can accommodate the unit's dimensions and that necessary wiring (network, power) can be routed to the location.
2. Mounting the Unit
The IMVDF-IP is designed for flush mounting. Use the provided installation template to mark the cutout area on the wall. Carefully cut the opening, ensuring clean edges.
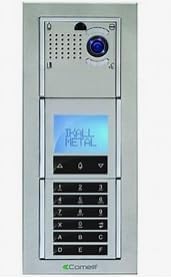
Figure 1: Front view of the IMVDF-IP EZ-Pack iKall Digital Entry Panel. This image displays the sleek, rectangular design with a camera lens, speaker grille, and microphone at the top. Below these are a small digital display screen and a full numeric keypad with additional function buttons. The entire unit is housed in a metallic frame, indicating its flush-mount design.
Insert the unit into the cutout and secure it using the provided mounting brackets or screws. Ensure the unit is level and flush with the wall surface.
3. Wiring Connections
Connect the network cable (Ethernet) to the designated port on the back of the unit. Connect the power supply according to the wiring diagram provided in the full technical documentation (not included in this general manual). Ensure all connections are secure before applying power.
4. Initial Power-Up
Once all connections are made, apply power to the unit. The display should illuminate, indicating successful power-up. Allow a few moments for the system to initialize.
Operating Instructions
1. Digital Keypad Access
To gain entry using a PIN code, enter your pre-programmed access code on the numeric keypad. The display will confirm successful entry, and the connected door lock will disengage.
2. Video Call Functionality
Visitors can initiate a video call by pressing the designated call button (if present) or by entering a specific apartment/unit number. The integrated camera will transmit video to the indoor monitor or connected device, allowing for visual verification and two-way audio communication.
3. Programming Access Codes
Programming new access codes or modifying existing ones typically requires administrator access. Refer to the system's network configuration interface or the detailed administrator manual for specific steps on code management.
- Access administrator mode (usually via a master code).
- Navigate to the user management or code programming section.
- Enter the new code and assign it to a user or purpose.
- Save changes and exit administrator mode.
Maintenance
1. Cleaning
Regularly clean the exterior of the unit with a soft, damp cloth. Do not use abrasive cleaners, solvents, or harsh chemicals, as these can damage the finish or electronic components. Ensure no liquid enters the unit.
2. Firmware Updates
Periodically check the manufacturer's website for available firmware updates. Firmware updates can improve performance, add new features, or address security vulnerabilities. Follow the manufacturer's instructions carefully when performing updates.
3. System Checks
Periodically test the keypad functionality, video feed, and audio communication to ensure all components are working correctly. Verify that access codes are still valid and that the door release mechanism functions as expected.
Troubleshooting
| Problem | Possible Cause | Solution |
|---|---|---|
| Unit does not power on. | No power supply; loose connection. | Check power source and all wiring connections. Ensure power adapter is functioning. |
| Keypad not responding. | Software glitch; physical damage. | Try power cycling the unit. Inspect for visible damage. If problem persists, contact support. |
| No video feed. | Network issue; camera malfunction. | Verify network connectivity. Check camera lens for obstructions. Restart the unit. |
| Cannot open door with code. | Incorrect code; code not programmed; lock malfunction. | Verify the entered code. Check if the code is correctly programmed. Test the door lock mechanism independently. |
Specifications
- Model: IMVDF-IP
- Type: Digital Entry Panel Video Keypad
- Mounting: Flush Mount
- Connectivity: IP (Ethernet)
- Manufacturer: COMELIT (as per product specifications)
- ASIN: B0F9MNHDJD
- First Available: May 22, 2025
Warranty and Support
For warranty information and technical support, please refer to the documentation provided with your purchase or visit the manufacturer's official website. Keep your proof of purchase for warranty claims.
For further assistance, contact your authorized dealer or the manufacturer's customer service department.