Introduction
This manual provides essential information for the proper installation, operation, and maintenance of your new Exercise Bike Tension Adjustment Knob. This product is designed to offer smooth and precise resistance control for a wide range of spinning bikes, enhancing your indoor cycling experience.
Safety Information
- Ensure the exercise bike is stable and on a level surface before attempting any installation or adjustment.
- Always turn off and unplug the exercise bike (if applicable) before performing maintenance or installation.
- Keep small parts away from children.
- If you are unsure about any step, consult a qualified technician.
Product Overview
The ibasenice Exercise Bike Tension Adjustment Knob is a replacement part designed to upgrade or repair the resistance control mechanism on compatible fitness bikes. It features a durable plastic construction and a clear dial for tension settings.

Figure 1: The complete tension adjustment knob assembly, showing the knob, housing, and attached cable with end fittings.

Figure 2: Detailed view of the knob's dial, indicating "LOW" to "HIGH" tension and numerical settings from 1 to 8.
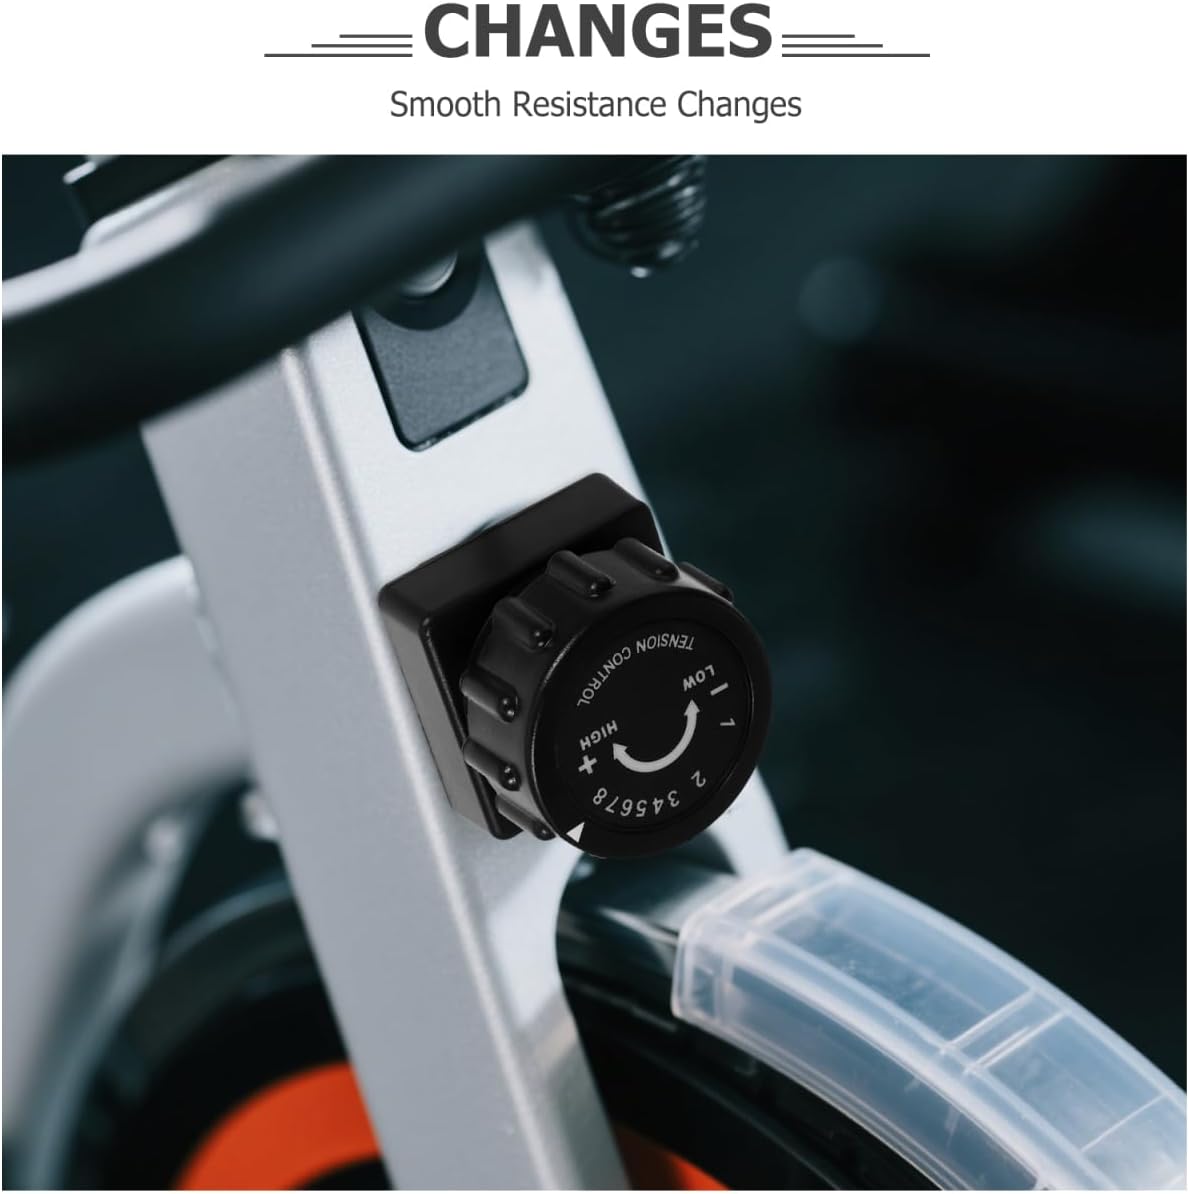
Figure 3: The tension adjustment knob shown installed on the frame of an exercise bike, demonstrating its typical placement.
Setup and Installation
This section outlines the steps for installing the tension adjustment knob on your exercise bike. Ensure your bike is stable and powered off before beginning.
- Preparation: Identify the location on your exercise bike where the tension knob is to be installed. This is typically near the flywheel or resistance mechanism.
- Remove Old Knob (if applicable): Carefully remove the existing tension knob and its cable assembly. Note how the cable is routed and connected to the resistance mechanism.
- Insert New Knob: Thread the new tension knob's cable through the designated opening on your exercise bike frame.
- Secure Knob Housing: Position the knob's housing securely against the bike frame. Some models may require screws or a locking mechanism (not included with this replacement part).
- Connect Cable: Attach the end of the cable to the resistance mechanism of your exercise bike. This connection method varies by bike model (e.g., spring, lever, magnetic brake). Ensure the cable is taut but not overly strained.
- Test Functionality: Once installed, slowly turn the knob from "LOW" to "HIGH" and observe the resistance mechanism. It should move smoothly and consistently.

Figure 4: Side view of the tension knob installed on an exercise bike, showing its compact fit.

Figure 5: Detail of the cable's threaded end and securing nuts, which connect to the bike's resistance system.
Operating Instructions
The tension adjustment knob provides precise control over the resistance level of your exercise bike.
- Adjusting Resistance: Turn the knob clockwise to increase resistance (move towards "HIGH" or higher numbers) and counter-clockwise to decrease resistance (move towards "LOW" or lower numbers).
- Smooth Transitions: The knob is designed for smooth transitions between resistance levels, allowing you to fine-tune your workout intensity.
- Finding Your Level: Experiment with different settings to find the resistance level that best suits your workout goals and fitness level.
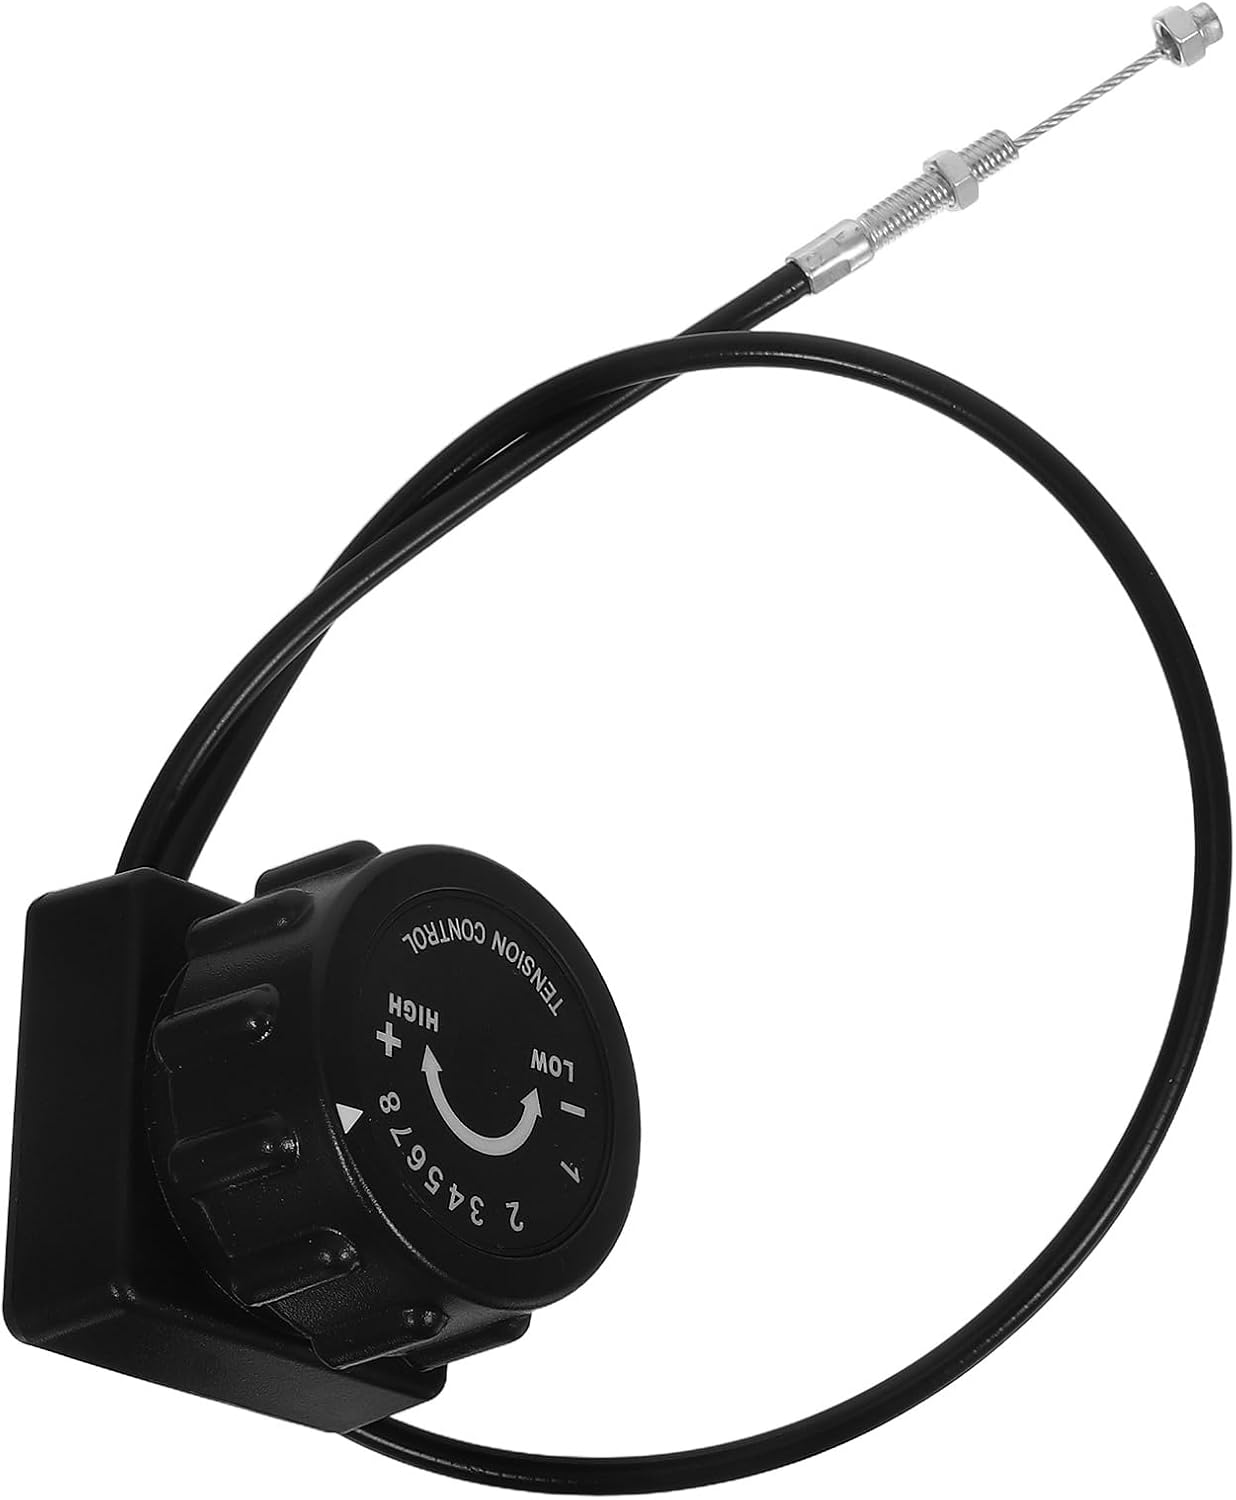
Figure 6: Close-up of the knob's dial, showing the arrow indicating the direction to turn for increasing tension.
Maintenance
Regular maintenance ensures the longevity and optimal performance of your tension adjustment knob.
- Cleaning: Wipe the knob and cable with a soft, damp cloth to remove dust and grime. Avoid abrasive cleaners.
- Cable Inspection: Periodically inspect the cable for any signs of fraying, kinks, or damage. A damaged cable should be replaced immediately.
- Lubrication (if applicable): If your exercise bike's resistance mechanism requires lubrication, follow the bike manufacturer's guidelines. Do not apply lubricant directly to the knob or its internal mechanism unless specified.
- Secure Mounting: Ensure the knob remains securely mounted to the exercise bike frame. Tighten any loose screws if necessary.
Troubleshooting
| Problem | Possible Cause | Solution |
|---|---|---|
| Resistance not changing smoothly. | Cable is kinked or damaged; resistance mechanism is dirty or needs lubrication; knob is not properly installed. | Inspect cable for damage and replace if necessary. Clean and lubricate the bike's resistance mechanism according to its manual. Re-install the knob, ensuring proper cable tension. |
| Knob feels loose or wobbly. | Mounting screws are loose; housing is not properly seated. | Tighten any mounting screws. Ensure the knob's housing is fully seated in its designated slot on the bike frame. |
| No resistance change. | Cable is disconnected from the resistance mechanism; cable is broken. | Check the cable connection at the resistance mechanism and reattach if loose. If the cable is broken, it needs to be replaced. |
Specifications
| Feature | Detail |
|---|---|
| Brand Name | ibasenice |
| Model Name | Exercise Machine Attachments |
| Part Number | YBKFAUFW39QK33800V21BD9P7 |
| Color | Black |
| Material | Plastic |
| Item Dimensions (LxWxH) | 2.75 x 2.16 x 2.16 inches |
| Item Weight | 6.24 ounces |
| Package Dimensions (LxWxH) | 5.9 x 5.9 x 3.14 inches |
| Package Weight | 6.4 ounces |
| Style | Modern |
| Included Components | knobs |

Figure 7: Diagram showing the dimensions of the tension adjustment knob (7cm height, 5.5cm width/depth).
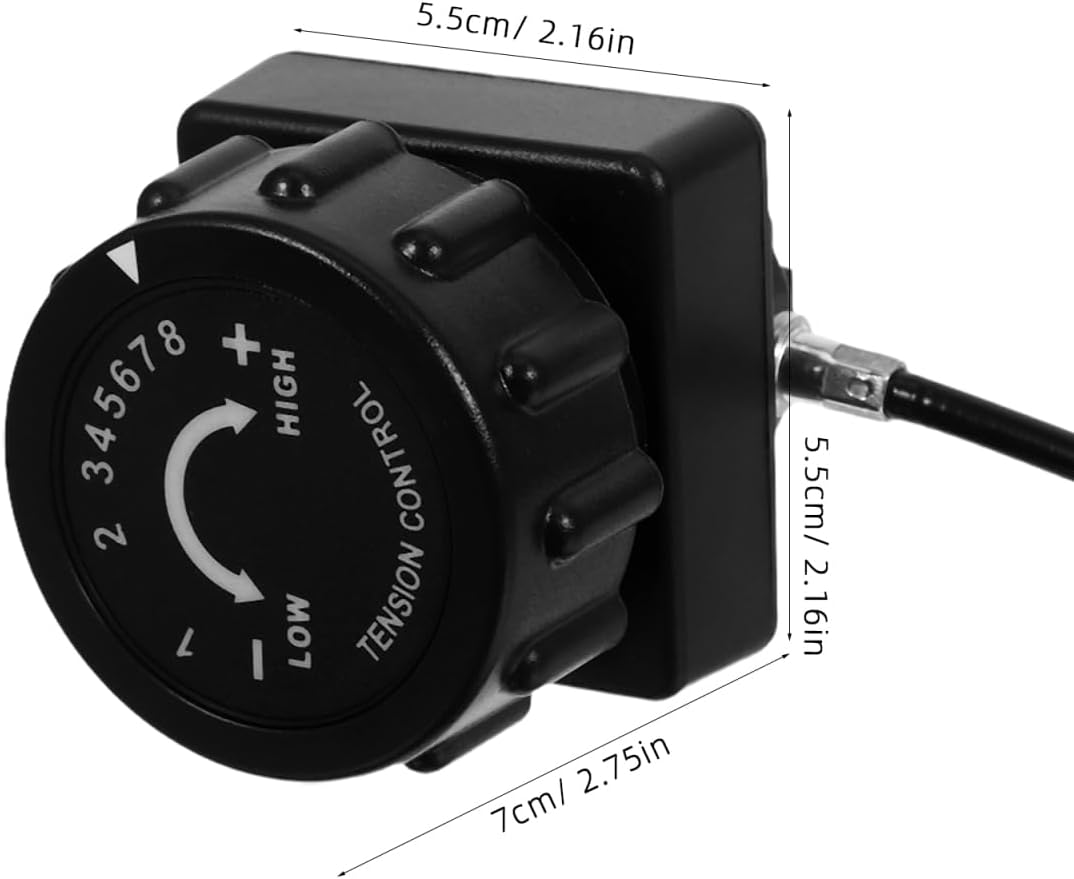
Figure 8: Alternate view of the knob with dimensions, highlighting the square base and overall height.
Warranty and Support
This product is covered by a standard manufacturer's warranty. For specific warranty details, please refer to the documentation provided with your original exercise bike or contact the manufacturer of the exercise bike directly. For product support regarding this tension adjustment knob, please contact ibasenice customer service through their official channels.
For further assistance, you may visit the ibasenice Store on Amazon.