
1. Introduction
This manual provides comprehensive instructions for the installation, operation, and maintenance of the Electric Power Window Master Switch, designed for Hyundai Elantra HD models from 2007-2010. This product is a direct replacement part (Part Number: 935702H110) for the Left-Hand Drive (LHD) master window lifter switch.
The switch is engineered for high sensitivity, stable characteristics, and reliability, aiming to restore full functionality to your vehicle's power windows and enhance driving comfort.
2. Safety Information
Please read all safety instructions carefully before installation and operation to prevent injury or damage to the product or vehicle.
- Professional Installation Recommended: While designed for easy installation, professional installation is highly recommended to ensure correct wiring and functionality, especially if you are unfamiliar with automotive electrical systems.
- Disconnect Power: Always disconnect the vehicle's battery before attempting any electrical work to prevent short circuits or electrical shock.
- Verify Compatibility: Confirm the part number (935702H110) and vehicle compatibility (Hyundai Elantra HD 2007-2010, LHD) before purchase and installation. Differences in model and application year may exist across markets.
- Handle with Care: The switch contains sensitive electronic components. Handle it carefully to avoid damage from drops or excessive force.
- Adult Supervision: As indicated on some packaging, this product should be used under the direct supervision of an adult, particularly during installation or if children are present.

Figure 2.1: Product packaging showing a multi-language warning label, emphasizing adult supervision.
3. Product Overview
The Electric Power Window Master Switch is a crucial component for controlling all power windows in your vehicle from the driver's side. It typically includes controls for all four windows (front left, front right, rear left, rear right), a window lock button, and a door lock/unlock button.
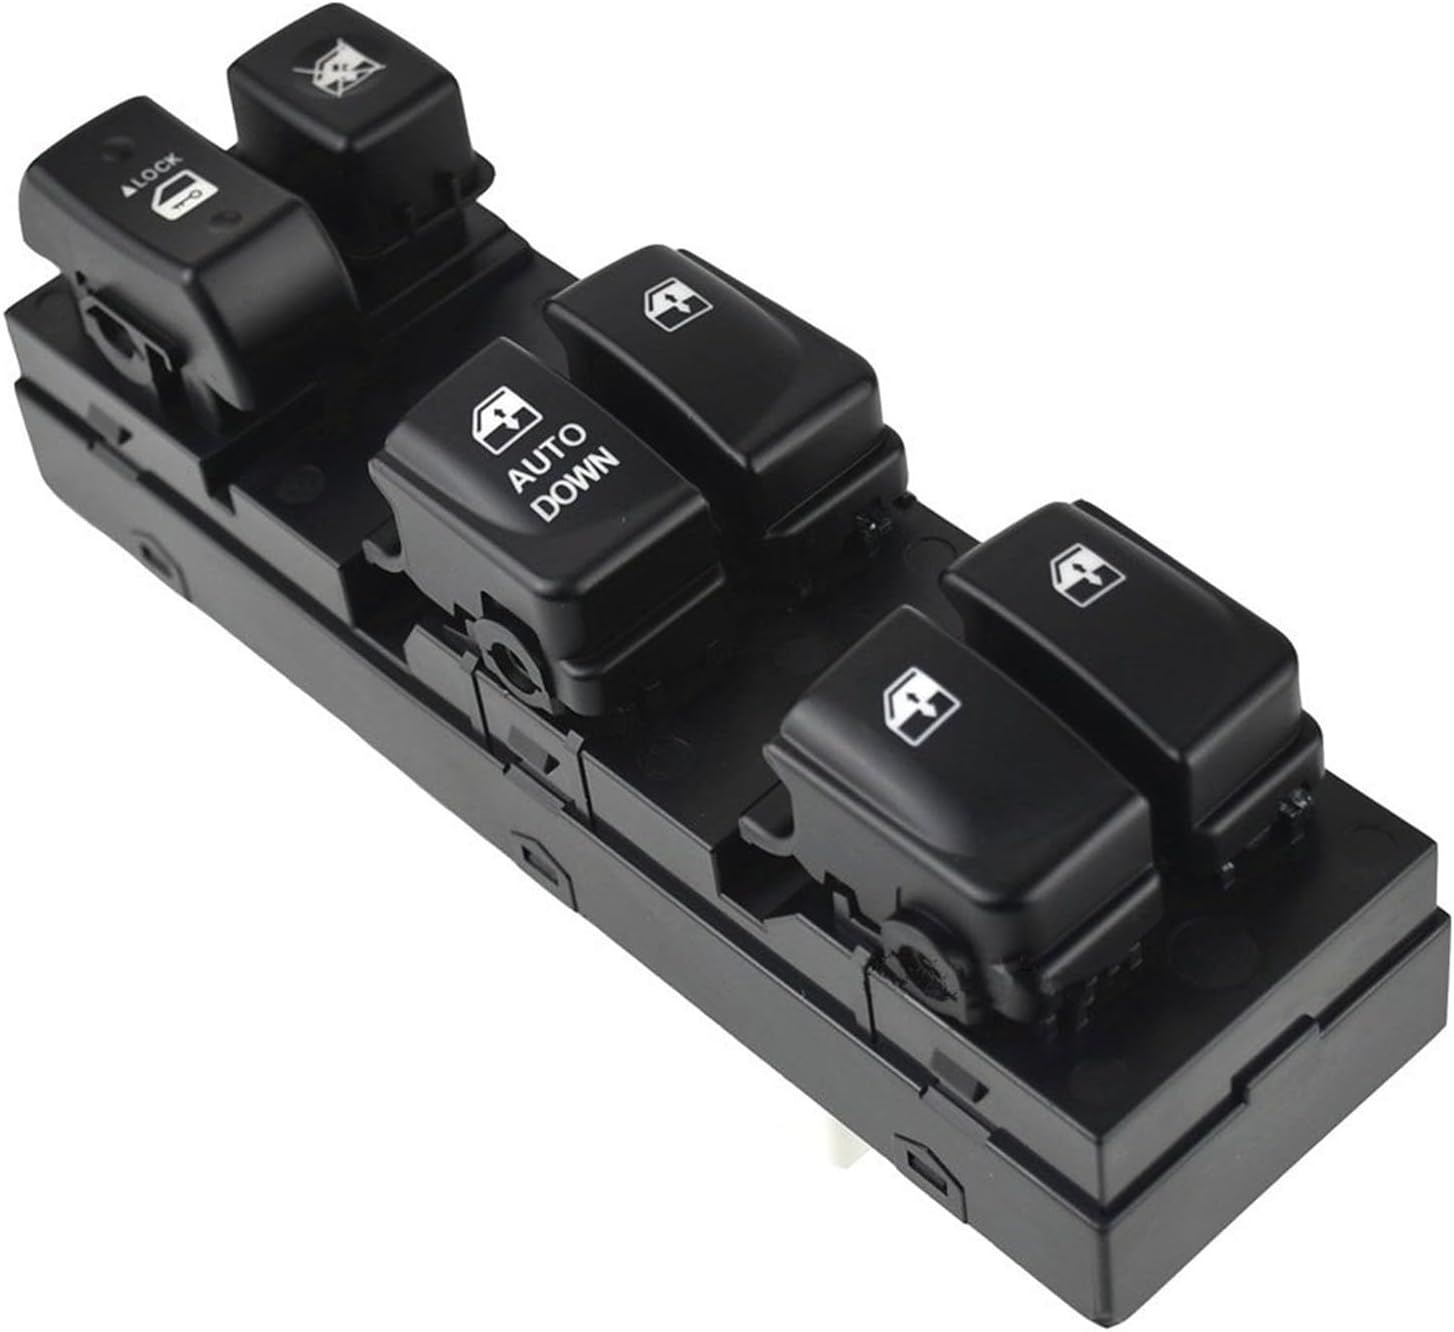
Figure 3.1: Angled view of the master power window switch, showing all buttons including "AUTO DOWN" for the driver's window, window lock, and door lock/unlock.

Figure 3.2: Top-down view of the switch, highlighting the layout of the individual window control buttons and the master lock buttons.

Figure 3.3: Rear view of the switch, displaying the 16-pin electrical connector, which ensures a secure and precise fit into the vehicle's wiring harness.
4. Setup and Installation
This power window switch is designed as a direct replacement for the original unit. Follow these steps for installation. If you are unsure, consult a qualified automotive technician.
- Prepare the Vehicle:
- Park the vehicle on a level surface and engage the parking brake.
- Turn off the ignition and remove the key.
- Disconnect the negative terminal of the vehicle's battery to prevent electrical hazards.
- Remove the Old Switch Assembly:
- Carefully pry off the trim panel surrounding the existing window switch on the driver's side door. Use a plastic trim removal tool to avoid scratching the interior.
- Once the panel is loose, disconnect any electrical connectors attached to the old switch assembly. Note their positions if necessary.
- Remove any screws or clips securing the old switch to the door panel.
- Gently lift out the old switch assembly.
- Install the New Switch Assembly:
- Align the new power window master switch with the opening in the door panel.
- Secure the new switch with any screws or clips that were removed earlier.
- Reconnect all electrical connectors to the corresponding ports on the new switch. Ensure connections are firm and secure.
- Carefully re-attach the trim panel to the door, ensuring all clips snap into place.
- Test Functionality:
- Reconnect the negative terminal of the vehicle's battery.
- Turn on the ignition (do not start the engine).
- Test each window control button (up/down) for all windows, including the "AUTO DOWN" function for the driver's window.
- Test the window lock button and the door lock/unlock buttons.
- If all functions operate correctly, the installation is complete.

Figure 4.1: Visual comparison of the old switch being removed and the new switch ready for installation, demonstrating the direct fit.
5. Operating Instructions
The power window master switch provides intuitive control over your vehicle's windows and door locks.
- Individual Window Control: Each window button controls its respective window. Press down to lower the window, and pull up to raise it.
- Driver's Window "AUTO DOWN": The driver's window button typically features an "AUTO DOWN" function. A single full press down will automatically lower the window completely without needing to hold the button. To stop the window mid-way, briefly press the button again.
- Window Lock Button: Press the window lock button (often marked with a window icon with a cross through it or a lock symbol) to disable the passenger window controls. This prevents passengers, especially children, from operating their windows. Press it again to unlock.
- Door Lock/Unlock Buttons: Use the dedicated lock and unlock buttons to control the central locking system of your vehicle.
6. Maintenance
The power window master switch is designed for long-term durability and typically requires minimal maintenance.
- Cleaning: To clean the surface of the switch, use a soft, damp cloth. Avoid using harsh chemicals, abrasive cleaners, or excessive moisture, as these can damage the plastic or electronic components.
- Environmental Factors: The switch is designed to withstand typical automotive environmental conditions. However, extreme temperatures or prolonged exposure to direct sunlight can affect its lifespan.
- Avoid Force: Do not apply excessive force to the buttons, as this can cause mechanical damage.
7. Troubleshooting
If you experience issues with your power window master switch, consider the following common troubleshooting steps:
| Problem | Possible Cause | Solution |
|---|---|---|
| Window does not move or moves slowly. |
|
|
| Only one window operates from the master switch. |
|
|
| Buttons feel sticky or unresponsive. |
|
|
If troubleshooting steps do not resolve the issue, it is recommended to seek assistance from a certified automotive technician.
8. Specifications
| Attribute | Detail |
|---|---|
| Product Type | Electric Power Window Master Lifter Switch Button |
| Brand | Generic |
| Manufacturer | ZIDAMAI |
| Model Number | 4857842588953 |
| Part Number (OEM Equivalent) | 935702H110 |
| Compatibility | Hyundai Elantra HD 2007-2010 (LHD) |
| Pin Configuration | 16 PIN |
| Material | High-quality plastic |
| ASIN | B0F9L9YN3P |
| First Available Date | May 22, 2025 |
9. Warranty and Support
For any questions regarding installation, operation, or troubleshooting that are not covered in this manual, please contact the manufacturer or seller directly. Refer to your purchase documentation for specific warranty terms and contact information.
This product is an aftermarket replacement item. While designed to meet or exceed OEM specifications, warranty claims and support are handled by the seller or manufacturer (ZIDAMAI).
For general inquiries or to find more information about Generic products, you may visit the brand's page on Amazon: Generic Brand Page.