1. Introduction
This manual provides detailed instructions for the installation, operation, and maintenance of the Generic Motorcycle Gear Position Sensor. This device is specifically designed to provide clear visibility of your current gear position while riding, enhancing safety and ensuring smooth transitions between gears.
The sensor is constructed from sturdy metal and PP materials, ensuring longevity and resistance to wear and tear. Its compact size ensures it does not occupy excessive space on your motorcycle, making it an unobtrusive yet essential addition.
Package Contents:
- 1 x Motorcycle Gear Position Sensor
2. Compatibility and Overview
This Gear Position Sensor is compatible with the following motorcycle models:
- Honda CB190R
- Honda CBF190
- Honda CB190X
- Honda WH125
- Honda WH175
- Honda CBR190
- Honda CBX190

Figure 2.1: Image showing the gear position sensor with text indicating compatibility for Honda WH125, WH175, CBR190, CB190R, CBF190R, CBF190, CBX190 models. The sensor features a copper core for reliable electrical conductivity.

Figure 2.2: The main view of the Motorcycle Gear Position Sensor, showcasing its compact design and integrated wiring harness with a multi-pin connector.
3. Setup and Installation
Installation of the Gear Position Sensor is designed to be straightforward. Please follow these steps carefully:
- Preparation: Ensure your motorcycle's ignition is off and the battery is disconnected to prevent accidental electrical shorts during installation.
- Locate Existing Sensor: Identify the current gear position sensor on your motorcycle. Refer to your motorcycle's service manual for the exact location.
- Disconnect Old Sensor: Carefully disconnect the wiring harness from the old gear position sensor. Note the orientation and connection points.
- Remove Old Sensor: Unscrew and remove the old gear position sensor from its mounting point.
- Install New Sensor: Position the new Generic Gear Position Sensor in the same location. Ensure it aligns correctly with the mounting holes.
- Secure New Sensor: Use appropriate fasteners to secure the new sensor firmly in place. Do not overtighten.
- Connect Wiring: Connect the wiring harness of the new sensor to the motorcycle's electrical system. Ensure the multi-pin connector is fully seated and secure. The connector is designed for a specific fit to prevent incorrect connections.
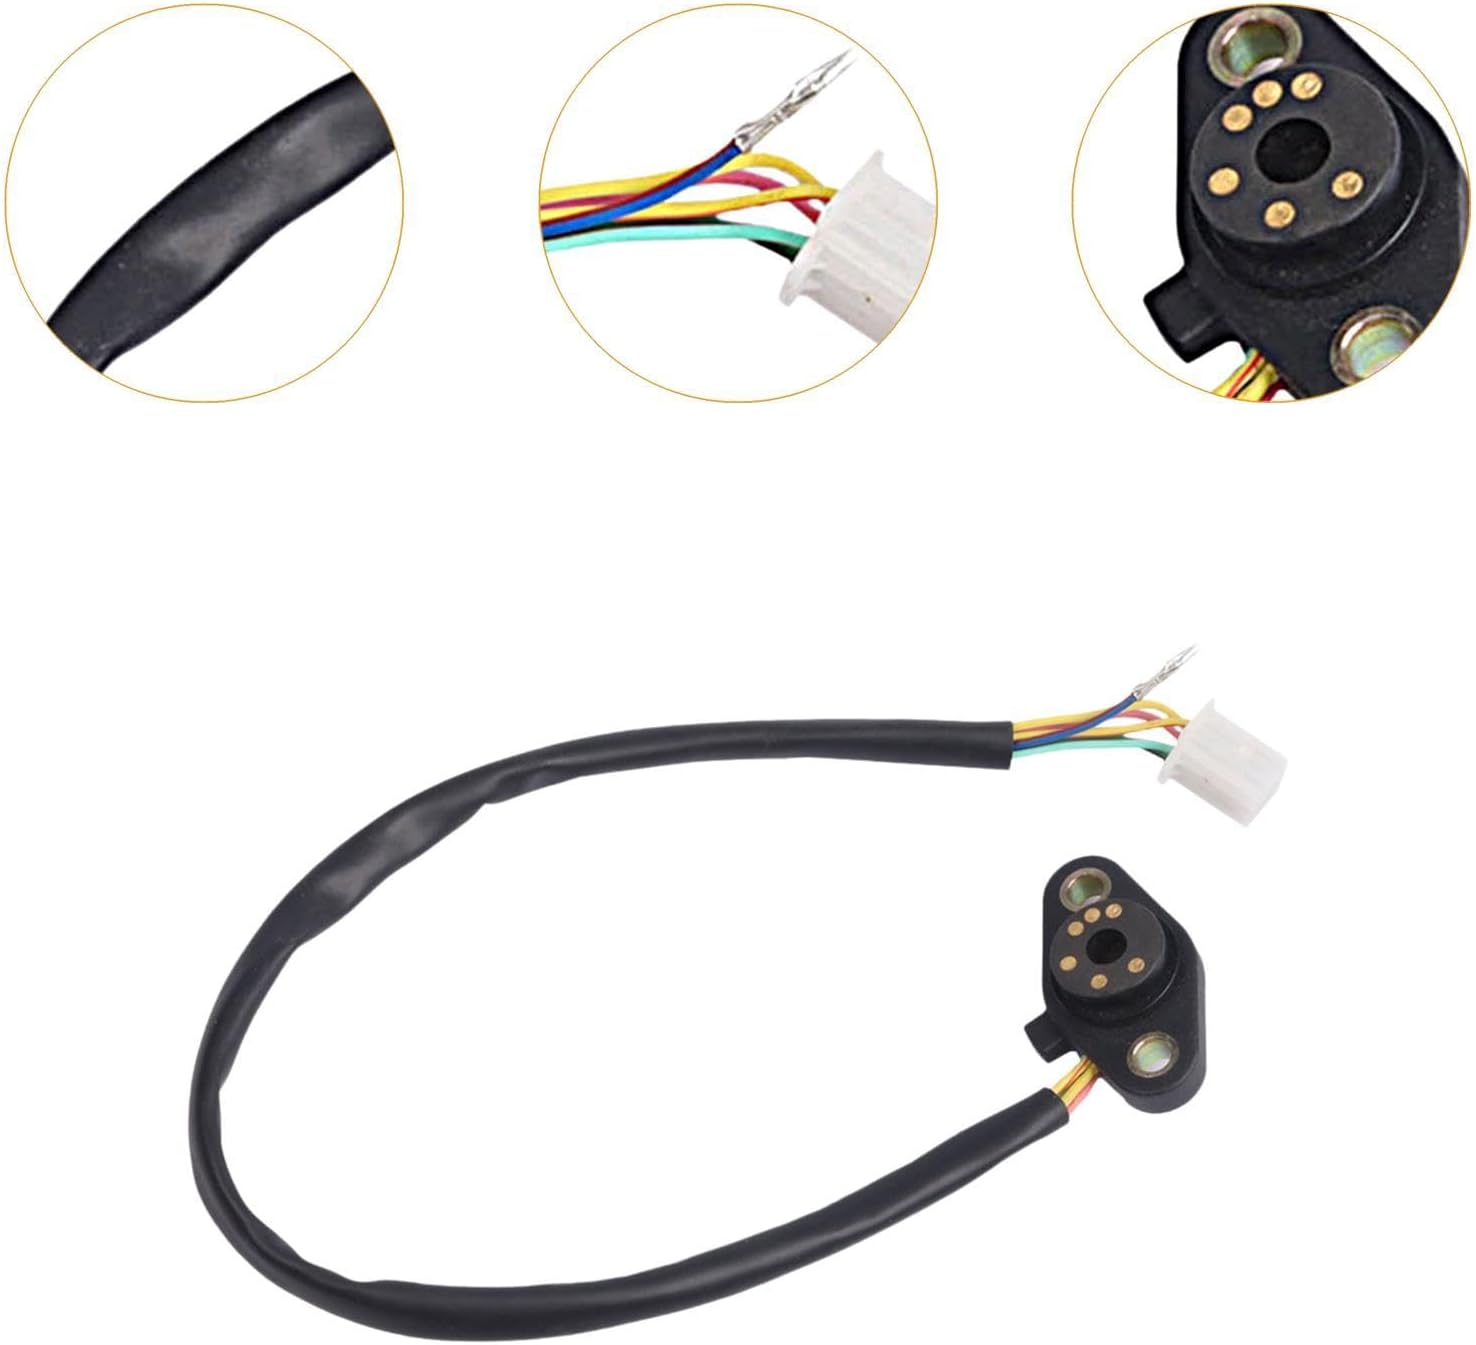
Figure 3.1: Detailed view of the sensor's wiring and the multi-pin connector, highlighting the individual colored wires for proper connection.

Figure 3.2: The gear position sensor showing its mounting points and the attached wiring with the connector, ready for installation.
Important: If you are unsure about any step, it is recommended to consult a qualified motorcycle mechanic or refer to your motorcycle's specific service manual.
4. Operating Instructions
Once installed, the Gear Position Sensor operates automatically. Its primary function is to transmit the current gear position to your motorcycle's display unit, providing real-time information to the rider.
- Power On: Reconnect the motorcycle battery and turn the ignition key to the ON position.
- Gear Display: The gear position should now be visible on your motorcycle's instrument cluster.
- Shifting: As you shift gears, the display should update instantly to reflect the current gear (e.g., N for Neutral, 1, 2, 3, 4, 5, 6).
This clear visibility aids in smoother gear changes and enhances overall riding safety, especially in varying traffic conditions or during spirited riding.
5. Maintenance
The Generic Gear Position Sensor is designed for durability and requires minimal maintenance. However, periodic checks can help ensure its long-term performance:
- Connection Check: Periodically inspect the wiring harness and connector for any signs of wear, corrosion, or loose connections. Ensure the connector remains securely seated.
- Cleanliness: Keep the sensor area clean from excessive dirt, mud, or debris. While designed to be robust, extreme build-up can potentially interfere with its operation.
- Physical Damage: Visually inspect the sensor for any physical damage, cracks, or bends that might have occurred due to impacts or vibrations.
No user-serviceable parts are inside the sensor unit. Do not attempt to disassemble the sensor.
6. Troubleshooting
If you experience issues with your Gear Position Sensor, consider the following troubleshooting steps:
| Problem | Possible Cause | Solution |
|---|---|---|
| Gear display not showing or incorrect. | Loose or disconnected wiring. Faulty sensor. Motorcycle's display unit issue. | Check all wiring connections to ensure they are secure. Verify the sensor is correctly installed. If connections are good, the sensor may be faulty and require replacement. Consult a mechanic to rule out display unit issues. |
| Intermittent display. | Poor connection. Vibration affecting sensor. | Ensure all connections are tight and free from corrosion. Secure the sensor firmly to prevent movement. |
If the problem persists after attempting these steps, it is recommended to seek assistance from a certified motorcycle technician.
7. Specifications
| Feature | Detail |
|---|---|
| Product Type | Motorcycle Gear Position Sensor |
| Material | Metal, PP (Polypropylene) |
| Dimensions (Approx.) | 57mm (Length) |
| Compatibility | CB190R, CBF190, CB190X, WH125, WH175, CBR190, CBX190 |
| Manufacturer Part Number | 67042861105699103 |

Figure 7.1: Diagram illustrating the approximate dimensions of the gear position sensor, showing a length of 57mm, a width of 40mm, and mounting hole diameter of 6mm.
8. Warranty and Support
This product is manufactured to high-quality standards. For specific warranty information, please refer to the documentation provided with your purchase or contact the seller directly. In case of any issues or questions regarding the product, please reach out to the retailer or manufacturer's customer support.
For further assistance, you may visit the product page on Amazon: Product Link