EBUYFIRE Set B
EBUYFIRE Bike Taillight with Turn Signals and Remote Control Horn
Model: Set B
1. Introduction
This manual provides detailed instructions for the installation, operation, and maintenance of your EBUYFIRE Bike Taillight with Turn Signals and Remote Control Horn. This device is designed to enhance cycling safety by providing clear visibility, turn indications, and an audible warning horn. Please read this manual thoroughly before use to ensure proper function and safety.
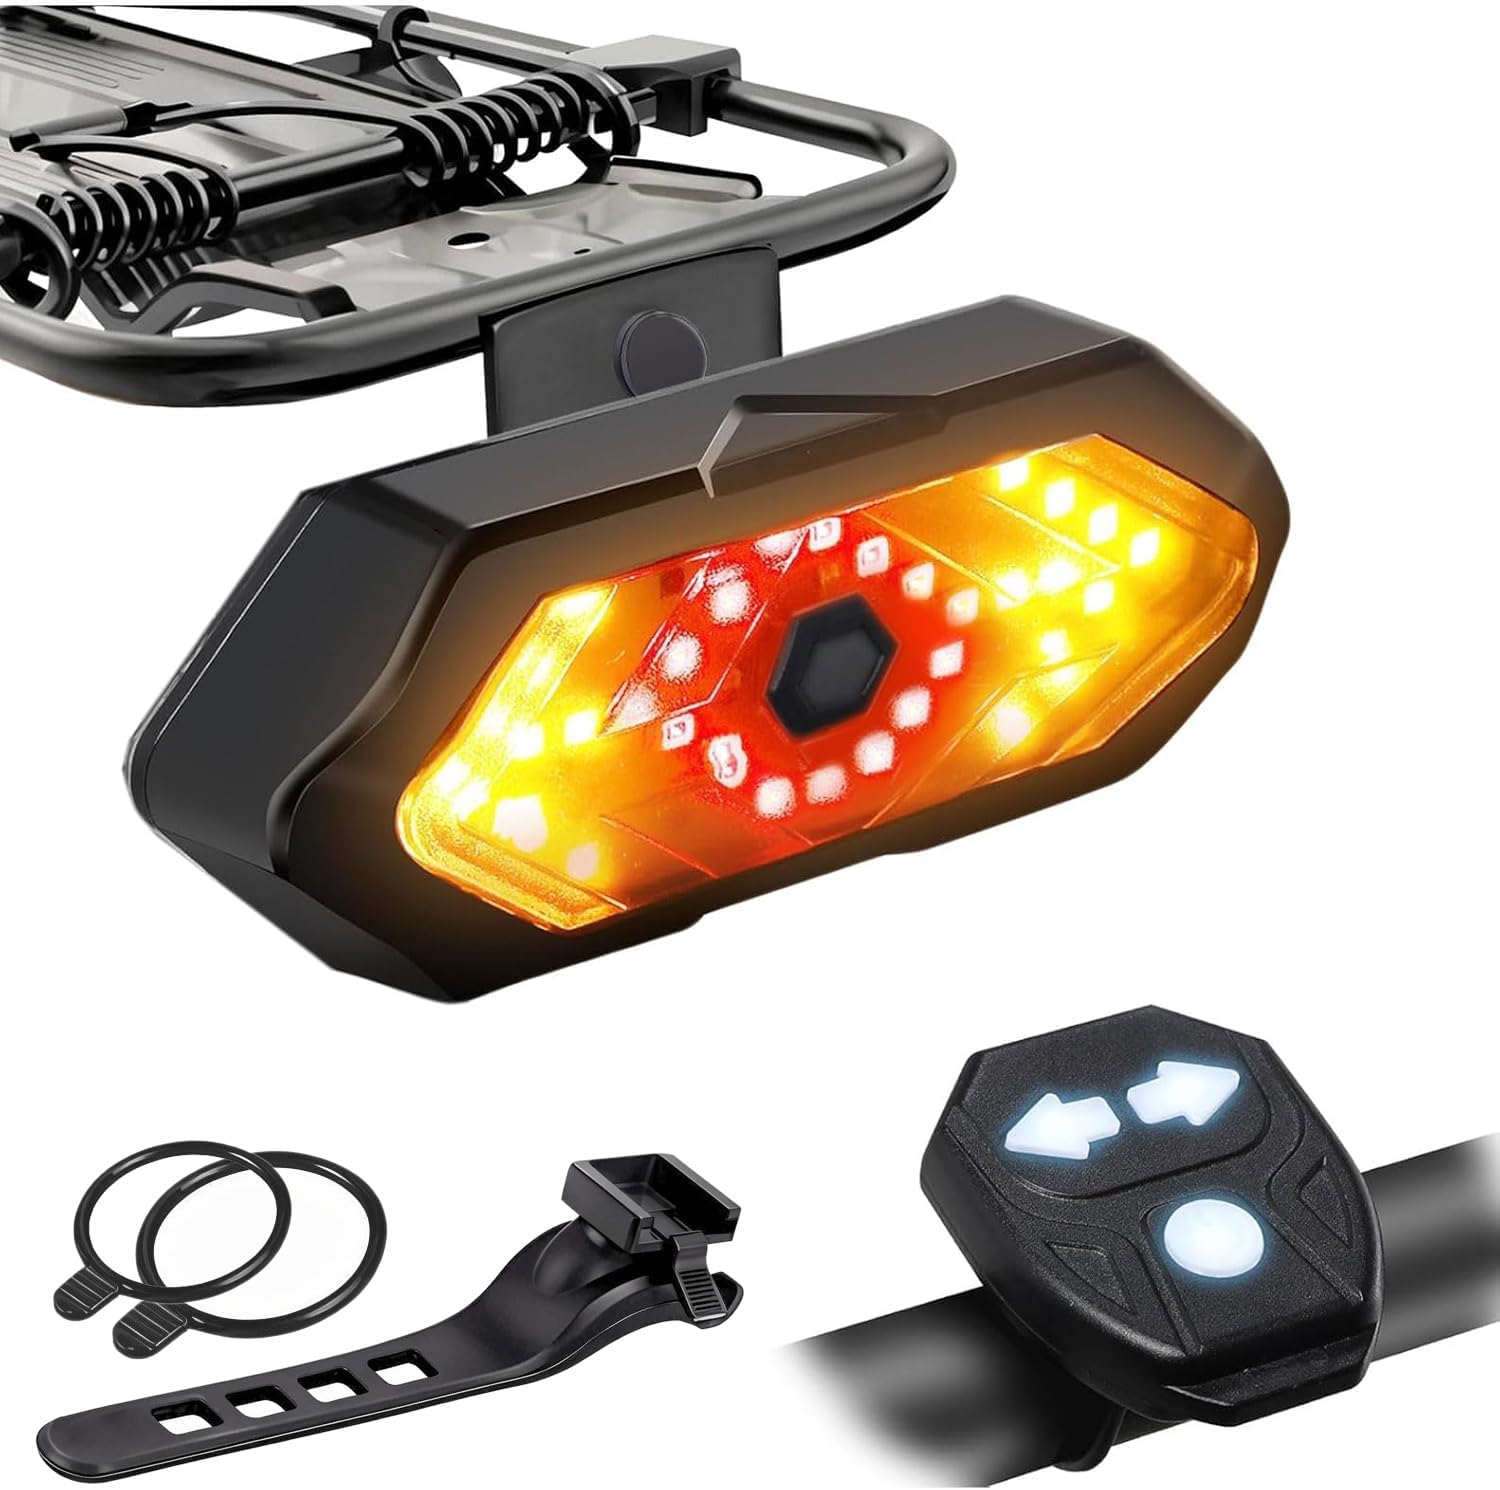
Image 1.1: EBUYFIRE Bike Taillight, remote control, and mounting accessories.
2. Package Contents
Verify that all items listed below are included in your package:
- Bike Taillight (1 unit)
- Remote Control (1 unit)
- Silicone Fixed Straps (2 units)
- USB Data Cable (1 unit)
- Gift Box (1 unit)
3. Product Features
The EBUYFIRE Bike Taillight offers several features designed for cyclist safety and convenience:
- Remote Control Operation: Wireless control of light modes and turn signals from your handlebar, with a range of up to 45 meters (150 feet).
- Multiple Light Modes: Five distinct light modes including right turn, left turn, red light always on, red light flashing, and all LEDs flashing.
- High Visibility: Equipped with 30 bright SMD LEDs and a 180-degree field of view, visible from up to 45 meters (150 feet) in various conditions.
- Integrated Horn: A 120dB horn for enhanced safety warnings and vehicle search functionality.
- IPX4 Waterproof Rating: Designed to withstand splashes and rain, suitable for use in various weather conditions.
- USB Rechargeable: Convenient charging via USB from computers, power banks, or other USB-enabled devices.
- Easy Installation: Tool-free installation with silicone straps for versatile mounting on handlebars, seat posts, or rear racks.
4. Setup and Installation
The EBUYFIRE Bike Taillight offers flexible installation options for both the taillight unit and the remote control.
4.1 Taillight Installation
The taillight can be installed on either the bicycle's rear bracket (rack) or the seat tube.

Image 4.1: Overview of taillight installation positions.
4.1.1 Installation on Rear Bracket (Rack)
- Attach the provided holder to the rear bracket using the screws. Ensure it is securely fastened.
- Slide the taillight unit onto the fixed holder until it clicks into place.
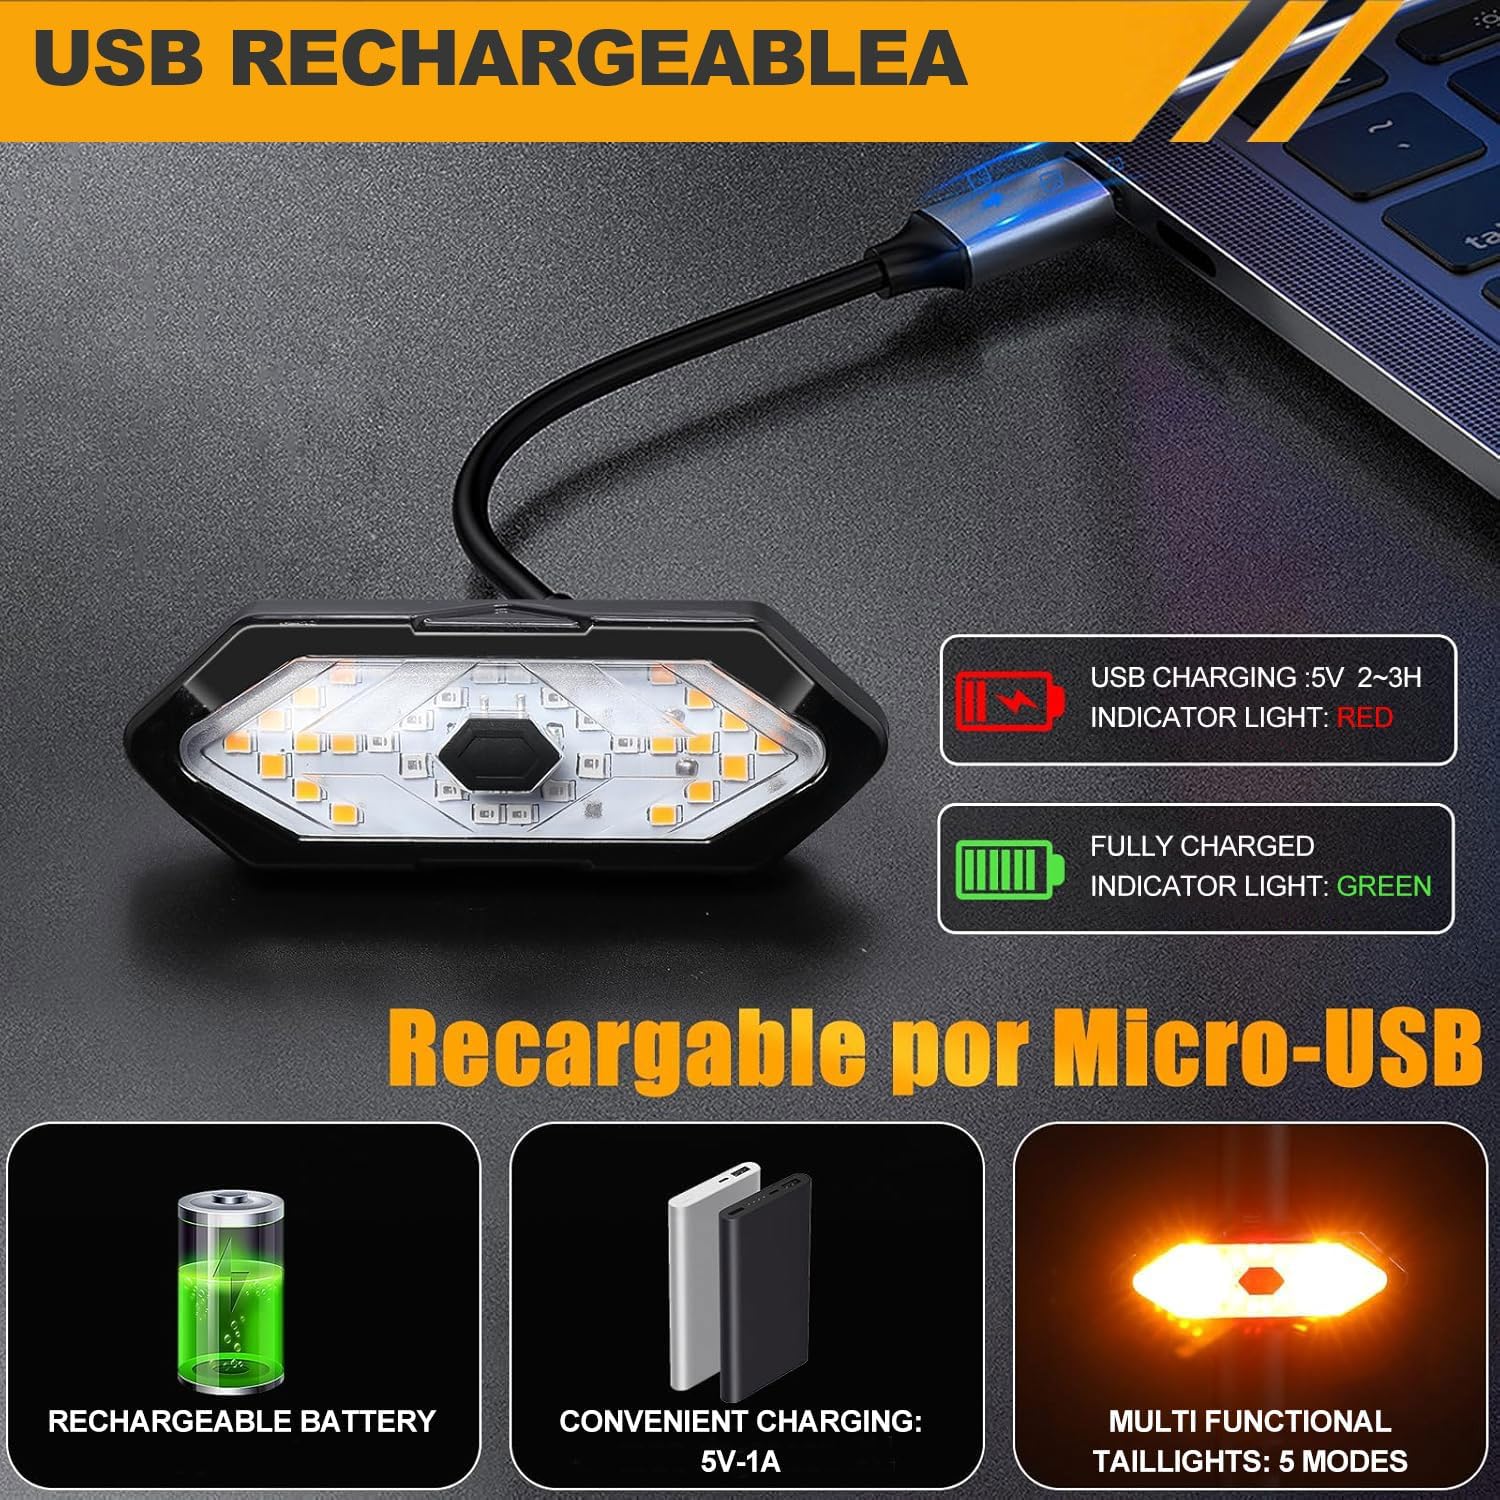
Image 4.2: Detailed steps for rear rack installation.
4.1.2 Installation on Seat Tube
- Select a suitable silicone fixed strap.
- Wrap the strap around the seat tube and secure the taillight unit firmly. Ensure the light is facing backward and is not obstructed.
4.2 Remote Control Installation
The remote control can be easily attached to your bicycle's handlebar using the provided silicone strap.
- Choose a convenient location on your handlebar that allows easy access to the buttons.
- Secure the remote control to the handlebar using the silicone fixed strap. Ensure it is tight enough to prevent movement during riding.
5. Operating Instructions
The EBUYFIRE Bike Taillight is operated wirelessly via the remote control.
5.1 Power On/Off
- To power on the taillight, press and hold the power button located on the taillight unit itself.
- To power off, press and hold the power button on the taillight unit again.
5.2 Remote Control Functions
The remote control features three buttons for various functions:
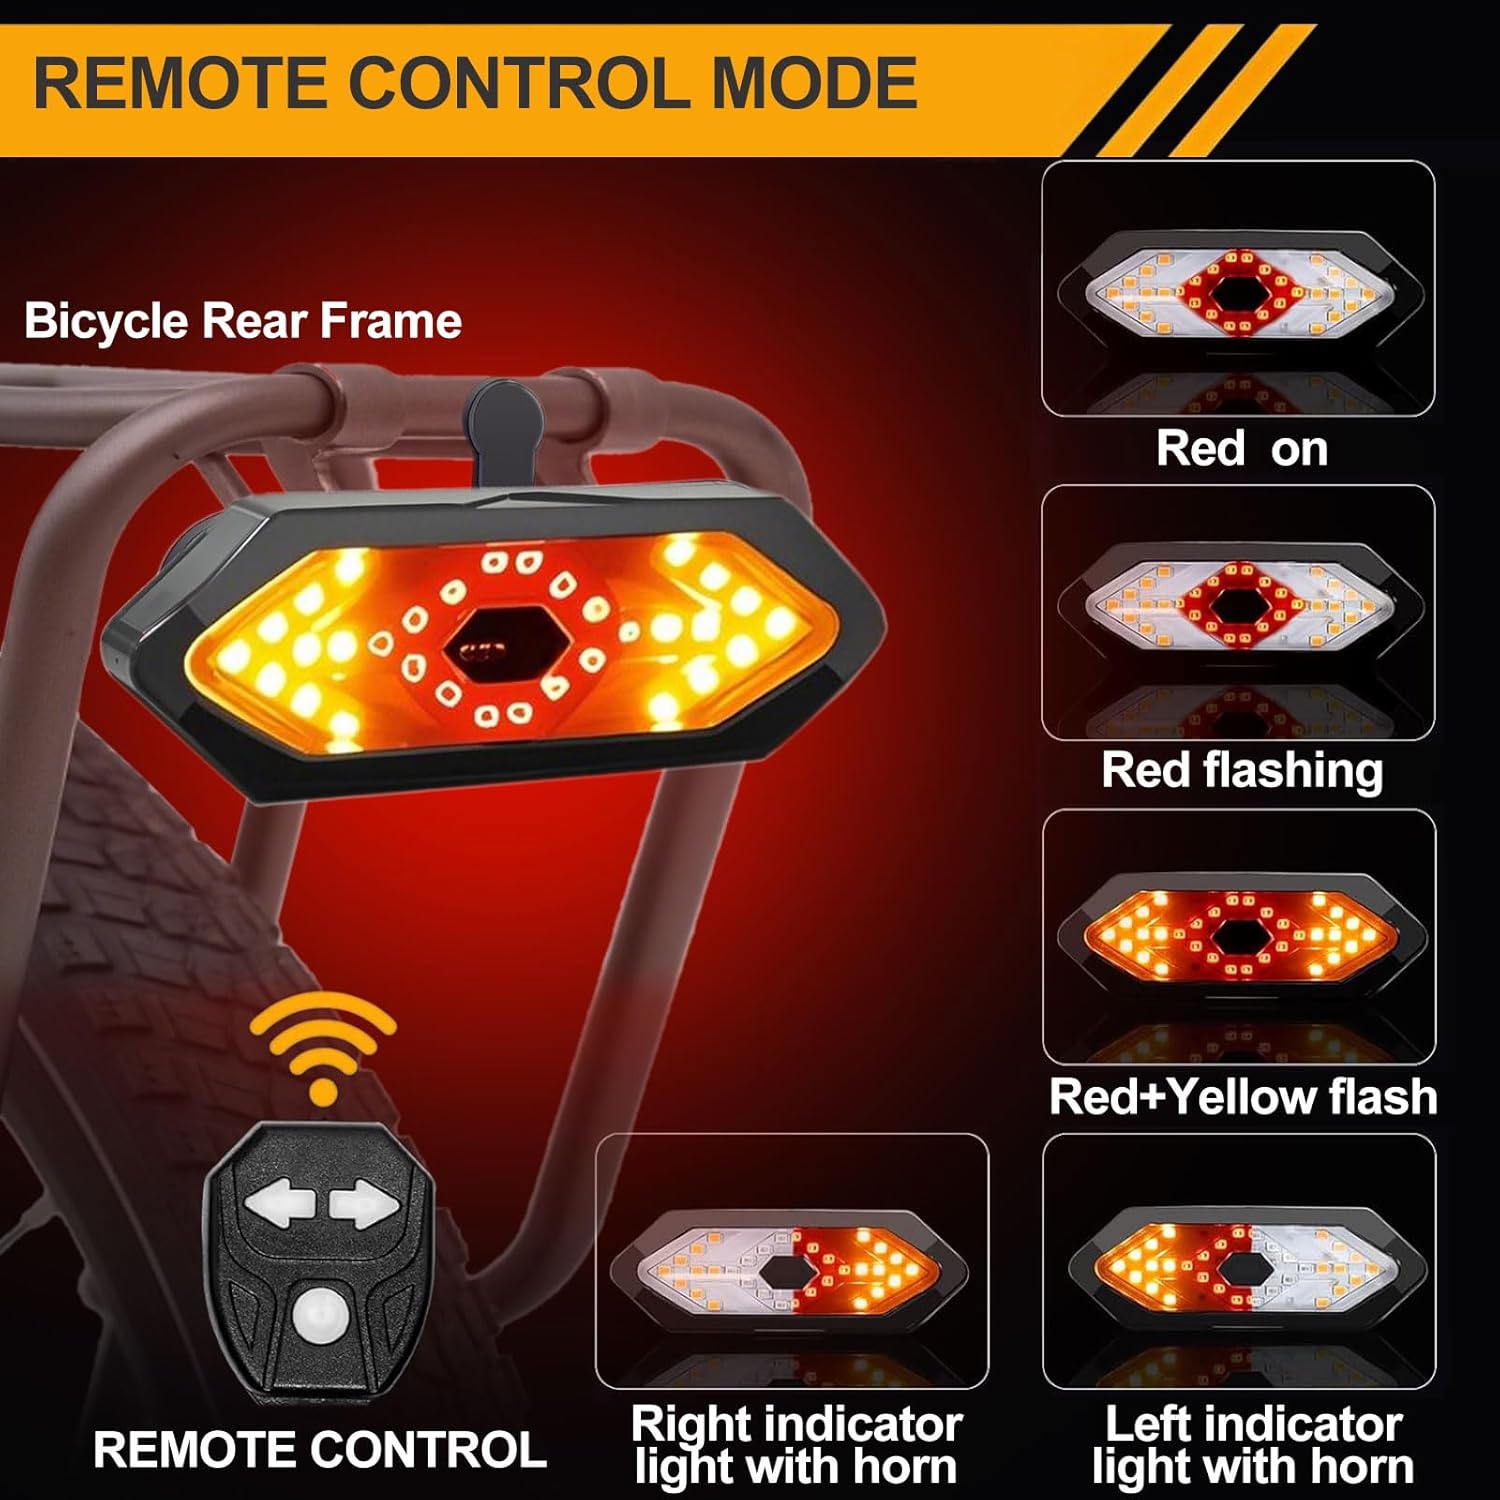
Image 5.1: Remote control and available light modes.
- Left Turn Signal Button (Left Arrow): Press to activate the left turn signal. The left side of the taillight will flash yellow, accompanied by an audible horn sound. Press again to deactivate.
- Right Turn Signal Button (Right Arrow): Press to activate the right turn signal. The right side of the taillight will flash yellow, accompanied by an audible horn sound. Press again to deactivate.
- Mode Switch Button (Center Button): Press to cycle through the taillight's five different modes:
- Red light always on
- Red light flashing
- Red + Yellow flashing (hazard mode)
- All LEDs flashing
- Off (if cycling through modes)
5.3 Vehicle Search Function
The 120dB horn can also be used to locate your bicycle in a parking area. Pressing either the left or right turn signal button will activate the horn, helping you identify your bike.
6. Charging
The EBUYFIRE Bike Taillight is equipped with a rechargeable battery. The remote control uses a separate, non-rechargeable battery (included).
6.1 Taillight Charging
- Locate the USB charging port on the taillight unit.
- Connect the provided USB data cable to the taillight and to a USB power source (e.g., computer, power bank, USB wall adapter).
- During charging, the indicator light will be red.
- Once fully charged (approximately 2-3 hours), the indicator light will turn green.
- Disconnect the USB cable once charging is complete.

Image 6.1: USB charging interface and indicator lights.
6.2 Remote Control Battery
The remote control uses a non-rechargeable battery. If the remote control's responsiveness decreases, replace the battery according to the instructions provided with the remote control or consult the manufacturer's website.
7. Maintenance
Proper maintenance ensures the longevity and optimal performance of your EBUYFIRE Bike Taillight.
- Cleaning: Wipe the taillight and remote control with a soft, damp cloth. Do not use abrasive cleaners or solvents.
- Water Resistance: The taillight has an IPX4 waterproof rating, meaning it is resistant to splashing water from any direction. It is suitable for normal use in rainy or foggy conditions. However, do not submerge the device in water.

Image 7.1: IPX4 Waterproofing for normal use in rainy conditions.
- Storage: When not in use for extended periods, store the device in a cool, dry place. Ensure the taillight is fully charged before storing.
- Battery Care: For the taillight's rechargeable battery, avoid complete discharge and recharge regularly to maintain battery health.
8. Troubleshooting
If you encounter issues with your EBUYFIRE Bike Taillight, refer to the following common solutions:
| Problem | Possible Cause | Solution |
|---|---|---|
| Taillight does not turn on. | Low battery; Power button not pressed correctly. | Charge the taillight fully. Press and hold the power button on the taillight unit until it activates. |
| Remote control not responding. | Remote control battery low/dead; Out of range; Interference. | Replace the remote control battery. Ensure the remote is within 45 meters of the taillight. Move away from sources of strong electromagnetic interference. |
| Turn signals or horn not working. | Remote control issue; Taillight not powered on. | Verify the taillight is powered on. Check remote control battery. Ensure proper pairing (if applicable, though typically automatic). |
| Light modes not cycling. | Mode switch button not pressed correctly. | Press the center mode button firmly and release to cycle through modes. |
9. Specifications
| Feature | Detail |
|---|---|
| Model | Set B |
| Brand | EBUYFIRE |
| Material | Plastic |
| Power Source | Battery Powered (USB Rechargeable Taillight) |
| Water Resistance Level | IPX4 (Water Resistant) |
| Mounting Type | Handlebar Mount (Remote), Seatpost Mount, Rear Rack Mount (Taillight) |
| Number of Settings | 5 Light Modes |
| Item Weight | 110 g |
| Parcel Dimensions | 10 x 7.4 x 5.7 cm |
| Batteries | 1 A battery required (included for remote) |
10. Safety Information
Always prioritize safety when cycling. This product is designed to enhance your visibility and communication on the road, but it does not replace safe riding practices.
- Ensure the taillight is securely mounted and visible to others.
- Regularly check battery levels and charge the taillight as needed.
- Do not stare directly into the light to avoid temporary vision impairment.
- Always obey local traffic laws and regulations.
- Keep the device out of reach of children.
11. Warranty and Support
EBUYFIRE products are manufactured to high-quality standards. For warranty information, technical support, or service inquiries, please refer to the contact information provided with your purchase or visit the official EBUYFIRE website. Please retain your proof of purchase for warranty claims.
Related Documents - Set B
 |
Electric Bicycle Waterproof Cable Light Set Technical Specifications Technical specifications and installation overview for the Electric Bicycle Waterproof Cable Light Set, featuring 36V/48V compatibility, integrated turn signals, horn, and headlight controls. |
 |
Toyota MR2 1993 Turn Signal and Hazard Warning System Service Information Detailed service information, wiring diagrams, troubleshooting guide, and inspection procedures for the Turn Signal and Hazard Warning System of the 1993 Toyota MR2. |
 |
Federal Signal Model 52 Series B Resonating Horn Installation and Safety Manual Comprehensive installation, safety, and maintenance guide for the Federal Signal Model 52 Series B Resonating Horn (Part No. 256A435 ES). Includes wiring diagrams, mounting instructions, and safety precautions for installers and operators. |
 |
G90 Bike Light Set User Manual - Installation, Operation, and Specifications Comprehensive user manual for the G90 Bike Light Set, covering installation, operation instructions for front and rear lights, charging tips, and detailed product specifications. Includes information on modes, battery life, and package contents. |
 |
User Manual: Bicycle Lights Set Kit TT-Y2857 User manual and compliance information for the TT-Y2857 Bicycle Lights Set Kit, featuring dynamo-powered front and rear lights. |
 |
LED Bike Light Set User Manual - HJ-030 User manual for the HJ-030 LED Bike Light Set, detailing package contents, specifications, charging, installation, operation modes, warranty, and troubleshooting tips. |
Ask a question about this manual
Ask about setup, troubleshooting, compatibility, parts, safety, or missing instructions. Manuals+ will review the question and use this page’s manual context to help answer it.