1. Introduction
This manual provides essential information for the safe and efficient installation, operation, and maintenance of your Generic FL-40 12V Mini Submersible Diaphragm Water Pump. Please read these instructions carefully before using the pump to ensure proper function and longevity.
2. Product Features
- Weight: Approximately 2.3 kg.
- Model: FL-40 / FL-44.
- Power Source: Electric.
- Pump Type: Diaphragm pump.
- Maximum Flow Rate: 4.5 GPM (17 Liters per minute).
- Tube Gauge: Designed for 20 mm hose connections.
- Versatile Applications: Suitable for agricultural irrigation, industrial drainage, residential water transfer, and off-grid solar-powered pumping systems.
3. Specifications
| Specification | Value |
|---|---|
| Brand | Generic |
| Model Number | CFAWDZDCQ-12V |
| Manufacturer Part Number | CFAWDZDCQ-12V |
| Voltage | 12V |
| Product Weight | 800 Grams |
| Package Quantity | 1.0 unit |
| ASIN | B0F9K9ZB7W |
4. Setup
Proper setup is crucial for the pump's performance and safety. Follow these steps carefully:
- Mounting: Securely mount the pump on a stable, flat surface using the integrated mounting feet. Ensure the pump is in a dry, well-ventilated area, protected from direct weather exposure.
- Plumbing Connections: Connect the inlet and outlet hoses (20 mm) to the pump. Ensure all connections are tight to prevent leaks. Use appropriate clamps for a secure fit. The inlet should be connected to the water source, and the outlet to the destination.
- Electrical Connection: Connect the pump to a 12V DC power source. Observe correct polarity: the red wire is positive (+), and the black wire is negative (-). Ensure the power source can provide sufficient current for the pump's operation. It is recommended to use an inline fuse for protection.
- Priming (if necessary): For some installations, especially if the pump is above the water source, priming may be required. Ensure the pump chamber is filled with water before initial operation to prevent dry running.
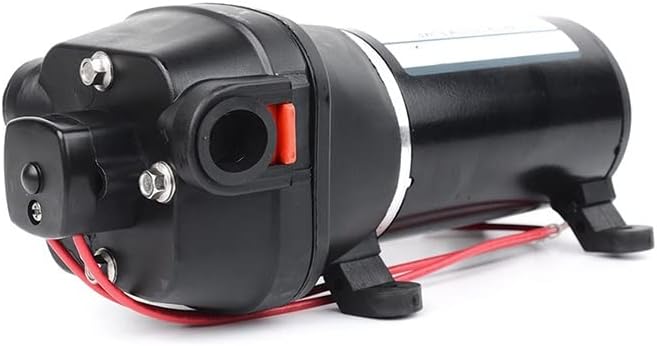
Image 1: Side view of the FL-40 pump, highlighting the inlet and outlet ports for hose connections.
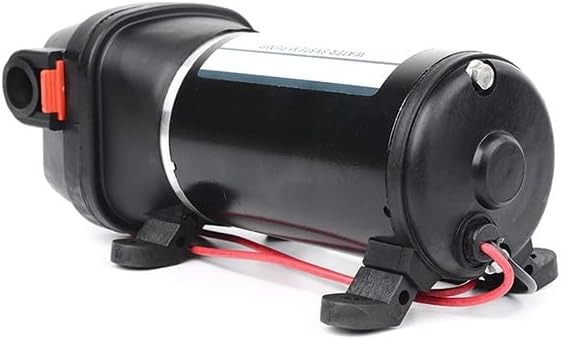
Image 2: Lower angle view of the FL-40 pump, illustrating the sturdy mounting feet for secure installation.
5. Operating Instructions
Once the pump is properly installed, follow these steps for operation:
- Ensure Water Supply: Verify that the water source connected to the pump's inlet is adequate and free of large debris.
- Power On: Apply 12V DC power to the pump. The pump should begin to operate, drawing water from the source and pushing it through the outlet.
- Monitor Performance: Observe the pump's operation. Check for consistent flow, unusual noises, or leaks.
- Power Off: To stop the pump, disconnect the 12V DC power supply.
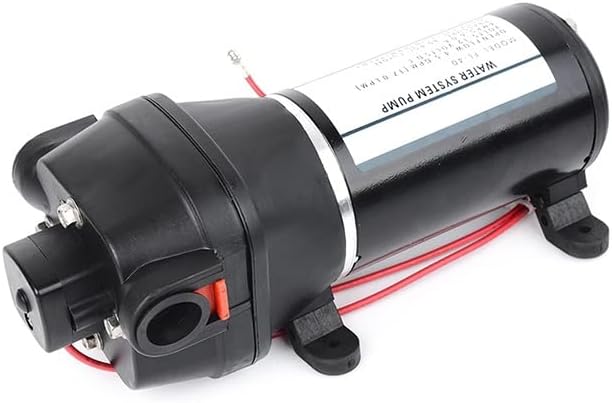
Image 3: Side view of the FL-40 pump, showing the product label with model and specification details.
6. Maintenance
Regular maintenance helps ensure the longevity and optimal performance of your pump:
- Inspect Connections: Periodically check all plumbing and electrical connections for tightness and signs of wear or corrosion.
- Clean Inlet Filter: If your system includes an inlet filter, clean it regularly to prevent blockages and maintain flow rate.
- Check for Leaks: Regularly inspect the pump and hoses for any signs of water leaks. Address leaks promptly to prevent damage.
- Winterization (if applicable): In freezing conditions, drain the pump and hoses completely to prevent damage from ice expansion.

Image 4: Rear view of the FL-40 pump, detailing the electrical wiring connections (red for positive, black for negative).
7. Troubleshooting
If you encounter issues with your pump, refer to the following common problems and solutions:
- Pump Not Starting:
- Check the 12V DC power supply and ensure it is connected correctly and providing power.
- Verify electrical connections for proper polarity and tightness.
- Check for a blown fuse in the power line.
- Low Flow or No Water Output:
- Inspect the inlet for blockages or debris. Clean any filters.
- Ensure the water source is adequate and the pump is properly primed (if applicable).
- Check for kinks or obstructions in the hoses.
- Verify all plumbing connections are sealed to prevent air leaks.
- Unusual Noise:
- Ensure the pump is securely mounted and not vibrating against other surfaces.
- Check for air in the system; re-prime if necessary.
- Inspect for any foreign objects that may have entered the pump.
- Leaks:
- Tighten all hose clamps and connections.
- Inspect hoses and pump housing for cracks or damage.
8. Warranty and Support
This product is subject to a 30-day return policy. If you have any questions or require assistance with the product, please do not hesitate to contact our professional customer service team. We are committed to providing effective solutions and support.