panaride Air Nano
Panaride Air Nano Mini Electric Bike Pump Instruction Manual
Brand: panaride | Model: Air Nano
Introduction
This manual provides detailed instructions for the safe and efficient operation of your Panaride Air Nano Mini Electric Bike Pump. Please read this manual thoroughly before use and retain it for future reference.
What's in the Box
Your package should contain the following items:
- 1x Panaride Air Nano Mini Electric Bike Pump
- 1x High Pressure Hose
- 1x Presta Connector
- 1x Needle Valve
- 1x USB Type-C Charging Cable
- 1x User Manual
- 1x Storage Bag

Image: All components included in the Panaride Air Nano package, neatly laid out.
Product Overview and Features
The Panaride Air Nano is a compact and powerful electric bike pump designed for convenience and precision. Key features include:
- High Precision Inflation: Achieves optimal tire pressure with ±1 PSI accuracy.
- Smart Auto-Stop Functionality: Automatically stops inflation once the preset pressure is reached, preventing over-inflation.
- Lightweight and Portable Design: Weighing only 120g, it's easy to carry and store.
- Versatile Valve Compatibility: Compatible with both Presta and Schrader valves, and includes a needle adapter for balls.
- Powerful Performance: Delivers up to 120 PSI for fast and efficient tire inflation.
- Built-in Display: Shows real-time tire pressure and battery status.
- Fast Charging: 500 mAh battery fully charges in approximately 40 minutes via USB Type-C.
- Altitude-Proof Accuracy: Automatic pressure calibration based on altitude.
- Durable Construction: Made with military-grade, shockproof, drop-resistant, IP54 water-resistant, and heat-resistant materials.
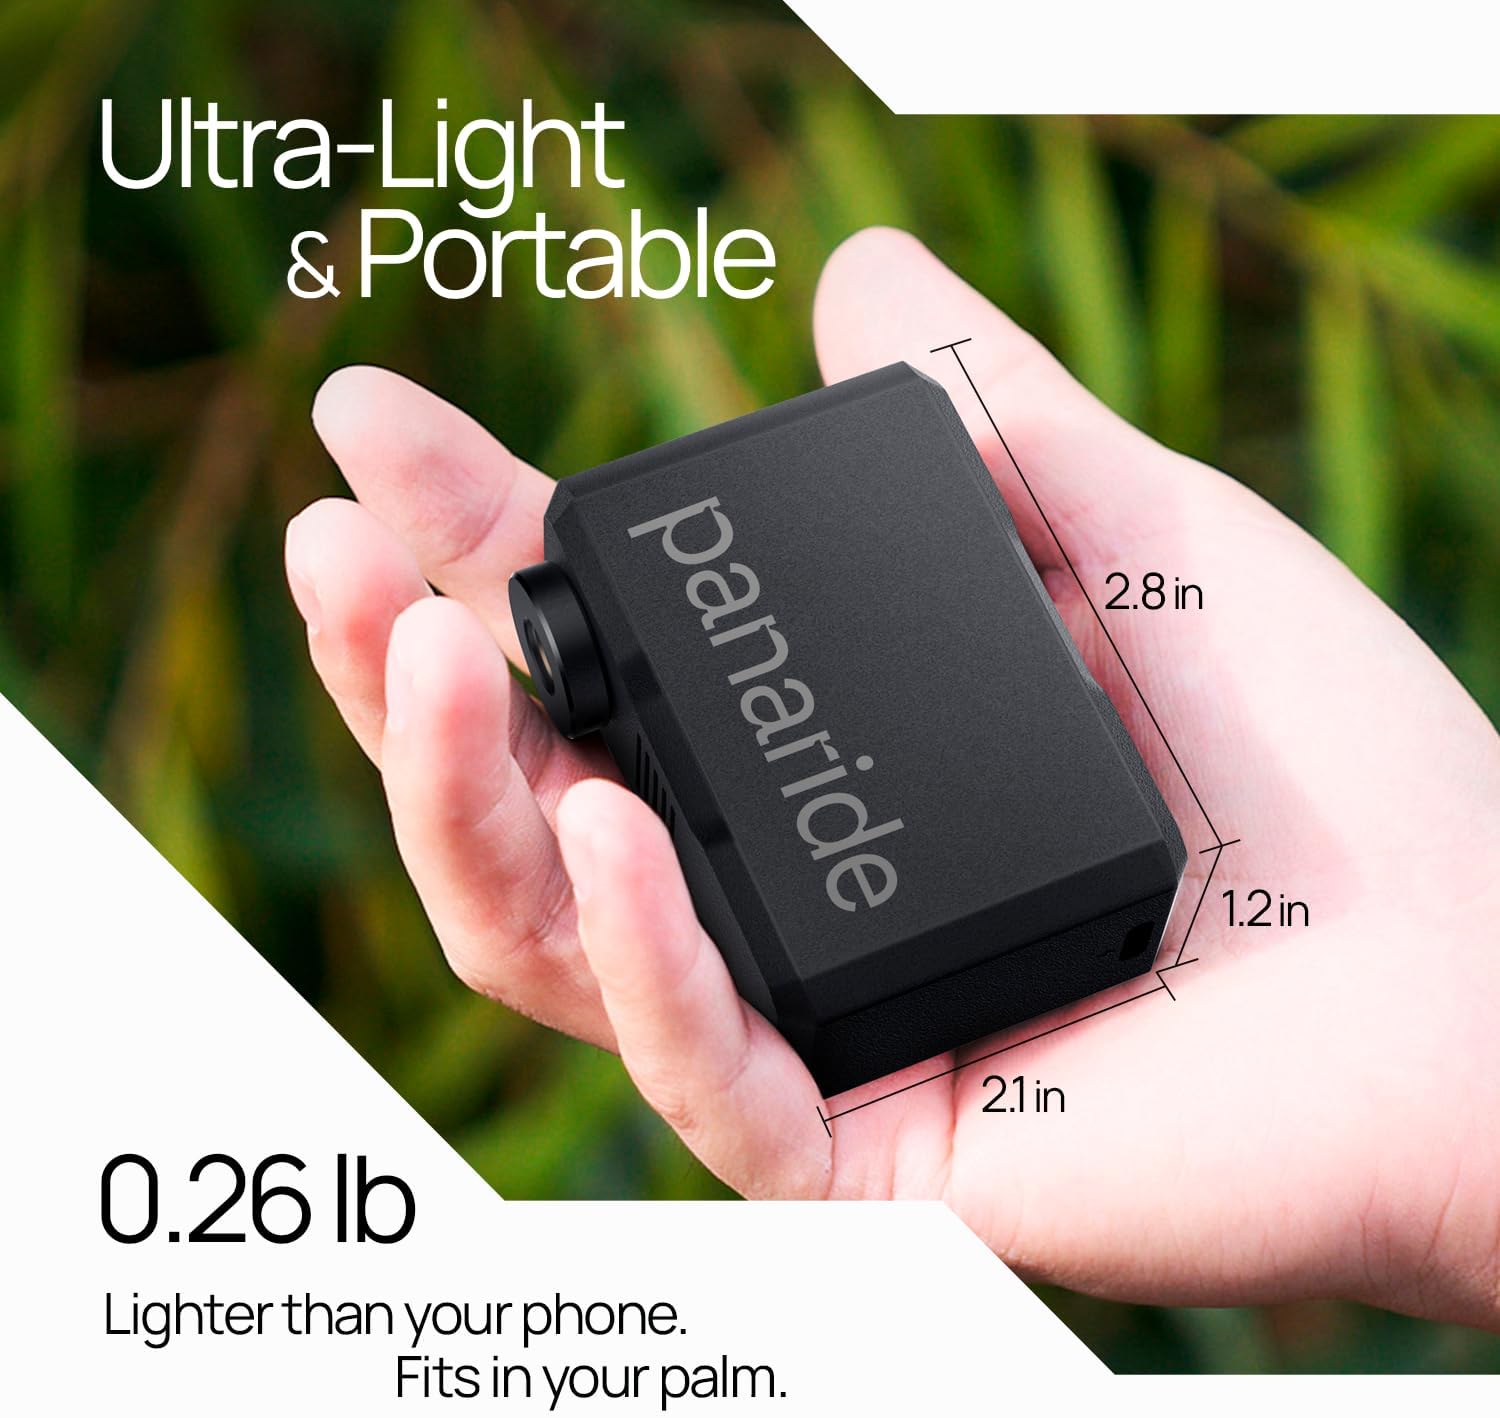
Image: The Panaride Air Nano Mini Electric Bike Pump, showcasing its compact size and digital display.

Image: Close-up of the pump's built-in display, indicating tire pressure, battery level, and control buttons.

Image: Diagram illustrating how to connect the pump to both Presta (SV) and Schrader (AV) valves, as well as a ball needle.

Image: Table detailing inflation speeds and capacities for various items like road bikes, MTB, and basketballs.
Setup
1. Charging the Device
Before first use, fully charge the Panaride Air Nano. Connect the provided USB Type-C cable to the charging port on the pump and to a compatible USB power source. The battery indicator on the display will show charging progress.

Image: The Panaride Air Nano connected to a USB-C cable for charging, highlighting the charging port.
2. Attaching the Hose and Adapters
Screw the high-pressure hose firmly into the inflation port on the top of the pump. Depending on your valve type (Presta or Schrader), attach the appropriate connector to the other end of the hose. For inflating balls, use the needle valve with the hose.
Operating Instructions
1. Power On/Off
Press and hold the power button (center button) for a few seconds to turn the pump on or off.
2. Selecting Pressure Unit (PSI/BAR)
Double-press the '-' button to switch between PSI and BAR units on the display.
3. Setting Desired Pressure
Once powered on and connected to the tire/ball, the display will show the current pressure. Use the '+' and '-' buttons to adjust the desired target pressure. The pump supports up to 120 PSI.
4. Starting Inflation
Press the power button once to start inflation. The pump will automatically stop when the preset pressure is reached.

Image: The Panaride Air Nano connected to a bicycle tire, demonstrating the automatic shut-off feature once the desired pressure is achieved.
5. Using the Built-in Light
Double-press the '+' button to turn the built-in LED light on or off. This is useful in low-light conditions.
6. Video Demonstration: Pump Usage
Video: A seller demonstration showcasing the unboxing and various uses of the Panaride Mini Electric Bike Pump, including inflating bicycle tires and a basketball.
Maintenance
1. Charging
Ensure the device is charged regularly, especially before long trips, to maintain optimal performance. A full charge takes approximately 40 minutes.
2. Storage
Store the pump and its accessories in the provided storage bag to protect them from dust and damage. Keep in a cool, dry place.
3. Cleaning
Wipe the exterior of the pump with a soft, dry cloth. Do not use harsh chemicals or abrasive materials.
Troubleshooting
- Pump not turning on: Ensure the battery is charged. If not, connect to a power source using the USB-C cable.
- Inaccurate pressure reading: Ensure the hose and adapter are securely attached to both the pump and the valve.
- Pump not inflating: Check if the desired PSI is set correctly. Ensure there are no leaks in the connection.
- Pump gets hot during use: This is normal during extended inflation. The pump has efficient heat dissipation. Allow it to cool down if it becomes excessively hot.
Specifications
| Brand | panaride |
| Model Name | Air Nano |
| Color | Black |
| Material | Plastic |
| Item Weight | 0.2 Kilograms (120g) |
| Power Source | Battery Powered |
| Air Flow Capacity | 12 Liters Per Minute |
| Maximum Pressure | 120 Pound per Square Inch |
| Operation Mode | Automatic |
| Item Package Dimensions | 4.49 x 3.23 x 1.46 inches |
Warranty and Support
The Panaride Air Nano Mini Electric Bike Pump comes with a 5-year warranty.
For product support, troubleshooting, or warranty claims, please contact Panaride customer service through the retailer's platform or visit the official Panaride website.
Ask a question about this manual
Ask about setup, troubleshooting, compatibility, parts, safety, or missing instructions. Manuals+ will review the question and use this page’s manual context to help answer it.