
1. Introduction
Thank you for choosing the Ranbomer CMk1030 Single Serve Coffee Maker. This appliance is designed for convenient and efficient brewing of both K-Cup pods and ground coffee. Please read this manual thoroughly before operating the coffee maker to ensure safe and optimal performance. Keep this manual for future reference.
2. Important Safety Instructions
- Read all instructions before use.
- Do not touch hot surfaces. Use handles or knobs.
- To protect against fire, electric shock, and injury to persons, do not immerse cord, plugs, or the appliance in water or other liquid.
- Close supervision is necessary when any appliance is used by or near children.
- Unplug from outlet when not in use and before cleaning. Allow to cool before putting on or taking off parts, and before cleaning the appliance.
- Do not operate any appliance with a damaged cord or plug, or after the appliance malfunctions or has been damaged in any manner.
- The use of accessory attachments not recommended by the appliance manufacturer may result in fire, electric shock, or injury to persons.
- Do not use outdoors.
- Do not let cord hang over edge of table or counter, or touch hot surfaces.
- Do not place on or near a hot gas or electric burner, or in a heated oven.
- Always attach plug to appliance first, then plug cord into the wall outlet. To disconnect, turn any control to 'off', then remove plug from wall outlet.
- Do not use appliance for other than intended use.
- Scalding may occur if the lid is removed during the brewing cycle.
3. Product Overview
The Ranbomer CMk1030 is a compact single-serve coffee maker designed for ease of use and versatility. It supports both K-Cup pods and ground coffee.
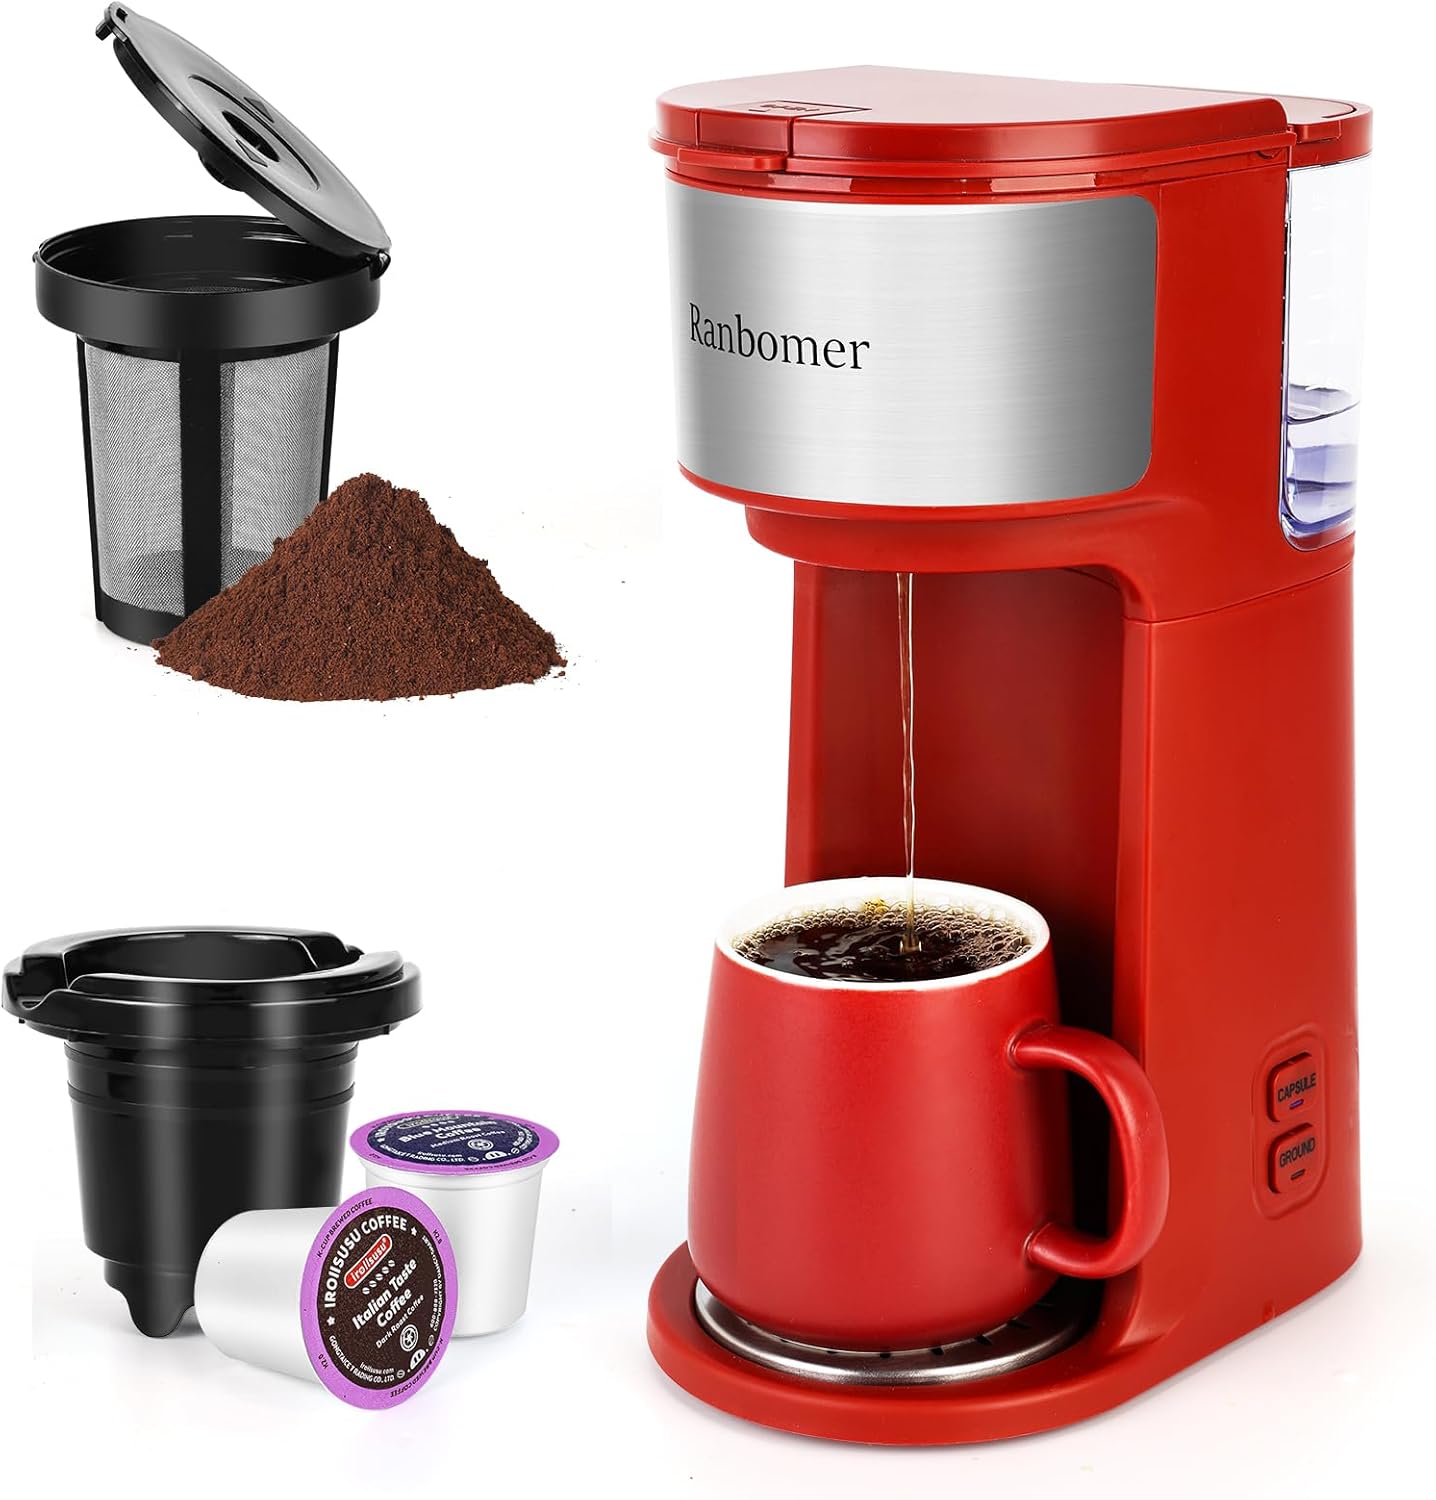
Image 3.1: Ranbomer CMk1030 Coffee Maker with included accessories (reusable filter, K-Cup holder, and ground coffee).
Components:
- Water Reservoir (with Min/Max markings)
- Brew Head
- Lid
- K-Cup Pod Holder
- Reusable Ground Coffee Filter Basket
- Brew Button (Capsule/Ground)
- Drip Tray and Removable Drip Tray Plate

Image 3.2: Overview of the Ranbomer CMk1030 highlighting its 2-in-1 brewing capability and water level markings.
4. Setup and First Use
4.1 Unpacking
- Carefully remove all packaging materials from the coffee maker.
- Inspect the appliance for any damage. Do not use if damaged.
- Ensure all components listed in Section 3 are present.
4.2 Initial Cleaning
Before first use, it is recommended to run two or three brewing cycles with only water to clean the internal components.
- Fill the water reservoir with clean water up to the MAX (14 oz) line.
- Place an empty mug on the drip tray.
- Close the lid without any K-Cup or ground coffee filter inserted.
- Press either the 'CAPSULE' or 'GROUND' button to start a brewing cycle.
- Discard the hot water. Repeat this process 2-3 times.
5. Operating Instructions
5.1 Brewing with K-Cup Pods
- Open the lid of the coffee maker.
- Insert a K-Cup pod into the K-Cup pod holder. Ensure it is seated correctly.
- Close the lid firmly until it clicks.
- Fill the water reservoir with the desired amount of water (6-14 oz). Refer to the water level markings on the side.
- Place your mug on the drip tray. For taller mugs, the drip tray can be removed.
- Press the 'CAPSULE' button to begin brewing. The indicator light will illuminate.
- The coffee maker will automatically stop when the brewing cycle is complete.
- Carefully remove the hot K-Cup pod after brewing.

Image 5.1: Pressing the 'CAPSULE' or 'GROUND' button to start brewing.
5.2 Brewing with Ground Coffee
- Open the lid of the coffee maker.
- Place the reusable ground coffee filter basket into the brew head.
- Add your desired amount of ground coffee (up to 0.88 oz / 25g) into the filter basket. Do not overfill.
- Close the lid firmly until it clicks.
- Fill the water reservoir with the desired amount of water (6-14 oz).
- Place your mug on the drip tray.
- Press the 'GROUND' button to begin brewing. The indicator light will illuminate.
- The coffee maker will automatically stop when the brewing cycle is complete.
- Carefully remove the hot filter basket and discard used grounds after brewing.

Image 5.2: The reusable brew basket for ground coffee, capable of holding up to 25g (0.88oz) of coffee grounds.
5.3 Water Level and Brewing Volume
The water reservoir has clear markings for 6 oz, 8 oz, 10 oz, 12 oz, and 14 oz. The coffee maker will brew all the water added to the reservoir. To adjust your coffee strength, you can vary the amount of water or coffee grounds/pod used.

Image 5.3: The water reservoir with visible level indicators from 6 oz to 14 oz.
6. Maintenance
6.1 Daily Cleaning
- Drip Tray: Remove the drip tray and plate. Wash with warm, soapy water, rinse, and dry thoroughly.
- K-Cup Pod Holder / Ground Coffee Filter: After each use, remove and rinse with warm water. For ground coffee, discard grounds before rinsing.
- Exterior: Wipe the exterior of the coffee maker with a damp cloth. Do not use abrasive cleaners or immerse the unit in water.
6.2 Descaling (Recommended Monthly)
Mineral deposits can build up in your coffee maker over time, affecting performance. Descaling helps remove these deposits.
- Ensure the coffee maker is unplugged and cool.
- Fill the water reservoir with a mixture of one part white vinegar and two parts water.
- Place a large empty mug on the drip tray.
- Plug in the coffee maker and run a brewing cycle with the vinegar solution (without a K-Cup or ground coffee).
- After the cycle, let the coffee maker sit for 30 minutes with the solution inside.
- Run another brewing cycle to empty the reservoir.
- Repeat the process with clean water 2-3 times to rinse out any remaining vinegar taste.
7. Troubleshooting
| Problem | Possible Cause | Solution |
|---|---|---|
| Coffee maker does not turn on. | Not plugged in; power outlet issue. | Ensure the power cord is securely plugged into a working outlet. |
| Coffee does not brew. | No water in reservoir; lid not closed properly; K-Cup/filter not inserted correctly. | Fill water reservoir; ensure lid is firmly closed; check K-Cup/filter placement. |
| Coffee tastes weak or too strong. | Incorrect water-to-coffee ratio. | Adjust water volume or amount of coffee grounds/pod strength. |
| Water leaks from the machine. | Overfilled water reservoir; K-Cup/filter not seated correctly; lid not closed. | Do not exceed MAX fill line; ensure K-Cup/filter is properly inserted and lid is closed. |
| Brewing is slow or coffee is not hot enough. | Mineral buildup (scale). | Perform a descaling cycle as described in Section 6.2. |
8. Specifications
| Feature | Detail |
|---|---|
| Brand | Ranbomer |
| Model Name | CMk1030 |
| Product Dimensions | 5.1"D x 7.3"W x 11.8"H |
| Coffee Maker Type | Drip Coffee Machine |
| Special Feature | Single Cup Brew |
| Coffee Input Type | Ground Coffee, K-Cup Pods |
| Operation Mode | Fully Automatic |
| Voltage | 120 Volts |
| Item Weight | 3.5 pounds |
| Included Components | Reusable Filter, K-Cup Pod Holder |

Image 8.1: Product dimensions of the Ranbomer CMk1030 Coffee Maker.
9. Warranty Information
This product is covered by a limited manufacturer's warranty. Please refer to the warranty card included in your product packaging for specific terms and conditions. Keep your proof of purchase for warranty claims.
10. Customer Support
For any questions, assistance, or troubleshooting not covered in this manual, please contact Ranbomer customer support. Contact details can typically be found on the product packaging or the official Ranbomer website.