1. Introduction
This manual provides comprehensive instructions for operating your VJIANGER 4K Digital Camera. Please read this manual thoroughly before use to ensure proper operation and to maximize the camera's capabilities. This camera is designed for photography and vlogging, offering high-resolution imaging and versatile features for beginners and content creators.
2. Product Overview
The VJIANGER 4K Digital Camera (Model W08) is a compact and feature-rich device. Key components include:
- 64MP Photo Sensor: For high-resolution still images.
- 4K Video Recording: Capable of recording smooth 4K UHD 2160p videos.
- 3-inch 180° Flip Screen: Ideal for vlogging and self-portraits.
- 18X Digital Zoom: Allows for magnification of subjects.
- Built-in Fill Light/Flash: For improved low-light performance.
- Internal Microphone and Speaker: For audio recording and playback.
- Wi-Fi Connectivity: For easy transfer of photos and videos to smart devices.
- Webcam Functionality: Can be used as a PC camera.

Figure 2.1: VJIANGER 4K Digital Camera (Light Pink) and included accessories.
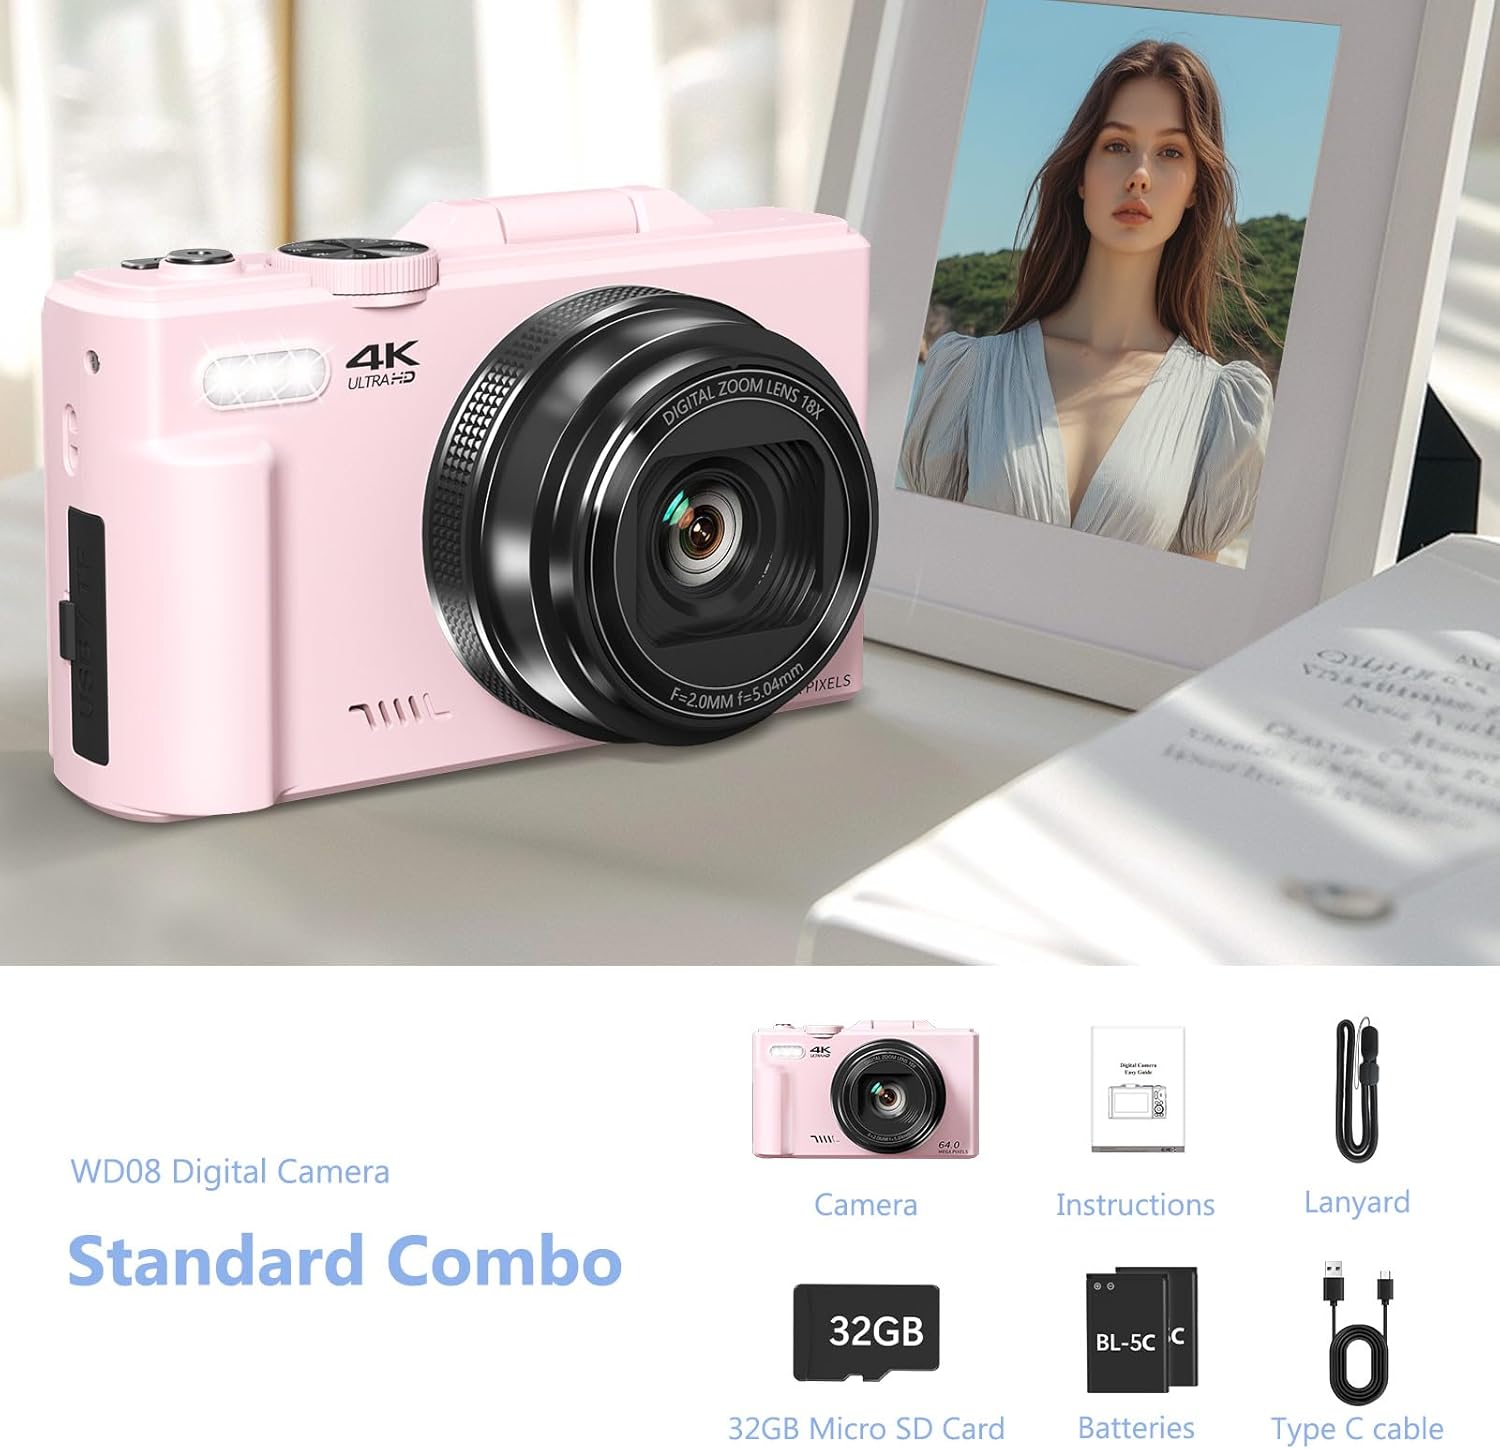
Figure 2.2: Standard Combo contents: Camera, Instructions, Lanyard, 32GB Micro SD Card, Batteries, Type-C Cable.
3. Setup
3.1 Battery Installation
The camera requires 1 Lithium Ion battery (included). Ensure correct polarity when inserting the battery.
- Open the battery compartment cover located on the side of the camera.
- Insert the battery according to the polarity indicators (+/-) inside the compartment.
- Close the battery compartment cover securely.

Figure 3.1: Location of memory card slot, data cable socket, and battery compartment.
3.2 Micro SD Card Installation
A 32GB Micro SD card is included. The camera supports Micro SD cards for storage.
- Locate the memory card slot next to the battery compartment.
- Insert the Micro SD card into the slot until it clicks into place.
- To remove, gently press the card until it springs out.
3.3 Initial Charging
Before first use, fully charge the camera battery using the provided Type-C USB cable.
- Connect the Type-C cable to the camera's data cable socket.
- Connect the other end of the cable to a USB power adapter (not included) or a computer USB port.
- The charging indicator will illuminate. It will turn off or change color when fully charged.
4. Operating Instructions
4.1 Power On/Off
Press and hold the power button to turn the camera on or off.
4.2 Focus Mode Adjustment
If images appear blurry, adjust the focus mode from "Fixed focus" to "Auto focus" in the camera settings.
Video 4.1: Demonstrates how to change the focus mode from fixed to auto focus for clearer images. This video is provided by the seller.
4.3 Photo and Video Modes
The camera offers various modes for capturing content:
- Photo Mode: Standard still image capture.
- Continuous Shooting: Captures multiple photos in quick succession.
- Timed Shooting: Sets a delay before taking a photo.
- Auto Shooting: Automatic settings for ease of use.
- Video Mode: Records standard video.
- Time-lapse Recording: Captures frames at intervals to create a sped-up video.
- Slow-motion Recording: Records at a higher frame rate for slow-motion playback.
- Loop Recording: Continuously records, overwriting older footage when storage is full.
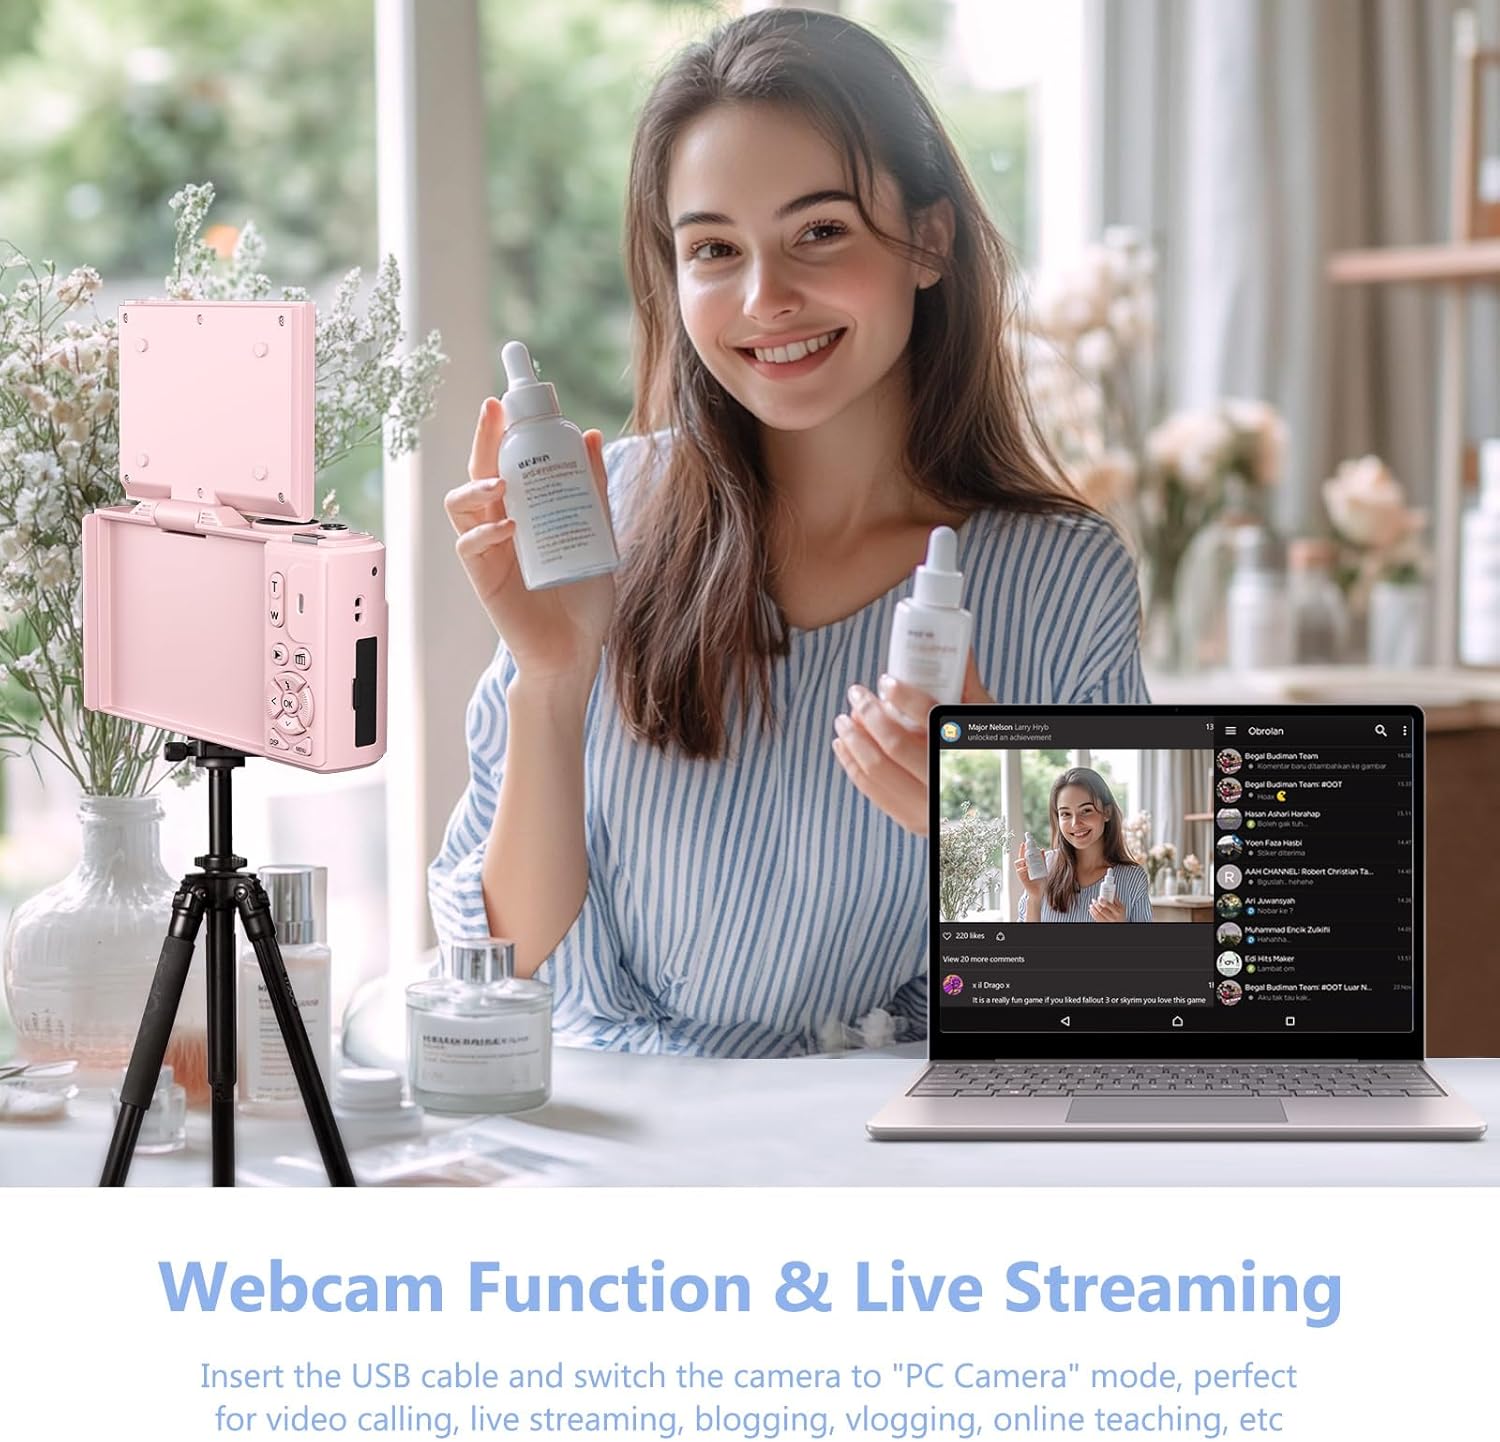
Figure 4.1: Overview of the camera's 9 multi-function modes, including Photo, Video, Continuous Shooting, Slow Motion Video, Timer, Auto, Time Lapse Video, Loop Video, and Video + Photo.

Figure 4.2: Detailed view of the four photography modes available.

Figure 4.3: Detailed view of the four video modes available.
4.4 Digital Zoom and Flash
Use the W/T buttons to control the 18X digital zoom. The built-in flash can be activated for low-light conditions.

Figure 4.4: The camera features 18X digital zoom with autofocus capabilities.
4.5 Wi-Fi Connectivity and File Transfer
Connect the camera to your smartphone or tablet via Wi-Fi for easy photo and video transfer and remote control.
- Enable Wi-Fi on the camera through the menu settings.
- Download the companion app to your smart device.
- Connect your device to the camera's Wi-Fi network.
- Use the app to download files, control the camera remotely, or view playback.

Figure 4.5: Built-in Wi-Fi allows for quick and seamless content uploading and sharing.
Alternatively, you can transfer files via USB connection or by using a card reader:
- USB Connection: Connect the camera to a PC using the Type-C cable. Select "Mass Storage Mode" on the camera.
- Card Reader: Remove the Micro SD card and insert it into a card reader connected to your computer.

Figure 4.6: Various methods for downloading photos, including Wi-Fi, USB connection, and using an OTG adapter/card reader.
4.6 Webcam Functionality
The camera can function as a webcam for live streaming and video calls.
- Connect the camera to your PC using the Type-C USB cable.
- On the camera screen, select "PC Camera" mode.
- Your computer should recognize the camera as a webcam.

Figure 4.7: The camera can be used as a webcam for video calls and live streaming by connecting it to a PC.
Video 4.2: Demonstration of connecting the camera to a PC and selecting "PC Camera" mode to use it as a webcam. This video is provided by the seller.
5. Maintenance
- Cleaning: Use a soft, dry cloth to clean the camera body. For the lens, use a specialized lens cleaning cloth and solution. Avoid abrasive materials.
- Storage: Store the camera in a cool, dry place away from direct sunlight and extreme temperatures. Remove the battery if storing for extended periods.
- Battery Care: To prolong battery life, avoid fully discharging the battery frequently. Charge it regularly.
6. Troubleshooting
| Problem | Possible Cause | Solution |
|---|---|---|
| Blurry images/videos | Incorrect focus mode (Fixed Focus) | Change Focus Mode to "Auto focus" in settings. (Refer to Section 4.2) |
| Camera not turning on | Low or uncharged battery; incorrectly inserted battery. | Charge the battery. Ensure the battery is inserted with correct polarity. |
| Cannot transfer files | Incorrect USB mode selected; Wi-Fi not connected. | Ensure "Mass Storage Mode" is selected when connecting via USB. Verify Wi-Fi connection and app settings. |
| Poor sound quality in recorded videos | Environmental noise; microphone obstruction. | Record in quieter environments. Ensure microphone is not covered. |
7. Specifications
| Feature | Detail |
|---|---|
| Brand | VJIANGER |
| Model Name | W08 |
| Effective Still Resolution | 64 MP |
| Video Resolution | 1080p, 4K UHD 2160p |
| Digital Zoom | 18 x |
| Screen Size | 3 Inches |
| Display Type | LCD |
| Connectivity Technology | Wi-Fi |
| Photo Sensor Technology | CMOS |
| Image Stabilization | Digital |
| External Memory Size | 32 GB (Micro SD) |
| Battery Type | Lithium Ion |
| Battery Average Life | 2 Hours |
| Form Factor | Compact |
| Material | Metal, Plastic |
8. Warranty and Support
For product support, warranty information, or to ask a question, please visit the VJIANGER store on Amazon or contact the seller directly through the Amazon platform.

Figure 8.1: Guide on contacting the seller for support via Amazon.


