Introduction
This manual provides detailed instructions for installing and maintaining the Generic Dual Z-axis Upgrade Kit. This kit is designed to enhance the stability and precision of your 3D printer's Z-axis movement, leading to improved print quality and reduced Z-wobble.
Compatibility: This kit is compatible with Ender-3, Ender-3 Pro, and Ender-3 V2 3D printer models.
Package Contents
Before beginning installation, please verify that all components listed below are present in your package.
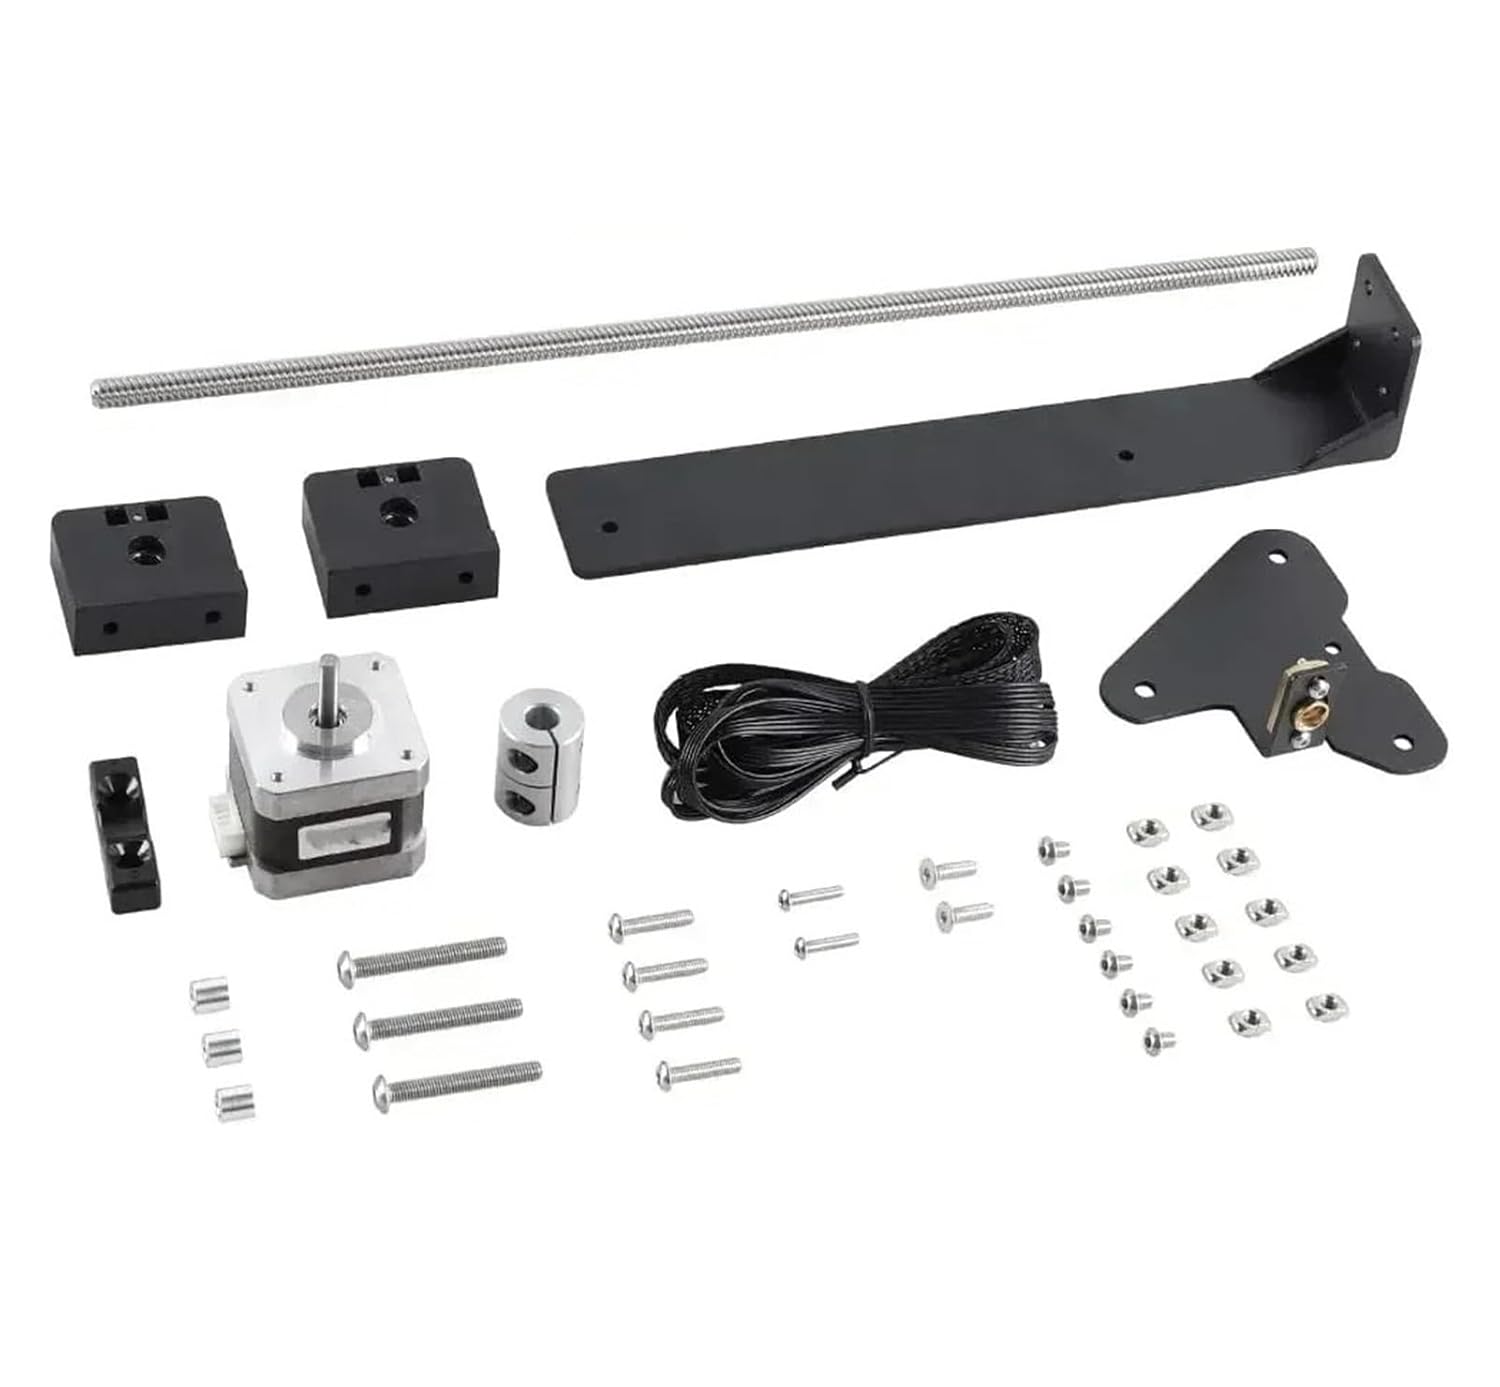
Image showing the complete kit contents: lead screws, stepper motor, motor mounts, lead screw nuts, couplers, wiring, and various fasteners.
- Stepper Motor (1x)
- Lead Screws (2x)
- Z-axis Motor Mounts/Brackets (various pieces)
- Lead Screw Nuts (2x)
- Couplers (2x)
- Wiring Harness (1x)
- Various Screws and T-nuts
- Power Supply Relocation Bracket (1x)
Setup and Installation
Important Safety Note: Always power off and unplug your 3D printer before performing any installation or maintenance.
Step 1: Prepare the Printer
Power off and unplug your Ender 3 series printer. Remove any existing Z-axis components that will be replaced or modified, such as the top bearing block on the right side.
Step 2: Install the Second Z-axis Motor and Lead Screw
Mount the additional stepper motor to the designated bracket on the right side of the printer frame. Attach the second lead screw to this motor using a coupler. Secure the lead screw nut to the gantry plate on the right side, ensuring it aligns with the new lead screw.
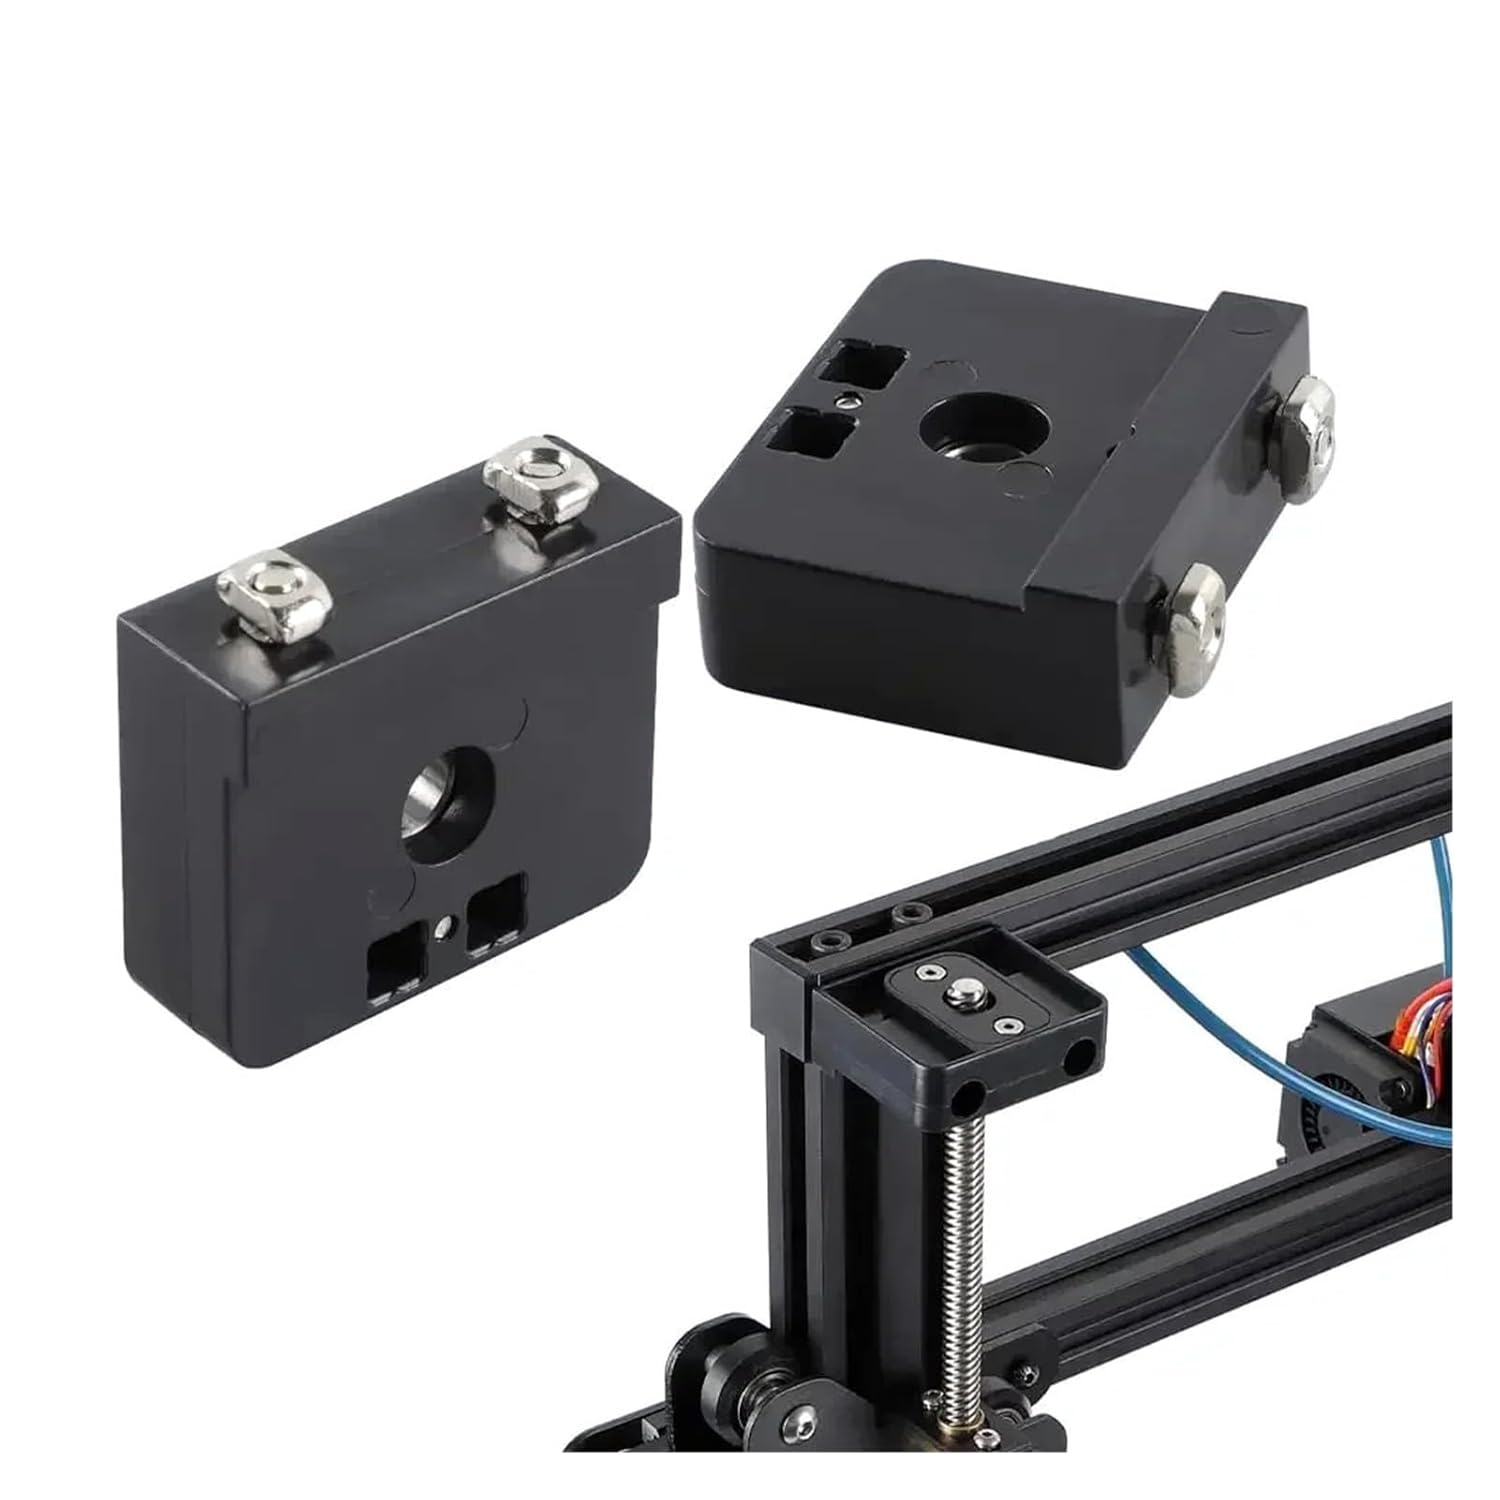
This image illustrates the design of the Z-axis motor mounts and the lead screw nut, showing how they connect to the printer frame and lead screw.
Step 3: Mount the Support Bracket
Install the upper support bracket for the new lead screw at the top of the right vertical extrusion. Ensure the lead screw moves freely within the bracket without binding.

A diagrammatic view of the Ender 3 printer with the Dual Z-axis Upgrade Kit installed. It highlights the placement of the second lead screw, stepper motor, and support brackets.
Step 4: Wiring
Connect the new stepper motor to the provided wiring harness. This harness typically splits the existing Z-axis motor signal to control both motors synchronously. Refer to your printer's mainboard diagram or the kit's specific wiring instructions if unsure about connection points.
Step 5: Power Supply Relocation
If your kit includes a power supply relocation bracket, install it as shown to accommodate the new Z-axis components and ensure proper clearance.

This image shows the power supply relocation bracket being installed on the side of the 3D printer, creating space for the dual Z-axis components.
Step 6: Final Checks and Calibration
Manually move the gantry up and down to check for smooth, unobstructed movement. Power on the printer. Perform Z-axis calibration to ensure both lead screws are synchronized and the gantry is level. This may involve adjusting the Z-offset or using a bed leveling routine.
Firmware Update (Optional but Recommended): Some dual Z-axis kits may benefit from a firmware update to enable specific dual Z-axis features or fine-tune motor current. Consult online resources or the printer manufacturer's support for specific firmware instructions for your model.
Operating Instructions
After successful installation and calibration, the dual Z-axis system operates automatically with your 3D printer's existing controls. The primary benefit is improved stability and reduced Z-wobble during printing, especially for taller prints or heavier print heads.
Monitor the Z-axis movement during your first few prints to ensure smooth operation and verify print quality improvements.
Maintenance
- Lubrication: Periodically apply a small amount of lithium grease or PTFE-based lubricant to the lead screws to ensure smooth movement and prevent wear. Avoid over-lubrication, which can attract dust.
- Cleaning: Keep the lead screws and nuts free from dust and debris. Use a soft brush or cloth to gently clean them.
- Tightness Check: Regularly inspect all fasteners, especially those securing the motors, brackets, and lead screw nuts, for tightness. Loose screws can lead to instability and print quality issues.
- Alignment Check: Occasionally verify that the Z-axis gantry remains level. If any tilt is observed, re-level the gantry by manually adjusting the lead screws or using your printer's leveling features.
Troubleshooting
Issue: Z-axis binding or rough movement
Possible Cause: Misalignment of lead screws or gantry, lack of lubrication.
Solution: Power off the printer. Loosen the lead screw nuts slightly, manually move the gantry up and down several times to allow components to self-align, then re-tighten. Ensure lead screws are properly lubricated. Check for any physical obstructions.
Issue: Z-axis motors not moving or moving unevenly
Possible Cause: Wiring issue, faulty motor, or driver problem.
Solution: Check all wiring connections for security and correct polarity. Ensure the stepper motor cable is correctly plugged into the splitter and mainboard. If possible, test each motor individually or swap connections to diagnose a faulty motor or driver.
Issue: Layer shifting or inconsistent layer height
Possible Cause: Loose lead screw nuts, loose couplers, or insufficient motor current.
Solution: Tighten all fasteners, especially the lead screw nuts and couplers. Ensure the couplers are securely gripping both the motor shaft and the lead screw. If using custom firmware, verify motor current settings for the Z-axis.
Specifications
| Product Name | Ender-3 Upgrade Dual Screw Rod Kit |
|---|---|
| Model Number | MAQQQBBLE-DUALZ-AXISUPGRADE |
| Applicable Models | Ender-3, Ender-3 Pro, Ender-3 V2 |
| Package Dimensions | 545 x 115 x 65 mm |
| Lead Screw Precision | P3-P7 |
| Repeated Positioning Accuracy | 0.01 mm |
| Item Type | Lifting Main Beam |
Warranty and Support
This product is covered by a standard manufacturer's warranty. For specific warranty details or technical support, please refer to the retailer or manufacturer's official website where the product was purchased. It is recommended to keep your proof of purchase for any warranty claims.