1. Introduction
Thank you for purchasing the ShunChengFa Smart Digital Electric Kettle. This manual provides essential information for the safe and efficient operation of your new appliance. Please read it thoroughly before first use and retain it for future reference.

Image: The ShunChengFa Smart Digital Electric Kettle, showcasing its sleek black matte finish, gooseneck spout, and digital control base.
2. Important Safety Instructions
When using electrical appliances, basic safety precautions should always be followed to reduce the risk of fire, electric shock, and/or injury to persons, including the following:
- Read all instructions.
- Do not touch hot surfaces. Use handles or knobs.
- To protect against fire, electric shock, and injury to persons, do not immerse cord, plugs, or electric kettle in water or other liquid.
- Close supervision is necessary when any appliance is used by or near children.
- Unplug from outlet when not in use and before cleaning. Allow to cool before putting on or taking off parts, and before cleaning the appliance.
- Do not operate any appliance with a damaged cord or plug or after the appliance malfunctions, or has been damaged in any manner. Return appliance to the nearest authorized service facility for examination, repair, or adjustment.
- The use of accessory attachments not recommended by the appliance manufacturer may result in fire, electric shock, or injury to persons.
- Do not use outdoors.
- Do not let cord hang over edge of table or counter, or touch hot surfaces.
- Do not place on or near a hot gas or electric burner, or in a heated oven.
- Always attach plug to appliance first, then plug cord into the wall outlet. To disconnect, turn any control to "off", then remove plug from wall outlet.
- Do not use appliance for other than intended use.
- Extreme caution must be used when moving an appliance containing hot water.
- The kettle is only to be used with the stand provided.
- If the supply cord is damaged, it must be replaced by the manufacturer, its service agent or similarly qualified persons in order to avoid a hazard.
- This appliance is intended to be used in household and similar applications such as: staff kitchen areas in shops, offices and other working environments; farm houses; by clients in hotels, motels and other residential type environments; bed and breakfast type environments.
- Do not fill above the MAX line. Overfilling may cause water to overflow.
- The kettle must be switched off before being lifted from its stand.
- This appliance can be used by children aged from 8 years and above and persons with reduced physical, sensory or mental capabilities or lack of experience and knowledge if they have been given supervision or instruction concerning use of the appliance in a safe way and understand the hazards involved. Children shall not play with the appliance. Cleaning and user maintenance shall not be made by children unless they are older than 8 and supervised.
3. Product Components
Familiarize yourself with the parts of your Smart Digital Electric Kettle:
- A. Gooseneck Spout: Designed for precise pour control, ideal for pour-over coffee.
- B. Kettle Body: Double-walled construction with a stylish matte finish and 304 stainless steel interior.
- C. Lid: Removable lid with a wooden knob for easy filling and cleaning.
- D. Handle: Ergonomically designed wooden handle for comfortable and safe grip.
- E. Power Base: Features a digital display and control buttons for temperature settings and functions.
- F. Power Cord: Connects the base to an electrical outlet.

Image: A view of the kettle's power base, highlighting the connection point for the kettle and the power cord, along with an indication of the memory function and dry-burning automatic power outage safety feature.

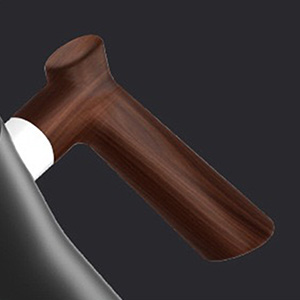

Image: Close-up views of the kettle's interior and lid, the ergonomic wooden handle, and the precision gooseneck spout.
4. Setup and First Use
- Unpack: Carefully remove all packaging materials and inspect the kettle for any damage.
- Clean: Before first use, fill the kettle with water to the MAX line and boil it. Discard this water. Repeat this process 2-3 times to remove any manufacturing residues.
- Placement: Place the power base on a dry, flat, stable, and heat-resistant surface. Ensure it is away from the edge of the counter and out of reach of children.
- Connect: Plug the power cord into a grounded electrical outlet.
5. Operating Instructions
5.1 Filling the Kettle
- Remove the kettle from the power base.
- Open the lid and fill the kettle with fresh, cold water. Do not fill below the MIN mark or above the MAX mark.
- Close the lid securely and place the kettle back onto the power base.
5.2 Control Panel Overview
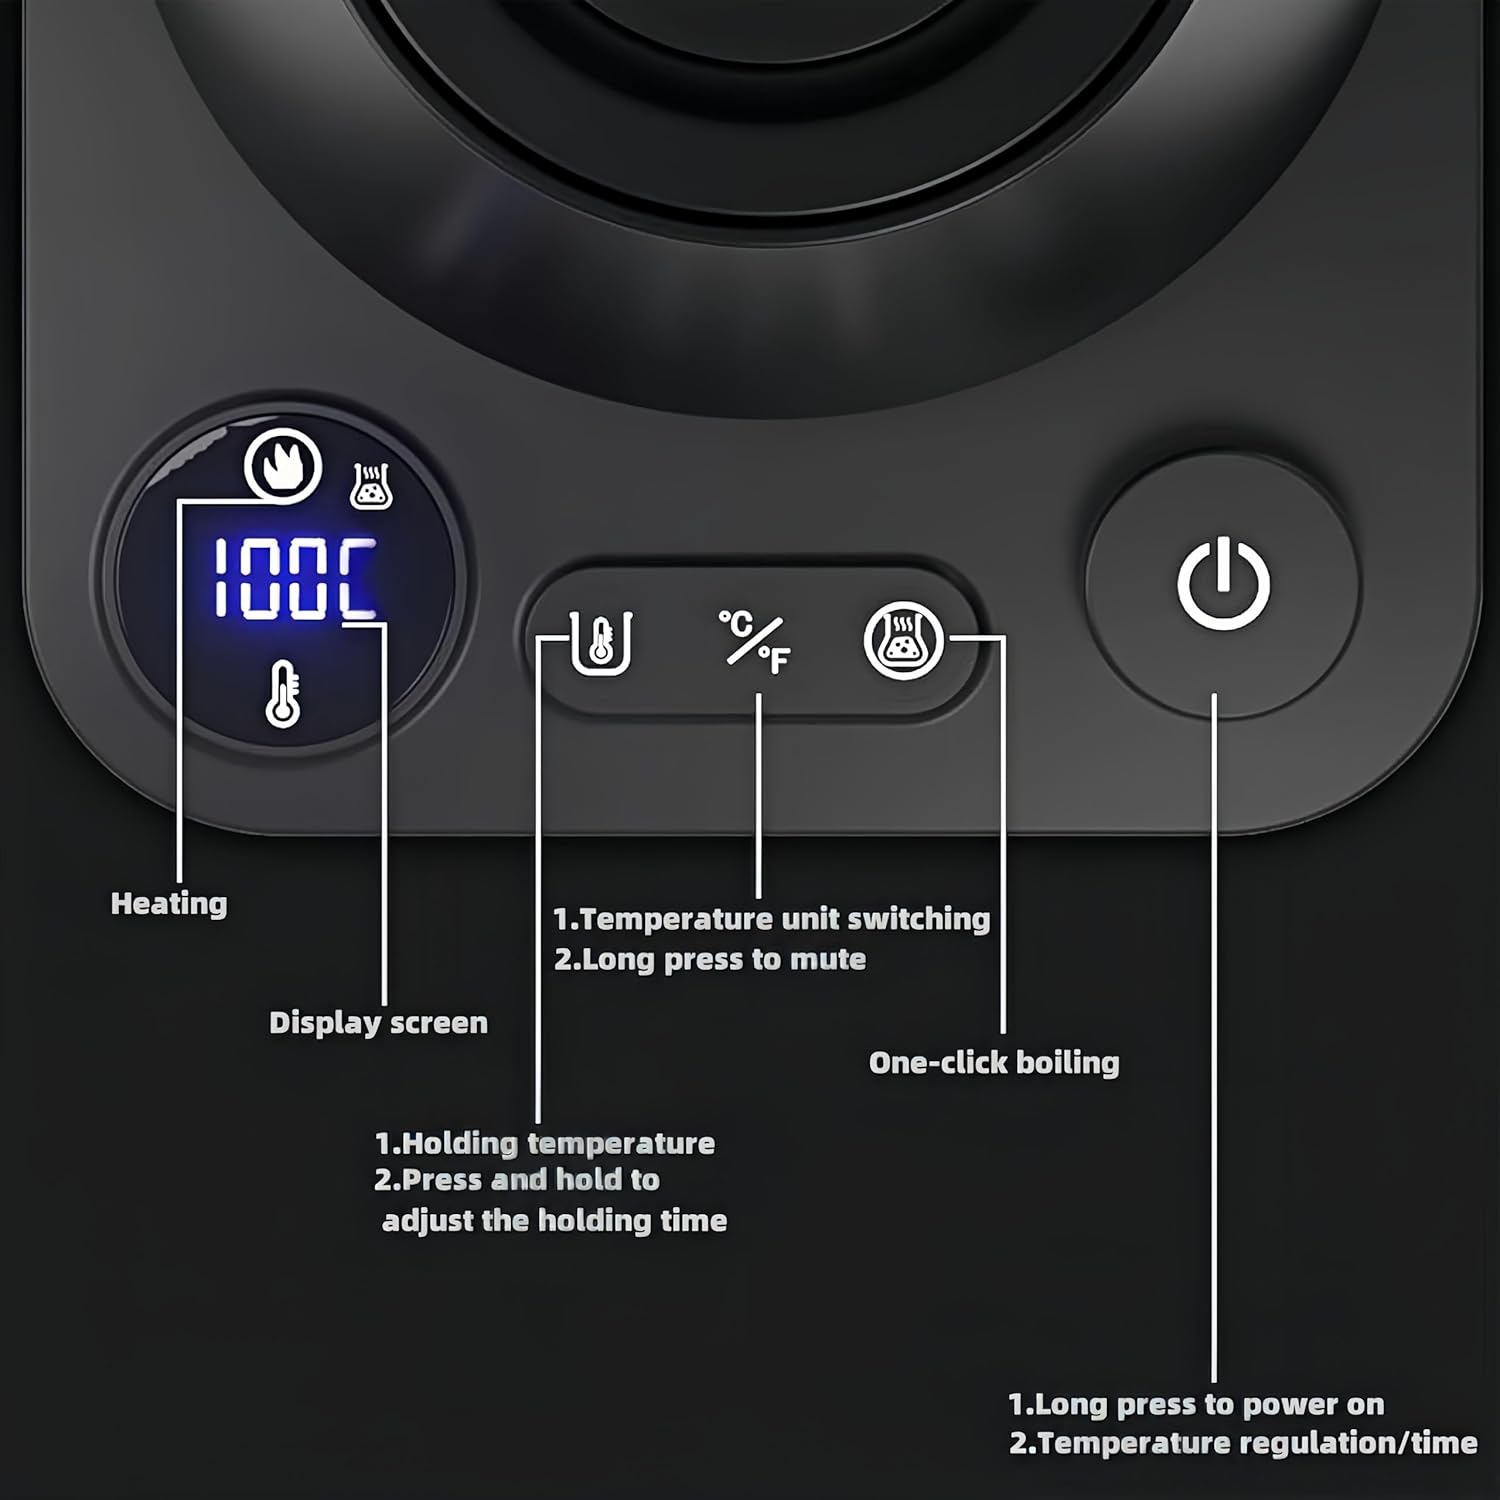
Image: A detailed view of the kettle's control panel, showing the digital display and labeled buttons for heating, temperature unit switching, mute, holding temperature, and power/temperature regulation.
- Digital Display: Shows current water temperature and target temperature.
- Heating Indicator: Illuminates when the kettle is actively heating.
- Temperature Unit Switching Button (°C/°F): Press to switch between Celsius and Fahrenheit. Long press to mute/unmute sounds.
- Holding Temperature Button: Press to activate/deactivate the keep warm function. Long press to adjust holding time.
- One-Click Boiling Button: Initiates boiling to 100°C (212°F).
- Power/Adjustment Knob: Long press to power on/off. Rotate to adjust target temperature or holding time.
5.3 Setting Temperature and Boiling
- Power On: Long press the Power/Adjustment Knob to turn on the kettle. The display will light up.
- Set Target Temperature: Rotate the Power/Adjustment Knob to select your desired temperature between 40°C and 100°C (104°F and 212°F). The temperature can be adjusted in 1-degree increments.
- Start Heating: Once the desired temperature is set, the kettle will automatically begin heating. The heating indicator will illuminate.
- One-Click Boil: Alternatively, press the "One-Click Boiling" button to quickly heat water to 100°C (212°F).
- Automatic Shut-off: The kettle will automatically shut off once the target temperature is reached or if it boils dry.

Image: A close-up of the control knob, illustrating how to rotate it left or right to adjust the water temperature from 40°C to 100°C.

Image: A visual guide showing recommended water temperatures for different beverages, including milk (40°C/104°F), green tea (80°C/176°F), white tea (85°C/185°F), oolong tea (90°C/194°F), coffee (96°C/205°F), and boiling/black tea (100°C/212°F).
5.4 Keep Warm Function
- After reaching the target temperature, press the "Holding Temperature" button to activate the keep warm function. The kettle will maintain the set temperature for a specified duration.
- To adjust the holding time, long press the "Holding Temperature" button and rotate the Power/Adjustment Knob.
- To deactivate, press the "Holding Temperature" button again.
5.5 Pouring
The gooseneck spout is designed for precise and controlled pouring, ideal for pour-over coffee or delicate teas. Tilt the kettle slowly to achieve a steady, even flow.
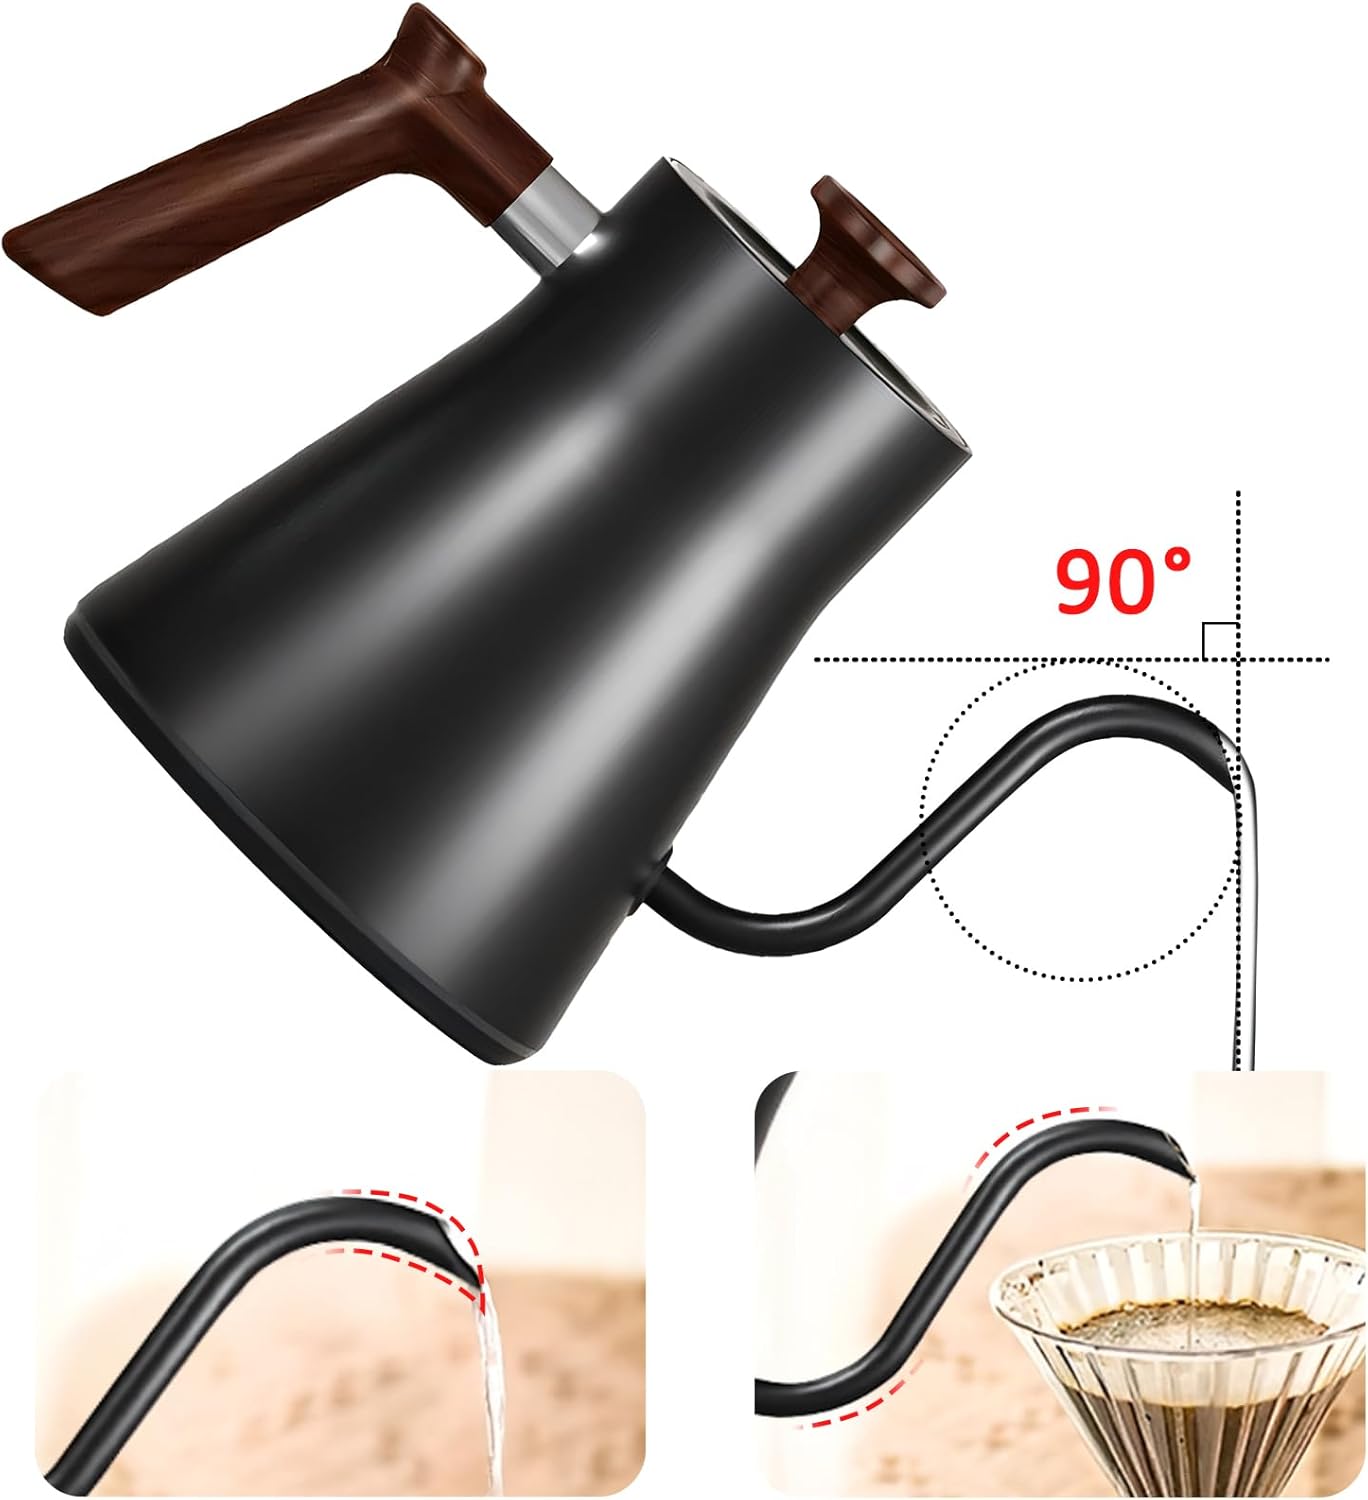
Image: An illustration demonstrating the precise 90-degree pouring angle of the gooseneck spout, allowing for controlled water flow, as shown with water pouring into a coffee filter.
6. Maintenance and Cleaning
Regular cleaning will extend the life of your kettle and ensure optimal performance.
6.1 Exterior Cleaning
- Always unplug the kettle and allow it to cool completely before cleaning.
- Wipe the exterior of the kettle and power base with a soft, damp cloth.
- Do not use abrasive cleaners or scouring pads, as they may damage the finish.
- Never immerse the kettle body or power base in water or any other liquid.
6.2 Descaling (Removing Mineral Deposits)
Mineral deposits (limescale) can build up inside the kettle, especially in hard water areas. Descale regularly to maintain efficiency.
- Fill the kettle with 2 cups of white vinegar and 2 cups of water.
- Bring the mixture to a boil and let it stand for at least 30 minutes, or longer for heavy buildup.
- Empty the kettle and rinse thoroughly with fresh water several times.
- For stubborn deposits, gently scrub the interior with a non-abrasive sponge.
- Alternatively, use a commercial descaling solution designed for kettles, following the product's instructions.
7. Troubleshooting
| Problem | Possible Cause | Solution |
|---|---|---|
| Kettle does not turn on. | Not plugged in; power outlet not working; kettle not properly seated on base. | Ensure power cord is securely plugged into a working outlet. Check if the kettle is correctly placed on the power base. |
| Water not heating. | Kettle not powered on; insufficient water; boil-dry protection activated. | Long press the power knob to turn on. Ensure water level is above MIN. If boil-dry protection activated, remove kettle, let cool, then refill. |
| Kettle shuts off too soon. | Limescale buildup; boil-dry protection activated. | Descale the kettle. Check water level. |
| Water tastes strange or has particles. | New kettle residue; limescale buildup. | Perform initial cleaning steps (boil and discard water). Descale the kettle. |
| Digital display not working. | Power issue; internal malfunction. | Check power connection. If problem persists, contact customer support. |
8. Specifications
| Feature | Detail |
|---|---|
| Model Name | Gooseneck Electric Kettle |
| Model Number | SH01 |
| Brand | ShunChengFa |
| Color | Black |
| Capacity | 0.9 Liters (approx.) |
| Wattage | 1200 watts |
| Voltage | Standard household voltage (e.g., 120V for US) |
| Material | 304 Stainless Steel Inner, BPA-free plastic exterior with matte finish |
| Special Features | Variable Temperature Control, Digital Display, Boil Dry Protection, Automatic Shut-off, Keep Warm Function |
| Product Dimensions (L x W x H) | 8.07"L x 11.02"W x 8.66"H |
| Item Weight | 2.87 pounds |
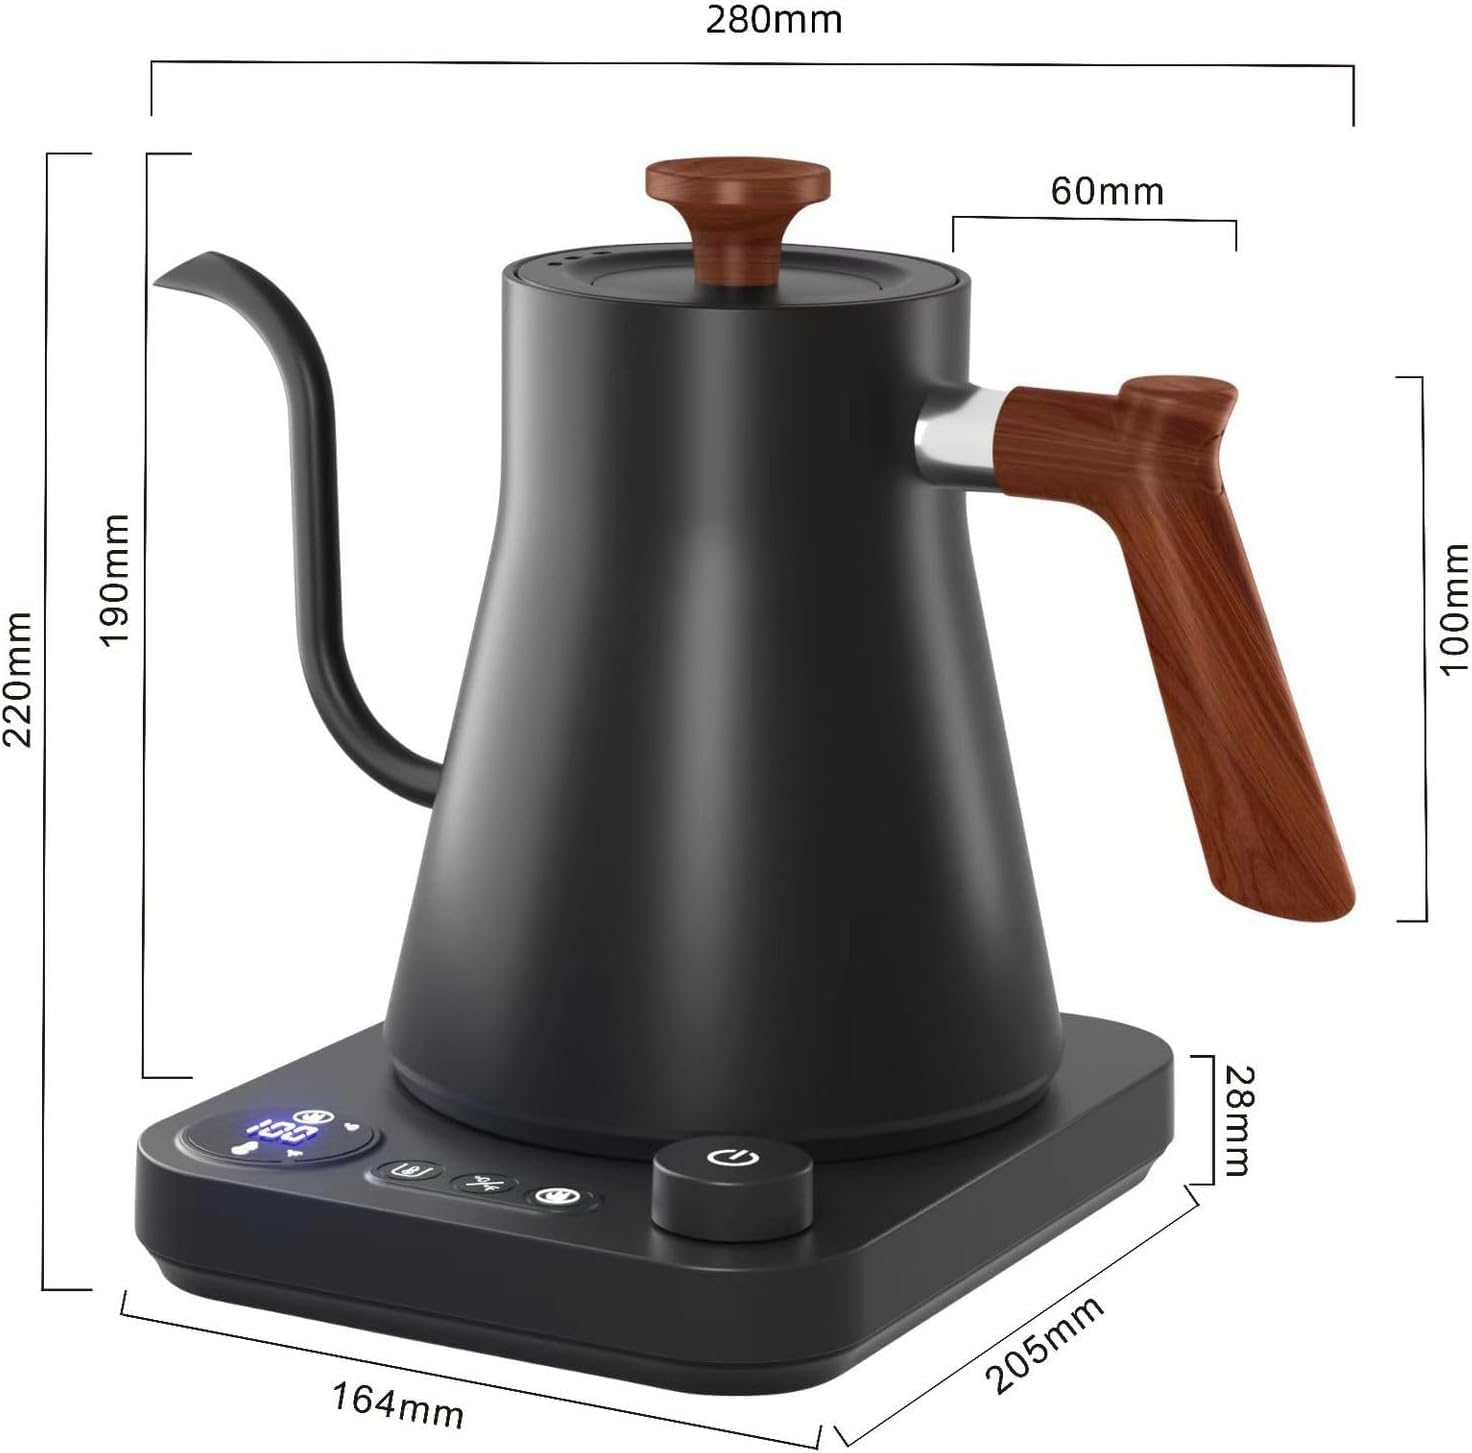
Image: A diagram illustrating the physical dimensions of the Smart Digital Electric Kettle, including height, width, and base measurements in millimeters.
9. Warranty and Customer Support
9.1 Warranty Information
This product is covered by a manufacturer's warranty. For specific warranty terms, duration, and conditions, please refer to the warranty card included in your product packaging or contact the manufacturer directly. Please retain your proof of purchase for warranty claims.
9.2 Customer Support
If you encounter any issues or have questions regarding your ShunChengFa Smart Digital Electric Kettle that are not addressed in this manual, please contact our customer support team. You can typically find contact information on the product packaging, the manufacturer's official website, or through your retailer.
For online purchases, you may also refer to the seller's contact information on the platform where the product was purchased.


